The Importance of a Washer in Your Delta Bathroom Faucet
Washers play a crucial role in the functionality of your Delta bathroom faucet, despite their small size and often overlooked presence. These seemingly insignificant components serve as a barrier between the moving parts of the faucet, preventing leaks and ensuring smooth operation. Understanding the importance of washers in your Delta bathroom faucet can help you appreciate their role in maintaining a properly functioning plumbing fixture.
- Sealing Mechanism: Washers act as seals between the faucet’s various components, such as the handle and the valve seat. When you turn the faucet handle, the washer creates a tight seal against the valve seat, preventing water from leaking out. This sealing mechanism is essential for controlling the flow of water and avoiding wastage.
- Preventing Leaks: One of the primary functions of washers is to prevent leaks in your Delta bathroom faucet. Over time, the constant friction and pressure exerted on the washers can cause them to wear out or become damaged, compromising their ability to create a watertight seal. This can result in annoying drips or even significant leaks, leading to water wastage and potential water damage to your bathroom.
- Ensuring Smooth Operation: In addition to sealing out leaks, washers also contribute to the smooth operation of your Delta bathroom faucet. When the washers are in good condition, they allow the faucet handle to move freely without any resistance. However, worn-out or damaged washers can cause the handle to feel stiff or loose, affecting the overall usability of the faucet.
- Maintaining Water Pressure: Properly functioning washers help maintain consistent water pressure in your Delta bathroom faucet. When the washers are worn or damaged, they may not create a tight seal, leading to fluctuations in water pressure and flow. This can result in inconsistent water flow, making it challenging to perform everyday tasks such as washing hands or brushing teeth.
- Prolonging Faucet Lifespan: By understanding the importance of washers in your Delta bathroom faucet, you can take proactive steps to maintain them properly. Regular inspection and replacement of worn-out washers can help prolong the lifespan of your faucet and prevent costly repairs down the line. Investing time and effort in maintaining your faucet’s washers can ultimately save you money and hassle in the long run.

Signs that Your Washer Needs Replacement
The washers in your Delta bathroom faucet are subjected to constant wear and tear due to their role in sealing out leaks and ensuring smooth operation. Over time, these small rubber or plastic components can deteriorate, leading to leaks, drips, and other plumbing issues. Recognizing the signs that your washer needs replacement can help you address the problem before it escalates into a more significant plumbing issue.
- Persistent Dripping: One of the most common signs that your washer needs replacement is persistent dripping from the faucet. If you notice water droplets forming even when the faucet is fully closed, the washer is likely worn out or damaged. Dripping faucets not only wastes water but can also lead to increased water bills and potential water damage to your bathroom fixtures.
- Difficulty Turning the Handle: Another indicator of a worn-out washer is difficulty turning the faucet handle. If you notice increased resistance or stiffness when trying to turn the handle on your Delta bathroom faucet, it could be due to a deteriorating washer. The friction caused by a worn washer can make it challenging to operate the faucet smoothly, affecting your overall user experience.
- Visible Wear and Tear: Inspecting the washers in your Delta bathroom faucet can also help you determine if they need replacement. If you notice any visible signs of wear and tear, such as cracks, tears, or deformation, it’s a clear indication that the washers are no longer functioning properly. Even minor damage to the washers can compromise their ability to create a watertight seal, leading to leaks and other issues.
- Inconsistent Water Flow: A sudden change in water flow or pressure from your Delta bathroom faucet can also signal a problem with the washers. If you notice fluctuations in water flow, such as reduced flow or sputtering, it may be due to worn-out washers. As the washers deteriorate, they may fail to create a consistent seal, resulting in inconsistent water flow and pressure.
- Age of the Faucet: Finally, the age of your Delta bathroom faucet can also be a factor in determining whether the washers need replacement. Over time, the constant use and exposure to water can cause the washers to degrade, regardless of their initial quality. If your faucet is several years old and you’ve been experiencing issues such as leaks or dripping, it’s worth inspecting and replacing the washers as part of your maintenance routine.
Step-by-Step Guide to Replacing the Washer in Your Delta Bathroom Faucet
Replacing the washer in your Delta bathroom faucet is a relatively straightforward process that can be completed with basic tools and minimal plumbing knowledge. By following a few simple steps, you can restore your faucet’s functionality and prevent leaks and other plumbing issues. This step-by-step guide will walk you through the process of replacing the washer in your Delta bathroom faucet.
- Gather Your Tools: Before you begin, gather the necessary tools and materials for the job. You’ll typically need an adjustable wrench, screwdriver, replacement washers, and plumber’s grease. Make sure to turn off the water supply to the faucet before starting to prevent any accidents or water damage.
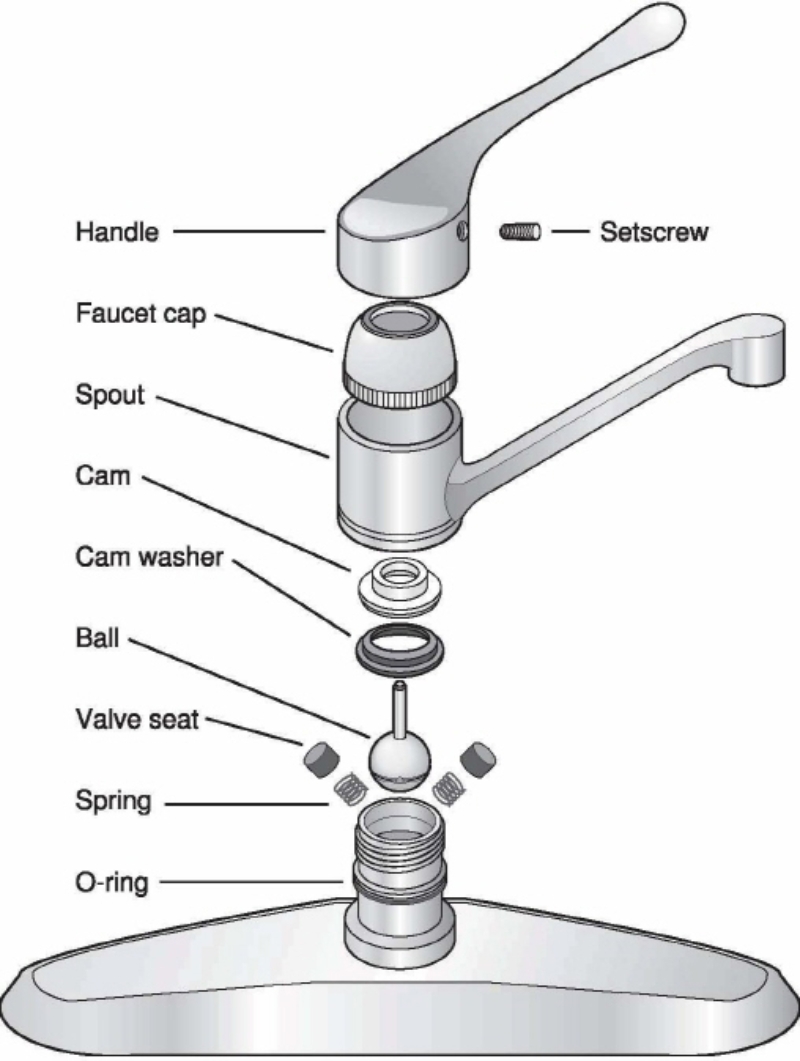
- Remove the Handle: Start by removing the handle of your Delta bathroom faucet. Depending on the model, you may need to pry off a decorative cap or cover to access the handle screw. Once the screw is exposed, use a screwdriver to loosen and remove it, allowing you to lift off the handle.
- Access the Valve Assembly: With the handle removed, you’ll have access to the valve assembly beneath. Use an adjustable wrench to loosen and remove the bonnet nut, which holds the valve assembly in place. Once the bonnet nut is removed, you can carefully lift out the valve assembly from the faucet body.
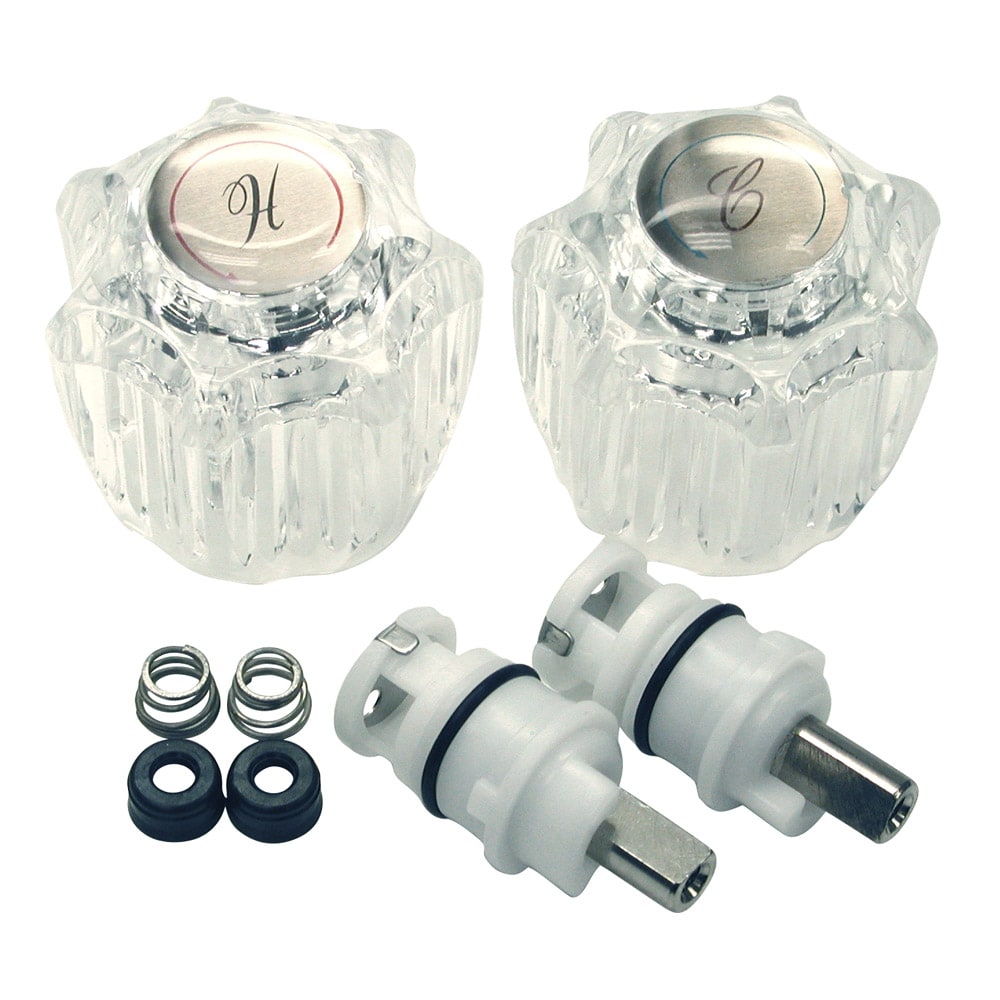
- Replace the Washer: Locate the washer on the bottom of the valve assembly. Depending on the faucet design, the washer may be secured with a screw or held in place by friction. Use a screwdriver or your fingers to remove the old washer and replace it with a new one of the same size and type.
- Apply Plumber’s Grease: Before reassembling the faucet, apply a thin layer of plumber’s grease to the threads of the bonnet nut and the stem of the valve assembly. This will help lubricate the components and ensure a tight seal when reassembling the faucet.
- Reassemble the Faucet: Carefully reinsert the valve assembly into the faucet body, ensuring that it sits flush and is aligned correctly. Use the adjustable wrench to tighten the bonnet nut securely, taking care not to overtighten. Once the valve assembly is in place, reinstall the handle and secure it with the handle screw.
- Test for Leaks: Turn the water supply back on and test the faucet for leaks. Slowly open and close the handle, checking for any signs of dripping or water seepage. If you notice any leaks, double-check the tightness of the bonnet nut and handle, and make any necessary adjustments.
- Final Checks: Once you’re satisfied that the faucet is leak-free, replace any decorative caps or covers and clean up any excess plumber’s grease or debris. Congratulations, you’ve successfully replaced the washer in your Delta bathroom faucet!

Tips and Tricks for a Successful Washer Replacement
Replacing the washer in your Delta bathroom faucet may seem like a daunting task, but with the right tools and techniques, it can be a relatively straightforward process. These tips and tricks will help you successfully replace the washer in your faucet and restore its functionality without any hassle.
Choose the Right Washer: When purchasing replacement washers for your Delta bathroom faucet, make sure to choose the correct size and type for your specific faucet model. Washers come in various sizes and materials, so it’s essential to select one that matches your faucet’s requirements to ensure a proper fit and seal.
Inspect Other Components: While you have the faucet disassembled for washer replacement, take the opportunity to inspect other components for signs of wear or damage. Check the valve seat for any corrosion or buildup that may interfere with the sealing mechanism. If necessary, clean or replace these components to ensure optimal performance.
Use Plumber’s Grease: Applying plumber’s grease to the threads of the bonnet nut and the stem of the valve assembly can make reassembly smoother and help prevent future corrosion and sticking. Be sure to use a thin layer of grease to avoid any excess buildup that could attract dirt and debris.
Turn Off the Water Supply: Before beginning the washer replacement process, always remember to turn off the water supply to the faucet to prevent any accidental leaks or flooding. This can typically be done by turning the shutoff valves located beneath the sink clockwise until they are fully closed.
Take Your Time: Rushing through the washer replacement process can lead to mistakes and potential damage to your faucet. Take your time to carefully disassemble the faucet, replace the washer, and reassemble everything correctly. Patience and attention to detail are key to a successful outcome.
Seek Professional Help if Needed: If you’re unsure about any aspect of replacing the washer in your Delta bathroom faucet or encounter unexpected difficulties during the process, don’t hesitate to seek professional help. A licensed plumber can provide expert assistance and ensure that the job is done safely and correctly.
Preventive Maintenance to Extend the Life of Your Delta Bathroom Faucet
Preventive maintenance is key to ensuring the long-term functionality and reliability of your Delta bathroom faucet. By taking proactive measures to care for your faucet and address any issues promptly, you can extend its lifespan and avoid costly repairs or replacements. Here are some preventive maintenance tips to help you keep your Delta bathroom faucet in optimal condition:
Inspect for Leaks Regularly: Make it a habit to inspect your Delta bathroom faucet regularly for any signs of leaks or dripping. Check beneath the sink for water puddles or moisture, which may indicate a leaky faucet. Addressing leaks promptly can prevent water damage to your bathroom fixtures and help conserve water.
Clean the Aerator: The aerator is a small mesh screen located at the end of the faucet spout that helps regulate water flow and reduce splashing. Over time, mineral deposits and debris can accumulate in the aerator, affecting water flow and pressure. Periodically remove the aerator and clean it thoroughly to maintain optimal performance.
Check for Mineral Buildup: Hard water can lead to mineral buildup inside your Delta bathroom faucet, affecting its performance and lifespan. To prevent mineral deposits from accumulating, periodically remove the faucet handle and spout and soak them in a solution of vinegar and water to dissolve any buildup. Rinse thoroughly before reassembling.
Test the Water Pressure: Low water pressure can be a sign of a clogged aerator or other issues with your Delta bathroom faucet. Test the water pressure periodically by turning on the faucet to its maximum flow and observing the strength of the water stream. If you notice a significant decrease in water pressure, inspect the aerator and clean or replace it as needed.
Address Dripping Faucets Promptly: If you notice any dripping or leaking from your Delta bathroom faucet, don’t ignore it. Even minor drips can waste a significant amount of water over time and may indicate underlying issues with the faucet’s washers or seals. Addressing dripping faucets promptly can prevent further damage and costly repairs.
Schedule Professional Maintenance: While many aspects of faucet maintenance can be done DIY, it’s essential to schedule periodic professional maintenance to ensure that your Delta bathroom faucet is in optimal condition. A licensed plumber can perform a thorough inspection, identify any potential issues, and make necessary repairs or adjustments to keep your faucet running smoothly.
Sink Faucet Repair, Delta Bathroom Sink Drips

Troubleshooting a Leaking Faucet : Delta Faucet
Delta Bathroom Faucet Repair: Seats and Springs, Serramar HOA
How To Fix Leaky Bathroom Handle Delta Faucet (Model 4530 Series

Simple Ways to Fix a Leaky Delta Bathroom Sink Faucet

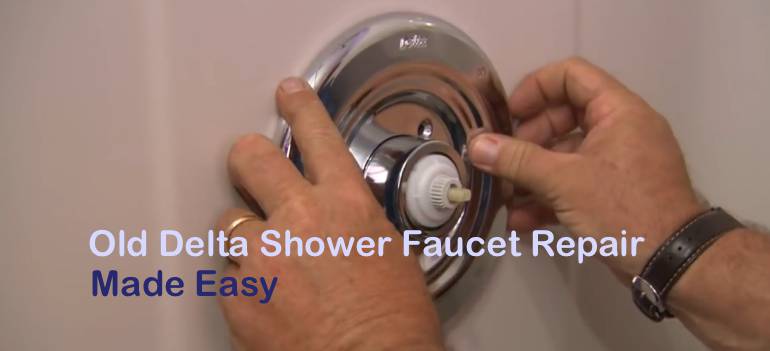
Old Delta Shower Faucet Repair Made Easy
Danco Metal Faucet Repair Kit Delta/Delex
Related Posts:
- Grohe Single Lever Bathroom Faucet
- Hansgrohe Focus Bathroom Faucet
- Bathroom Faucet Drain Installation
- Old Moen Bathroom Faucet Repair
- Pfister Single Hole Bathroom Faucet
- Evelyn Two Handle Bathroom Faucet
- Aquasource Glyndon Bathroom Faucet
- Kohler Bathroom Faucet Installation Instructions
- Best Quality Bathroom Faucets Review
- Old Bathroom Faucet Types


