Exploring the Anatomy of a Delta Bathroom Faucet
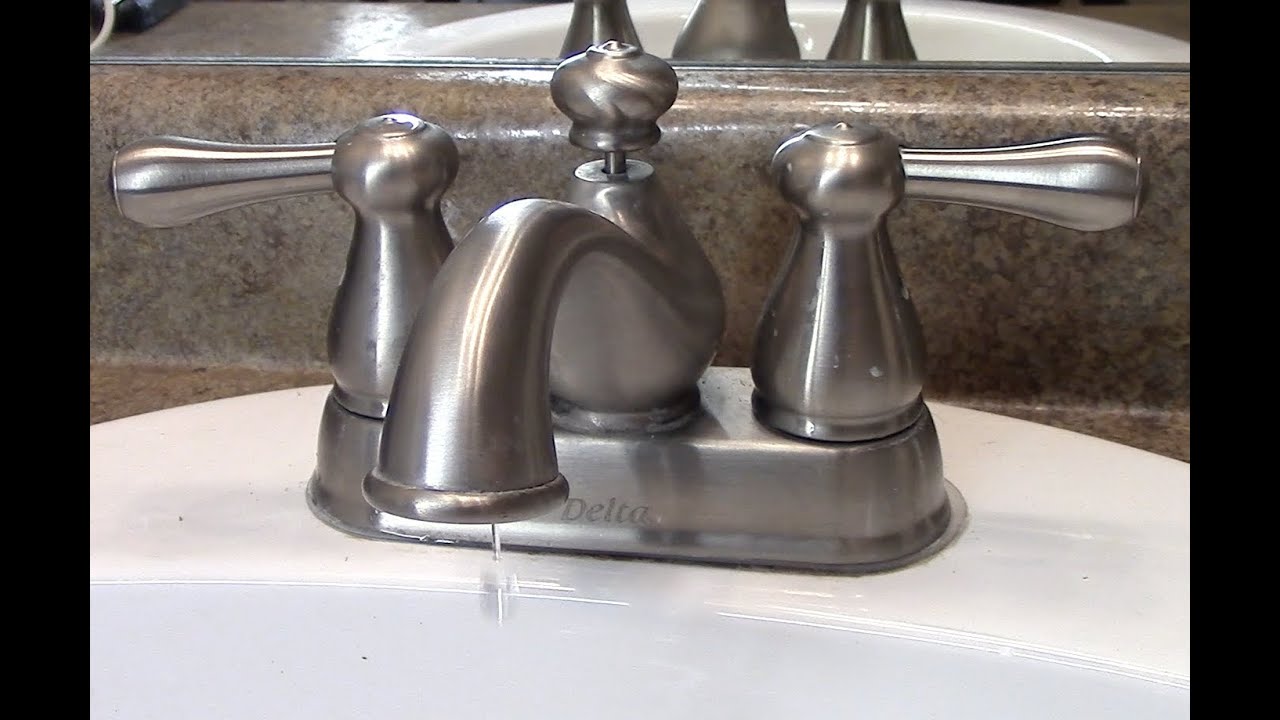
The Delta bathroom faucet is a popular choice among homeowners due to its sleek design and reliable performance. Understanding the anatomy of this faucet is essential for troubleshooting and maintenance. Let’s explore the different components that make up a Delta bathroom faucet.
- The Handle: The handle is the part of the faucet that allows you to control the water flow and temperature. It is usually located on the top of the faucet and can be a single lever or separate hot and cold handles. The handle is connected to the cartridge, which regulates the flow of water.
- The Spout: The spout is the curved or straight part of the faucet where the water flows out. It is connected to the body of the faucet and can be fixed or swivel for added convenience. The spout is designed to aerate the water, providing a smooth and even flow.
- The Cartridge: The cartridge is the heart of a Delta bathroom faucet. It controls the water flow and temperature by mixing hot and cold water. It is located inside the handle and can be easily replaced if necessary. The cartridge is responsible for the smooth operation of the faucet and should be checked regularly for any signs of wear or leakage.
- The Aerator: The aerator is a small device located at the end of the spout. Its main function is to introduce air into the water stream, reducing splashing and conserving water. The aerator also helps to maintain a steady water pressure and prevent clogs by filtering out debris.
- The Valve: The valve is responsible for controlling the water flow within the faucet. It is usually located beneath the handle and can be turned on or off by rotating the handle. The valve is connected to the cartridge and ensures that the water flow is regulated according to the desired settings.
- The Pop-Up Drain: Some Delta bathroom faucets come with a pop-up drain mechanism. This allows you to control the flow of water into the sink by simply pushing or pulling a lever. The pop-up drain is connected to a rod that extends into the drainpipe, allowing you to open or close the drain as needed.

What You’ll Need to Successfully Replace a Washer
Replacing a washer in a Delta bathroom faucet is a common maintenance task that can help solve dripping or leaking issues. Before you begin, it is important to gather the necessary tools to ensure a successful repair. Let’s discuss the tools you’ll need to replace a washer in a Delta bathroom faucet.
Adjustable Wrench: An adjustable wrench is a versatile tool that can be adjusted to fit different sizes of nuts and bolts. It is essential for loosening and tightening the various connections in the faucet. Choose a wrench that is comfortable to grip and has a wide opening range to accommodate different sizes of fittings.
Screwdriver Set: A set of screwdrivers with different types and sizes of heads is necessary for disassembling and reassembling the faucet components. Flathead and Phillips head screwdrivers are the most commonly used types. Make sure to choose high-quality screwdrivers with comfortable handles to prevent slipping and ensure a secure grip.
Plumber’s Tape: Plumber’s tape, also known as Teflon tape, is a thin white tape that is used to seal pipe threads. It helps create a watertight seal and prevents leaks around threaded connections. Apply plumber’s tape to the threads of the faucet components before reassembling them to ensure a tight seal.
Replacement Washer: To replace a washer, you will need a new one that matches the size and type of the existing washer. Washers come in various materials, such as rubber or neoprene, and different sizes to fit different faucets. It is important to choose the correct washer to ensure a proper fit and prevent leaks.
Bucket or Bowl: Having a bucket or bowl on hand is essential to catch any water that may spill or drip during the repair process. This will prevent water damage to your bathroom floor and make cleanup easier.
Towel or Rag: A towel or rag will come in handy for wiping away any excess water and keeping your work area clean and dry. It is important to work in a clean and organized space to prevent any small parts from getting lost or misplaced.

Step-by-Step Guide: A Foolproof Method to Remove and Replace the Washer
Replacing a washer in a Delta bathroom faucet is a relatively straightforward process that can be done by homeowners with basic DIY skills. Follow this step-by-step guide to help you successfully remove and replace the washer in your Delta bathroom faucet.
Turn off the Water Supply: Before you begin any repair work, it is important to turn off the water supply to the faucet. Locate the shut-off valves under the sink and turn them clockwise to shut off the water flow. If there are no shut-off valves, you may need to turn off the main water supply to your house.
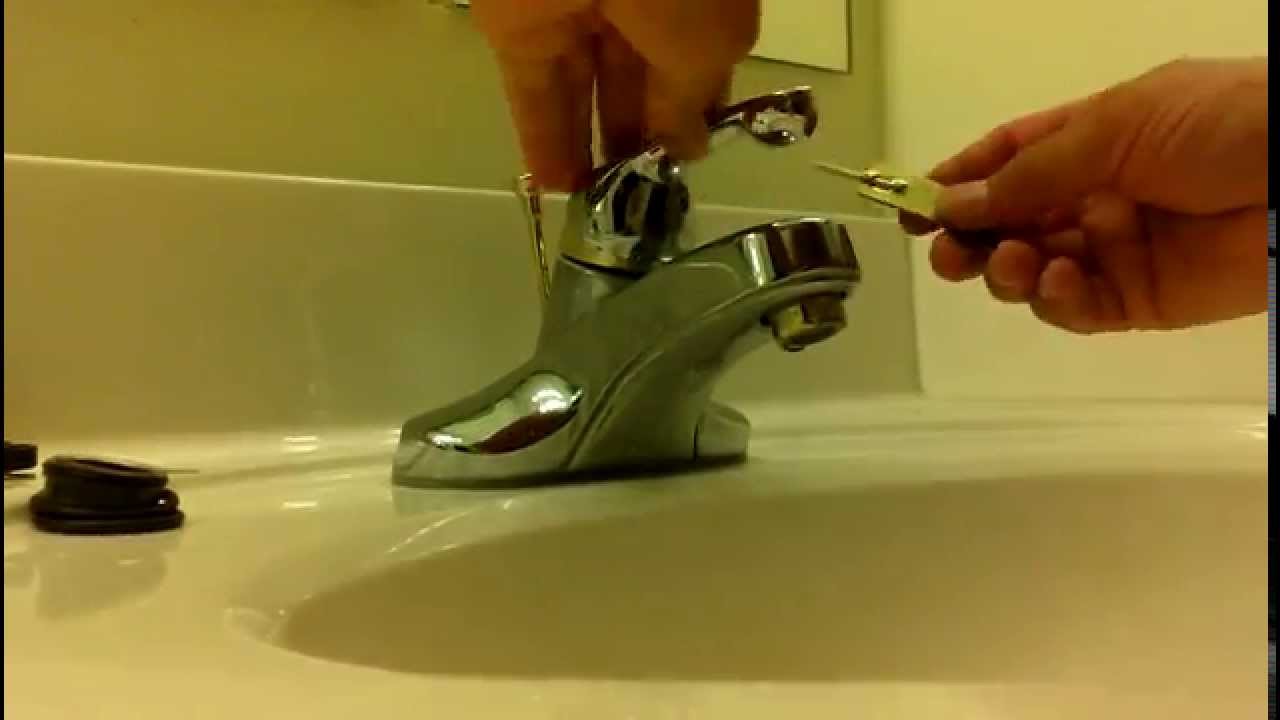
Remove the Handle: Using a screwdriver, remove the screw or nut securing the handle to the faucet. Once the screw or nut is removed, gently pull the handle away from the faucet body. Set the handle aside in a safe place.
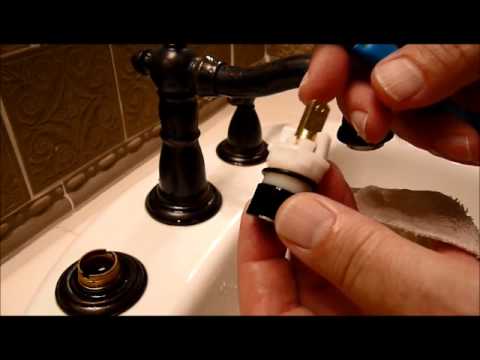
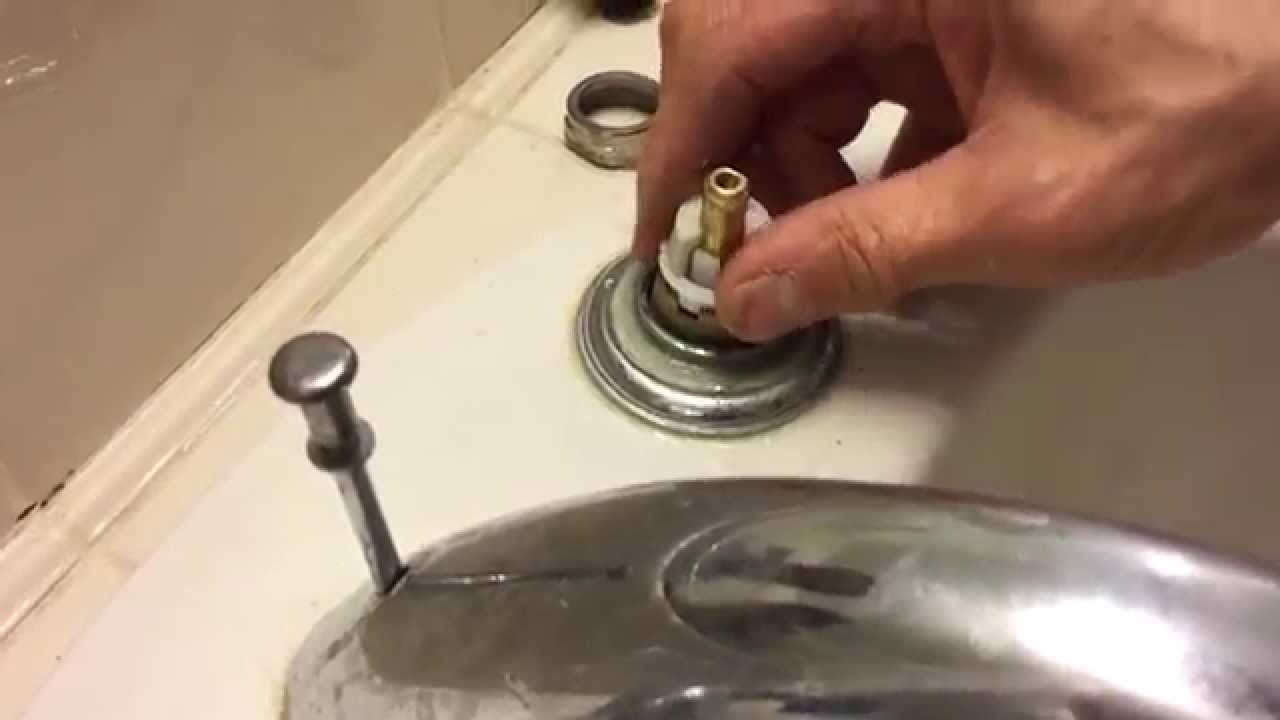
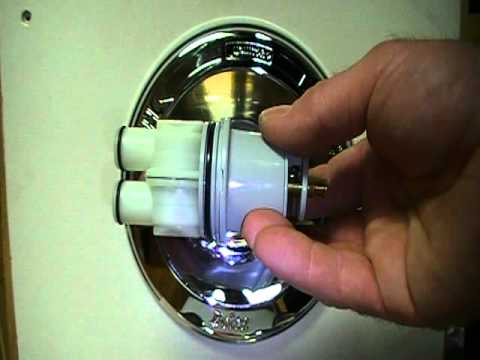
Remove the Cartridge: With the handle removed, you will have access to the cartridge. Depending on the model of your Delta faucet, you may need to unscrew the cartridge or use pliers to remove it. Carefully pull the cartridge out of the faucet body, taking note of its orientation for proper reinstallation.
Replace the Washer: Inspect the old washer for any signs of wear or damage. If necessary, use a screwdriver or other tool to pry out the old washer from the cartridge. Replace it with a new washer of the same size and type. Make sure the new washer is properly seated in the cartridge.
Reassemble the Faucet: Carefully insert the cartridge back into the faucet body, aligning it with the appropriate slots or grooves. Use pliers or a wrench to secure the cartridge in place, taking care not to overtighten. Reattach the handle and secure it with the screw or nut.
Turn on the Water Supply: Once the faucet is reassembled, turn on the water supply to the faucet by turning the shut-off valves counterclockwise. Slowly open the faucet to check for any leaks. If there are no leaks, you have successfully replaced the washer in your Delta bathroom faucet.
Common Challenges and Solutions During Washer Replacement
Replacing a washer in a Delta bathroom faucet is generally a straightforward process, but sometimes challenges may arise. We will address some common challenges that you may encounter during washer replacement and provide solutions to help you overcome them.
Difficult-to-Remove Cartridge: If the cartridge is stuck or difficult to remove, try using a cartridge puller tool specifically designed for Delta faucets. This tool provides extra leverage and makes it easier to pull out the cartridge without causing damage to the faucet.
Leaking Handle: If you notice water leaking from the handle after replacing the washer, it may indicate a problem with the cartridge. Remove the handle and cartridge again, inspecting them for any signs of damage or misalignment. Ensure that the new washer is properly seated in the cartridge and that the cartridge is correctly installed in the faucet body.
Persistent Dripping: If the faucet continues to drip even after replacing the washer, there may be other underlying issues. Check for any loose or worn-out parts, such as O-rings or seals, and replace them if necessary. If the problem persists, it may be best to consult a professional plumber for further assistance.
Water Pressure Issues: After replacing the washer, you may notice a decrease in water pressure. This can be caused by mineral buildup or debris in the faucet aerator. Remove the aerator and clean it thoroughly, removing any clogs or deposits. Reattach the aerator and check if the water pressure has improved.
Difficulties with Reassembly: If you encounter difficulties while reassembling the faucet, refer to the manufacturer’s instructions or consult an online tutorial specific to your Delta faucet model. Take your time and ensure that all components are properly aligned and secured.
Call a Professional: If you are unsure about any aspect of the washer replacement process or encounter unexpected challenges, it is always best to seek the assistance of a professional plumber. They have the knowledge and experience to diagnose and resolve complex faucet issues.
Tips to Extend the Lifespan of Your Delta Bathroom Faucet
Regular maintenance is essential for keeping your Delta bathroom faucet in optimal condition and extending its lifespan. Below we provide you with some valuable tips to help you maintain your Delta bathroom faucet and ensure its long-term performance.
Clean Regularly: Regularly clean your Delta bathroom faucet to remove any dirt, grime, or mineral deposits that may accumulate over time. Use a mild soap or a mixture of vinegar and water to clean the faucet surfaces. Avoid using abrasive cleaners or scrubbing brushes that can scratch the finish.
Inspect for Leaks: Periodically check for any signs of leaks around the faucet, including under the sink. Even minor leaks can lead to water damage and increased water bills. If you notice any leaks, promptly repair or replace any faulty components to prevent further damage.
Apply Lubrication: Apply a small amount of silicone-based lubricant to the moving parts of the faucet, such as the handle and spout. This will help maintain smooth operation and prevent sticking or stiff movements. Be cautious not to apply too much lubricant, as it can attract dirt and debris.
Avoid Excessive Force: Handle your Delta bathroom faucet with care and avoid using excessive force when turning the handles or adjusting the temperature. Applying too much pressure can damage the internal components and lead to leaks or other issues. Use gentle, fluid movements to operate the faucet.
Maintain Water Pressure: Keep an eye on the water pressure in your Delta bathroom faucet. If you notice a sudden decrease in water pressure, it may indicate a clog or buildup in the aerator. Remove the aerator and clean it thoroughly to restore proper water flow. Additionally, be mindful of the water pressure in your home and avoid using high-pressure water sources that can strain the faucet.
Protect the Finish: To maintain the aesthetic appeal of your Delta bathroom faucet, it is important to protect its finish. Avoid using harsh chemicals or abrasive materials when cleaning the faucet, as they can damage the finish. Instead, use a soft cloth or sponge and mild soap to gently clean the surfaces. Consider using a non-abrasive cleaner specifically designed for faucets to remove any stubborn stains or spots.
Check Seals and O-Rings: Periodically inspect the seals and O-rings in your Delta bathroom faucet for any signs of wear or damage. These components play a crucial role in preventing leaks and maintaining a tight seal. If you notice any cracks, tears, or deterioration, replace the seals or O-rings as needed to prevent leaks and ensure proper functionality.
Avoid Excessive Heat: Delta bathroom faucets are designed to withstand normal hot water temperatures. However, exposing the faucet to excessive heat, such as placing hot pots or pans directly on the fixture, can cause damage to the finish or internal components. Always use caution and use trivets or heat-resistant pads to protect the faucet from extreme heat.
Schedule Professional Maintenance: While regular maintenance can go a long way in ensuring the longevity of your Delta bathroom faucet, it is also beneficial to schedule professional maintenance periodically. A professional plumber can inspect the faucet, identify any potential issues, and perform any necessary repairs or replacements. This proactive approach can help catch problems early on and prevent major issues down the line.
Delta Repair Kit For Single Handle Faucets
Tutorial: Delta Faucet Cartridge Replacement
How to Fix a Leaky Delta Faucet – Delta Faucet Dripping

How To Fix Leaky Bathroom Handle Delta Faucet (Model 4530 Series

Fix a leaky Delta Single-handle shower faucet for UNDER $2!!
Repairing a leaky Delta bath or shower faucet-single lever and setting temp
Related Posts:
- Moen Bathroom Faucet Valve
- Moen Bathroom Faucet Chrome
- Delta Grail Bathroom Faucet
- Two Handle Centerset Bathroom Faucet
- Gold Swan Bathroom Faucets
- Black Bathroom Faucets
- Delta Bathroom Faucet Dripping Fix
- 8 Inch Bathroom Faucet Brushed Nickel
- Cheap Bathroom Faucets And Fixtures
- Grohe Bathroom Faucet Single Hole


