Choosing the Right Faucet and Drain Assembly
When installing a bathroom faucet drain, the first and most crucial step is choosing the right faucet and drain assembly. This decision impacts both the functionality and aesthetics of your bathroom. Here are some key points to consider:
- Assessing Your Needs: Determine the type of faucet and drain that suits your bathroom sink. Consider the size of the sink, the existing plumbing configuration, and the style you want to achieve. Single-handle faucets are convenient and space-saving, while double-handle faucets offer more precise temperature control.
- Material Matters: Faucets and drains come in various materials, including brass, stainless steel, and plastic. Brass is durable and resistant to corrosion, making it a popular choice. Stainless steel offers a modern look and is also resistant to rust. Plastic is cost-effective but may not last as long.
- Finish Options: The finish of your faucet and drain assembly should complement your bathroom’s overall design. Chrome is classic and easy to clean, brushed nickel provides a softer look, and oil-rubbed bronze adds a touch of vintage charm. Choose a finish that matches other fixtures in your bathroom for a cohesive look.
- Compatibility with Sink Type: Ensure the faucet and drain assembly you select is compatible with your sink type. For example, vessel sinks require taller faucets, while undermount sinks need a faucet that can reach over the edge. Measure your sink and countertop to avoid any fitting issues.
- Brand and Warranty: Opt for reputable brands known for their quality and reliability. Check the warranty terms as well, as a good warranty can save you from future hassles. Well-known brands often offer better customer support and replacement parts availability.
- Budget Considerations: While it’s tempting to go for the cheapest option, investing in a good-quality faucet and drain assembly can save you money in the long run. Consider the cost of installation, maintenance, and potential replacements when setting your budget.
Gathering Necessary Tools and Materials
Before diving into the installation process, it’s essential to gather all the necessary tools and materials. Being well-prepared can make the installation smoother and prevent unnecessary trips to the hardware store. Here’s what you’ll need:
Basic Tools: Start with the basics: a wrench set, screwdriver set, and pliers. These tools are fundamental for loosening and tightening nuts and screws, removing old fixtures, and securing new ones in place.
Specialty Tools: Depending on your faucet and drain assembly, you might need specific tools like a basin wrench for hard-to-reach nuts, a plumber’s putty knife for scraping off old putty, and a Teflon tape for sealing threaded connections.
Plumbing Supplies: Gather essential plumbing supplies, including plumber’s putty or silicone caulk, Teflon tape, and a bucket to catch any water that might spill during the installation. Having these supplies on hand ensures a watertight seal and a clean installation.
New Faucet and Drain Assembly: Ensure you have the new faucet and drain assembly ready for installation. Check that all parts are included in the package and nothing is missing. It’s also a good idea to read through the installation instructions provided by the manufacturer.
Cleaning Supplies: Keep cleaning supplies handy, such as a sponge, cloth, and mild cleaner. You’ll need to clean the sink area before and after installation to ensure a smooth surface for sealing and to remove any debris.
Protective Gear: Safety should always be a priority. Wear protective gloves to safeguard your hands from sharp edges and hot water. Safety goggles can protect your eyes from debris, especially if you’re working in a tight space under the sink.

Preparing Your Sink for Installation
Properly preparing your sink is a crucial step in ensuring a successful faucet and drain installation. This process involves cleaning, inspecting, and sometimes removing old fixtures. Here’s how to get your sink ready:
Turn Off Water Supply: Begin by turning off the water supply to the sink. Locate the shut-off valves under the sink and turn them clockwise until they are fully closed. If there are no shut-off valves, you may need to turn off the main water supply to your home.
Drain the Faucet: Open the faucet to drain any remaining water in the lines. This will prevent water from spilling out when you disconnect the supply lines. Place a bucket or towel under the sink to catch any residual water.
Remove Old Faucet: If you’re replacing an existing faucet, start by disconnecting the water supply lines from the faucet using an adjustable wrench. Next, remove the mounting nuts or screws that hold the faucet in place. Carefully lift the old faucet out of the sink.
Clean the Sink Area: Thoroughly clean the sink and the surrounding countertop. Remove any old plumber’s putty, silicone, or debris from the faucet and drain openings. A clean surface ensures a better seal for the new fixtures.
Inspect the Sink and Countertop: Check for any damage or wear around the faucet and drain openings. If you notice any cracks or chips, consider repairing them before proceeding with the installation. This step ensures a secure and leak-free installation.
Check Fit and Alignment: Before installing the new faucet and drain assembly, do a dry fit to ensure everything lines up correctly. Place the faucet and drain in their respective openings and check for any misalignments. Adjust as necessary to ensure a proper fit.
Installing the Faucet: Step-by-Step Guide
With your sink prepared and tools at the ready, you can now proceed with the actual installation of your new faucet. Follow these steps for a smooth and successful installation:
Assemble the Faucet: Start by assembling the faucet according to the manufacturer’s instructions. This may involve attaching the handles, spout, and other components. Make sure all parts are securely connected before proceeding.
Apply Plumber’s Putty: Apply a generous amount of plumber’s putty or silicone caulk around the base of the faucet. This creates a watertight seal between the faucet and the sink. If using putty, roll it into a thin rope and place it around the bottom edge of the faucet.
Insert the Faucet: Insert the faucet into the mounting holes on the sink. Ensure the faucet is aligned correctly and press it down firmly to create a seal with the plumber’s putty or silicone caulk. Wipe away any excess putty or caulk that squeezes out.
Secure the Faucet: From underneath the sink, secure the faucet using the provided mounting hardware. Tighten the mounting nuts or screws evenly to ensure the faucet is stable and does not move. Use a basin wrench if necessary to reach tight spaces.
Connect Water Supply Lines: Attach the hot and cold water supply lines to the corresponding inlets on the faucet. Use Teflon tape on the threaded connections to prevent leaks. Tighten the connections with an adjustable wrench, being careful not to overtighten and damage the fittings.
Check for Stability: Once everything is connected, check the faucet for stability. Make sure it is securely mounted and does not wobble. If it feels loose, tighten the mounting hardware further until the faucet is firmly in place.
Connecting and Securing the Drain
With the faucet installed, the next step is to connect and secure the drain assembly. This process ensures that water flows smoothly from the sink to the plumbing system without any leaks. Here’s how to do it:
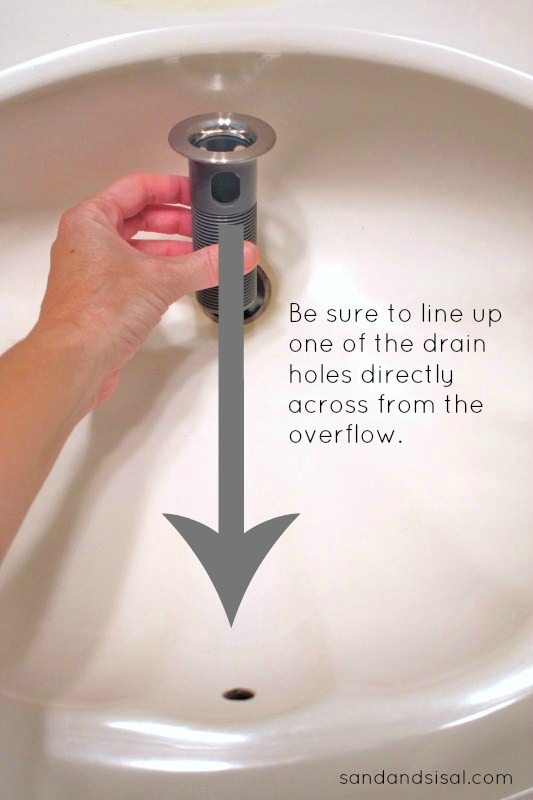
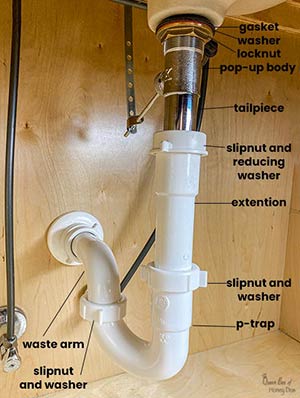
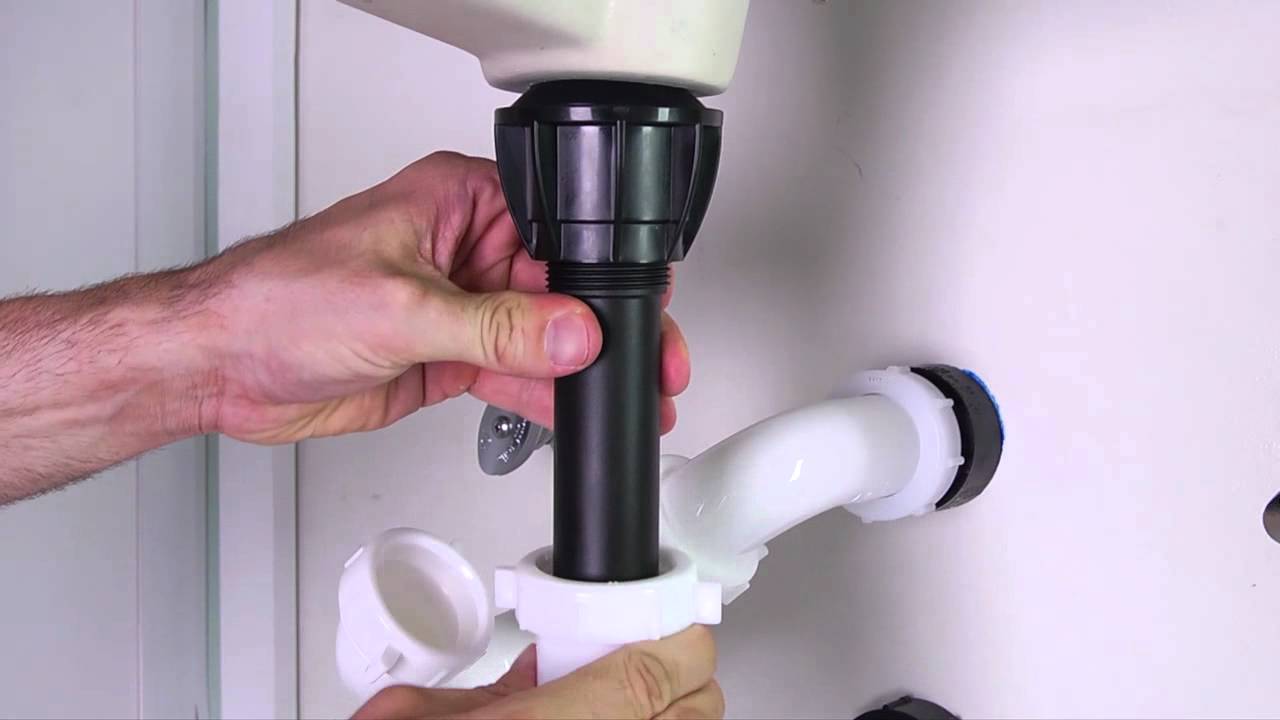
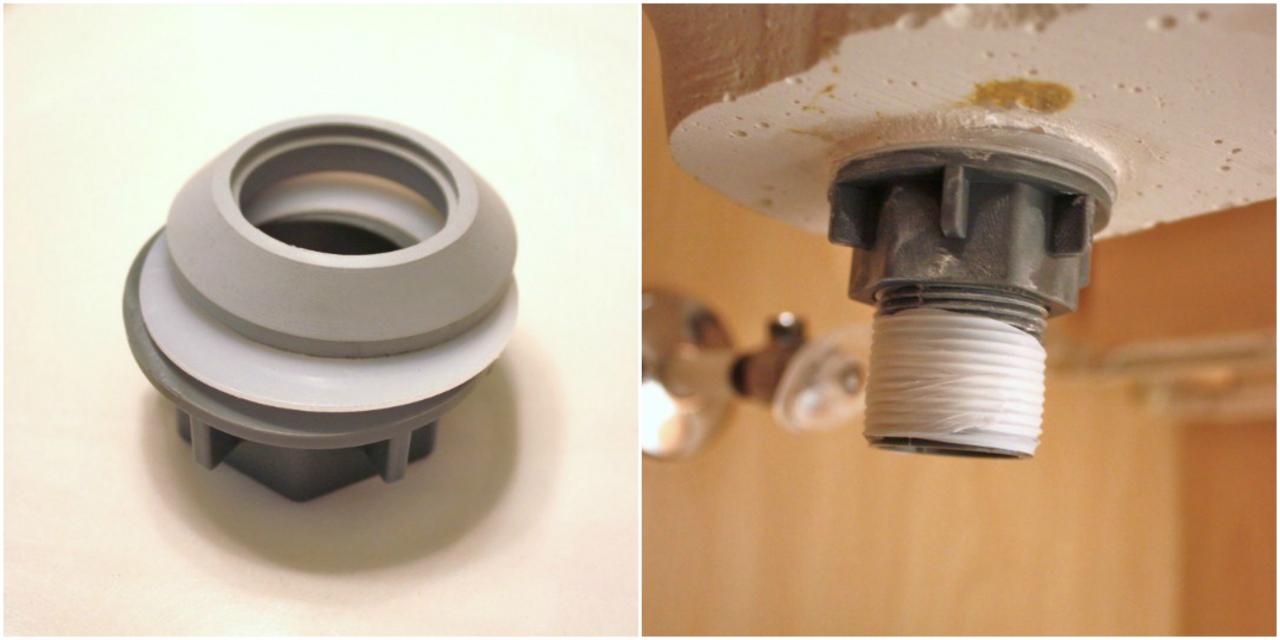
Assemble the Drain: Begin by assembling the drain components according to the manufacturer’s instructions. This typically includes the drain body, flange, and gasket. Apply the plumber’s putty or silicone caulk to the underside of the drain flange to create a watertight seal.
Insert the Drain Body: Insert the assembled drain body into the sink’s drain opening from above. Make sure the gasket is properly seated to prevent leaks. Press down firmly to create a seal with the plumber’s putty or silicone caulk.
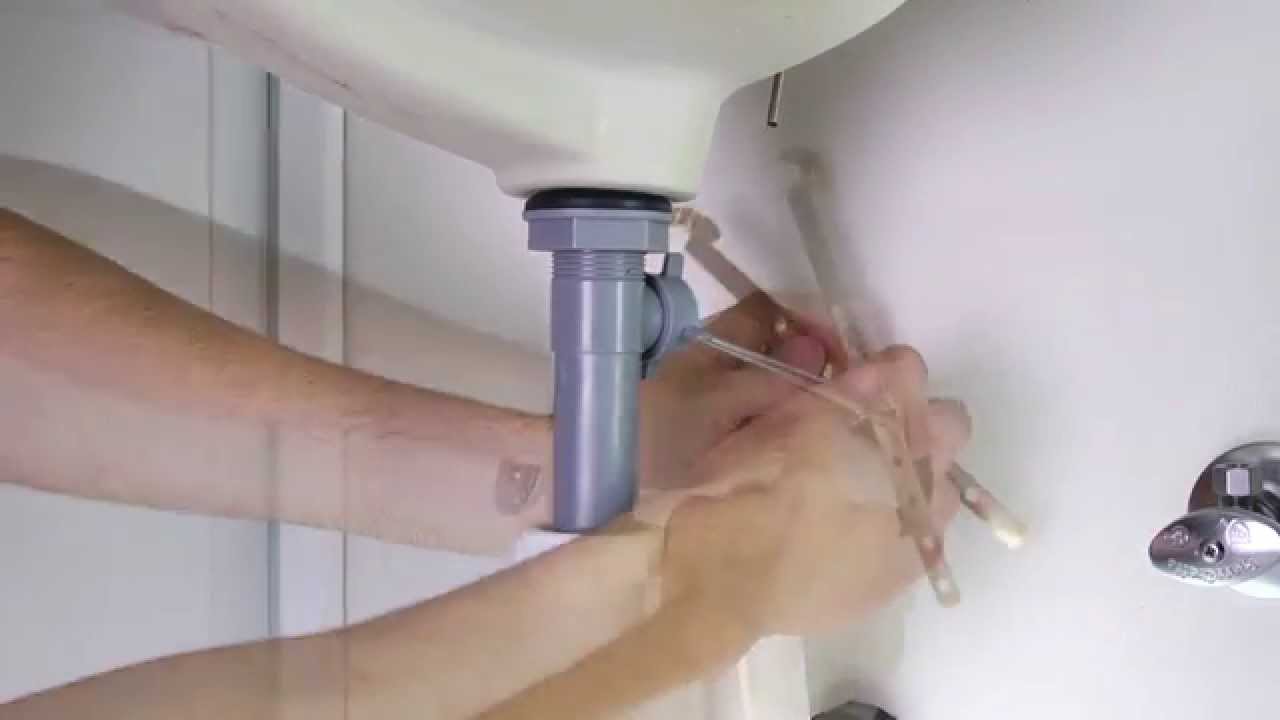
Secure the Drain from Below: Underneath the sink, secure the drain body with the provided mounting hardware. This usually involves tightening a locknut onto the drain body. Use pliers or a wrench to ensure the locknut is tight and the drain is securely in place.
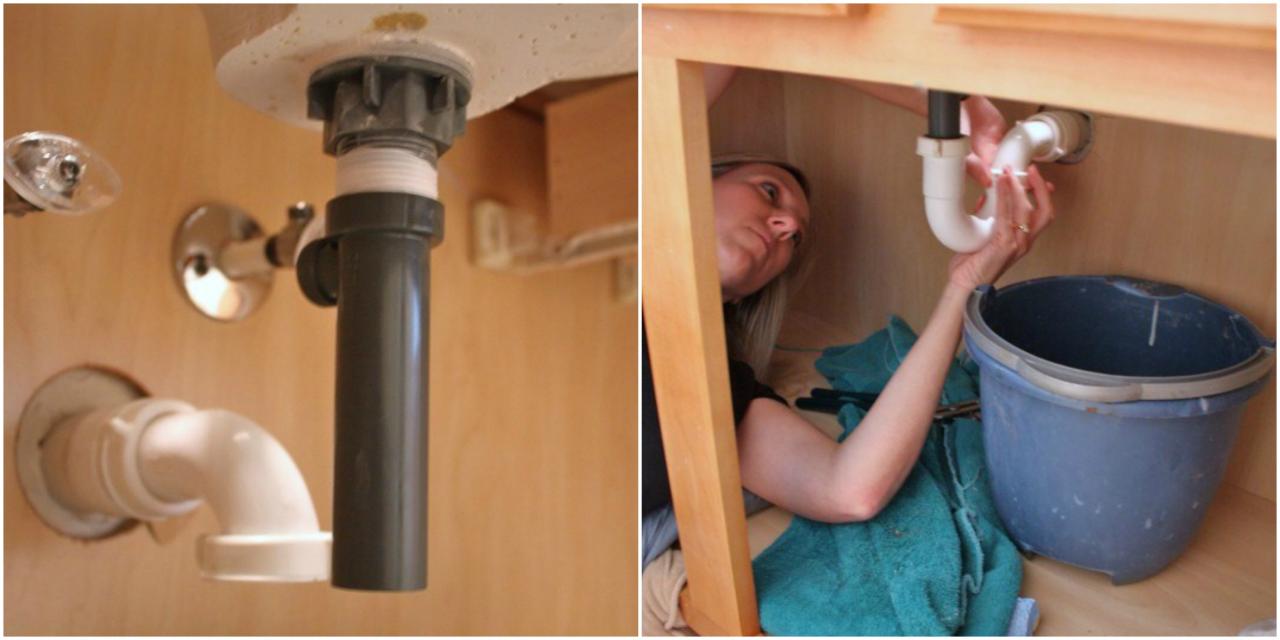
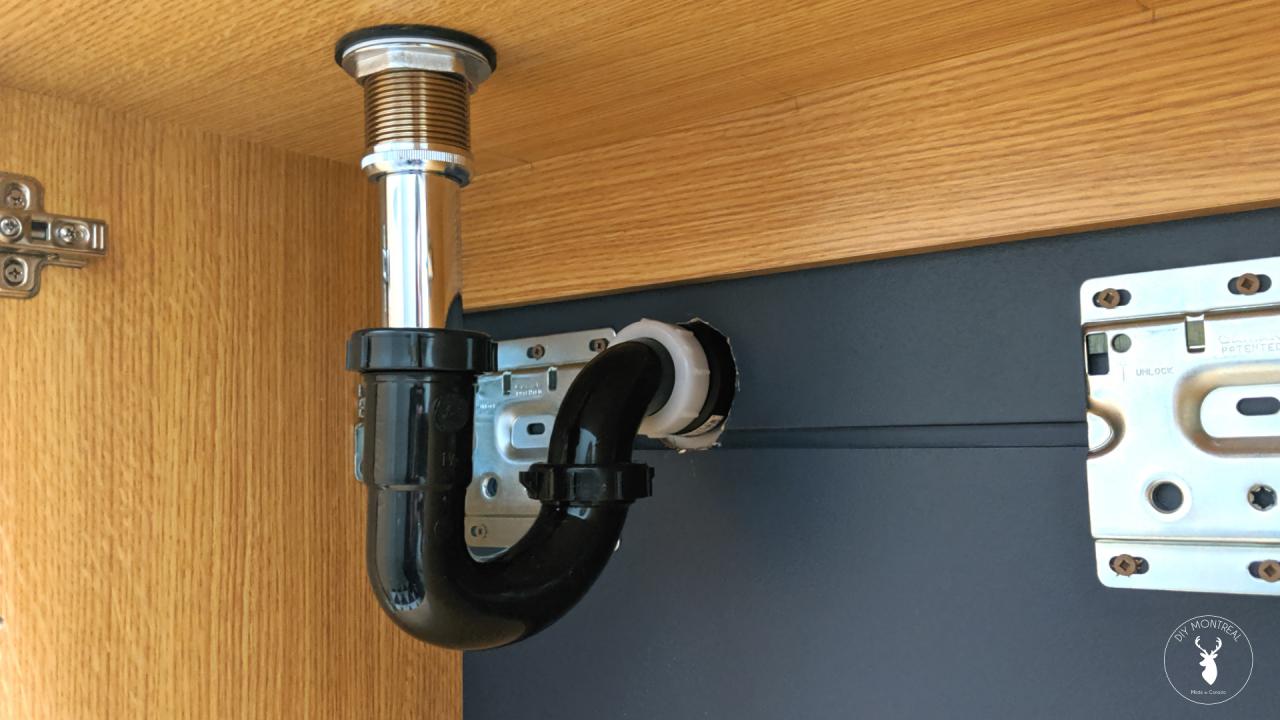
Attach the P-Trap: Connect the P-trap to the drain body. The P-trap is a curved pipe that prevents sewer gases from entering your home. Ensure all connections are tight and use Teflon tape on threaded connections to prevent leaks.
Check for Leaks: Once the drain is securely connected, turn on the water and check for any leaks around the drain assembly. Look for any drips or water pooling under the sink. Tighten connections as necessary to eliminate any leaks.
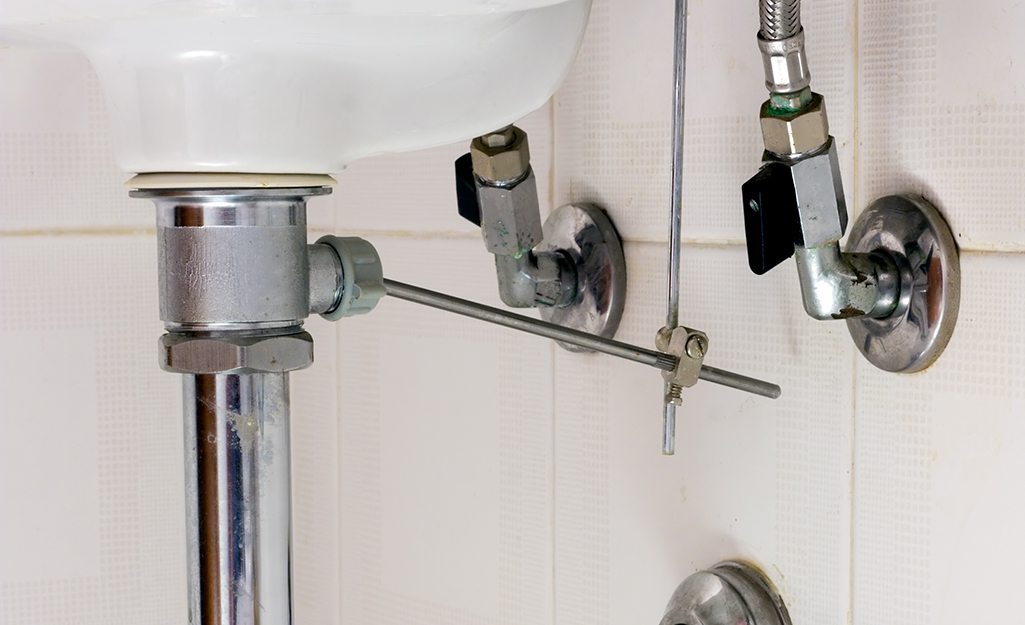
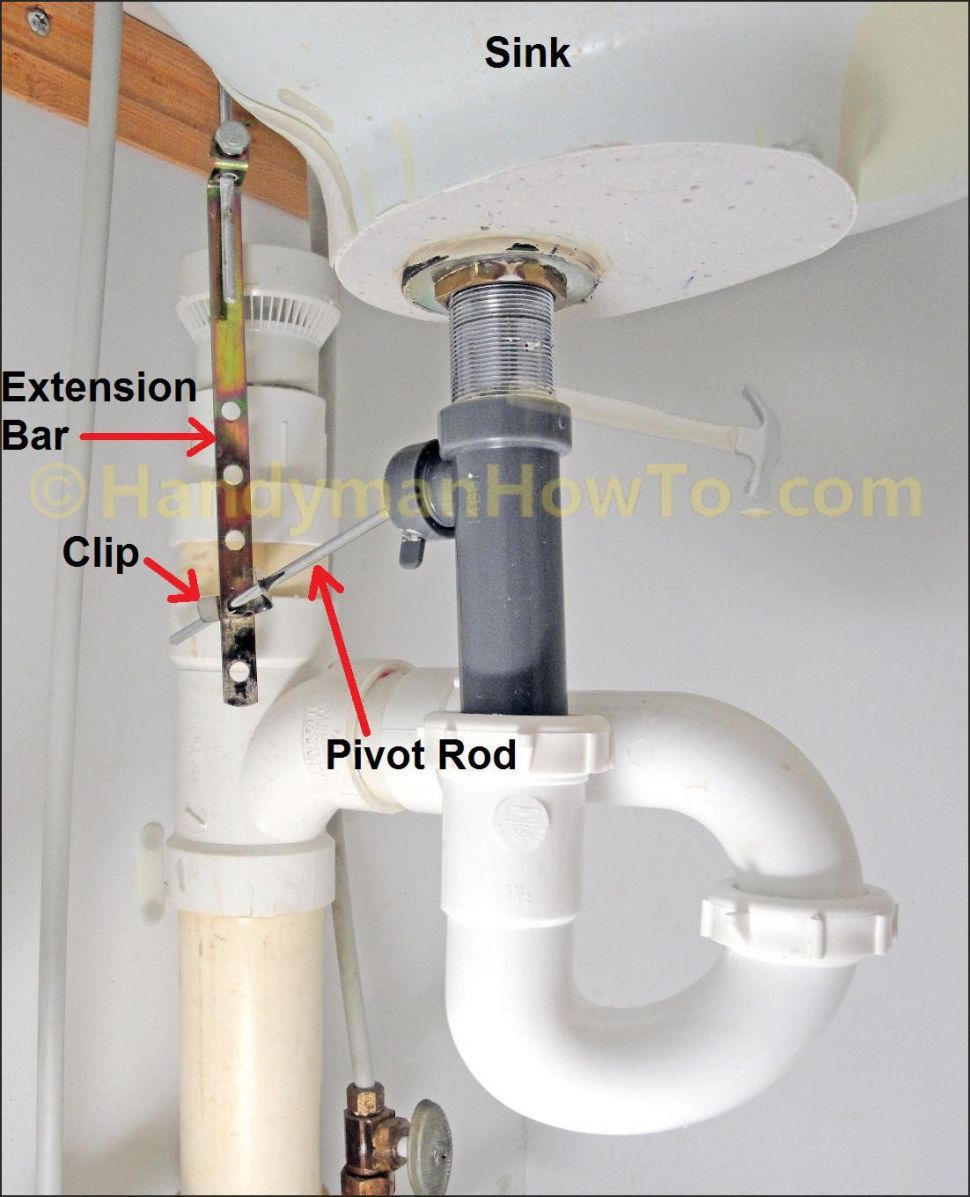
Install Pop-Up Assembly (Optional): If your faucet includes a pop-up drain assembly, install it according to the manufacturer’s instructions. This typically involves connecting the pop-up lever to the drain stopper and ensuring it operates smoothly.

Testing for Leaks and Final Adjustments
After installing the faucet and drain, the final step is to test for leaks and make any necessary adjustments. This ensures that everything is functioning correctly and that your installation is complete. Follow these steps:
Turn On the Water Supply: Turn on the water supply valves under the sink by rotating them counterclockwise. Open the faucet and allow the water to flow. Check for any leaks around the water supply connections and the faucet base.
Inspect the Drain: Fill the sink with water and then release it to check the drain. Look for any leaks around the drain assembly and P-trap. Pay close attention to the connections and ensure no drips or water are pooling under the sink.
Adjust Water Temperature: Test the water temperature by turning the faucet handles. Ensure that the hot and cold water mix properly and that the temperature can be adjusted smoothly. If the water temperature is not correct, check the supply line connections.
Check Faucet Operation: Test the faucet operation by turning it on and off several times. Ensure that the handles move smoothly and that the water flow is consistent. If there are any issues with the operation, refer to the manufacturer’s instructions for troubleshooting.
Make Final Adjustments: If you notice any leaks or issues, make the necessary adjustments. Tighten any loose connections, reapply plumber’s putty or silicone caulk if needed, and ensure all parts are securely in place. This step is crucial for ensuring a watertight installation.
Clean Up: Once you are satisfied with the installation, clean up any debris or excess putty around the sink area. Wipe down the faucet and sink to remove any fingerprints or smudges. A clean and tidy workspace enhances the overall look of your bathroom.

How to Install a Pop-Up Drain
Push & Seal Tool-Less Drain Assembly
A Woman’s Guide to Installing a Faucet – Sand and Sisal
How to Install a Bathroom Sink Drain
How to Install a Bathroom Sink Drain Repair and Replace

A Womanu0027s Guide to Installing a Faucet – Sand and Sisal
Replace Bathroom Sink Drain – MAGZHOUSE
Related Posts:
- White Bathroom Faucet Fixtures
- Discount Kohler Bathroom Faucets
- Delta Bathroom Faucets 8 Inch Spread
- Delta Bathroom Faucet Chrome
- How To Fix A Leaky Bathroom Faucet Handle
- Bathroom Faucet Vessel Sink
- Changing Bathroom Faucets And Drains
- American Standard Single Lever Bathroom Faucets
- Delta Single Lever Bathroom Faucet Repair
- Bathroom Faucets 8 Inch Spread Brushed Nickel


