Guide to Assembling Your Bathroom Sink
Installing a new bathroom sink can update the look of your space. But figuring out the process of connecting the faucet, drain, water lines, and mounting the sink can be confusing if you’ve never done it before. Having the right diagram and instructions makes a sink installation much smoother.
As a DIY enthusiast who has assembled my fair share of bathroom sinks, let me walk you through the process with helpful diagrams and tips. Read on to learn how to assemble your bathroom sink like a pro!
Supplies You’ll Need
Before starting any installation, make sure you have all the necessary supplies:
- Sink basin
- Faucet
- Drain assembly and p-trap
- Supply lines
- Shutoff valves
- Mounting hardware
- Plumber’s putty
- Adjustable wrench and pipe wrench
- Basin wrench
- Silicone caulk
Having the right tools for the job will make your bathroom sink assembly secure and headache-free. Don’t forget work gloves and eye protection.
Prepping the Sink Base Cabinet
If your sink will be mounted in a vanity cabinet, make sure the base is prepared. Remove any drawers or doors and set aside. Take out the shelf inside if needed to allow room for the sink and plumbing. Cut a hole in the back panel of the cabinet for water line access.
Apply a thin bead of plumber’s putty or silicone caulk around the top edges of the cabinet base. This seals any gaps between the sink and cabinet for stability when you install the sink atop the base.
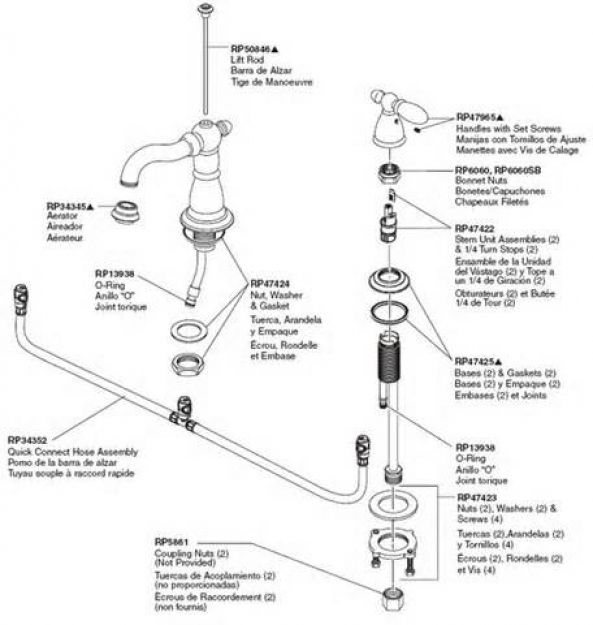
Mounting the Faucet
Before you install the sink, it’s best to pre-assemble the faucet and drain. Refer to the faucet diagram for specifics, but in general:
- Place the faucet through the designated holes in the sink top.
- Underneath, slide on the plastic washers and mounting brackets.
- Secure with the nuts and tighten by hand first, then fully tighten with wrenches. Don’t over tighten.
- If your faucet has supply hoses, connect them to the shutoff valves or water supply lines at this point.
This will allow you to access the underside of the sink before mounting it.
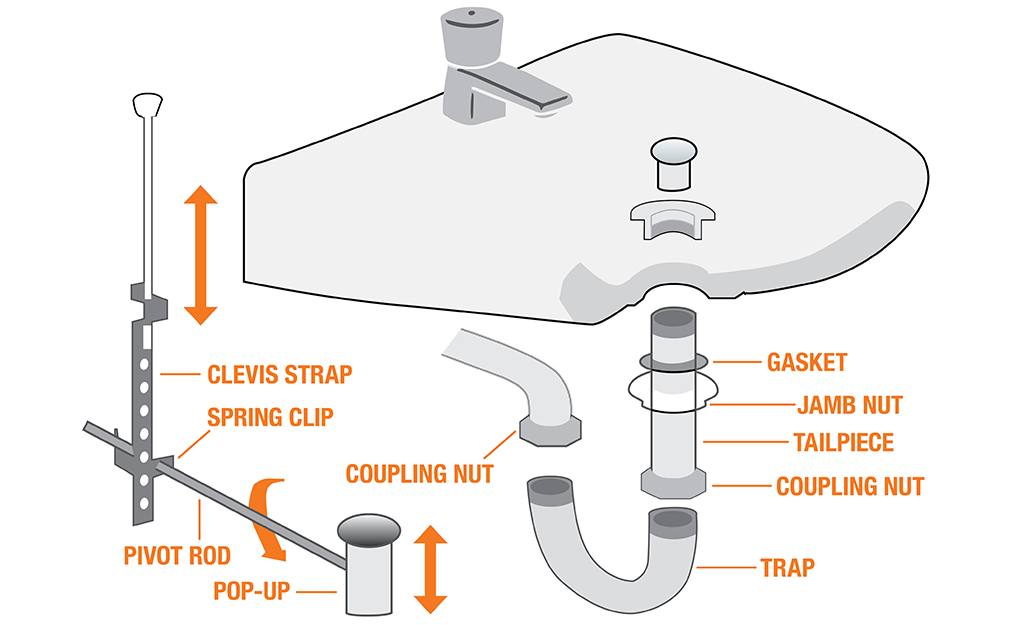
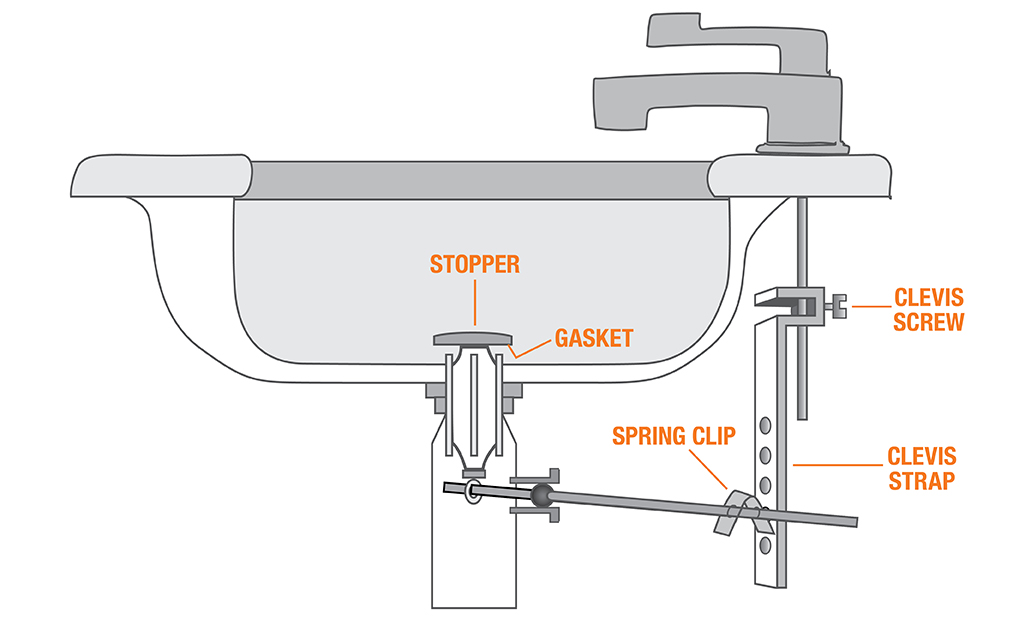
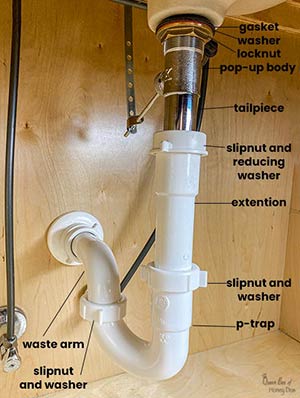
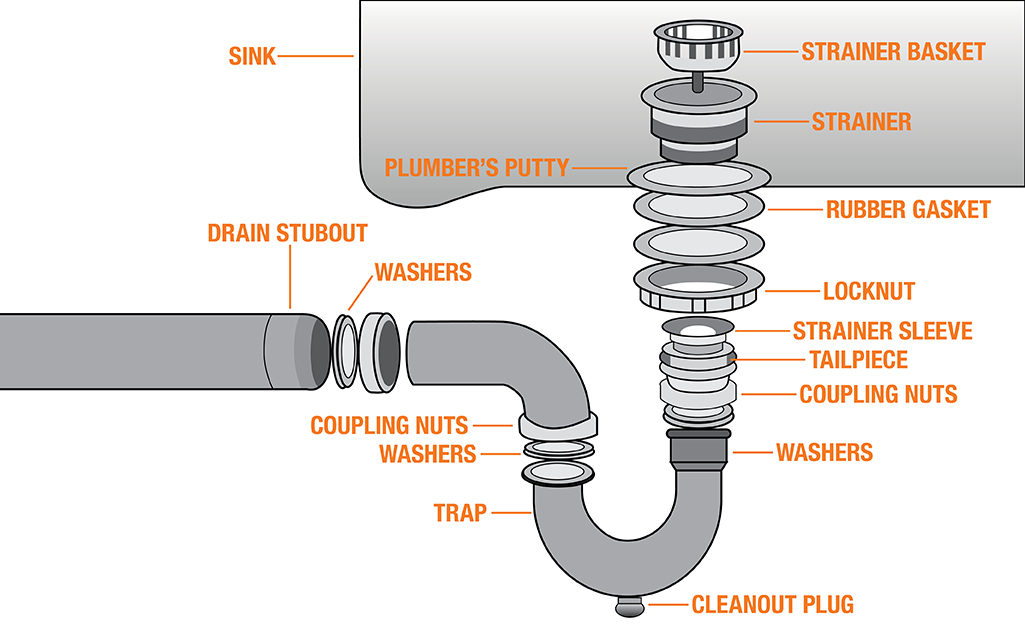
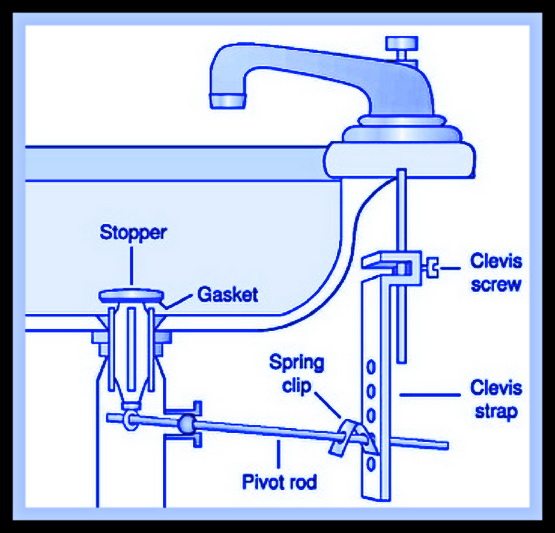
Attaching the Drain
Now let’s focus on the drain assembly. Follow these steps and refer to the drain diagram:
- Remove the drain basket strainer from the sink drain hole.
- Slide the rubber gasket over the drain throat and press evenly against the sink bottom.
- From below, slide on the metal friction ring and mounting ring.
- Thread on the lock nut and tighten with your hand and a wrench until snug.
- Screw on the tailpiece. Don’t fully tighten yet.
- Apply plumber’s putty around the drain basket strainer.
- Insert the basket strainer into the drain hole, add the gasket and lock nut below, and hand tighten.
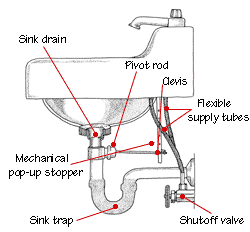
Making the Water Line Connections
With your faucet and drain pre-assembled, now it’s time to mount the sink.
- Set the sink into place on the cabinet or vanity.
- Underneath, use the provided screws and washers to anchor the sink clips to the countertop. Tighten with a screwdriver.
- Connect the water supply lines to the shutoff valves and tighten with an adjustable wrench.
- Attach the drain tailpiece to the p-trap and outlet drain pipe. Adjust and tighten all joints.
- Turn on the shutoff valves and check for any leaks at the connections. Tighten if needed.
Finishing Touches
Once your sink is fully installed and connected, finish up with these steps:
- Seal around the edges with silicone caulk and let dry.
- Re-install the cabinet doors and drawers, if applicable.
- Run the faucet and drain to ensure proper operation.
- Check for any leaks underneath and tighten joints as needed.
- Add any finishing touches like storage baskets, a towel bar, and a soap dispenser.
Refer back to the diagrams any time you need to refresh your memory on how to assemble your bathroom sink. With the right process, you can enjoy a beautiful new sink installation! Let me know in the comments if this guide helped you DIY your own sink connection.
Bathroom Sink Plumbing
Parts of a Sink
Bathroom Sink Drain Parts: Diagrams and Installation – Plumbing Sniper
Bathroom Sink Drain Diagram Bathroom sink plumbing, Bathroom

How To Install Bathroom Sink Drain u2022 Queen Bee of Honey Dos
Parts of a Sink
Bathroom Sink Plumbing
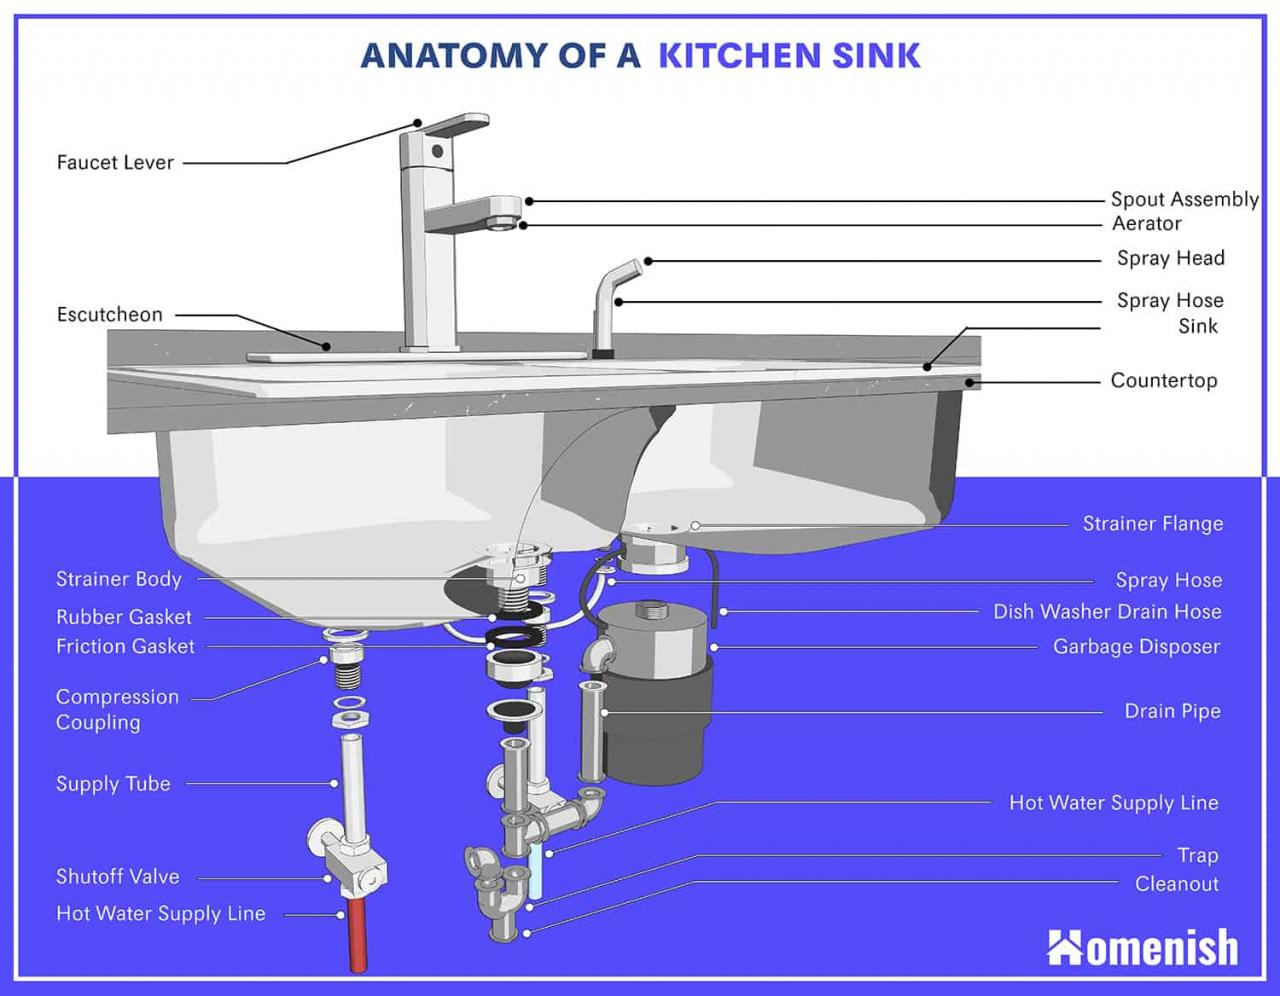
15 Parts of a Kitchen Sink (with a 3D Illustrated Diagram) – Homenish
Bathroom Sink Drain Parts Diagram , , http://www.designbabylon
The 35 Parts of a Kitchen Sink (Detailed Diagram) – Home Stratosphere

DIY Plumbing – Troubleshooting Your Sink Stopper
Related Posts:


