Identifying the Source of the Leak
When faced with a leaky bathroom sink drain pipe, the first and most crucial step is to identify the source of the leak. This task might seem daunting at first, but with a methodical approach, you can easily pinpoint where the problem lies. Here are some steps to guide you through this process.
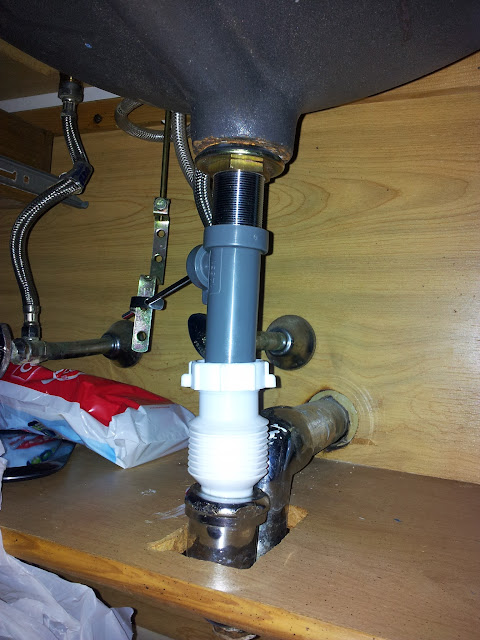
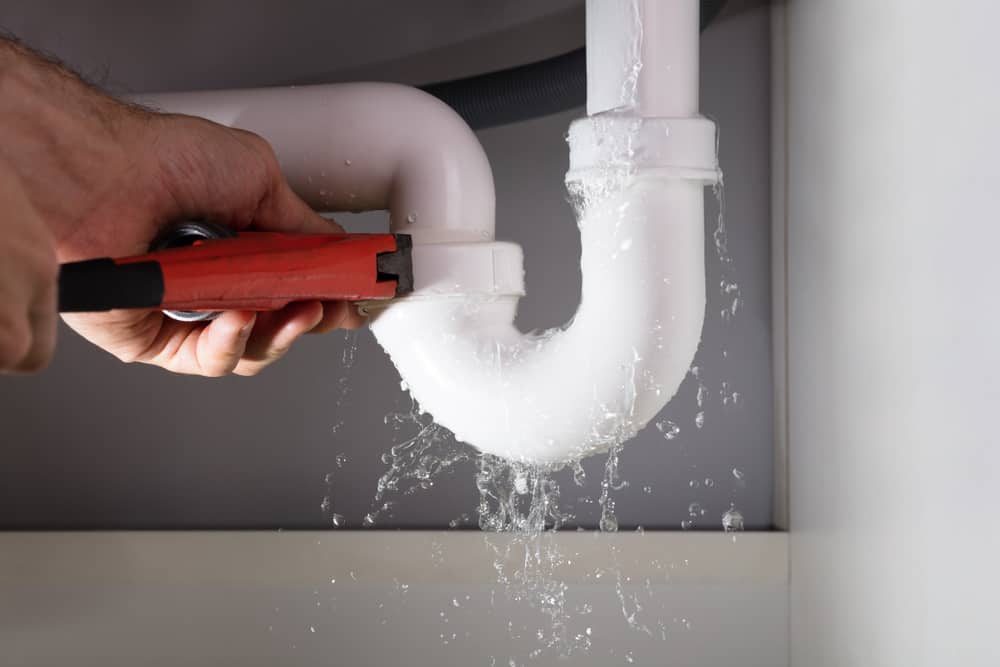
- Visual Inspection: Start with a thorough visual inspection. Look under the sink and around the drain pipe to see if you can spot any obvious signs of water leakage. Pay close attention to joints and connections, as these are common areas where leaks occur. If you see water droplets, rust, or any other signs of moisture, note these areas for closer inspection.
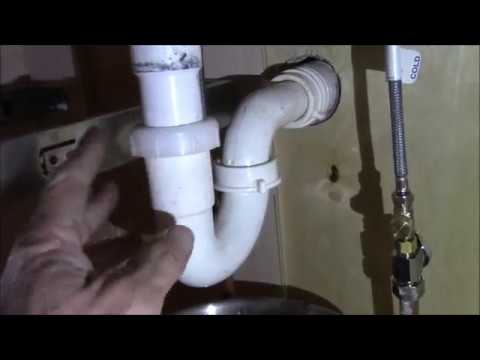
- Check the P-Trap: The P-trap, a U-shaped pipe under your sink, is a frequent culprit of leaks. It’s designed to trap debris and prevent sewer gases from entering your home. However, it can also collect grime and lead to leaks. Run your fingers along the P-trap to feel for moisture. If it’s wet, it could be cracked or have a loose connection.
- Examine the Pipe Seals and Connections: Sometimes, the issue lies with the seals and connections between pipes. Use a flashlight to inspect these areas. Look for signs of corrosion or water stains, which indicate a leak. Tighten any loose connections with a wrench to see if this resolves the problem.
- Test for Leaks with Water: After your visual inspection, turn on the faucet and let the water run for a few minutes. Check under the sink to see if any water is dripping. Use a dry cloth or paper towel to detect moisture around suspected areas. If you find wet spots, you’ve likely found the source of your leak.
- Use a Dye Test: If the source of the leak is still unclear, perform a dye test. Add a few drops of food coloring into the sink and let the water run. Observe the pipes and connections under the sink. The colored water will help you trace the exact location of the leak.
- Inspect for Hidden Leaks: Sometimes, leaks can be hidden behind walls or in less accessible areas. If you suspect a hidden leak, check for signs of water damage on the walls or floors around your sink. Peeling paint, warped wood, and mold growth are indicators of hidden water damage.
Gathering the Necessary Tools and Materials
Once you’ve identified the source of the leak, the next step is to gather all the tools and materials you’ll need for the repair. Being well-prepared ensures the repair process goes smoothly and efficiently. Here’s a comprehensive list of what you’ll need and why each item is essential.
Basic Tools: The fundamental tools you’ll need include an adjustable wrench, pliers, a pipe wrench, a bucket, and a flashlight. These tools are crucial for loosening and tightening connections, catching drips, and seeing into dark spaces under your sink.
Replacement Parts: Depending on the source of the leak, you might need new pipe sections, a new P-trap, or replacement seals and washers. Measure the diameter of your existing pipes to ensure you buy the correct sizes. It’s also wise to bring a sample of the part to the hardware store for a perfect match.
Plumber’s Putty and Teflon Tape: Plumber’s putty is used to create watertight seals around sink drains, while Teflon tape (also known as pipe thread seal tape) is essential for sealing threaded pipe connections. These materials help prevent future leaks by ensuring tight, waterproof seals.
Cleaning Supplies: Before installing new parts, you’ll need to clean the area. Have a scrub brush, rags, and a cleaning solution handy to remove grime, mold, and old plumber’s putty or tape. A clean surface ensures a better seal and a more professional finish.
Protective Gear: Safety should always be a priority. Wear gloves to protect your hands from sharp edges and chemicals. Safety goggles are also a good idea to protect your eyes from debris and splashes. If you’re using any strong cleaning agents, ensure the area is well-ventilated or use a mask.
Instruction Manual or Online Guides: If you’re not familiar with plumbing repairs, having an instruction manual or access to online video tutorials can be incredibly helpful. These resources can provide step-by-step guidance and tips for a successful repair.

Turning Off the Water Supply
Before you begin any plumbing repair, turning off the water supply is a critical step. This prevents water from flowing while you work and reduces the risk of water damage. Here’s how to properly shut off the water supply to your bathroom sink.
Locate the Shut-Off Valves: Look under your bathroom sink to find the shut-off valves. There are usually two valves: one for hot water and one for cold water. These valves are typically located near the wall, where the water supply lines connect to the sink.
Turn Off the Valves: Rotate the shut-off valves clockwise to turn them off. If the valves are hard to turn, use a pair of pliers for better grip. Ensure both the hot and cold water valves are completely closed. If you encounter any resistance or the valves won’t turn, they may be corroded and need replacement.
Test the Water Flow: After shutting off the valves, turn on the faucet to check if the water flow has stopped. Let the water run until it slows to a trickle or stops completely. This step confirms that the water supply is indeed turned off and you can proceed safely with your repair.
Drain the Remaining Water: Place a bucket under the sink to catch any water that may still be in the pipes. Use a wrench to loosen the connections at the shut-off valves and let the remaining water drain into the bucket. This ensures you won’t have any unexpected water spills while working on the pipes.
Disconnect the Supply Lines: Once the water is turned off and drained, disconnect the supply lines from the shut-off valves. Use an adjustable wrench to loosen the nuts connecting the supply lines to the valves. Carefully remove the lines and place them aside, ensuring they are out of the way.
Inspect the Shut-Off Valves: While you have the water supply turned off, it’s a good time to inspect the shut-off valves for any signs of wear or corrosion. If the valves are old or damaged, consider replacing them to prevent future issues. This proactive step can save you from potential leaks and repairs down the road.

Removing the Old Drain Pipe
With the water supply safely turned off, the next step is to remove the old, leaky drain pipe. This process involves disassembling the existing plumbing components to make way for the new parts. Here’s a detailed guide on how to do this effectively.
Clear the Area: Before you start, clear the area under the sink. Remove any stored items to give yourself ample workspace. Place a bucket under the sink to catch any water that may still be in the pipes. This will help keep your workspace dry and clean.
Loosen the Slip Nuts: The drain pipe is typically connected to the sink and other pipes using slip nuts. Use an adjustable wrench or pliers to loosen these slip nuts. Turn the nuts counterclockwise to unscrew them. Be careful not to damage the nuts or pipes, as you may need to reuse them.
Remove the P-Trap: The P-trap, the curved section of the pipe, is the first part to remove. Once the slip nuts are loosened, gently wiggle the P-trap to detach it from the sink drain and the wall drain pipe. Be prepared for water to spill out, so keep your bucket in place.
Disconnect the Drain Pipe: After removing the P-trap, proceed to disconnect the remaining sections of the drain pipe. This might include straight sections of pipe and connectors. Loosen and remove all slip nuts and carefully separate the pipes. If any sections are stuck due to corrosion or grime, use a pipe wrench for extra leverage.
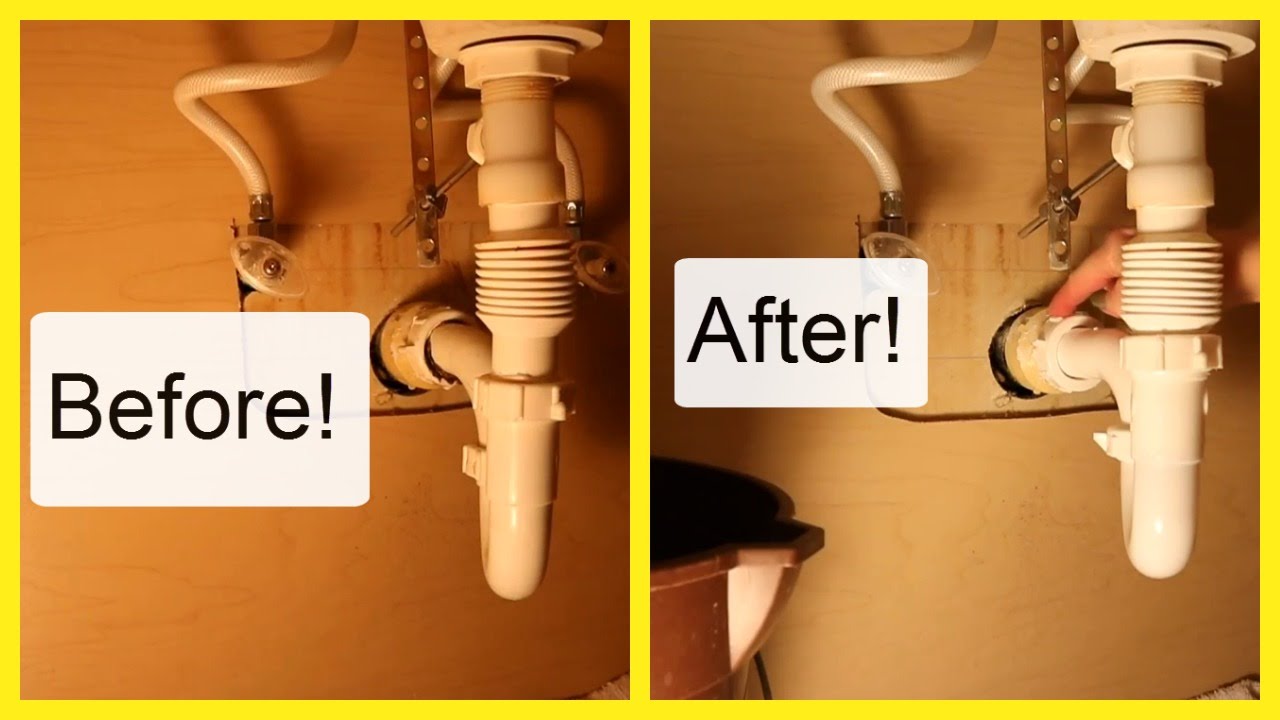
Clean the Connection Points: With the old drain pipe removed, clean the connection points on the sink and wall drain pipe. Use a scrub brush and cleaning solution to remove any residue, old plumber’s putty, or tape. A clean surface ensures a better fit and seal for the new drain pipe.
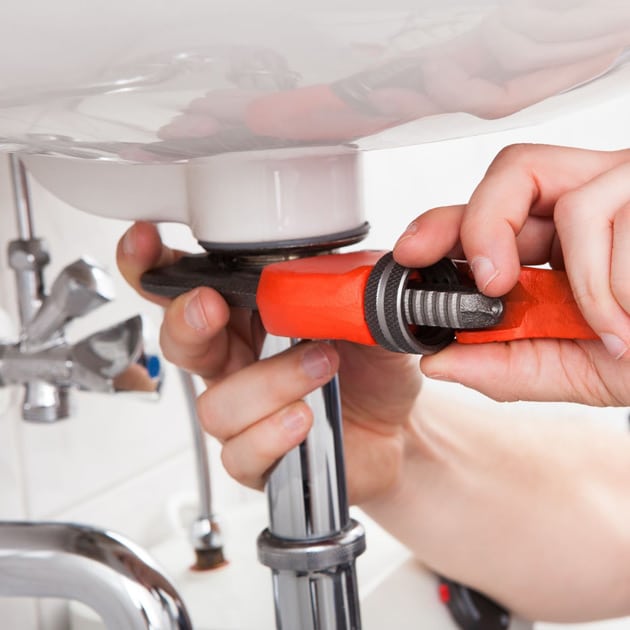
Inspect the Sink Drain Flange: The sink drain flange, located at the base of the sink bowl, should also be inspected. If it’s damaged or corroded, consider replacing it. Loosen the locknut underneath the sink that holds the flange in place, and carefully remove the flange from the sink. Clean the area thoroughly before installing a new flange.

Installing the New Drain Pipe
With the old drain pipe removed and the area cleaned, it’s time to install the new drain pipe. This process involves carefully fitting and sealing the new components to ensure a leak-free connection. Here’s how to do it step-by-step.
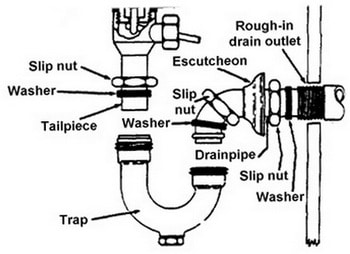
Assemble the New P-Trap: Start by assembling the new P-trap. Position the U-shaped section and the straight pipe that connects to the wall drain. Ensure that the slip nuts and washers are in place on both ends of the pipes. Don’t tighten the nuts just yet; leave them loose for adjustment.
Attach the P-Trap to the Sink Drain: Slide the P-trap into place, connecting it to the sink drain tailpiece and the wall drain pipe. Adjust the alignment of the pipes to ensure they fit together snugly. Once aligned, hand-tighten the slip nuts to hold the pipes in place.
Apply Plumber’s Putty: If you’re installing a new sink drain flange, apply a bead of plumber’s putty around the underside of the flange. Insert the flange into the sink drain hole, pressing it firmly into place. Underneath the sink, secure the flange with the provided locknut, tightening it with pliers or a wrench.
Seal the Connections with Teflon Tape: For threaded connections, wrap Teflon tape around the threads before connecting the pipes. This helps create a watertight seal. Wrap the tape in the direction of the threads to ensure it stays in place when the connections are tightened.
Tighten the Slip Nuts: Once all parts are in place and properly aligned, use a wrench to tighten the slip nuts. Be careful not to overtighten, as this can damage the nuts or pipes. Tighten them just enough to create a secure, leak-free connection.
Check the Alignment and Secure the Pipes: Ensure that all sections of the new drain pipe are properly aligned and securely connected. The P-trap should be positioned correctly to trap debris and prevent sewer gases from entering your home. If everything looks good, give all connections a final check to ensure they’re tight.
Testing the Repair and Ensuring a Leak-Free Sink
After installing the new drain pipe, it’s essential to test the repair to ensure there are no leaks and that everything functions correctly. This final step involves a series of checks and tests to confirm that your plumbing repair was successful. Here’s how to thoroughly test your new installation.
Turn On the Water Supply: Start by turning the water supply back on. Open the shut-off valves for both hot and cold water by turning them counterclockwise. Once the valves are fully open, let the water flow through the pipes for a few seconds.
Check for Leaks: With the water running, inspect all the connections and joints under the sink. Use a dry cloth or paper towel to check for any signs of moisture. Pay close attention to the areas around the slip nuts and the P-trap, as these are common spots for leaks.
Run the Faucet: Turn on the faucet and let the water run for a few minutes. Observe the drain pipe while the water is running to check for any leaks. Ensure that the water flows smoothly down the drain without any backup or slow drainage.
Inspect the P-Trap: The P-trap is designed to hold a small amount of water to block sewer gases. Check the P-trap for leaks by running the faucet and then turning it off. After a few minutes, inspect the P-trap area for any drips or moisture. If the P-trap is dry, it’s functioning correctly.
Test with a Full Sink: Fill the sink with water and then let it drain all at once. This test puts more pressure on the drain pipe and can help reveal any hidden leaks. While the sink is draining, closely monitor the drain pipe and connections for any signs of water escaping.
Final Adjustments: If you notice any leaks during your tests, turn off the water supply and make necessary adjustments. Tighten any loose connections or apply additional Teflon tape if needed. Once you’ve made adjustments, repeat the testing process to ensure the leaks are fixed.
4 Simple Ways to Fix a Leaky Sink Drain Pipe – wikiHow

Bathroom Sink Drain Pipe Is Leaking – How To Fix – What To Check?
REPLACE A LEAKING SINK DRAIN PIPE – CAN WE DO THIS?
Sink Drain Pipe Leaking At Connection? (Fix It Now!) u2013 Upgraded Home
How To Fix Bathroom Sink Drain Leaks Underneath Gasket, Threads [SOLVED]
Bathroom sink drain leak – not sure how to fix

Pin on ideas

Bathroom Sink Drain Pipe Is Leaking – How To Fix – What To Check?
Leaking drains? Hereu0027s some solutions for this common plumbing problem
Easy Ways to Fix a Leaky Sink Trap: 12 Steps (with Pictures)

Sink Trap Leaking? Here is Why and How to Fix it Fast – Plumbing

Related Posts:
- Oakley Bathroom Sink Vs Kitchen Sink
- Bathroom Sink Pipe Cover
- Bathroom Sink Store
- Bathroom Sinks Stores
- Bathroom Sink Tailpiece Extension
- Bathroom Sink 24″
- Tall Bathroom Sink Cabinets
- Bathroom Sink Plug Hole Cover
- Gold Colored Bathroom Sink Faucets
- Bathroom Sink Drain Pipe Too Short


