Preparing Your Bathroom Cabinets for Restaining
Restaining bathroom cabinets can rejuvenate your space, giving it a fresh, updated look without the expense of replacing the cabinets entirely. Proper preparation is crucial to achieving a professional finish and ensuring the stain adheres correctly. Here’s how to prepare your bathroom cabinets for restaining:
- Empty and Clean the Cabinets Before you begin, remove all items from the cabinets and drawers. Use a gentle cleaner or a mixture of water and mild soap to clean the surfaces thoroughly. This step is essential to remove any dirt, grease, or residue that could interfere with the staining process. Rinse the surfaces with clean water and let them dry completely.
- Remove Hardware and Doors To achieve a smooth and even stain, it’s best to remove all hardware, such as handles, knobs, and hinges. Label each piece and its corresponding location to ensure easy reassembly. Next, take off the cabinet doors and drawers. This will make the sanding and staining process more manageable and help you reach all areas evenly.
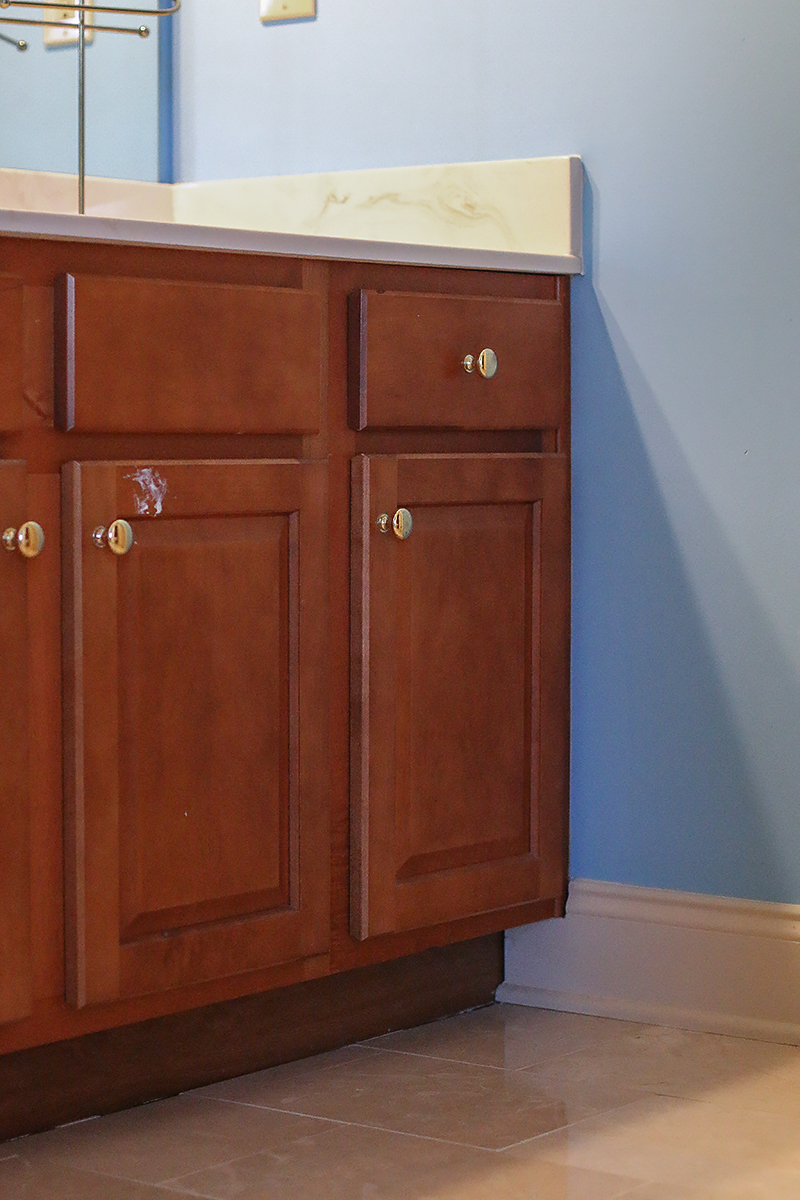
- Assess and Repair Any Damage Inspect the cabinets for any damage, such as cracks, dents, or loose veneer. Use wood filler to repair any imperfections, following the manufacturer’s instructions. Allow the filler to dry completely before sanding it smooth. This step is crucial for ensuring a flawless finish once the stain is applied.
- Degloss the Surfaces If your cabinets have a glossy finish, you’ll need to degloss them to ensure the new stain adheres properly. Use a liquid deglosser, following the product instructions carefully. Apply the deglosser with a clean cloth, working in small sections. This will help remove the glossy topcoat and prepare the wood for sanding.
- Sand the Cabinets Sanding is a critical step in preparing your cabinets for restaining. Start with a medium-grit sandpaper (about 120-grit) to remove the old finish and smooth out any rough areas. Follow up with a fine-grit sandpaper (about 220-grit) to create a smooth, even surface. Sand in the direction of the wood grain to avoid scratches and achieve a professional finish.
- Clean Up Dust and Debris After sanding, use a vacuum and a tack cloth to remove all dust and debris from the surfaces. This step is vital, as any remaining dust can interfere with the staining process and result in an uneven finish. Ensure the area is well-ventilated and free from dust before proceeding to the next steps in the restaining process.

Choosing the Right Stain for Your Bathroom Cabinets
Selecting the appropriate stain for your bathroom cabinets is a critical step in achieving the desired look and durability. The right stain not only enhances the wood’s natural beauty but also protects against moisture and wear. Here’s how to choose the best stain for your bathroom cabinets:
Understand Different Types of Stains There are several types of wood stains available, including oil-based, water-based, gel, and lacquer stains. Oil-based stains penetrate deeply into the wood, offering long-lasting color and durability. Water-based stains dry quickly, have low odors, and are easy to clean up with water. Gel stains are thicker and provide a more even color on difficult-to-stain woods. Lacquer stains dry fast and offer a hard, durable finish but require more expertise to apply.
Consider the Bathroom Environment Bathrooms are high-moisture areas, so it’s essential to choose a stain that can withstand humidity and frequent cleaning. Oil-based and gel stains are generally more durable in moist environments. Additionally, some stains come with built-in sealants that provide extra protection against water damage, which can be particularly beneficial for bathroom cabinets.
Test Color Samples Stain colors can look different on various types of wood. Before committing to a color, purchase small samples of a few stains you are considering. Apply them to an inconspicuous area or a piece of scrap wood that matches your cabinets. This will help you see how the stain interacts with the wood grain and ensure you achieve the desired color.
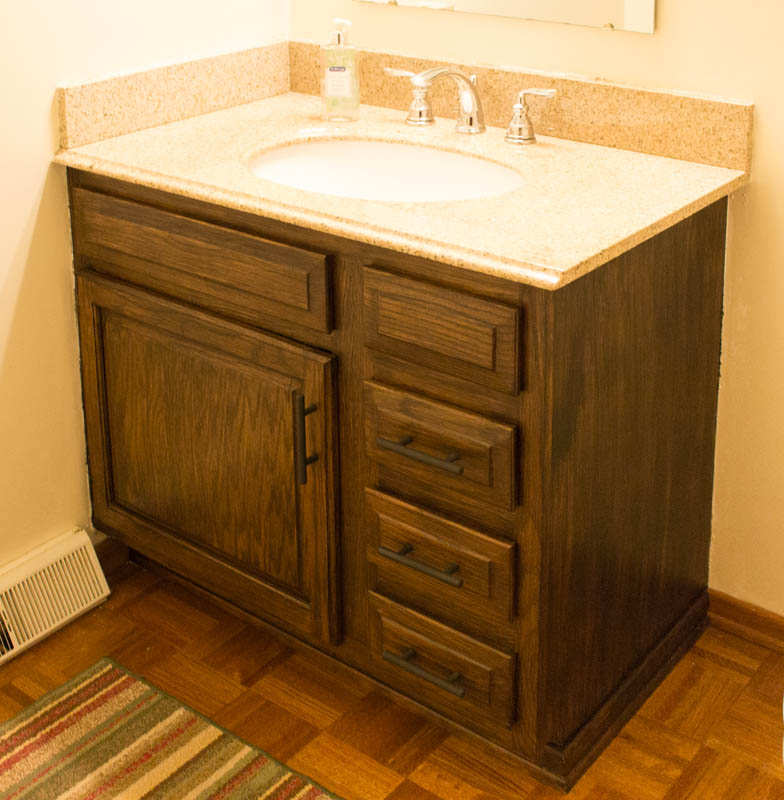
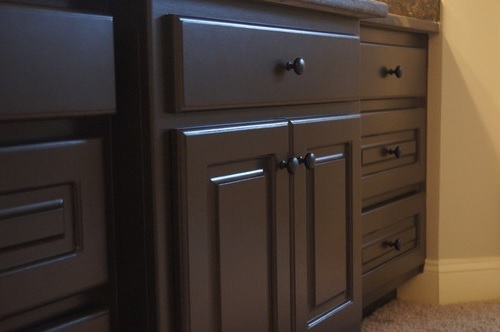
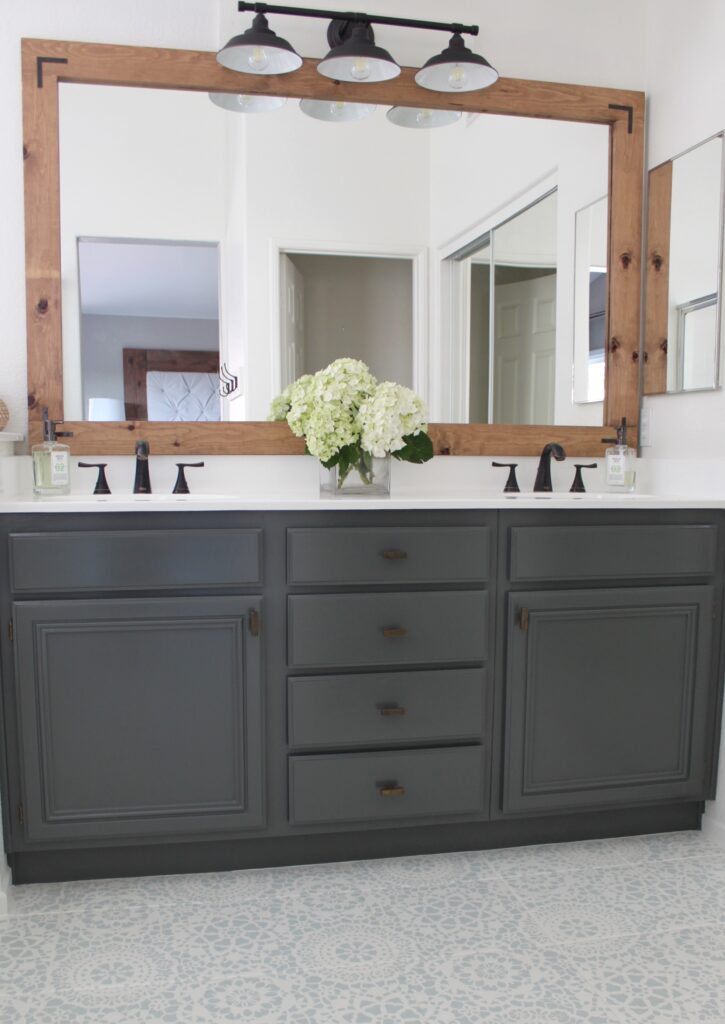
Match Stain to Existing Décor Consider the overall color scheme and style of your bathroom when selecting a stain color. Dark stains can add a sophisticated, modern look, while lighter stains can make the space feel airy and bright. Ensure the stain complements other elements in the bathroom, such as the countertop, flooring, and wall colors.
Check for Low VOC Options Volatile Organic Compounds (VOCs) are chemicals found in many wood stains that can emit harmful fumes. For a safer and more environmentally friendly option, look for low VOC or zero VOC stains. These products are better for indoor air quality, especially in a confined space like a bathroom.
Review Manufacturer Recommendations Each stain has specific application and drying instructions. Review the manufacturer’s guidelines to ensure compatibility with your project and to understand the required preparation and application process. Following these recommendations will help achieve the best results and longevity for your newly stained cabinets.
Step-by-Step Guide to Sanding Your Cabinets
Sanding your bathroom cabinets is a vital step in the restaining process. It prepares the wood surface to accept the new stain evenly, ensuring a smooth and professional finish. Here’s a detailed guide on how to sand your cabinets properly:
Gather Your Sanding Supplies To start, you’ll need various grits of sandpaper (120-grit and 220-grit), a sanding block or an orbital sander, a tack cloth, a vacuum, and safety gear such as gloves, goggles, and a dust mask. Having the right tools and protective gear will make the sanding process more efficient and safe.
Remove Cabinet Doors and Hardware Before sanding, remove all cabinet doors, drawers, and hardware. This allows you to sand each piece thoroughly without obstruction. Label the hardware and its corresponding locations to facilitate easy reassembly after the sanding and staining process.
Start with Medium-Grit Sandpaper Begin sanding with 120-grit sandpaper to remove the old finish and smooth out any imperfections. Sand in the direction of the wood grain to avoid scratches. Use an orbital sander for large, flat surfaces and a sanding block or hand sand for detailed areas and edges. This initial sanding will prepare the surface for a finer finish.
Progress to Fine-Grit Sandpaper Once the initial sanding is complete, switch to 220-grit sandpaper to achieve a smooth, even surface. Again, sand in the direction of the wood grain. This step ensures that the wood is adequately prepared to absorb the new stain evenly, resulting in a professional-looking finish.
Clean the Sanded Surfaces After sanding, use a vacuum to remove the bulk of the dust and debris from the surfaces and surrounding area. Follow up with a tack cloth to pick up any remaining dust particles. This step is crucial to prevent dust from interfering with the staining process, which can cause an uneven finish.
Inspect and Touch Up Once the cabinets are clean, inspect the surfaces for any areas that may need additional sanding. Touch up these spots as necessary with a fine-grit sandpaper. Ensure all surfaces are smooth and free of any rough patches or scratches. Proper inspection and touch-up guarantee that the cabinets are fully prepared for the staining process.

Applying the Stain: Techniques for a Professional Finish
Applying stain to your bathroom cabinets requires attention to detail and the right techniques to achieve a professional-looking finish. Follow these steps to ensure your cabinets turn out beautifully:
Choose the Right Application Tools Depending on the type of stain you are using, select appropriate application tools. Brushes, foam applicators, and clean, lint-free cloths are commonly used for applying stain. Brushes are suitable for detailed areas, while cloths and foam applicators work well for flat surfaces. Ensure your tools are clean and suitable for the type of stain you’ve chosen.
Apply a Pre-Stain Conditioner If you’re working with softwoods or woods prone to blotching, such as pine or cherry, applying a pre-stain wood conditioner can help achieve a more even stain application. Follow the manufacturer’s instructions for application and drying times. This step can prevent uneven absorption of the stain and result in a more consistent color.
Apply the Stain Evenly Start applying the stain in a well-ventilated area. Dip your brush or cloth into the stain and apply it to the wood in the direction of the grain. Work in small sections to ensure even coverage. Avoid overloading your brush or cloth with too much stain, as this can lead to blotches and drips. Apply a thin, even coat and wipe off any excess stain with a clean cloth.
Allow the Stain to Penetrate Let the stain penetrate the wood for the recommended amount of time, usually indicated on the stain’s label. The longer the stain sits, the darker the color will be. However, avoid letting it sit too long, as this can cause the stain to dry unevenly. After the recommended time, wipe off any excess stain with a clean, dry cloth to ensure an even finish.
Apply Additional Coats if Needed If you desire a darker color, apply additional coats of stain. Allow each coat to dry completely before applying the next. Sand lightly with fine-grit sandpaper between coats to ensure a smooth finish. Be sure to remove all dust with a tack cloth before applying the next coat. Repeat this process until you achieve the desired color.
Let the Stain Dry Completely After the final coat of stain, allow the cabinets to dry completely according to the manufacturer’s instructions. This may take several hours or even overnight, depending on the type of stain and environmental conditions. Ensure the stained cabinets are in a dust-free area during the drying process to avoid imperfections in the finish.

Sealing and Protecting Your Newly Stained Cabinets
Sealing your newly stained bathroom cabinets is a crucial step to protect the wood and ensure the finish lasts. A good sealant will shield the cabinets from moisture, scratches, and wear. Here’s how to properly seal and protect your stained cabinets:
Choose the Right Sealant Select a sealant that suits your needs and complements the type of stain used. Polyurethane, lacquer, and shellac are common options. Water-based polyurethanes are popular for their low odor and quick drying times, while oil-based polyurethanes offer a durable, long-lasting finish. Ensure the sealant is compatible with the stain you’ve used to prevent any adverse reactions.
Prepare the Surface for Sealing Before applying the sealant, ensure the stained surfaces are clean and free of dust. Lightly sand the stained wood with fine-grit sandpaper (220-grit) to create a smooth surface for the sealant to adhere to. Remove any sanding dust with a tack cloth to ensure a clean application.
Apply the First Coat of Sealant Use a high-quality brush or foam applicator to apply the first coat of sealant. Apply it in thin, even layers, following the direction of the wood grain. Avoid applying too much sealant at once, as this can cause runs and bubbles. Work in well-ventilated areas to ensure proper drying and reduce fumes.
Sand Between Coats Once the first coat is dry, lightly sand the surface with fine-grit sandpaper to remove any imperfections and ensure a smooth finish. Wipe away the dust with a tack cloth before applying additional coats. Sanding between coats helps create a professional, durable finish and enhances the sealant’s adhesion.
Apply Additional Coats Apply at least two to three coats of sealant for optimal protection. Follow the manufacturer’s drying times between coats, and repeat the sanding process between each coat. The additional layers provide extra durability and protection against moisture and daily wear, which is especially important in a bathroom setting.
Cure the Sealant Allow the final coat of sealant to cure fully before reassembling and using the cabinets. Curing times can vary, so check the manufacturer’s instructions. Proper curing ensures the sealant hardens completely, providing a robust protective layer that will keep your cabinets looking new for years to come.
Maintenance Tips to Keep Your Cabinets Looking New
After investing time and effort into restaining your bathroom cabinets, it’s important to maintain them properly to keep them looking new. Regular care and maintenance will prolong the life of the stain and sealant, ensuring your cabinets remain attractive and functional. Here are some tips to help you maintain your newly stained cabinets:
Clean Regularly and Gently Wipe down your cabinets regularly with a soft, damp cloth to remove dust and grime. Avoid using harsh chemicals or abrasive cleaners, as they can damage the stain and sealant. A mild soap solution or a wood-specific cleaner is usually sufficient for routine cleaning. Be sure to dry the cabinets thoroughly to prevent moisture damage.
Avoid Excess Moisture Bathrooms are prone to high humidity, which can affect the wood. Use exhaust fans to reduce moisture levels, especially after showers or baths. Wipe up any water spills immediately to prevent water spots and warping. Keeping the bathroom well-ventilated will help maintain the integrity of the wood and finish.
Protect Against Scratches and Dents Use cabinet liners or felt pads inside drawers and on the undersides of items placed on the cabinet surface to prevent scratches and dents. Be mindful when handling objects near the cabinets to avoid accidental damage. Regularly check for any signs of wear and address them promptly to prevent further damage.
Touch-Up Minor Damage Over time, minor scratches and nicks may occur. Keep a small amount of matching stain and a fine brush on hand for touch-ups. Lightly sand the damaged area, clean it, and apply the stain. Follow up with a small amount of sealant to blend the touch-up with the surrounding finish. Addressing minor issues quickly can prevent them from becoming major problems.
Reapply Sealant Periodically To maintain the protective layer on your cabinets, consider reapplying the sealant every few years. This will refresh the finish and provide continued protection against moisture and wear. Lightly sand the surface before applying a new coat of sealant to ensure good adhesion and a smooth finish.
Inspect Regularly Regularly inspect your cabinets for any signs of damage, wear, or moisture issues. Catching problems early allows you to address them before they worsen. Pay attention to areas near sinks and showers where water exposure is more likely. By staying proactive with maintenance, you can keep your cabinets looking new and beautiful for many years.
How To Refinish Bathroom Cabinets DIY
Restaining Bathroom Cabinets with Water Based Wood Stain
Staining Oak Bathroom Cabinets Oak bathroom cabinets, Oak

How to Refinish a Bathroom Vanity – Bower Power
Restaining Bathroom Cabinets with Water Based Wood Stain
How to Refinish a Bathroom Vanity – Bower Power
DIY Gel Stain Cabinets (No heavy sanding or stripping!)

How to Refinish a Bathroom Vanity Naturally, No VOCs – Treasured Tips
Bathroom vanity redo! harringtonlori Staining oak cabinets

Related articles:

