The Importance of Regrouting
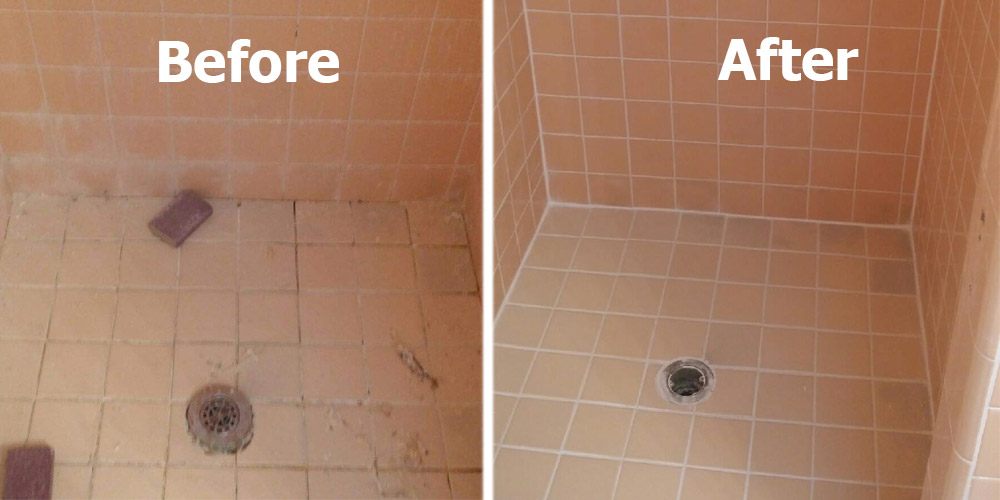
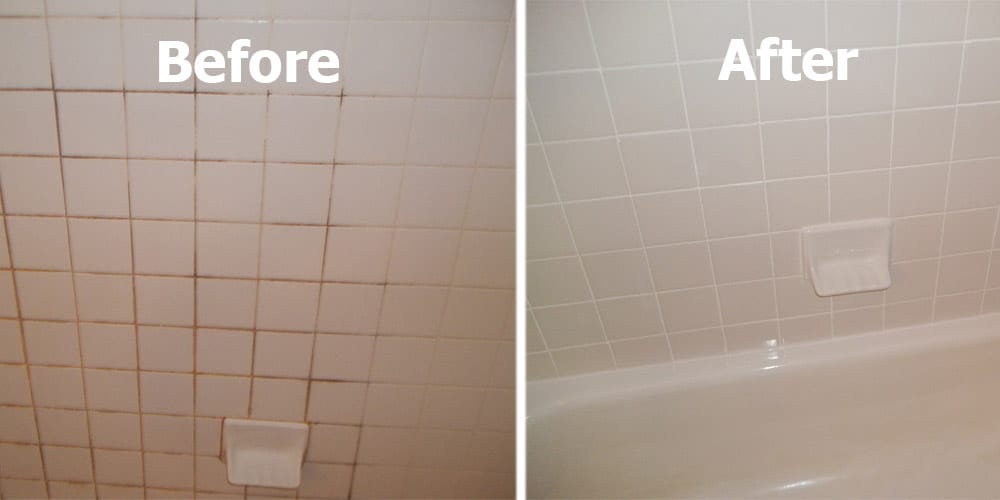
Regrouting your bathroom tiles might seem like a mundane task, but it plays a crucial role in maintaining both the aesthetic and structural integrity of your bathroom. Over time, grout can become discolored, cracked, or eroded, leading to a host of problems. Understanding why regrouting is essential can help you appreciate the value of this home improvement task.
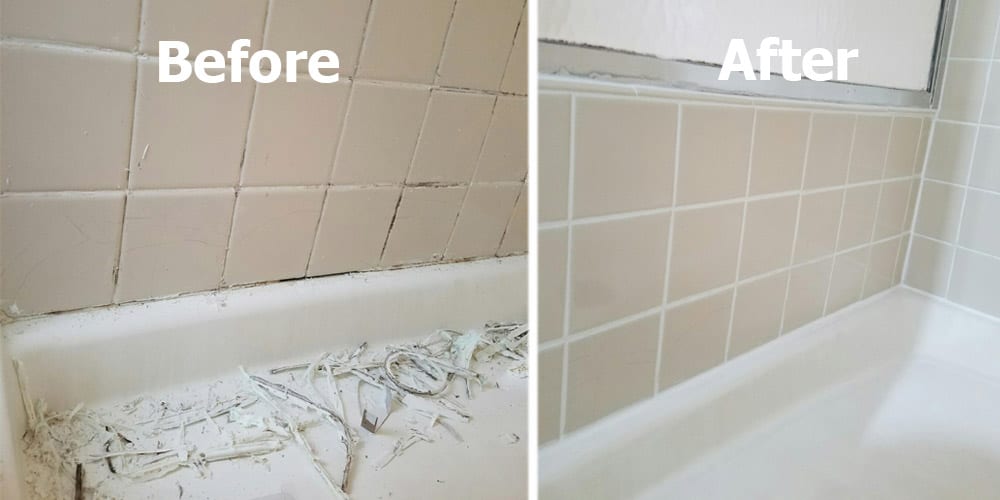
- Preventing Water Damage: Grout serves as a barrier against moisture, preventing water from seeping behind tiles and causing damage to the wall or floor structure. Compromised grout can lead to mold growth, wood rot, and other water-related issues that can be costly to repair.
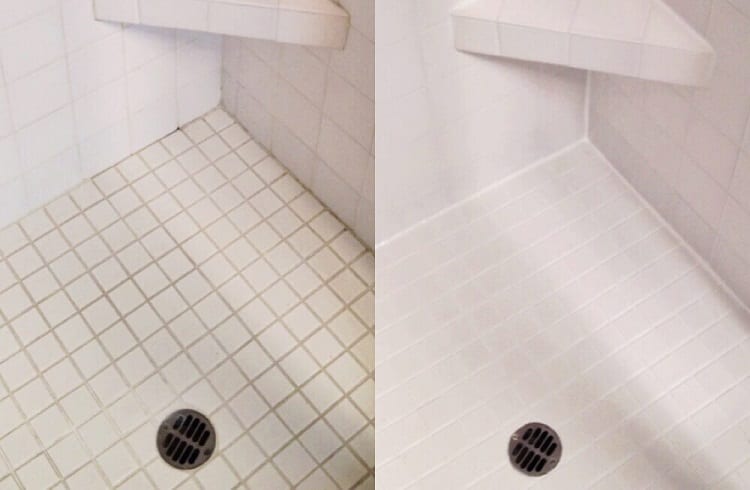
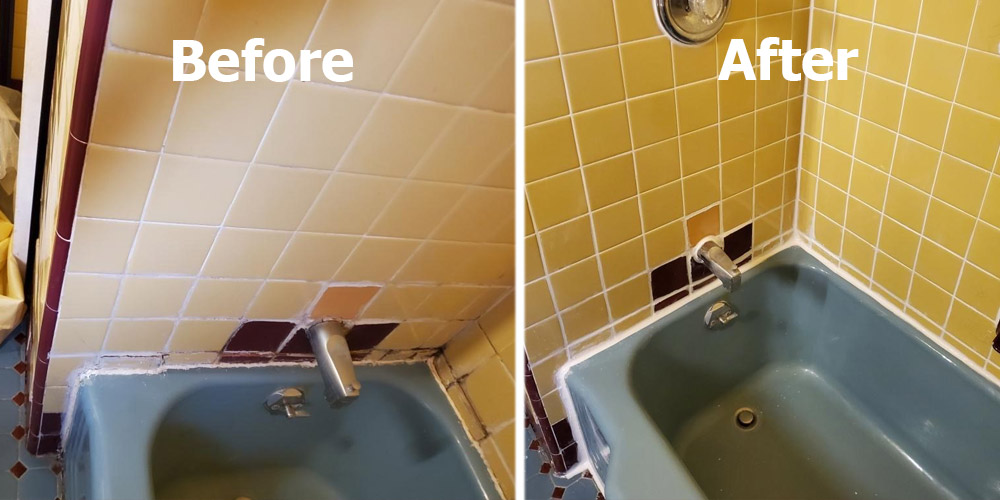
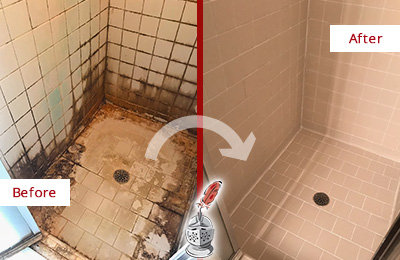
- Improving Aesthetics: Discolored or damaged grout can make an otherwise clean bathroom look old and dirty. Regrouting can instantly refresh the appearance of your tiles, making the entire bathroom look newer and more appealing.
- Enhancing Hygiene: Old grout can harbor mold, mildew, and bacteria, which not only cause unpleasant odors but also pose health risks. Regrouting ensures that your bathroom remains a sanitary environment, reducing the likelihood of mold and mildew buildup.
- Increasing Durability: Fresh grout strengthens the bond between tiles, enhancing their durability and reducing the chances of tiles becoming loose or cracking. This is particularly important in high-moisture areas like bathrooms where tiles are frequently exposed to water.
- Boosting Property Value: A well-maintained bathroom can significantly increase the value of your home. Potential buyers are more likely to be impressed by a bathroom that looks clean, modern, and well-cared for, making regrouting a worthwhile investment if you’re planning to sell.
- Cost-Effective Maintenance: Compared to a complete tile replacement, regrouting is a cost-effective way to maintain and enhance your bathroom. It requires less time, effort, and money, making it an efficient way to prolong the life of your tiles and keep your bathroom in top condition.

Gathering the Necessary Tools and Materials
Before embarking on your regrouting project, it’s essential to gather all the tools and materials you’ll need. Having everything on hand will streamline the process and ensure you can complete the job efficiently and effectively.
Grout Removal Tools: The first step in regrouting is removing the old grout. You’ll need a grout saw or grout removal tool, which can be manual or electric. A manual grout saw is inexpensive and easy to control, while an electric grout removal tool can make the job faster, especially for larger areas.
Grout: Choose the right type of grout for your tiles. There are two main types: sanded and unsanded. Sanded grout is more durable and suitable for wider joints (over 1/8 inch), while unsanded grout is smoother and ideal for narrower joints. Make sure to pick a color that complements your tiles.
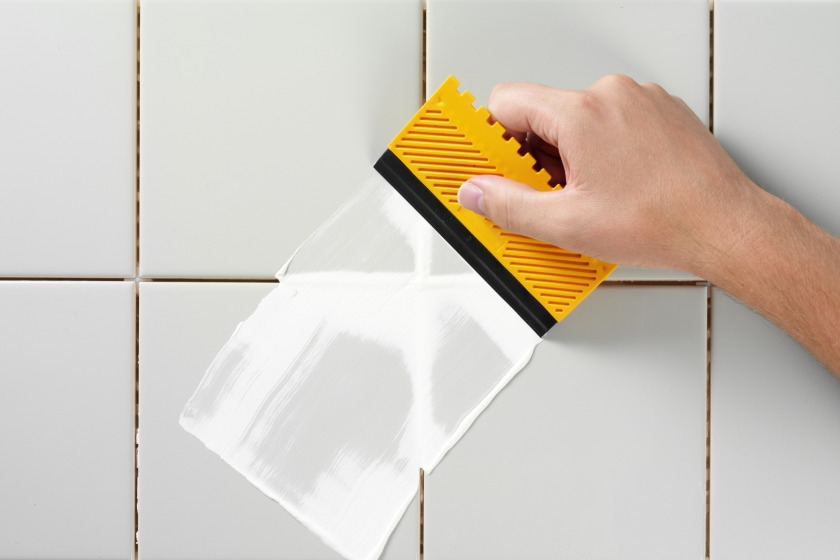
Grout Float: This is used to apply the new grout. A grout float has a flat, rubber surface that helps spread the grout evenly across the tiles and push it into the joints. It’s a crucial tool for achieving a professional finish.
Bucket and Sponge: You’ll need a bucket for mixing the grout and clean water for wiping away excess grout. A large, firm sponge is essential for cleaning the tiles after applying the grout and ensuring a smooth finish on the grout lines.
Grout Sealer: After the grout has cured, applying a grout sealer helps protect it from moisture, stains, and mold. There are various types of sealers available, including spray-on and brush-on options. Choose one that suits your needs and preferences.
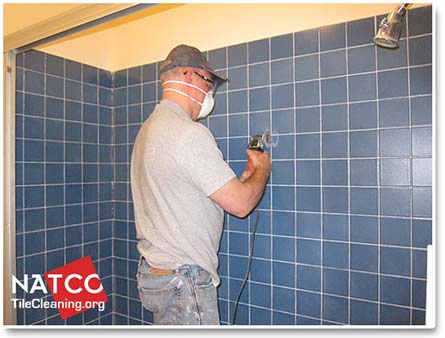
Protective Gear: Safety is important during any home improvement project. Wear safety goggles to protect your eyes from dust and debris, gloves to keep your hands clean and protected from chemicals, and a mask to avoid inhaling fine particles from the grout removal process.
Preparing Your Bathroom for Regrouting
Preparation is key to a successful regrouting project. Taking the time to properly prepare your bathroom will make the regrouting process smoother and more effective, ensuring a lasting and professional result.
Clear the Area: Remove all items from your bathroom, including toiletries, rugs, and any other movable objects. This will give you clear access to the tiles and prevent any accidental damage to your belongings.
Clean the Tiles: Thoroughly clean the tiles and grout lines to remove any soap scum, mold, or mildew. Use a tile cleaner or a mixture of vinegar and water for a deep clean. This step is crucial because any residue left on the tiles can interfere with the adhesion of the new grout.
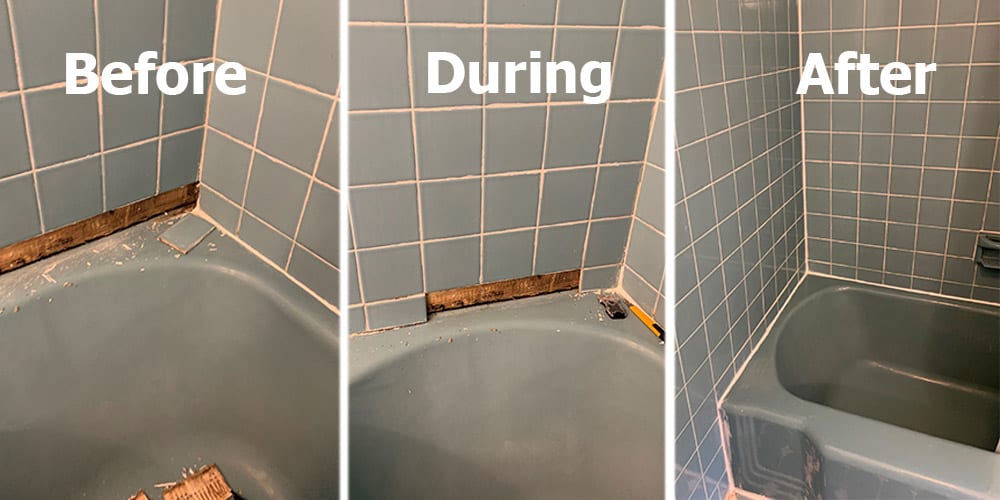
Inspect for Damage: Check the tiles and grout lines for any damage. If you find any loose or cracked tiles, repair or replace them before regrouting. Addressing these issues beforehand will ensure that your new grout adheres properly and lasts longer.
Protect Surfaces: Use painter’s tape to protect any surfaces that you don’t want to get grout on, such as the edges of bathtubs, sinks, and fixtures. This will help keep the area neat and make cleanup easier.
Ventilate the Area: Ensure good ventilation in your bathroom by opening windows or using a fan. Proper ventilation helps with the drying process and prevents the buildup of fumes from cleaning agents and grout.
Gather Your Tools: Lay out all the tools and materials you’ll need within easy reach. Having everything organized and accessible will save you time and reduce stress during the regrouting process. This includes your grout removal tool, new grout, grout float, sponge, bucket, and protective gear.
Removing the Old Grout
Removing the old grout is a crucial step in the regrouting process. Proper removal ensures that the new grout will adhere correctly and last longer. This part of the project requires patience and precision to avoid damaging your tiles.
Choose Your Grout Removal Tool: Depending on the size of the area and the condition of the grout, you can use a manual grout saw, an electric grout removal tool, or a multi-tool with a grout removal attachment. Each tool has its advantages, with electric tools offering speed and manual tools providing more control.
Cut Into the Grout: Start by scoring the grout lines with your chosen tool. Be careful to stay within the grout lines to avoid chipping or scratching the tiles. Apply steady pressure and work slowly to ensure even removal.
Remove the Grout: Once the grout is scored, use the tool to remove the remaining grout from between the tiles. For stubborn areas, you might need to make multiple passes. Ensure that you remove at least 1/8 inch of grout to create enough space for the new grout to bond properly.
Clean Out the Joints: After removing the bulk of the grout, use a vacuum or brush to clean out the joints. Remove any dust and debris to ensure a clean surface for the new grout. A damp cloth can help pick up any remaining particles.
Inspect Your Work: Check the grout lines to ensure that all the old grout has been removed. Any remnants can prevent the new grout from adhering correctly. If necessary, go over any missed spots with your grout removal tool.
Prepare for Grouting: With the old grout removed, your tiles are now ready for the new grout. Wipe down the tiles and grout lines one last time to remove any dust or debris, ensuring a clean surface for the new grout application.

Applying the New Grout
Applying new grout is where your bathroom transformation starts to take shape. This step requires precision and attention to detail to ensure a professional-looking finish. Follow these steps to apply your new grout effectively.
Mix the Grout: Follow the manufacturer’s instructions to mix the grout to the correct consistency. It should be thick but not too dry, similar to peanut butter. Use a bucket and a margin trowel to mix the grout thoroughly, ensuring there are no lumps.
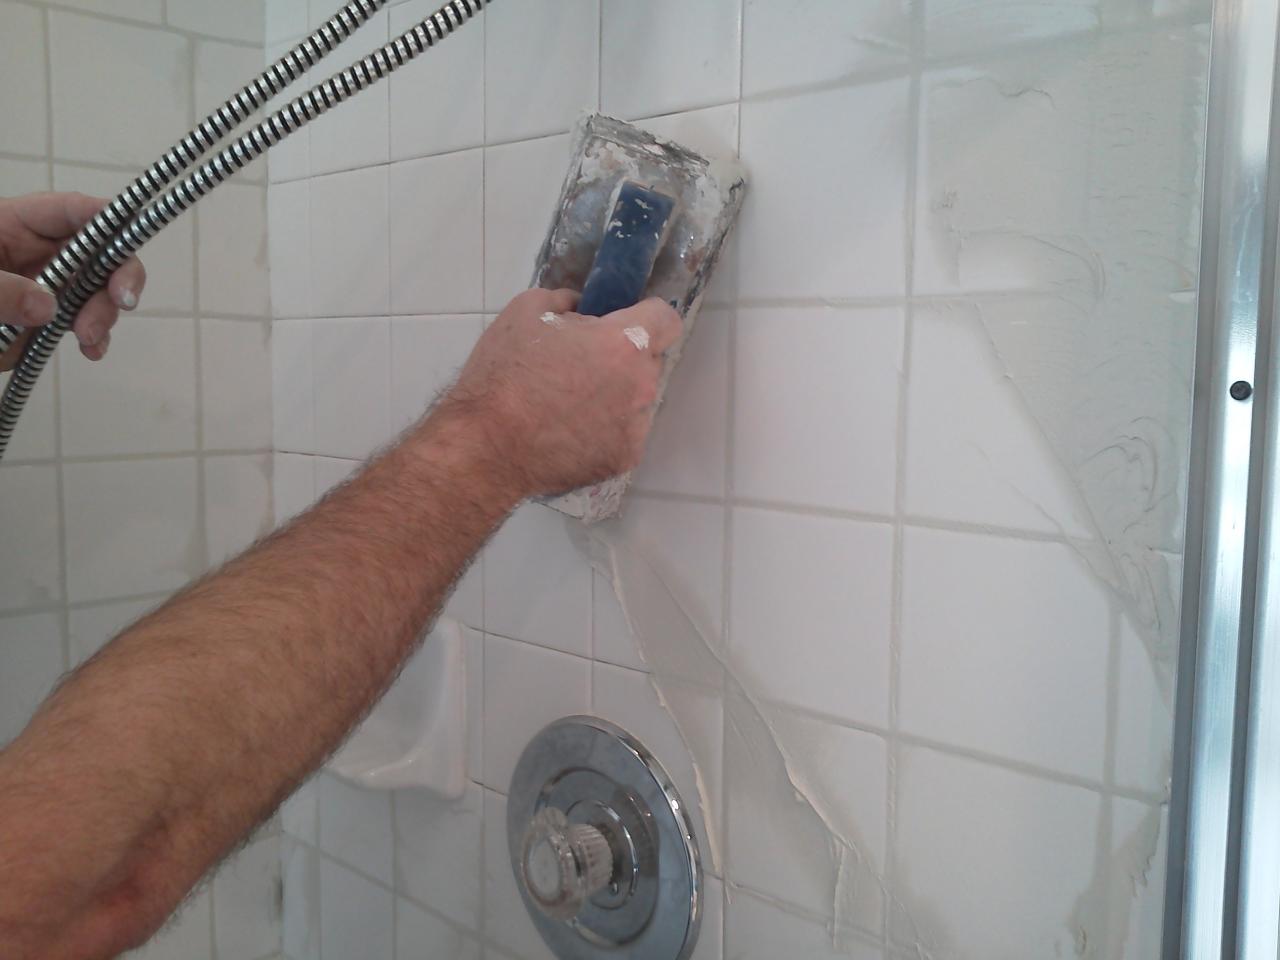
Apply the Grout: Use a grout float to apply the grout to the tiles. Hold the float at a 45-degree angle and spread the grout across the tiles, pressing it into the joints. Work in small sections to prevent the grout from drying out before you can clean it off the tiles.
Fill the Joints: Ensure that all the joints are fully filled with grout. Use the edge of the float to press the grout firmly into the gaps, making sure there are no air pockets or voids. This step is crucial for the durability and longevity of the grout.
Remove Excess Grout: After filling the joints, use the grout float to scrape off excess grout from the surface of the tiles. Hold the float at a sharp angle and move diagonally across the tiles to avoid pulling grout out of the joints.
Clean the Tiles: Wait for about 10-15 minutes for the grout to set slightly, then use a damp sponge to clean the tiles. Rinse the sponge frequently and use a gentle, circular motion to remove grout haze from the tile surface without disturbing the grout lines.
Smooth the Joints: Once the tiles are clean, use a damp sponge to smooth the grout lines. Run the sponge along the joints to create a consistent, professional finish. Allow the grout to cure for the time specified by the manufacturer, usually 24-48 hours.

Finishing Touches and Maintenance Tips
After the grout has cured, it’s time to add the finishing touches and implement maintenance practices to keep your bathroom tiles looking great. Proper care ensures that your regrouting efforts last longer and remain effective.
Seal the Grout: Applying a grout sealer helps protect the grout from moisture, stains, and mold. Choose a sealer that is appropriate for your type of grout and follow the manufacturer’s instructions for application. Typically, you’ll apply the sealer with a brush or spray, then wipe off any excess from the tiles.
Polish the Tiles: Once the sealer has dried, give your tiles a final polish. Use a clean, dry cloth to buff the tiles and remove any remaining grout haze. This step enhances the shine and appearance of your tiles, giving your bathroom a fresh, clean look.
Regular Cleaning: To maintain the appearance and integrity of your grout, clean your bathroom tiles regularly. Use a mild, non-abrasive cleaner and a soft brush or sponge to avoid damaging the grout. Regular cleaning prevents the buildup of soap scum, mold, and mildew.
Address Stains Promptly: If you notice any stains or discoloration on the grout, address them promptly. Use a grout cleaner or a mixture of baking soda and water to scrub away stains. Prompt action prevents the stains from becoming permanent and keeps your grout looking fresh.
Reapply Sealer Annually: Grout sealer can wear down over time, especially in high-moisture areas like bathrooms. Reapply the sealer annually to maintain its protective properties. This simple step can extend the life of your grout and keep it looking new.
Inspect for Damage: Periodically inspect your grout for any signs of cracking, chipping, or erosion. Address any issues immediately to prevent further damage. Minor repairs can often be done with a grout repair kit, saving you from more extensive regrouting in the future.

How To Regrout A Shower: Steps & Cost Of Regrouting Bathroom Floor
How to Regrout Bathroom Tile: 5 Easy Steps True Value
Tile Regrouting Services Perfected The Grout Medic
How to regrout a shower – Pristine Tile u0026 Carpet Cleaning
How do I know if I need to regrout my shower? The Grout Medic
Can I put new grout over my old grout? The Grout Medic
Regrouting Tile, Tile Regrout – Sir Grout
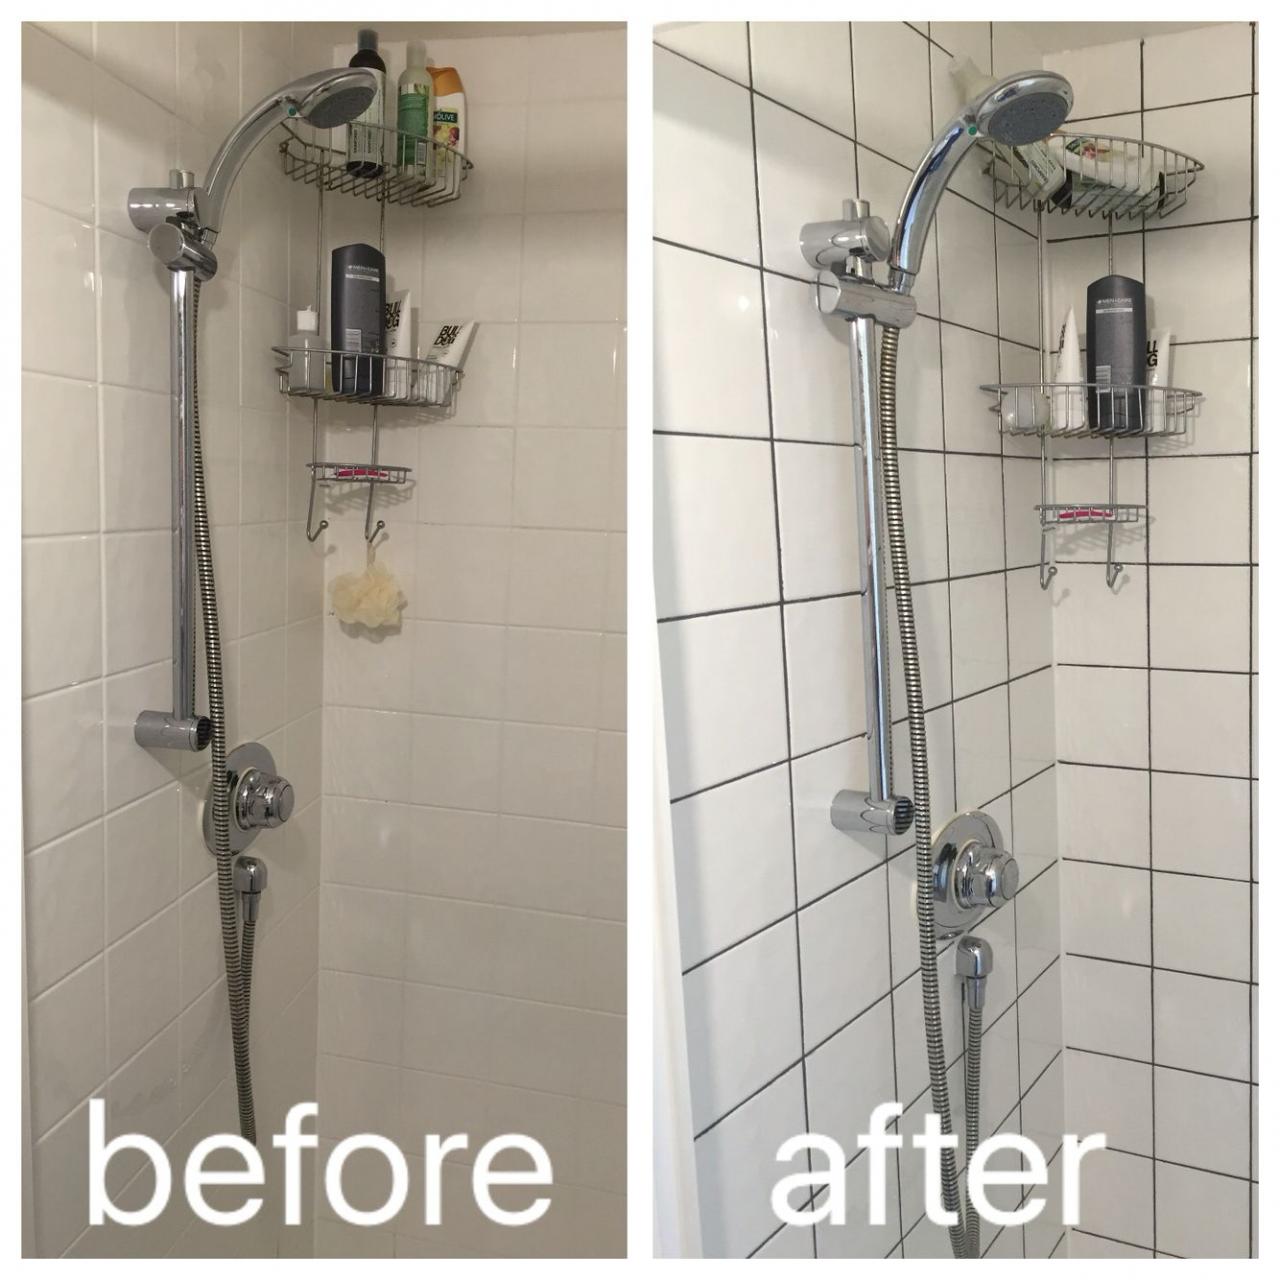
Regrouting with dark grey grout to modernise a boring shower
How To Professionally Regrout A Tile Shower
Related Posts:


