Understanding Your Options: Tile Covering vs. Replacement
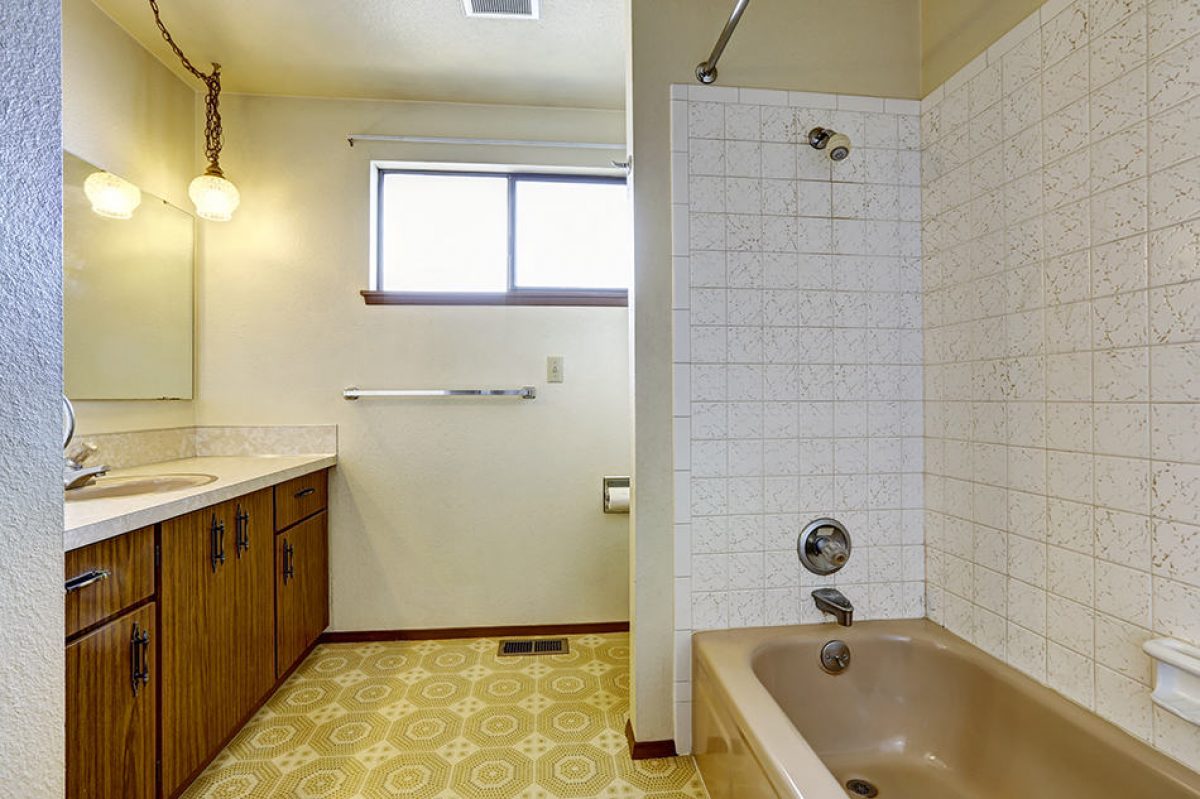
When faced with outdated or worn bathroom tiles, homeowners often find themselves at a crossroads: should they cover the old tiles or replace them entirely? Each option has its pros and cons, and the right choice depends on your budget, time constraints, and the condition of the existing tiles. This article explores these two approaches to help you make an informed decision.
- The Pros and Cons of Tile Replacement: Replacing old bathroom tiles with new ones offers a fresh start. It allows you to completely revamp the look of your bathroom and address any underlying issues, such as water damage or mold. However, tile replacement can be expensive and time-consuming. The process involves removing the old tiles, repairing the substrate, and installing new tiles, which often requires professional help.
- Benefits of Covering Old Tiles: Covering old bathroom tiles is a quicker, less expensive option that can still deliver impressive results. Methods like painting, applying peel-and-stick tiles, or using wall panels allow you to update the look of your bathroom without the mess and hassle of demolition. Additionally, covering tiles can be a DIY-friendly project, saving on labor costs.
- Considerations for Tile Covering: While covering tiles is a convenient option, it’s not always suitable for every situation. The existing tiles must be in good condition, without major cracks or loose pieces. Covering tiles also adds a new layer, which can slightly reduce the overall space in the bathroom. This might be an issue in smaller bathrooms or around fixtures like faucets and showerheads.
- Cost Comparison: The cost difference between replacing and covering tiles is significant. Tile replacement typically involves higher material and labor costs, especially if you opt for high-end tiles. In contrast, covering methods like painting or peel-and-stick tiles are much more affordable, making them ideal for budget-conscious renovations. However, the longevity of these solutions may vary, which is an important factor to consider in your cost analysis.
- Aesthetic Outcomes: When it comes to aesthetics, tile replacement offers more flexibility and a higher-end finish. You can choose from a wide range of materials, patterns, and colors to achieve your desired look. Covering options, while improving, might still have some limitations in terms of design variety and realism. Nevertheless, innovative products like high-quality peel-and-stick tiles can mimic the look of real tiles quite effectively.
- Making the Right Choice: Ultimately, the decision between covering and replacing old tiles depends on your specific needs and constraints. If your tiles are severely damaged or you’re aiming for a long-term solution, replacement might be the better option. However, if you’re looking for a quick, budget-friendly update and your tiles are in decent condition, covering them can be a practical and stylish solution.

Painting Old Bathroom Tiles: A Step-by-Step Guide
Painting old bathroom tiles is an excellent way to refresh your space without the expense of a full renovation. With the right materials and a bit of patience, you can transform outdated tiles into something modern and chic. This step-by-step guide will walk you through the process, ensuring a durable and attractive finish.
Preparing the Surface
Proper surface preparation is key to a successful tile painting project. Start by thoroughly cleaning the tiles with a strong detergent or a mix of water and vinegar to remove any soap scum, grease, or mildew. Use a scrub brush or sponge to ensure the tiles are completely clean. Once clean, rinse with water and let the tiles dry completely.
Sanding the Tiles
After the tiles are dry, lightly sand the surface to help the paint adhere better. Use fine-grit sandpaper (around 220 grit) and sand in a circular motion. The goal is to scuff up the surface, not to remove the glaze entirely. After sanding, wipe the tiles with a damp cloth to remove any dust and allow them to dry.
Applying Primer
A good-quality primer is essential for achieving a smooth, long-lasting finish. Choose a bonding primer specifically designed for slick surfaces like tiles. Apply the primer using a brush or roller, ensuring even coverage. Allow the primer to dry according to the manufacturer’s instructions before moving on to painting.
Choosing the Right Paint
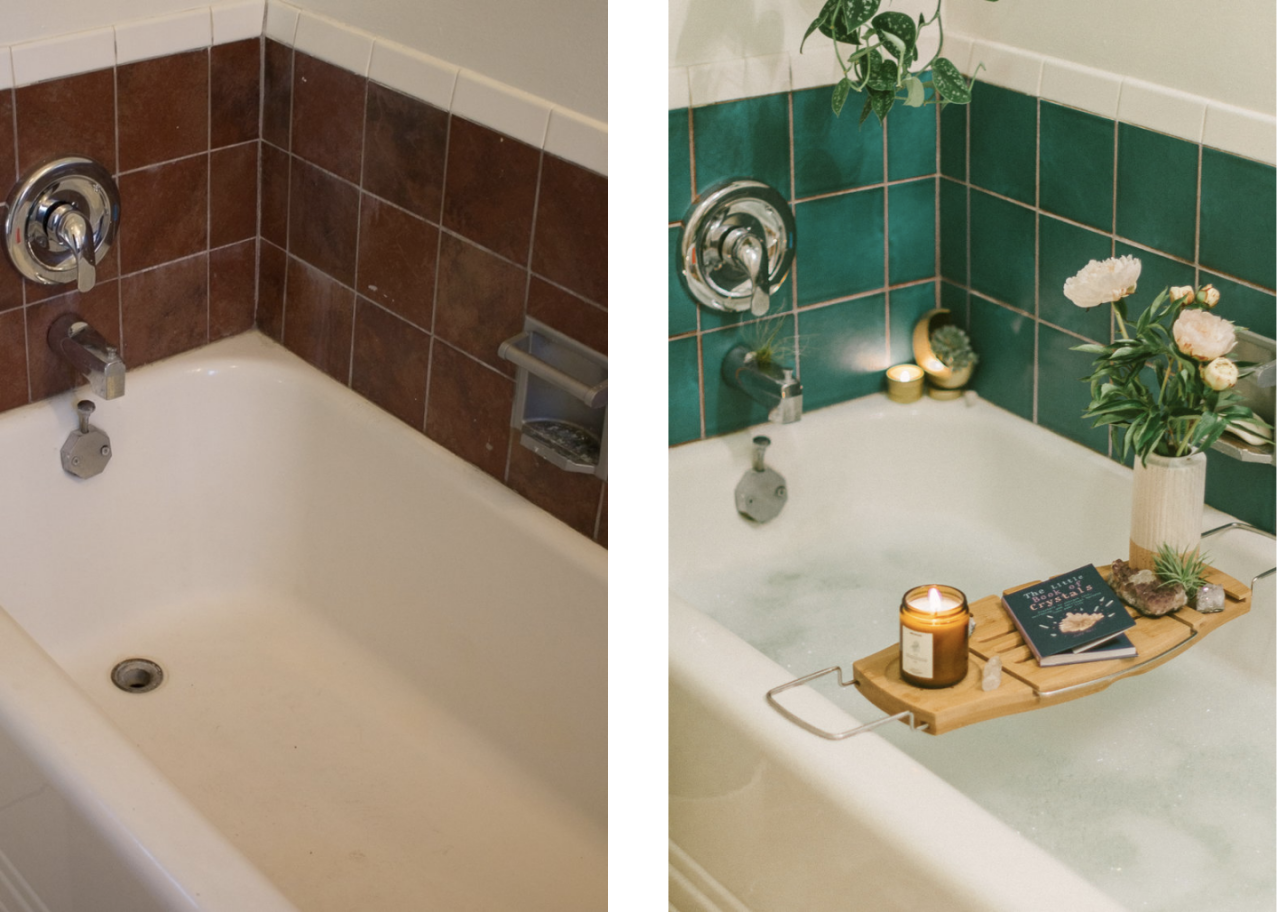
For bathroom tiles, it’s important to choose paint that can withstand moisture and frequent cleaning. Epoxy-based paints are a popular choice for their durability and water resistance. You can also use high-quality latex paint, but be sure to seal it with a clear urethane topcoat to protect the finish. Apply the paint in thin, even coats, allowing each coat to dry completely before adding another.
Painting the Tiles
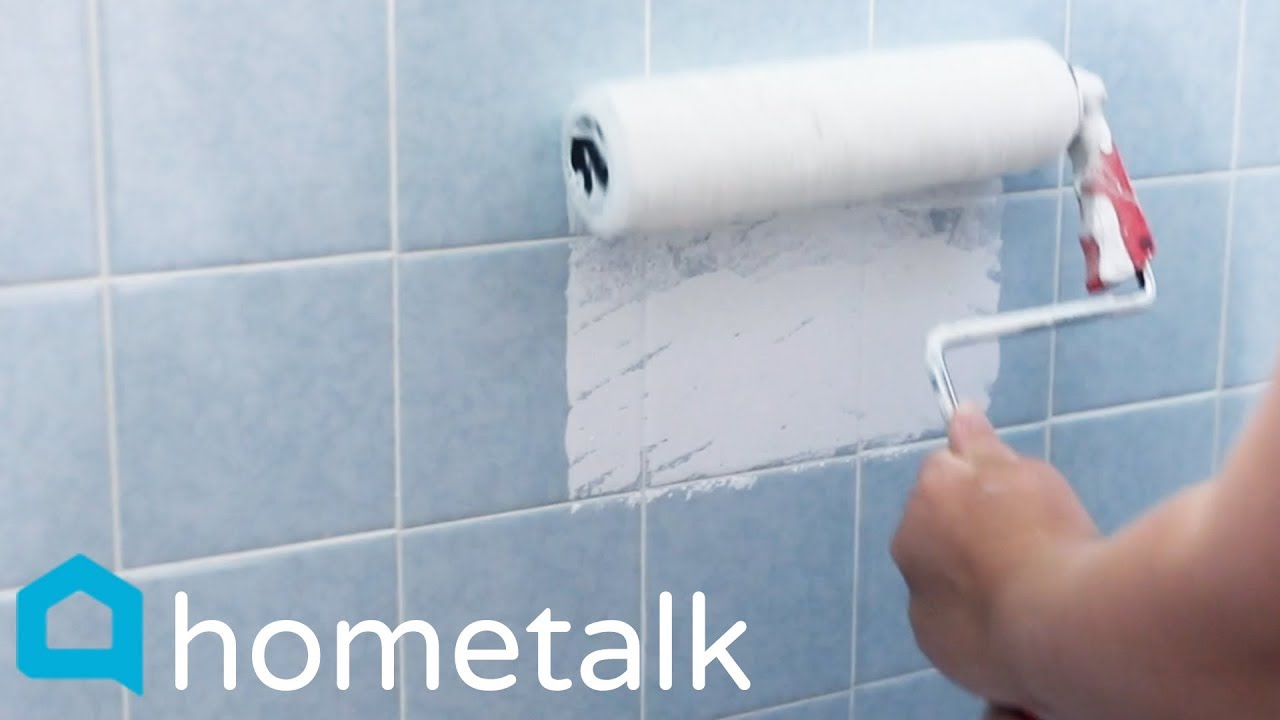
Start painting from the top of the wall and work your way down, using a brush for edges and a roller for larger areas. Two to three coats are typically needed for full coverage. Be patient and allow each coat to dry thoroughly to prevent peeling or bubbling. Once the final coat is applied, allow the paint to cure for several days before exposing the tiles to water or heavy use.
Maintaining the Painted Tiles
Painted tiles require some care to maintain their appearance. Avoid using abrasive cleaners or scrubbing too hard, as this can damage the paint. Stick to mild, non-abrasive cleaners and a soft cloth or sponge for regular cleaning. With proper care, your painted tiles can last for several years, providing a fresh, updated look to your bathroom.
Using Peel-and-Stick Tiles for a Quick and Easy Update
Peel-and-stick tiles are a popular choice for homeowners looking to update their bathroom quickly and affordably. These tiles come in a variety of styles, colors, and patterns, making it easy to achieve a custom look without the hassle of traditional tile installation. This article will guide you through the process of using peel-and-stick tiles to cover old bathroom tiles.
Benefits of Peel-and-Stick Tiles
Peel-and-stick tiles offer several advantages, particularly for DIY enthusiasts. They are easy to install, require no special tools or skills, and can be applied directly over existing tiles. This makes them an ideal solution for renters or anyone looking to refresh their bathroom without committing to a permanent change. Additionally, peel-and-stick tiles are generally more affordable than traditional tiles, making them a budget-friendly option.
Choosing the Right Peel-and-Stick Tiles
The first step is selecting the right peel-and-stick tiles for your bathroom. Consider the overall style and color scheme of your bathroom, as well as the durability of the tiles. Some peel-and-stick tiles are made from vinyl, while others are constructed from materials like gel or metal. Look for tiles that are water-resistant and designed for use in high-moisture areas, such as bathrooms.
Preparing the Surface
Before applying the peel-and-stick tiles, it’s essential to prepare the surface. Start by cleaning the existing tiles thoroughly to remove any dirt, grease, or soap residue. Use a strong cleaner or a mix of water and vinegar, and allow the surface to dry completely. If the existing tiles have grout lines, you may need to fill them in with spackle or a similar product to create a smooth surface.
Applying the Tiles
Begin by planning your layout. Measure your tiles and mark the wall where you want to place them. It’s usually best to start in the center of the wall or at a prominent feature and work outward. Peel the backing off the tile and press it firmly onto the wall, smoothing out any air bubbles with your hand or a flat tool. Continue applying the tiles, making sure to align them carefully for a seamless look.
Cutting Tiles to Fit
In most cases, you’ll need to cut some tiles to fit around edges, corners, or fixtures. Use a utility knife or a pair of scissors to trim the tiles to size. Measure carefully before cutting, and remember to leave a slight gap at the edges for expansion. This will help prevent the tiles from peeling up over time.
Maintaining Peel-and-Stick Tiles
While peel-and-stick tiles are durable, they do require some maintenance to keep them looking their best. Avoid using harsh chemicals or abrasive cleaners, as these can damage the tiles. Instead, clean them with a mild detergent and a soft cloth. If a tile becomes loose, simply press it back into place, or replace it if necessary. With proper care, peel-and-stick tiles can provide a stylish and long-lasting update to your bathroom.
Covering Tiles with Waterproof Wall Panels
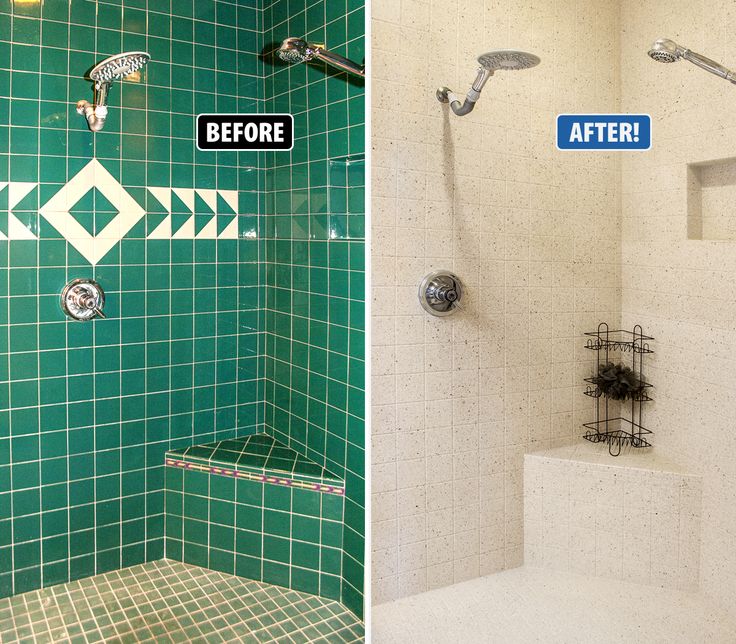
Waterproof wall panels are an excellent solution for covering old bathroom tiles, offering a sleek and modern finish that is both durable and low-maintenance. These panels are designed to withstand the moisture and humidity common in bathrooms, making them a practical and stylish choice for a tile makeover.
Advantages of Waterproof Wall Panels
Waterproof wall panels are popular for their ease of installation and minimal maintenance requirements. Unlike traditional tiles, these panels have no grout lines, which means there’s no need to worry about grout discoloration or mold buildup. They also come in a variety of finishes, including stone, marble, and tile-look designs, allowing you to achieve a high-end look without the associated costs.
Selecting the Right Panels for Your Bathroom
When choosing waterproof wall panels, consider the overall design and layout of your bathroom. Panels come in different sizes and materials, such as PVC, acrylic, or composite, each with its own benefits. PVC panels are lightweight and easy to install, while acrylic panels offer a more solid, high-gloss finish. Composite panels are thicker and more durable, providing a premium look and feel.
Preparing the Surface
As with any tile covering method, proper surface preparation is crucial. Start by cleaning the existing tiles to remove any dirt, grease, or soap scum. Inspect the tiles for any loose pieces or damage, and repair them if necessary. In some cases, you may need to apply a primer to help the panels adhere better, especially if the tiles have a glossy finish.
Installing the Wall Panels
Most waterproof wall panels are designed for easy installation, often using an interlocking system or adhesive. Measure and cut the panels to fit your bathroom walls, starting with the largest sections. Apply the adhesive to the back of the panel, then press it firmly onto the wall, ensuring it’s level and properly aligned. Continue installing the panels, working from one corner of the room to the other, and trimming them as needed to fit around fixtures and edges.
Sealing the Edges and Joints
Once the panels are installed, it’s important to seal the edges and joints to prevent water from seeping behind them. Use a high-quality silicone sealant along the seams, corners, and around any fixtures. This will ensure the panels remain waterproof and secure, extending their lifespan and maintaining the integrity of your bathroom’s walls.
Caring for Waterproof Wall Panels
One of the biggest advantages of waterproof wall panels is their low maintenance. To keep them looking their best, simply wipe them down with a damp cloth and a mild detergent. Avoid using abrasive cleaners or tools that could scratch the surface. With proper care, these panels can last for many years, providing a durable and stylish alternative to traditional tiles.
Applying Tile Decals: A Budget-Friendly Makeover
Tile decals offer a creative and budget-friendly way to transform old bathroom tiles without the need for a full renovation. These adhesive designs can be applied directly over existing tiles, allowing you to customize your bathroom with minimal effort. This article will guide you through the process of using tile decals to refresh your space.
What Are Tile Decals?
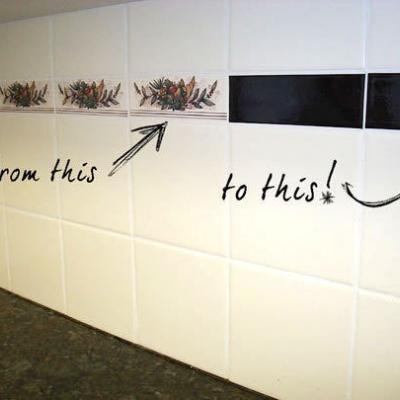
Tile decals are adhesive stickers designed to mimic the look of traditional tiles. They come in various designs, including patterns, geometric shapes, and faux stone finishes. Tile decals are an affordable way to update your bathroom, as they can be applied directly over existing tiles, allowing for a quick and easy transformation without the need for professional installation.
Benefits of Tile Decals
Tile decals are a great option for renters or homeowners on a budget. They’re easy to apply and remove, making them a flexible choice for those who want to update their bathroom without making permanent changes. Additionally, tile decals are available in a wide range of styles, allowing you to experiment with different looks without committing to a long-term design.
Choosing the Right Tile Decals
When selecting tile decals, consider the size and style of your existing tiles. Decals should be large enough to cover the entire tile surface without leaving gaps or edges exposed. Additionally, choose designs that complement your bathroom’s color scheme and overall aesthetic. Some decals are also water-resistant, making them more durable in high-moisture areas like bathrooms.
Preparing the Surface
As with any adhesive product, proper surface preparation is crucial for ensuring the decals adhere correctly. Start by cleaning the tiles with a strong detergent to remove any grease, soap scum, or mildew. Allow the tiles to dry completely before applying the decals. If the tiles have a glossy finish, lightly sand the surface to create a better grip for the adhesive.
Applying the Decals
Applying tile decals is a straightforward process. Begin by measuring and cutting the decals to fit your tiles if necessary. Peel off the backing and carefully position the decal over the tile, starting from one corner and smoothing it down to remove any air bubbles. Use a flat tool, like a credit card, to press the decal firmly onto the tile. Repeat this process for each tile, making sure the decals are aligned for a seamless look.
Maintaining Tile Decals
Tile decals are relatively low-maintenance, but they do require some care to ensure they stay in place. Avoid using abrasive cleaners or scrubbing too hard, as this can damage the decals. Instead, clean them with a mild detergent and a soft cloth. With proper care, tile decals can last for several years, providing a fresh and stylish update to your bathroom.
Installing Wainscoting Over Existing Bathroom Tiles
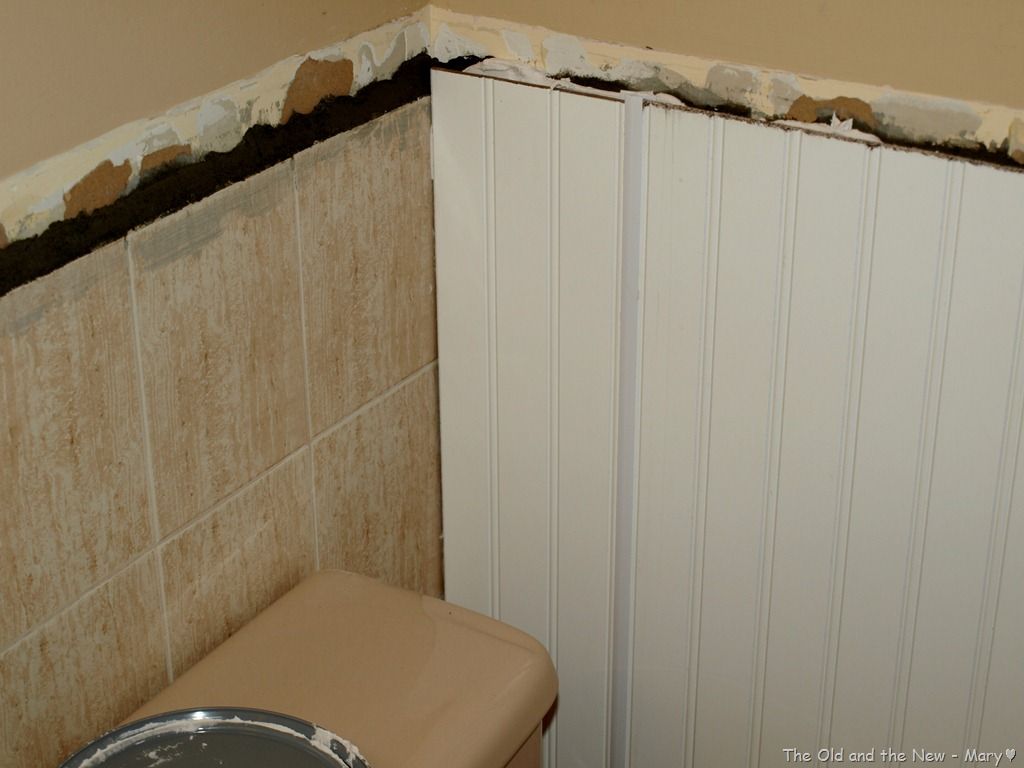
Wainscoting is a classic design feature that can add charm and sophistication to any bathroom. Installing wainscoting over existing tiles is an excellent way to cover old, outdated tiles while enhancing the room’s overall aesthetic. This guide will walk you through the process of installing wainscoting in your bathroom.
Why Choose Wainscoting?
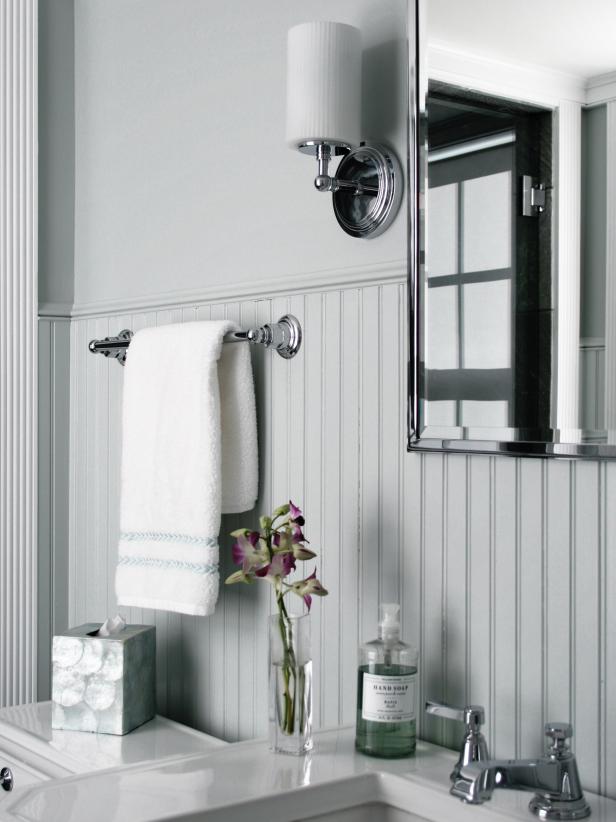
Wainscoting is a decorative wall treatment that typically covers the lower portion of the wall, adding visual interest and a touch of elegance. It’s particularly effective in bathrooms, where it can protect walls from moisture and wear. Wainscoting can be installed over existing tiles, providing a stylish solution for covering up old or unattractive tiles.
Selecting the Right Wainscoting Material
There are several materials to choose from when installing wainscoting in your bathroom. MDF (medium-density fiberboard) is a popular choice for its affordability and ease of installation, but it’s essential to choose a moisture-resistant variety for bathroom use. Wood and PVC wainscoting are also excellent options, with PVC being particularly suitable for wet environments due to its water-resistant properties.
Preparing the Surface
Before installing wainscoting, it’s crucial to prepare the existing tiles. Start by cleaning the tiles thoroughly to remove any dirt, soap scum, or mildew. If the tiles are loose or damaged, repair them before proceeding. Depending on the type of wainscoting you’re using, you may need to apply a layer of adhesive or construction glue to ensure the panels adhere properly to the tiles.
Measuring and Cutting the Wainscoting
Accurate measurements are essential for a professional-looking installation. Measure the height you want the wainscoting to cover and mark it on the wall. Cut the wainscoting panels to size using a saw, ensuring the edges are straight and smooth. It’s a good idea to dry-fit the panels before attaching them to the wall to make sure everything lines up correctly.
Installing the Wainscoting
Begin by applying adhesive to the back of the wainscoting panels, then press them firmly against the tiles, starting from one corner of the room. Use a level to ensure the panels are straight, and secure them with finishing nails or screws if needed. Continue installing the panels around the room, making sure to align the edges for a seamless finish. Once the wainscoting is in place, install a chair rail or molding at the top to complete the look.
Finishing Touches and Maintenance
After the wainscoting is installed, fill any gaps or nail holes with caulk or wood filler. Sand the filled areas smooth, then paint or stain the wainscoting to match your bathroom’s décor. To maintain the wainscoting, wipe it down regularly with a damp cloth to remove dust and moisture. With proper care, wainscoting can add beauty and durability to your bathroom for many years.
Tips for Choosing the Best Tile Covering Solution for Your Bathroom
Choosing the best tile covering solution for your bathroom involves careful consideration of several factors, including budget, style preferences, and the condition of the existing tiles. With so many options available, it’s important to weigh the pros and cons of each method to find the one that best suits your needs. This article offers practical tips to help you make the right choice.
Assessing the Condition of Your Existing Tiles
The first step in choosing a tile covering solution is to assess the condition of your current tiles. If they’re cracked, loose, or damaged, some covering options may not be suitable. In such cases, more durable solutions like wall panels or wainscoting might be necessary. On the other hand, if the tiles are in good shape but just outdated, simpler methods like painting or decals could work well.
Considering Your Budget
Budget is a crucial factor in any home renovation project. Some tile covering options, like peel-and-stick tiles or decals, are highly affordable and can be done as a DIY project. Others, like waterproof wall panels or wainscoting, may require a larger investment but offer a more permanent solution. Consider how much you’re willing to spend and how long you want the update to last when making your decision.
Evaluating Ease of Installation
If you’re planning to tackle the project yourself, consider the ease of installation for each tile covering option. Peel-and-stick tiles, decals, and painting are generally straightforward and don’t require specialized tools or skills. However, options like wall panels or wainscoting might be more challenging and could require professional installation. Choose a method that matches your DIY skill level and the time you have available.
Matching the Solution to Your Style Preferences
Your bathroom’s overall style and design should also influence your choice of tile covering. For a modern, sleek look, waterproof wall panels or high-gloss paint might be ideal. If you prefer a more traditional or rustic aesthetic, wainscoting or wood-look peel-and-stick tiles could be a better fit. Consider the visual impact of each option and how it will complement the rest of your bathroom.
Considering Long-Term Maintenance
Different tile covering solutions have varying maintenance requirements. Painted tiles and decals may require more frequent touch-ups, while wall panels and wainscoting are typically more durable and easier to maintain. Think about how much upkeep you’re willing to commit to when choosing a covering method. Opting for a solution that aligns with your lifestyle can save time and effort in the long run.
Weighing the Pros and Cons of Each Option
Finally, take the time to weigh the pros and cons of each tile covering solution. Consider factors like cost, durability, ease of installation, and the final look you want to achieve. If you’re still unsure, consult with a professional who can provide guidance based on your specific bathroom and needs. By carefully evaluating your options, you can choose the best solution that not only enhances the appearance of your bathroom but also meets your practical requirements.
Update your ceramic tile without replacement with refinishing
How do you cover ceramic tile on a wall?
How to Cover Ugly Shower Tile
How to Cover Tiles Cheaply – 7 Clever Ways and Ideas on it
How To Update Your Bathroom Floor Tiles
Simple Ways to Cover Tiles Cheaply
Related Posts:
- Bathroom Tiles USA
- How To Clean Grout In Bathroom Tile Floors
- Green Marble Bathroom Tiles
- Cream And Brown Bathroom Tiles
- Bathroom Tile Easy To Clean
- White Bathroom Tiles 250 X 330
- Black And White Bathroom Tile Patterns
- Bathroom Tiles Online Buy
- Transitional Bathroom Tile Ideas
- Old Fashioned Bathroom Tile Designs
