Gathering the Right Tools and Materials
Before tackling any DIY project, it’s crucial to gather all the necessary tools and materials. Changing a bathroom faucet and drain is no exception. By having everything you need at hand, you’ll ensure a smooth and efficient installation process. We will guide you through the essential tools and materials required for a successful bathroom faucet and drain replacement.
- Wrenches: You’ll need two types of wrenches for this project: an adjustable wrench and a basin wrench. The adjustable wrench is versatile and can be used for various tasks, while the basin wrench is specifically designed to reach tight spaces under the sink.
- Screwdriver: A flathead or Phillips head screwdriver will come in handy for removing screws and fasteners during the process. Make sure to have both types available, as different faucets may require different screwdriver types.
- Plumber’s Putty: Plumber’s putty is used to create a watertight seal between the sink and the new drain. It prevents leaks and ensures a secure installation. Make sure to choose a high-quality plumber’s putty for long-lasting results.
- Replacement Faucet and Drain: Selecting the right replacement faucet and drain is crucial for a successful installation. Consider factors such as style, finish, and compatibility with your existing plumbing. Measure the existing faucet and drain to ensure a proper fit.
- Teflon Tape: Teflon tape is used to create a tight seal between threaded connections, preventing leaks. Wrap the tape clockwise around the threads before attaching the new faucet and drain.
Removing the Old Faucet and Drain
Removing the old faucet and drain is the first step in changing a bathroom faucet and drain. This process may seem intimidating, but with the right guidance, it can be accomplished easily. We’ll provide you with a step-by-step guide on how to remove the old faucet and drain, preparing the way for the installation of your new fixtures.
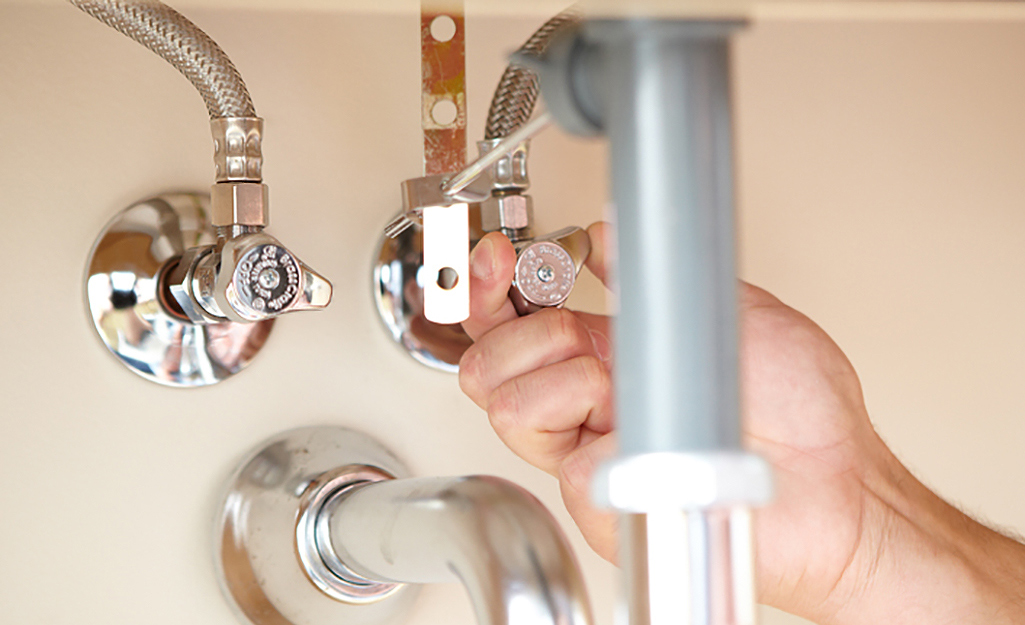
Shut Off the Water Supply: Before beginning any work, it’s crucial to turn off the water supply to the bathroom. Locate the shut-off valves under the sink, usually located on the hot and cold water supply lines. Turn both valves clockwise to shut off the water.
Disconnect the Water Supply Lines: Using an adjustable wrench, disconnect the water supply lines from the bottom of the faucet. Place a bucket or towel beneath to catch any remaining water.
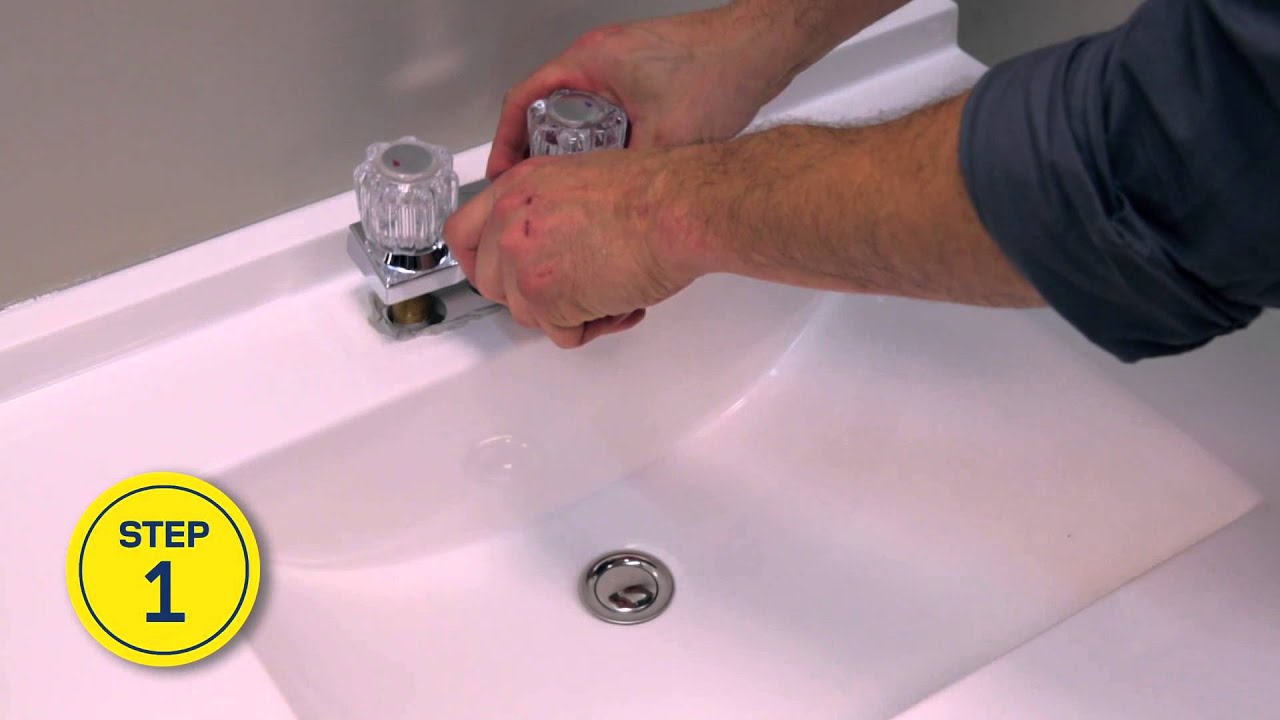
Remove the Faucet: With the water supply lines disconnected, remove any decorative caps or handles covering the faucet screws. Use a screwdriver or Allen wrench to unscrew the screws and detach the faucet from the sink.
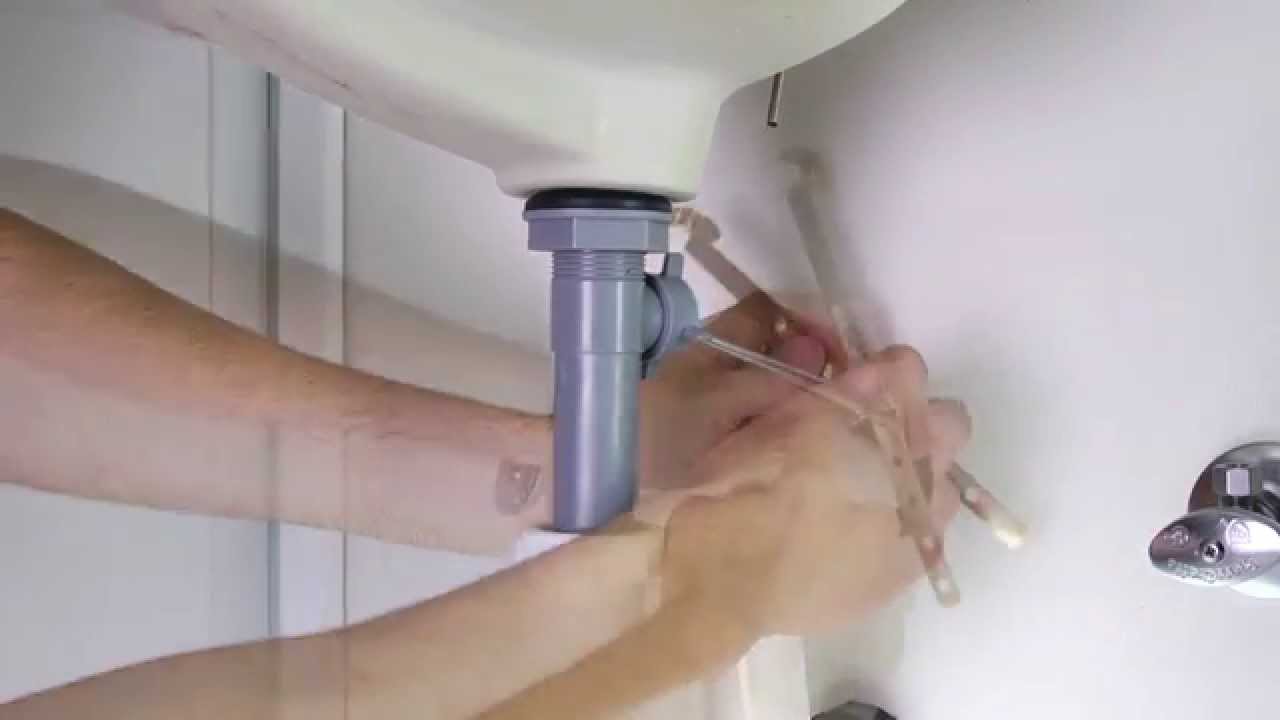
Loosen and Remove the Drain: Underneath the sink, locate the nut securing the drain assembly. Use a wrench or pliers to loosen and remove the nut. Once the nut is removed, the drain assembly can be lifted out of the sink.
Clean and Prepare the Sink: After removing the old faucet and drain, thoroughly clean the sink surface to remove any residue. Inspect the sink for any damage or corrosion that may require repair before installing the new fixtures.

Choosing the Right Replacement Faucet and Drain
Choosing the right replacement faucet and drain is essential for a successful bathroom renovation. With a wide range of options available, it’s important to consider factors such as style, functionality, and compatibility with your existing plumbing. We will guide you through the process of selecting the perfect replacement faucet and drain for your bathroom.
Style and Design: Consider the overall style and design of your bathroom when choosing a replacement faucet and drain. Whether you prefer a modern, traditional, or transitional look, there are numerous styles and finishes available to complement your bathroom décor.
Functionality: Evaluate the functionality of the faucets you’re considering. Do you prefer a single-handle or double-handle faucet? Are you looking for additional features such as a pull-out sprayer or touchless operation? Consider your specific needs and preferences when making your selection.
Compatibility: Ensure that the replacement faucet and drain are compatible with your existing plumbing setup. Measure the existing faucet and drain to ensure a proper fit. Pay attention to the number of mounting holes required and the spacing between them.
Quality and Durability: Invest in high-quality faucets and drains that are built to last. Look for products with solid brass construction or other durable materials. Read customer reviews and check for warranty information to gauge the quality and reliability of the products.
Budget: Set a budget for your faucet and drain replacement project. There are options available at various price points, so it’s important to find a balance between quality and affordability. Consider the long-term value and durability of the fixtures when making your decision.

Installing the New Faucet and Drain
Installing a new faucet and drain can give your bathroom a fresh look while improving functionality. Although the installation process may seem daunting, it can be accomplished with the right tools and guidance. Below we provide you with a step-by-step guide on how to install your new faucet and drain, ensuring a successful and leak-free installation.
Prepare the Sink: Clean the sink surface thoroughly and remove any residue from the previous fixtures. Place a bead of plumber’s putty around the drain opening to create a watertight seal.
Attach the Drain: Insert the drain assembly into the drain opening and secure it from underneath with the provided nut. Use a wrench or pliers to tighten the nut, ensuring a secure fit. Wipe away any excess putty.
Install the Faucet: Position the new faucet onto the sink, aligning the mounting holes with the corresponding holes on the sink. Insert the faucet stems or mounting hardware through the holes and secure them from underneath using the provided nuts or screws.
Connect the Water Supply Lines: Attach the water supply lines to the bottom of the faucet. Use an adjustable wrench to tighten the connections, ensuring they are snug but not over-tightened.
Test for Leaks: Turn on the water supply and check for any leaks around the faucet and drain area. If you notice any leaks, tighten the connections further or apply plumber’s tape to create a tighter seal.
Reassemble and Test: Reassemble any decorative caps or handles on the faucet. Turn on the faucet and check for proper water flow and temperature control. Make any necessary adjustments before completing the installation.

Troubleshooting and Tips for a Successful Installation
Even with careful planning and execution, you may encounter some challenges during the installation of a new bathroom faucet and drain. Below are several troubleshooting tips and valuable advice to ensure a successful installation.
Leak Detection: If you notice a leak after installation, check the connections for any loose or improperly tightened nuts. Apply plumber’s tape to create a tighter seal if necessary. Inspect the drain and ensure the plumber’s putty is properly applied.
Proper Tightening: Avoid over-tightening connections, as this may cause damage to the fixtures or result in leaks. Use an adjustable wrench or pliers to tighten nuts and connections until they are snug, but be cautious not to apply excessive force.
Follow Manufacturer’s Instructions: Carefully read and follow the manufacturer’s instructions provided with your new faucet and drain. Each product may have specific installation requirements and recommendations that are crucial for a successful installation.
Regular Maintenance: Once the installation is complete, develop a regular maintenance routine for your new faucet and drain. Clean the fixtures regularly using mild soap and water, and avoid using abrasive cleaners that may damage the finish.
Seek Professional Help: If you encounter any difficulties during the installation process or are unsure about any steps, don’t hesitate to seek professional help. A licensed plumber can provide guidance and ensure a proper installation if needed.
How to Replace a Bathroom Faucet: 14 Steps (with Pictures)

Bathroom faucet with drain replacement

How to Install a Bathroom Sink Drain : 4 Steps (with Pictures
How To Install A Bathroom Faucet With Pop Up Drain – Bargain Bathroom

How To Install a Bathroom Faucet
Related Posts:
- Brushed Nickel Bathroom Faucet Single Handle
- Kohler July Bathroom Faucet
- 8 Inch Bathroom Faucet Brushed Nickel
- Delta Bathroom Faucet Aerator Size
- Delta Bathroom Faucets And Fixtures
- 4 In Bathroom Faucet
- Kohler Margaux Bathroom Faucet
- Repairing Delta Bathroom Faucet Single Handle
- Antique Brass Bathroom Faucets Centerset
- Polished Brass And Chrome Bathroom Faucets


