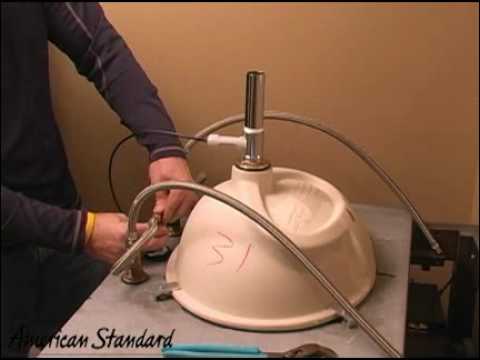
Common Issues: Troubleshooting Chateau by Moen Faucets
Chateau by Moen faucets are known for their quality and durability, but like any plumbing fixture, they can experience issues over time. From leaks and drips to low water pressure, troubleshooting these common problems can help you keep your Chateau faucet running smoothly. Here are some common issues you may encounter with Chateau by Moen faucets and how to troubleshoot them:
- Leaking or Dripping Faucet: A leaking or dripping faucet is one of the most common issues homeowners face with any type of faucet, including Chateau by Moen models. The cause of the leak can vary, but it’s often due to worn-out seals, O-rings, or cartridges. To troubleshoot a leaking faucet, start by turning off the water supply to the faucet. Then, disassemble the faucet and inspect the seals, O-rings, and cartridges for signs of wear or damage. Replace any worn-out components with new ones, reassemble the faucet, and test for leaks.
- Low Water Pressure: If you’re experiencing low water pressure from your Chateau by Moen faucet, there could be several possible causes. Check to see if the aerator is clogged with sediment or mineral deposits, as this can restrict water flow. Remove the aerator and clean it thoroughly with a brush and vinegar solution to remove any buildup. If cleaning the aerator doesn’t improve water pressure, check for kinks or blockages in the supply lines and ensure that the shut-off valves are fully open.
- Handle Issues: Problems with the faucet handle, such as difficulty turning it on or off, can be caused by a variety of factors. If the handle feels loose or wobbly, it may be due to a loose screw or mounting nut. Tighten the screw or nut using a wrench or screwdriver to secure the handle in place. If the handle is stiff or difficult to move, it may be due to mineral deposits or corrosion inside the handle mechanism. Disassemble the handle and clean it thoroughly, removing any debris or buildup that may be causing the issue.
- Sprayer Malfunction: If you have a Chateau by Moen faucet with a pull-out or pull-down sprayer, you may encounter issues such as a stuck or malfunctioning sprayer head. If the sprayer doesn’t retract or extend properly, check for obstructions in the sprayer hose or diverter valve. Remove any debris or buildup from the hose and valve, and lubricate the O-rings with silicone grease to ensure smooth operation. If the sprayer head itself is damaged or worn out, replace it with a new one.
- Persistent Noise: Unusual noises coming from your Chateau by Moen faucet, such as rattling, humming, or squeaking, can be indicative of underlying issues that require attention. These noises may be caused by loose components, water hammer, or mineral buildup in the pipes. Inspect the faucet and supply lines for loose or vibrating parts, and tighten any connections as needed. If the water hammer is the culprit, consider installing a water hammer arrestor or pressure-reducing valve to regulate water flow and prevent noisy pipes.
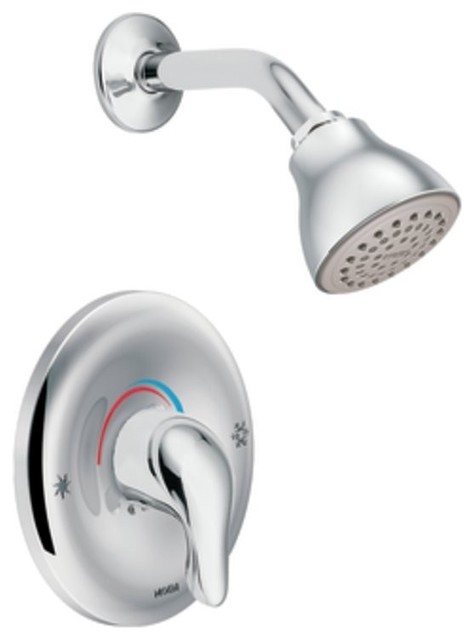
Tools and Materials
Repairing a Chateau by Moen faucet requires the right tools and materials to ensure a successful outcome. Whether you’re fixing a leaky faucet, replacing a worn-out cartridge, or addressing other issues, having the proper equipment on hand is essential for completing the job efficiently and effectively. Here are some essential tools and materials you’ll need for repairing Chateau by Moen faucets:
Adjustable Wrench: An adjustable wrench is a versatile tool that can be used to tighten or loosen nuts and bolts of various sizes. It’s essential for removing and installing faucet components such as mounting nuts, supply line connections, and handle screws.
Screwdriver Set: A set of screwdrivers in various sizes and types (flathead and Phillips) is necessary for disassembling and reassembling the faucet components. You’ll use screwdrivers to remove screws holding the faucet handles, escutcheon plates, and other parts in place.
Plumber’s Tape: Also known as Teflon tape, plumber’s tape is used to seal threaded connections and prevent leaks. Apply the plumber’s tape to the threads of supply line connections, cartridge threads, and other threaded fittings to create a watertight seal.
Cartridge Puller: A cartridge puller is a specialized tool designed to remove stubborn cartridges from faucet bodies. It provides leverage and grip to help you extract the cartridge without damaging the faucet or surrounding components.
Replacement Parts: Depending on the nature of the repair, you may need to purchase replacement parts such as cartridges, O-rings, seals, aerators, or sprayer heads. Make sure to identify the specific model and type of Chateau by Moen faucet you have to ensure compatibility with the replacement parts.
Cleaning Supplies: Before reassembling the faucet, it’s essential to clean all components thoroughly to remove any debris, mineral deposits, or buildup that may interfere with the faucet’s operation. Use a mild cleaning solution, such as vinegar and water, to dissolve mineral deposits and sanitize the components.
Silicone Grease: Silicone grease is used to lubricate O-rings, seals, and other rubber components to ensure smooth operation and prevent leaks. Apply a thin layer of silicone grease to the O-rings before reassembling the faucet to extend their lifespan and maintain a watertight seal.
Flashlight: A flashlight can be handy for inspecting hard-to-reach areas under the sink or inside the faucet body. Use a flashlight to illuminate dark spaces and identify any hidden leaks or obstructions that may be causing issues with the faucet.
Step-by-Step Repair Guide: Fixing Leaks, Drips, and Other Problems
Repairing a Chateau by Moen faucet is a relatively straightforward process that can be completed with basic tools and materials. Whether you’re dealing with a leaky faucet, low water pressure, or other issues, following a step-by-step repair guide can help you troubleshoot and resolve the problem quickly and effectively. Here’s a comprehensive guide to fixing common problems with Chateau by Moen faucets:
Turn Off the Water: Before beginning any repairs, shut off the water supply to the faucet to prevent flooding or water damage. Locate the shut-off valves under the sink or at the main water supply and turn them clockwise to close them completely.
Disassemble the Faucet: Use a screwdriver to remove the screws holding the faucet handles in place. Once the handles are removed, unscrew the escutcheon plates and any remaining components to access the faucet cartridge or valve assembly.
Inspect for Damage: Once the faucet is disassembled, inspect the cartridge, O-rings, seals, and other components for signs of wear, damage, or mineral buildup. Replace any worn-out or damaged parts with new ones to ensure a proper repair.
Clean Components: Thoroughly clean all faucet components, including the cartridge, O-rings, and aerator, to remove any debris, sediment, or mineral deposits that may be causing issues. Use a mild cleaning solution and a soft brush to scrub away buildup and restore the components to their original condition.
Replace Cartridge or Valve Assembly: If the faucet is leaking or dripping, the cartridge or valve assembly may be the culprit. Remove the old cartridge or valve assembly and install a new one according to manufacturer instructions. Make sure to lubricate O-rings and seals with silicone grease before reassembling the faucet to ensure a watertight seal.
Reassemble the Faucet: Once the repairs are complete, reassemble the faucet components in the reverse order of disassembly. Tighten screws and mounting nuts securely to prevent leaks or wobbling. Turn the water supply back on and test the faucet for leaks, drips, and proper operation.
Adjust Water Pressure: If you’re experiencing low water pressure, check the aerator for clogs or debris that may be restricting water flow. Remove the aerator and clean it thoroughly with a brush and vinegar solution to remove any buildup. Reinstall the aerator and test the faucet to see if the water pressure has improved.
Inspect for Leaks: After completing the repairs, carefully inspect the faucet and surrounding area for any signs of leaks or drips. Check under the sink and around the faucet connections for moisture or water spots that may indicate a leak. Tighten connections as needed to eliminate leaks and ensure a watertight seal.
Maintenance Tips: Preventive Care for Long-lasting Performance
Proper maintenance is essential for ensuring the long-term performance and durability of your Chateau by Moen faucet. By implementing a regular maintenance routine and following these preventive care tips, you can keep your faucet in top condition and avoid costly repairs or replacements down the line. Here are some maintenance tips to help you maintain your Chateau by Moen faucet:
Clean Regularly: Regular cleaning is essential for preventing mineral buildup, sediment accumulation, and other issues that can affect faucet performance. Clean the faucet and aerator regularly with a mild cleaning solution and a soft brush to remove debris and maintain a clean and hygienic surface.
Check for Leaks: Periodically inspect the faucet and surrounding area for signs of leaks or drips. Check under the sink and around the faucet connections for moisture or water spots that may indicate a leak. Address any leaks promptly to prevent water damage and ensure the integrity of your plumbing system.
Inspect Seals and O-rings: Inspect the seals and O-rings on your Chateau by Moen faucet regularly for signs of wear, damage, or deterioration. Replace any worn-out or damaged seals and O-rings with new ones to prevent leaks and maintain a watertight seal.
Lubricate Moving Parts: Lubricate moving parts such as handles, spouts, and cartridges regularly to ensure smooth operation and prevent corrosion or damage. Apply silicone grease to O-rings, seals, and other rubber components to maintain flexibility and prevent drying out.
Check Water Pressure: Monitor water pressure regularly to ensure optimal flow and performance from your Chateau by Moen faucet. If you notice a decrease in water pressure, check the aerator for clogs or debris that may be restricting water flow. Clean the aerator thoroughly to remove any buildup and restore proper water pressure.
Avoid Harsh Cleaners: Avoid using harsh chemical cleaners or abrasive scrubbers on your Chateau by Moen faucet, as these can damage the finish and cause corrosion or discoloration. Instead, use mild cleaning solutions and non-abrasive materials to clean the faucet and maintain its appearance.
Address Hard Water Issues: If you live in an area with hard water, consider installing a water softener or filtration system to prevent mineral buildup and extend the lifespan of your Chateau by Moen faucet. Regularly descale and clean the faucet and aerator to remove mineral deposits and maintain optimal performance.
Schedule Professional Inspections: Periodically schedule professional inspections and maintenance checks for your plumbing system, including your Chateau by Moen faucet. A licensed plumber can identify potential issues early on and address them before they escalate into larger problems, saving you time and money in the long run.
When to Seek Professional Help
While many repairs and maintenance tasks can be completed DIY-style, there are certain situations where it’s best to leave the job to the professionals. Knowing when to seek professional help for your Chateau by Moen faucet can save you time, money, and frustration in the long run. Here are some signs that it’s time to call in a licensed plumber:
Complex Repairs: If you’re dealing with complex repairs such as replacing a faulty valve assembly, repairing a cracked faucet body, or addressing issues with the plumbing connections, it’s best to leave these tasks to the professionals. Attempting to tackle complex repairs without the necessary skills or experience can lead to further damage and costly repairs down the line.
Persistent Leaks: If you’ve tried troubleshooting and repairing a leaky faucet multiple times without success, it may be time to seek professional help. Persistent leaks can indicate underlying issues with the faucet or plumbing system that require professional diagnosis and repair. A licensed plumber can identify the source of the leak and implement a permanent solution to prevent further damage.
Water Damage: If you discover water damage or moisture buildup around your Chateau by Moen faucet or under the sink, it’s crucial to address the issue promptly to prevent mold growth, structural damage, and other costly problems. Water damage can indicate leaks or plumbing issues that require professional repair and remediation. A licensed plumber can assess the extent of the damage and implement appropriate repairs to restore the integrity of your plumbing system.
Safety Concerns: If you encounter safety concerns such as exposed wiring, gas leaks, or structural damage during your faucet repair or maintenance efforts, it’s essential to prioritize safety and seek professional assistance immediately. Attempting to address safety hazards without the necessary expertise and equipment can result in injury or property damage. Contact a licensed plumber or contractor to assess the situation and implement appropriate safety measures.
Warranty Coverage: If your Chateau by Moen faucet is still under warranty, it’s important to follow the manufacturer’s guidelines for repairs and maintenance to avoid voiding the warranty. In some cases, attempting DIY repairs or hiring an unlicensed contractor can void the warranty and negate your coverage. Before attempting any repairs, check the terms and conditions of your warranty and contact the manufacturer or an authorized service provider for guidance.
Professional Installation: If you’re installing a new Chateau by Moen faucet or replacing an existing faucet with a different model or type, it’s best to hire a professional plumber for the installation. Professional installation ensures that the faucet is properly installed, sealed, and calibrated for optimal performance and longevity. A licensed plumber can also provide valuable advice and recommendations for selecting the right faucet for your needs and ensuring compatibility with your plumbing system.
Moen 64621 Cht 1 Handle Lav Knb 50/50 Wa 1/2 Chr Bk
Moen 96782 Chateau Replacement Single Handle Bathroom Faucet Acrylic Knob Handle Kit
Moen Part # 64621 – Moen Chateau 4 In Centerset Single-Handle
Moen Bathroom Faucet L64725 eReplacementParts.com
HOW TO REPAIR REMOVE REPLACE A LEAKING MOEN SHOWER FAUCET CARTRIDGE VALVE with a SINGLE KNOB 1225
MOEN Chateau 4 in. Centerset 2-Handle Low Arc Bathroom Faucet in Chrome with Drain Assembly 4925
Chateau One-Handle Tub and Shower Knob Handle Kit Repair
Chateau Chrome Two-Handle Low Arc Roman Tub Faucet
Moen 7430 Chateau One-Handle Low-Arc Kitchen Faucet with Side Sprayer, Chrome
Related Posts:
- Bathroom Faucets That Light Up
- How To Repair A Moen Bathroom Faucet Handle
- How To Fix A Leaky Bathroom Faucet Handle
- Delta Replacement Bathroom Faucet Handles
- Bathroom Faucets Two Tone
- Used Bathroom Faucets For Sale
- American Standard Symphony Bathroom Faucet
- How To Tighten A Moen Bathroom Faucet Handle
- Artistic Brass Bathroom Faucets
- Peerless Brushed Nickel Bathroom Faucet


