Choosing the Right Paint for Bathroom Tiles
When it comes to painting bathroom tiles, selecting the right type of paint is crucial to achieving a durable and aesthetically pleasing result. Bathroom environments are unique due to their high humidity levels and frequent exposure to water, making it essential to choose paint that can withstand these conditions. Let’s explore the different types of paint suitable for bathroom tiles and how to make the best choice for your DIY project.
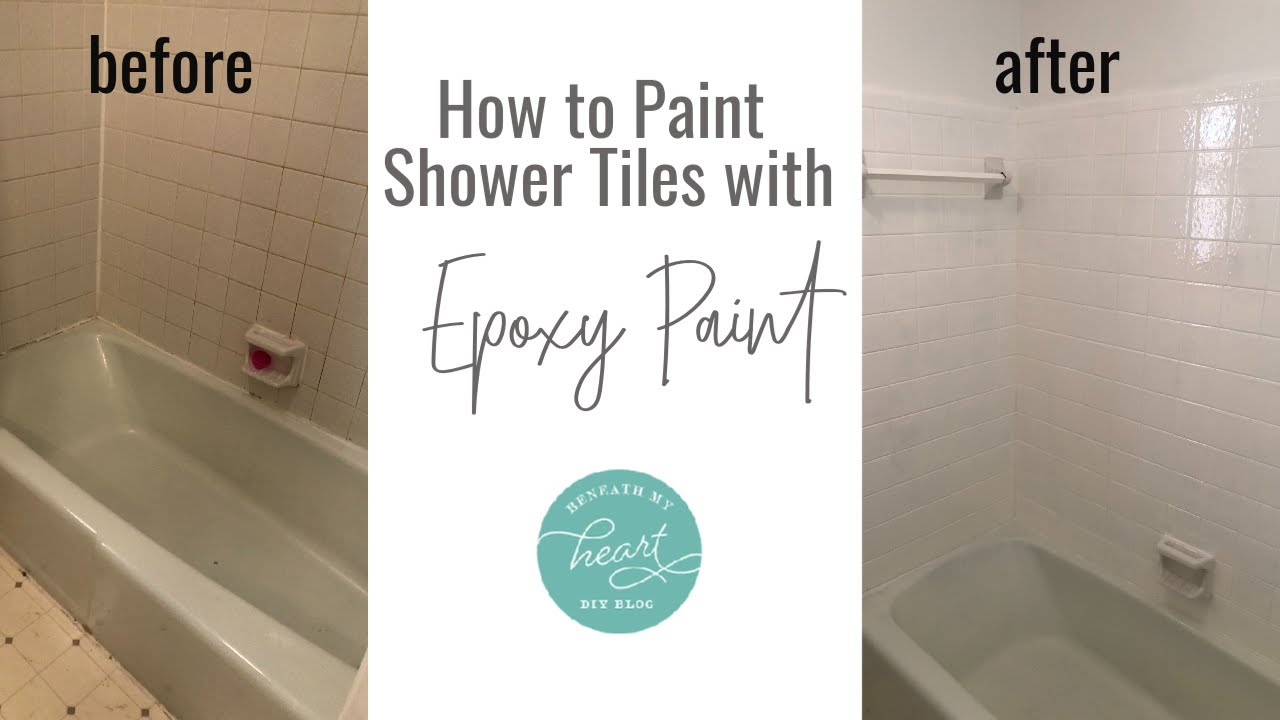
- Understanding the Types of Tile Paint The first step in choosing the right paint is understanding the different types available. Two of the most popular options for painting bathroom tiles are epoxy and latex paint. Epoxy paint is known for its durability and water resistance, making it an excellent choice for high-moisture areas like bathrooms. It adheres well to tiles and forms a hard, glossy finish that can withstand wear and tear. Latex paint, on the other hand, is easier to work with and offers a wide range of colors, but it may not be as durable as epoxy.
- Considering the Finish The finish of the paint plays a significant role in the final look of your bathroom tiles. Glossy finishes are commonly preferred for bathroom tiles because they are easier to clean and offer a sleek, polished appearance. However, a matte finish can provide a more understated, contemporary look, though it may require more maintenance to keep clean. Semi-gloss and satin finishes strike a balance between the two, offering some sheen while still being relatively easy to maintain.
- Durability and Water Resistance Durability is a key factor when selecting paint for bathroom tiles. Bathrooms are exposed to high levels of moisture, so the paint must be able to withstand water without peeling or blistering. Epoxy paints are generally the most durable option, providing excellent resistance to moisture and wear. If you opt for latex paint, consider using a primer designed for bathroom surfaces to enhance the paint’s durability and adhesion to the tiles.
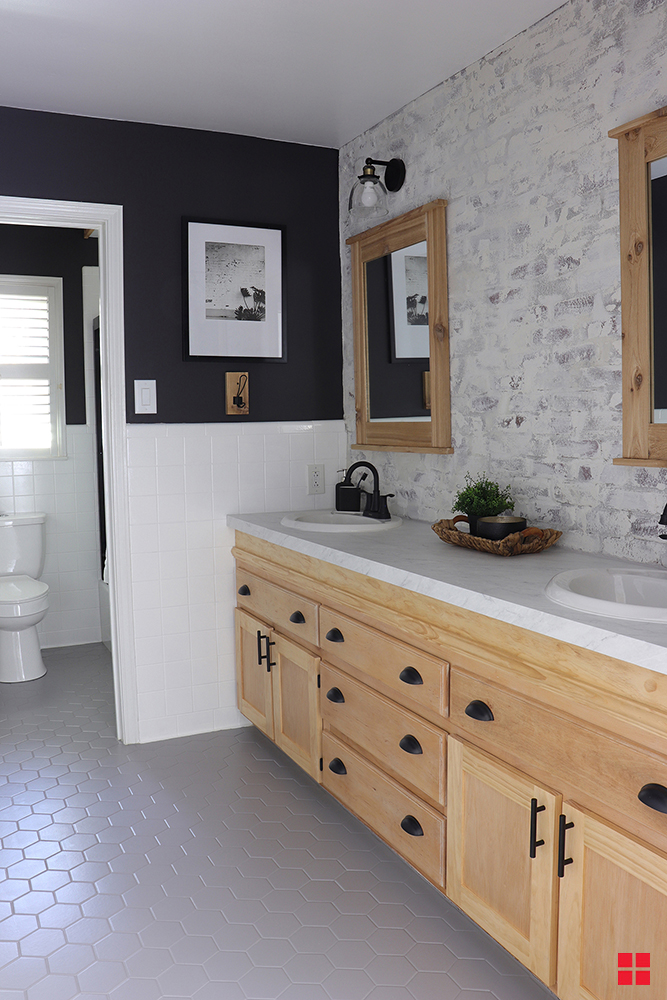
- Choosing the Right Color Color choice is an important aspect of any painting project, and it’s especially true for bathroom tiles. Light colors, such as whites, creams, and soft pastels, can make a small bathroom feel larger and more open. Darker colors can add drama and sophistication, but they may also make the space feel smaller. Consider the overall design of your bathroom and how the color of the tiles will complement the existing fixtures and decor.
- Health and Safety Considerations When working in a confined space like a bathroom, it’s important to consider the health and safety implications of the paint you choose. Look for low-VOC (volatile organic compounds) or zero-VOC paints, which are less harmful to breathe in and reduce the risk of indoor air pollution. Additionally, ensure proper ventilation while painting, and consider wearing a mask to protect yourself from fumes, especially when using epoxy-based paints.
- Test Before You Commit Before committing to a full-scale tile painting project, it’s a good idea to test the paint on a small, inconspicuous area of the tiles. This will allow you to see how the paint adheres to the surface and how it looks once dry. Testing also allows you to experiment with different colors and finishes to find the perfect combination for your bathroom.
Preparing Your Bathroom Tiles for Painting
Proper preparation is the foundation of any successful DIY project, and painting bathroom tiles is no exception. Ensuring that your tiles are clean, dry, and properly primed will help the paint adhere better and last longer. Let me guide you through the essential steps to prepare your bathroom tiles for painting, setting the stage for a flawless finish.
- Thorough Cleaning of the Tiles The first step in preparing your bathroom tiles for painting is to give them a thorough cleaning. Over time, bathroom tiles accumulate soap scum, mildew, and grime, all of which can prevent paint from adhering properly. Use a strong tile cleaner or a mixture of vinegar and water to scrub the tiles clean. Pay special attention to the grout lines, as these areas tend to harbor the most dirt and mold. After cleaning, rinse the tiles with clean water and allow them to dry completely before moving on to the next step.
- Repairing Any Damage Before you start painting, it’s important to inspect the tiles for any damage, such as cracks, chips, or missing grout. Damaged tiles should be repaired to create a smooth, even surface for painting. Small cracks and chips can be filled with a tile repair compound, which can be found at most hardware stores. If the grout is damaged or missing in some areas, reapply fresh grout and allow it to cure fully before painting. Repairing these imperfections will ensure that your painted tiles look flawless and last longer.
- Sanding the Tiles Sanding the tiles is a critical step in the preparation process, as it helps to roughen the surface and improve the paint’s adhesion. Use fine-grit sandpaper (around 220-grit) to gently sand the surface of the tiles. This process creates tiny grooves that allow the paint to grip the tiles more effectively. Be sure to sand evenly and cover the entire surface, including the grout lines. After sanding, wipe the tiles with a damp cloth to remove any dust or debris.
- Taping Off Surrounding Areas To protect areas that you don’t want to paint, such as the bathroom fixtures, walls, and floors, use painter’s tape to tape off the surrounding areas. Cover the countertop, sink, and any other nearby surfaces with plastic sheeting or drop cloths to catch any drips or splatters. Taking the time to properly tape and cover these areas will save you a lot of cleanup work later on and ensure that your paint job looks neat and professional.
- Applying a Primer Applying a primer is an essential step in the preparation process, especially if you’re painting glossy or non-porous tiles. A good-quality primer will help the paint adhere better and provide a smooth, even base for the topcoat. Choose a primer specifically designed for bathroom surfaces or tiles, and apply it according to the manufacturer’s instructions. Use a brush to apply the primer to the grout lines and a roller for the flat surfaces. Allow the primer to dry completely before applying the paint.
- Ensuring Proper Ventilation Proper ventilation is important when preparing and painting bathroom tiles, as it helps to disperse fumes and speeds up drying times. Open windows and doors to allow fresh air to circulate, and consider using a fan to help ventilate the space. If your bathroom has an exhaust fan, turn it on to help remove any lingering fumes. Ensuring adequate ventilation will not only protect your health but also help the paint dry more evenly and reduce the risk of peeling or bubbling.
Step-by-Step Guide to Painting Bathroom Tiles
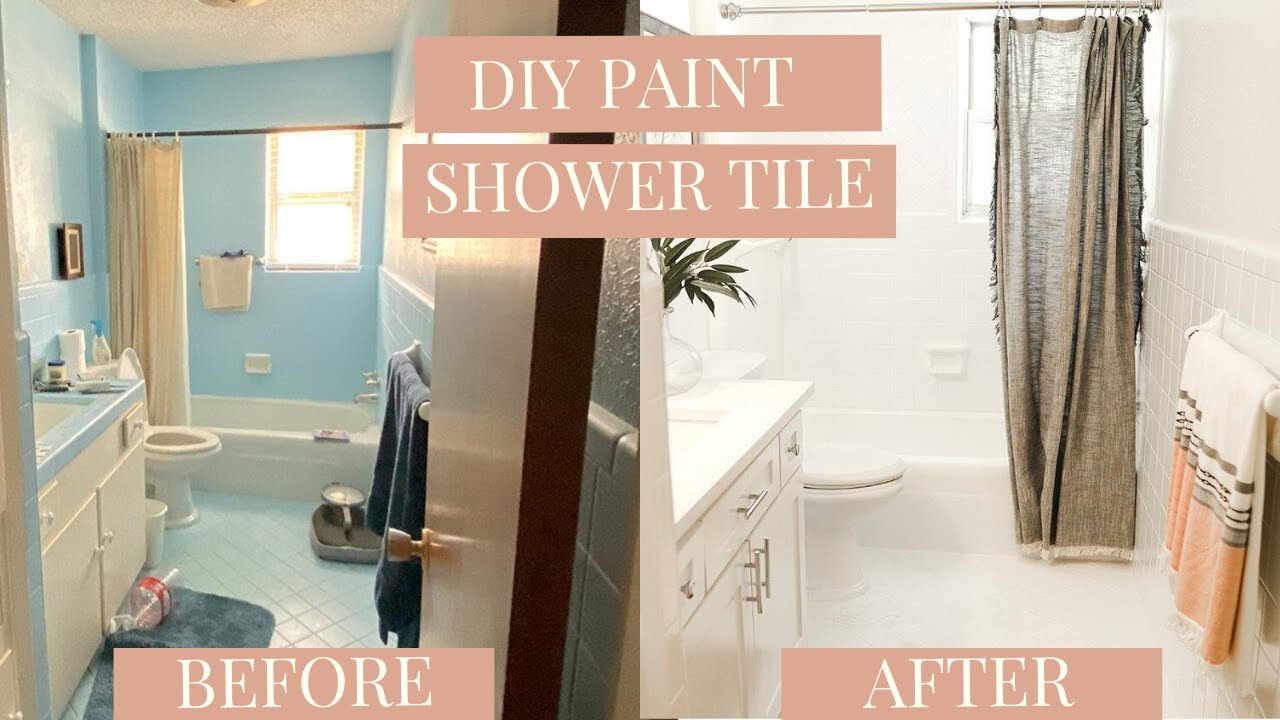
Painting bathroom tiles can be a cost-effective and creative way to update your bathroom without the expense of replacing the tiles. With the right tools and techniques, you can achieve a professional-looking finish that breathes new life into your space. Below we provide a step-by-step guide to painting bathroom tiles, from start to finish.
- Gathering Your Materials Before you begin, make sure you have all the necessary materials on hand. You’ll need tile paint (either epoxy or latex), a primer, fine-grit sandpaper, painter’s tape, brushes, rollers, a paint tray, and cleaning supplies. Having everything ready before you start will make the process smoother and more efficient. Additionally, consider wearing old clothes or a painter’s apron, as paint can be difficult to remove from fabric.
- Priming the Tiles Once your tiles are clean, sanded, and taped off, it’s time to apply the primer. Using a high-quality primer designed for bathroom surfaces is key to achieving a long-lasting finish. Start by using a brush to apply the primer to the grout lines, ensuring that every crevice is covered. Then, use a roller to apply the primer to the flat surfaces of the tiles. Apply the primer in thin, even coats, allowing it to dry completely between applications. Depending on the type of primer you use, you may need to apply two coats to achieve full coverage.
- Applying the First Coat of Paint After the primer has dried, it’s time to apply the first coat of paint. Start with the grout lines, using a small brush to carefully paint between the tiles. Once the grout lines are covered, use a roller to apply paint to the flat surfaces. Roll the paint in a consistent direction to avoid visible brush strokes or roller marks. It’s important to apply the paint in thin, even coats to prevent drips and achieve a smooth finish. Allow the first coat to dry completely before applying the second coat.
- Applying Additional Coats Depending on the color and type of paint you’ve chosen, you may need to apply multiple coats to achieve the desired coverage. Each coat should be applied in the same manner as the first, starting with the grout lines and then moving to the flat surfaces. Be sure to allow each coat to dry fully before applying the next one. Typically, two to three coats are sufficient, but darker colors or heavily patterned tiles may require additional coats for full coverage.
- Removing the Painter’s Tape After you’ve applied the final coat of paint and it’s fully dried, carefully remove the painter’s tape from the surrounding areas. It’s best to remove the tape while the paint is still slightly tacky to avoid peeling off any paint with the tape. If any paint has bled under the tape, use a small brush to touch up the edges. Removing the tape promptly will help ensure clean, crisp lines and a professional-looking finish.
- Allowing the Paint to Cure Once the painting is complete, it’s important to allow the paint to fully cure before using the bathroom. The curing process can take anywhere from several days to a week, depending on the type of paint and the humidity levels in your bathroom. During this time, avoid using the painted tiles or exposing them to water. Proper curing is essential to achieving a durable finish that will last for years to come.
Creative Design Ideas for Painted Bathroom Tiles
Painting your bathroom tiles opens up a world of creative possibilities, allowing you to transform the look of your space without the need for expensive renovations. Whether you’re looking to add a pop of color, create a unique pattern, or achieve a sophisticated, modern look, there are countless design options to explore. Below are some creative design ideas for painted bathroom tiles that can inspire your DIY project.
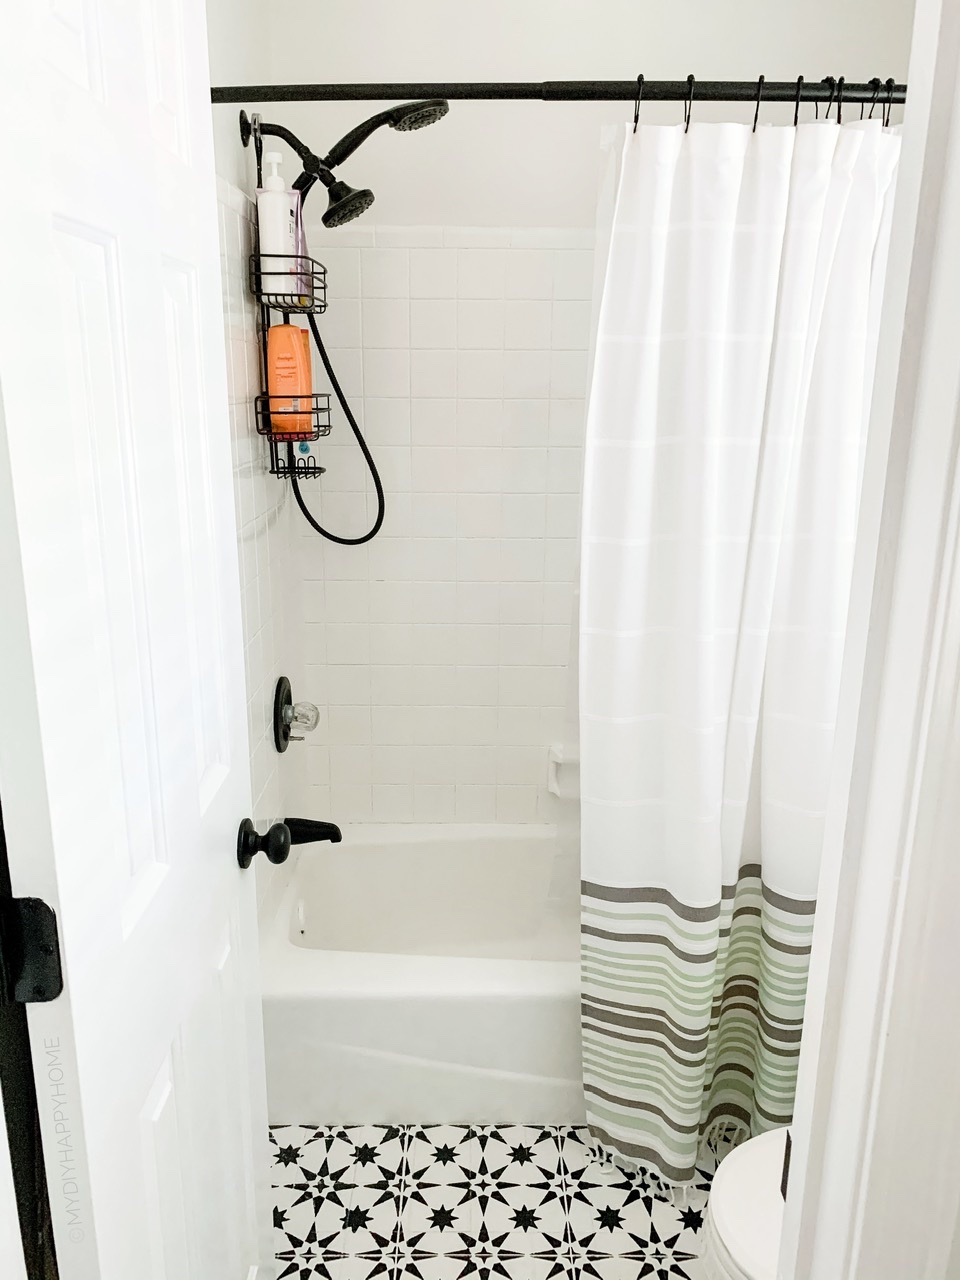
- Bold Geometric Patterns Geometric patterns are a popular choice for modern bathroom designs, and painting your tiles in bold, eye-catching shapes can create a stunning focal point. Consider using painter’s tape to create patterns like chevrons, hexagons, or diamonds on your tiles. Choose contrasting colors, such as black and white or navy and gold, to make the pattern stand out. Geometric patterns work particularly well on accent walls or shower enclosures, where they can add a touch of contemporary flair to your bathroom.
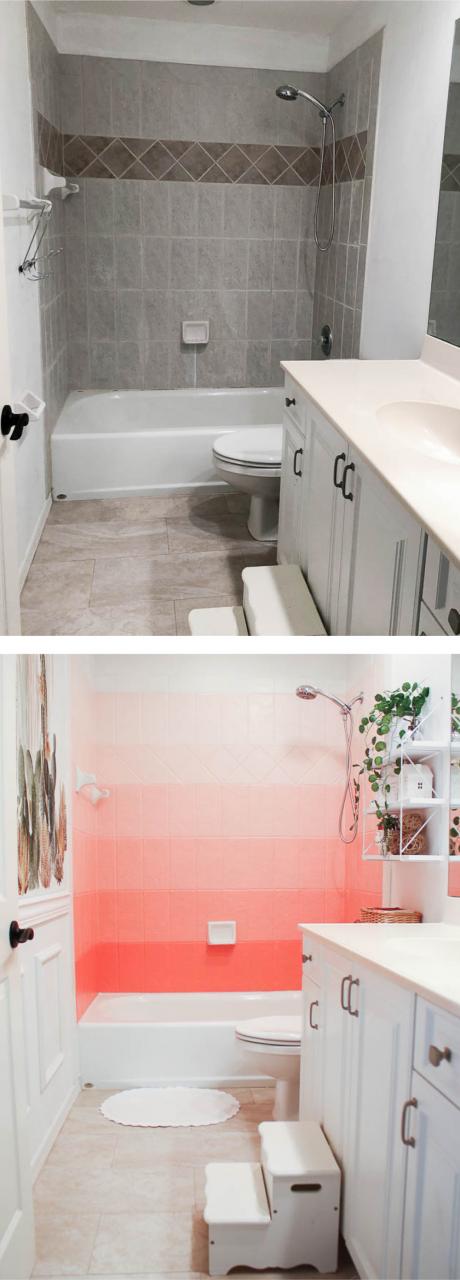
- Ombre Effect The ombre effect, where colors gradually blend from light to dark, can add a soft, elegant touch to your bathroom tiles. To achieve this look, choose a base color and then mix varying shades of that color to create a gradient effect. Start with the lightest shade at the top of the wall and gradually work your way down to the darkest shade at the bottom. This technique works beautifully on large tile surfaces, such as shower walls or backsplashes, and can create a serene, spa-like atmosphere in your bathroom.
- Mosaic-Inspired Designs Mosaic tiles are known for their intricate patterns and vibrant colors, but they can be expensive to install. By painting your existing tiles, you can achieve a similar look at a fraction of the cost. Use small stencils to create intricate designs on each tile, or freehand paint a pattern that mimics the look of a mosaic. Choose a color palette that complements your bathroom’s overall design, and don’t be afraid to experiment with metallic or iridescent paints to add a touch of glamour.
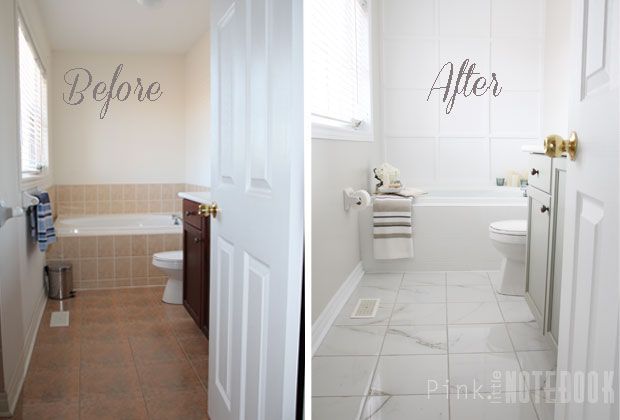
- Faux Marble Finish Marble is a timeless and luxurious material, but it can be costly to install in a bathroom. A faux marble finish can be achieved by painting your tiles with a marbleizing technique. Start by applying a base coat of white or light gray paint. Once dry, use a feather or fine brush to create delicate, veining patterns with darker shades of gray or black. Blend the lines slightly with a damp sponge to soften the look and add depth. This technique works well on larger tiles and can give your bathroom a high-end, sophisticated appearance.
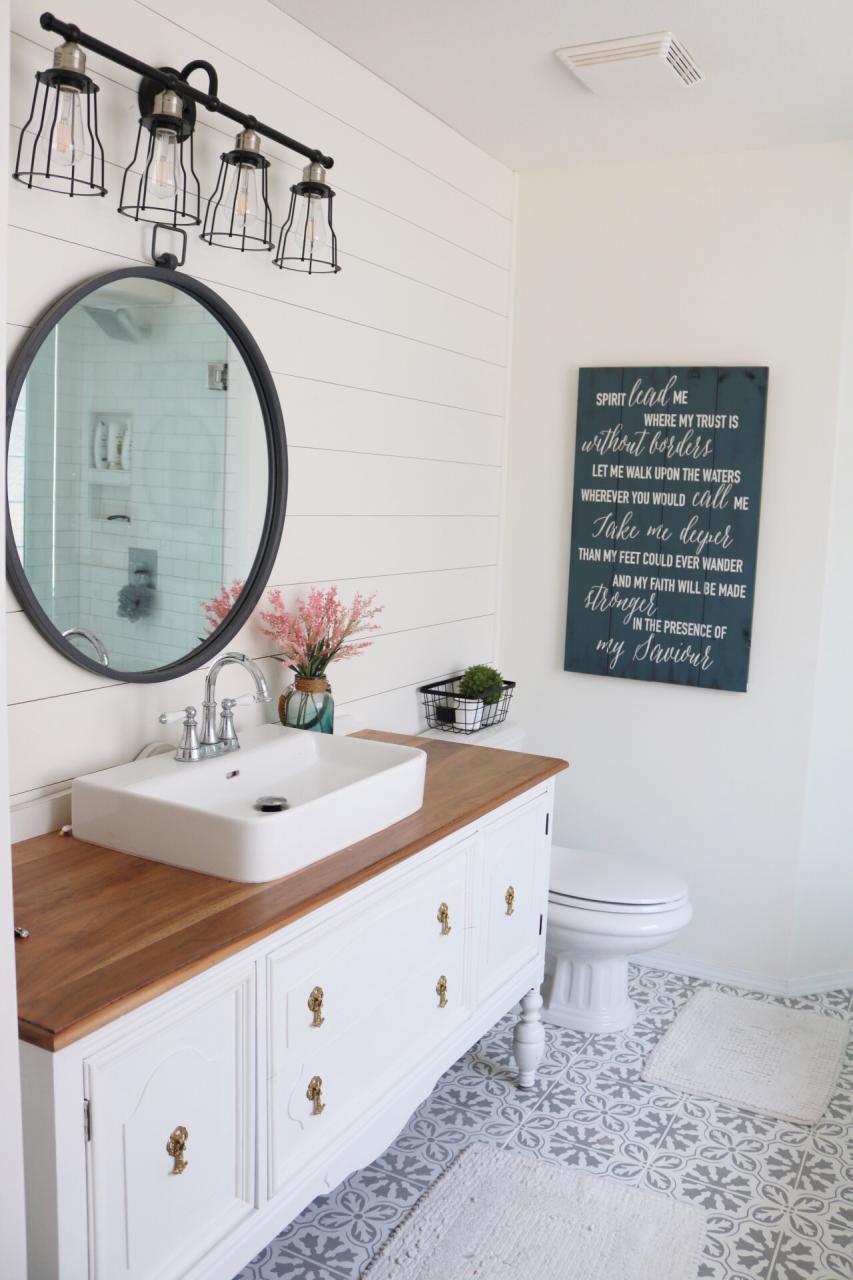
- Vintage Floral Patterns For a more traditional or vintage-inspired bathroom, consider painting your tiles with floral patterns. Choose a delicate, intricate design that features flowers, vines, or leaves, and use soft, muted colors like blush pink, sage green, or pale blue. Floral patterns can add a touch of charm and femininity to your bathroom, and they work particularly well in cottage or shabby chic-style spaces. Use stencils for precision, or freehand the design for a more organic, whimsical look.
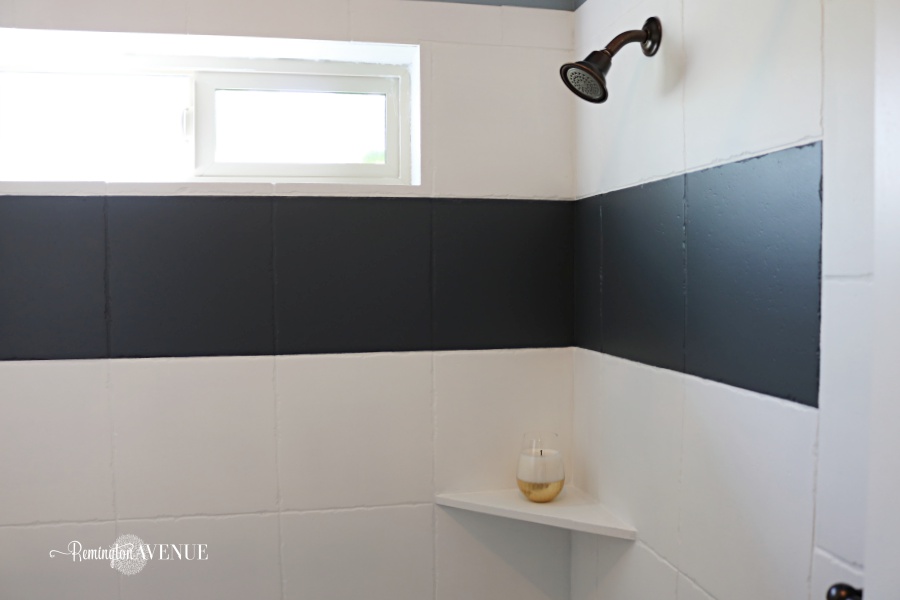
- Color Blocking Color blocking is a design technique that involves using solid blocks of color to create a bold, graphic look. In a bathroom, you can achieve this effect by painting different sections of your tiles in contrasting or complementary colors. For example, you could paint the lower half of your wall tiles in a deep navy blue and the upper half in a crisp white, creating a striking contrast. Color blocking is a versatile design option that can be tailored to suit both modern and traditional bathroom styles.
Sealing and Protecting Painted Bathroom Tiles
After putting in the effort to paint your bathroom tiles, it’s important to take the necessary steps to protect your work and ensure it lasts. Sealing the painted tiles is a crucial step in the process, as it helps to protect the paint from moisture, wear, and everyday use. Let’s discuss how to properly seal and protect your painted bathroom tiles to keep them looking fresh and vibrant for years to come.
- Choosing the Right Sealer The first step in sealing painted bathroom tiles is choosing the right type of sealer. There are several options available, including clear acrylic sealers, polyurethane sealers, and epoxy-based sealers. Clear acrylic sealers are a popular choice because they are easy to apply, dry quickly, and provide a durable, protective finish. Polyurethane sealers offer a high level of durability and are resistant to water and chemicals, making them ideal for bathroom environments. Epoxy-based sealers provide the most robust protection, but they can be more challenging to work with.
- Applying the Sealer Once you’ve chosen the right sealer for your project, it’s time to apply it to the painted tiles. Start by ensuring that the paint is fully dry and cured, which can take several days. Apply the sealer using a clean brush or roller, starting with the grout lines and then moving to the flat surfaces of the tiles. Be sure to apply the sealer in thin, even coats, allowing each coat to dry fully before applying the next one. Depending on the type of sealer you use, you may need to apply multiple coats for optimal protection.
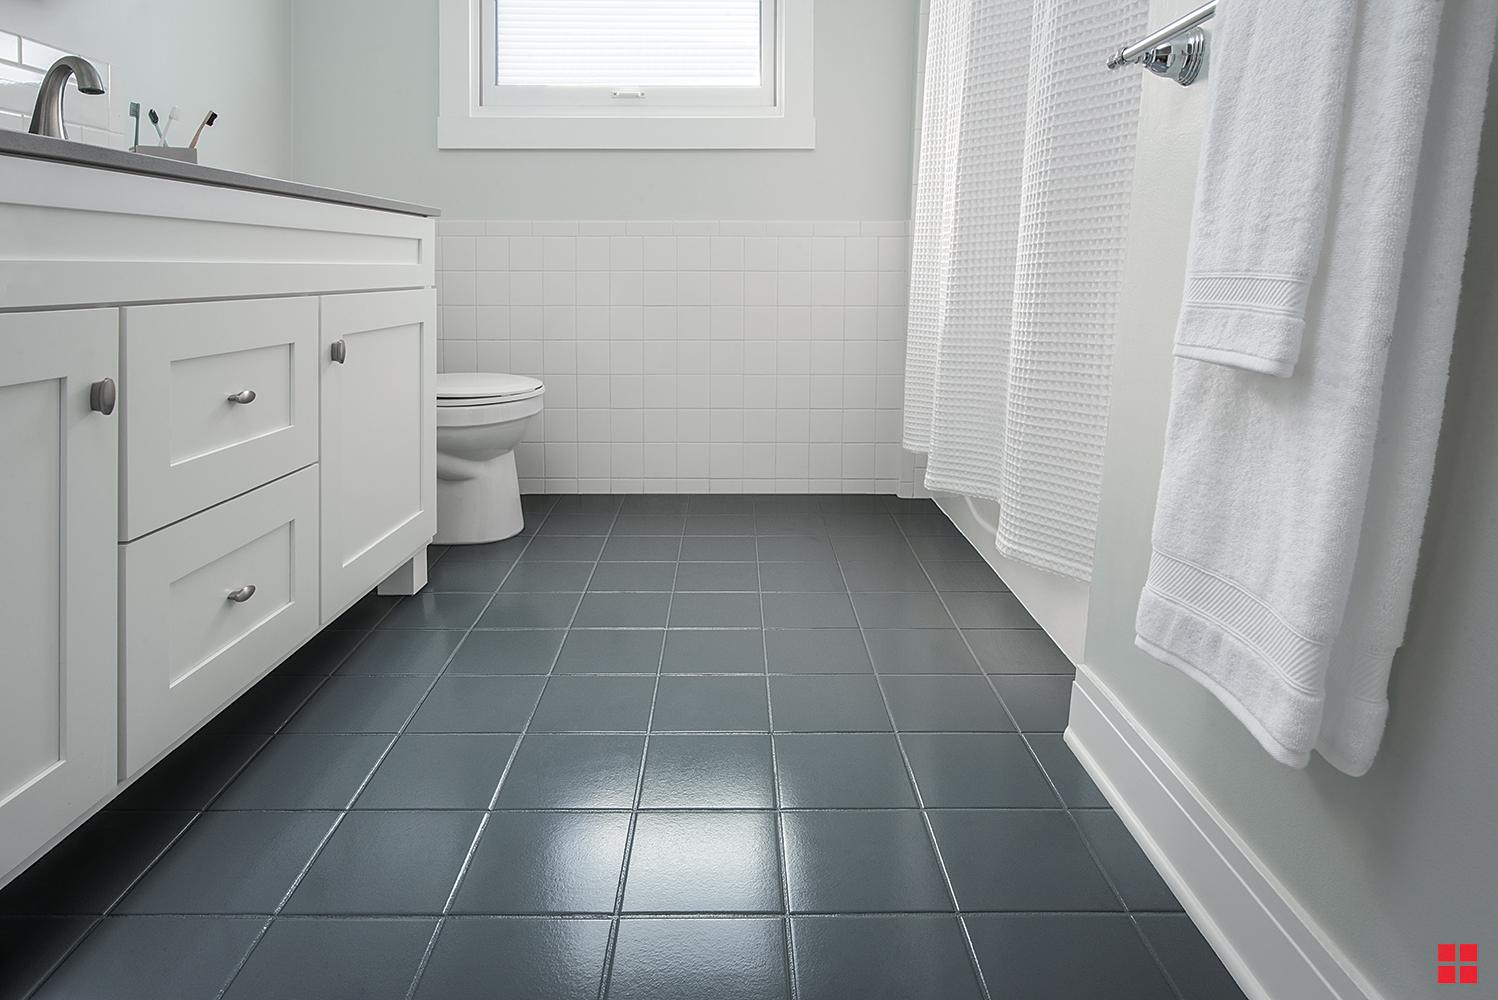
- Protecting High-Traffic Areas Some areas of your bathroom may experience more wear and tear than others, such as the floor tiles or the area around the sink. To protect these high-traffic areas, consider applying an extra coat or two of sealer. This will provide additional protection against scratches, stains, and moisture, helping to extend the life of your painted tiles. If you’ve painted floor tiles, it’s also a good idea to place rugs or mats in areas that receive the most foot traffic to further protect the surface.
- Maintaining the Sealer Even with a high-quality sealer, regular maintenance is key to keeping your painted tiles looking their best. Avoid using harsh or abrasive cleaners on the sealed surface, as they can damage the sealer and the paint underneath. Instead, opt for mild, non-abrasive cleaners and soft cloths or sponges. If you notice any areas where the sealer has worn away, reapply a fresh coat to ensure continued protection.
- Re-Sealing Over Time Over time, the sealer on your painted tiles may begin to wear down, especially in areas that are exposed to a lot of moisture or use. To keep your tiles protected, it’s a good idea to re-seal them periodically. How often you need to re-seal will depend on the type of sealer used and the amount of wear the tiles receive, but generally, every 1-2 years is a good rule of thumb. Re-sealing is a relatively simple process and can help to keep your bathroom looking fresh and well-maintained.
- Caring for the Grout Lines The grout lines between your tiles can be particularly vulnerable to wear and staining, so it’s important to pay special attention to them when sealing. Use a small brush to apply sealer directly to the grout lines, ensuring they are fully covered. If your grout lines are painted, be extra careful to avoid disturbing the paint while applying the sealer. Properly sealed grout lines will help to prevent moisture from seeping in and causing damage, keeping your painted tiles in great condition.
Common Mistakes to Avoid When Painting Bathroom Tiles
Painting bathroom tiles is a rewarding DIY project, but it’s not without its challenges. To achieve a professional-looking result, it’s important to avoid some common pitfalls that can lead to issues like peeling paint, uneven coverage, or a less-than-perfect finish. Let’s highlight some of the most common mistakes people make when painting bathroom tiles and how you can avoid them.
- Skipping the Cleaning Step One of the most common mistakes people make is skipping or rushing through the cleaning step. Properly cleaning the tiles before painting is essential to ensure that the paint adheres properly. If the tiles are dirty, greasy, or covered in soap scum, the paint may not stick, leading to peeling or flaking over time. Take the time to thoroughly clean the tiles using a strong tile cleaner or a mixture of vinegar and water, and allow them to dry completely before starting the painting process.
- Not Sanding the Tiles Another mistake is neglecting to sand the tiles before painting. Sanding creates a rougher surface that helps the paint adhere better to the tiles. Without sanding, the paint may not bond properly, resulting in a less durable finish. Use fine-grit sandpaper to lightly sand the tiles, making sure to cover the entire surface, including the grout lines. After sanding, be sure to wipe away any dust or debris before applying the primer.
- Using the Wrong Type of Paint Choosing the wrong type of paint is a common mistake that can affect the longevity and appearance of your painted tiles. Not all paints are suitable for use in high-moisture environments like bathrooms. It’s important to choose a paint that is specifically designed for use on tiles and is resistant to moisture and wear. Epoxy paint is generally the best option for bathroom tiles due to its durability and water resistance, but latex paint can also work if paired with a good primer.
- Applying Paint Too Thickly Applying paint too thickly is a common issue that can lead to drips, uneven coverage, and a longer drying time. It’s better to apply multiple thin coats of paint rather than one thick coat. Thin coats dry more evenly and are less likely to develop drips or bubbles. Be patient and allow each coat to dry fully before applying the next one. This approach will result in a smoother, more professional-looking finish.
- Ignoring Ventilation Needs Proper ventilation is often overlooked during the painting process, but it’s crucial for both your safety and the quality of the finish. Painting in a poorly ventilated bathroom can lead to a buildup of fumes, which can be harmful to your health. Additionally, lack of ventilation can slow down the drying process and increase the risk of paint peeling or bubbling. Always ensure that your bathroom is well-ventilated by opening windows, using fans, or turning on the exhaust fan during and after painting.
- Not Sealing the Painted Tiles Failing to seal the painted tiles is a mistake that can significantly reduce the durability of your paint job. Sealing helps to protect the paint from moisture, wear, and everyday use, extending the life of your painted tiles. Choose a sealer that is compatible with the type of paint you used, and apply it in thin, even coats after the paint has fully cured. Skipping this step can lead to peeling, chipping, or fading over time, especially in high-moisture areas like bathrooms.
Maintenance Tips for Long-Lasting Painted Bathroom Tiles
After investing time and effort into painting your bathroom tiles, it’s important to follow proper maintenance practices to ensure your work lasts. Painted tiles require a bit of extra care to keep them looking their best, but with the right approach, you can enjoy your refreshed bathroom for years to come. Here are some maintenance tips to help you keep your painted bathroom tiles in top condition.
- Regular Cleaning with Gentle Products To maintain the appearance of your painted tiles, it’s important to clean them regularly using gentle, non-abrasive products. Harsh cleaners or abrasive scrubbers can damage the paint and the sealer, leading to scratches or peeling. Instead, use a mild cleaner, such as a mixture of dish soap and water, and a soft cloth or sponge to wipe down the tiles. Regular cleaning will help to prevent the buildup of soap scum, mildew, and grime, keeping your tiles looking fresh.
- Avoiding Harsh Chemicals While it’s important to keep your bathroom clean, it’s equally important to avoid using harsh chemicals that can damage the painted surface. Products containing bleach, ammonia, or strong acids can erode the paint and cause discoloration or peeling. If you need to disinfect the bathroom, choose a mild disinfectant that is safe for use on painted surfaces, and always rinse thoroughly with water afterward to remove any residue.
- Addressing Moisture Issues Moisture is one of the biggest threats to the longevity of painted bathroom tiles, so it’s crucial to address any moisture issues promptly. Ensure that your bathroom is well-ventilated to reduce humidity levels and prevent mold and mildew growth. After showering, use a squeegee to remove excess water from the tiles and grout lines, and wipe down the surfaces with a dry cloth. If you notice any signs of peeling or bubbling, address them immediately to prevent further damage.
- Reapplying Sealer as Needed Over time, the sealer on your painted tiles may begin to wear down, especially in areas that are exposed to frequent use or moisture. To maintain the protective barrier, it’s important to reapply the sealer periodically. The frequency of re-sealing will depend on the type of sealer used and the amount of wear the tiles receive, but typically, every 1-2 years is recommended. Regularly reapplying sealer will help to protect the paint from damage and extend the life of your tiles.
- Touching Up Chips and Scratches Despite your best efforts, your painted tiles may eventually develop small chips or scratches. It’s important to address these issues promptly to prevent them from worsening. Keep some of the original paint on hand for touch-ups, and use a small brush to carefully fill in any chips or scratches. Be sure to re-seal the touched-up area after the paint has dried to restore the protective barrier.
- Monitoring for Wear and Tear Regularly inspect your painted tiles for signs of wear and tear, such as peeling paint, fading colors, or damage to the grout lines. Catching these issues early allows you to address them before they become more serious problems. If you notice any areas where the paint is beginning to wear down, consider touching up the paint and re-sealing the tiles to prevent further damage. With regular maintenance and care, your painted bathroom tiles can continue to look beautiful and vibrant for years to come.

