Signs Your Bathroom Tiles Need Attention
Over time, bathroom tiles can start to show signs of wear and tear, indicating that they may need to be replaced. By being aware of these signs, you can address issues promptly and ensure your bathroom remains in top condition.
- Cracked or Damaged Tiles: One of the most obvious signs that your bathroom tiles need attention is the presence of cracks or damage. Cracked tiles not only detract from the appearance of the bathroom but can also pose safety hazards, especially if they are sharp or uneven.
- Loose or Missing Grout: Another common issue with bathroom tiles is loose or missing grout. Grout serves to hold the tiles in place and create a watertight seal, so when it starts to deteriorate or come loose, it can compromise the integrity of the tiled surface and lead to further damage.
- Water Damage: Water damage is a serious concern in bathrooms, as it can lead to mold, mildew, and structural issues if left unchecked. Signs of water damage on bathroom tiles include discoloration, warping, or softening of the tiles, as well as mold or mildew growth in the grout lines.
- Stained or Discolored Tiles: Over time, bathroom tiles can become stained or discolored due to exposure to water, soap scum, and other substances. While regular cleaning can help prevent this issue, stubborn stains that cannot be removed may indicate that it’s time to replace the tiles.
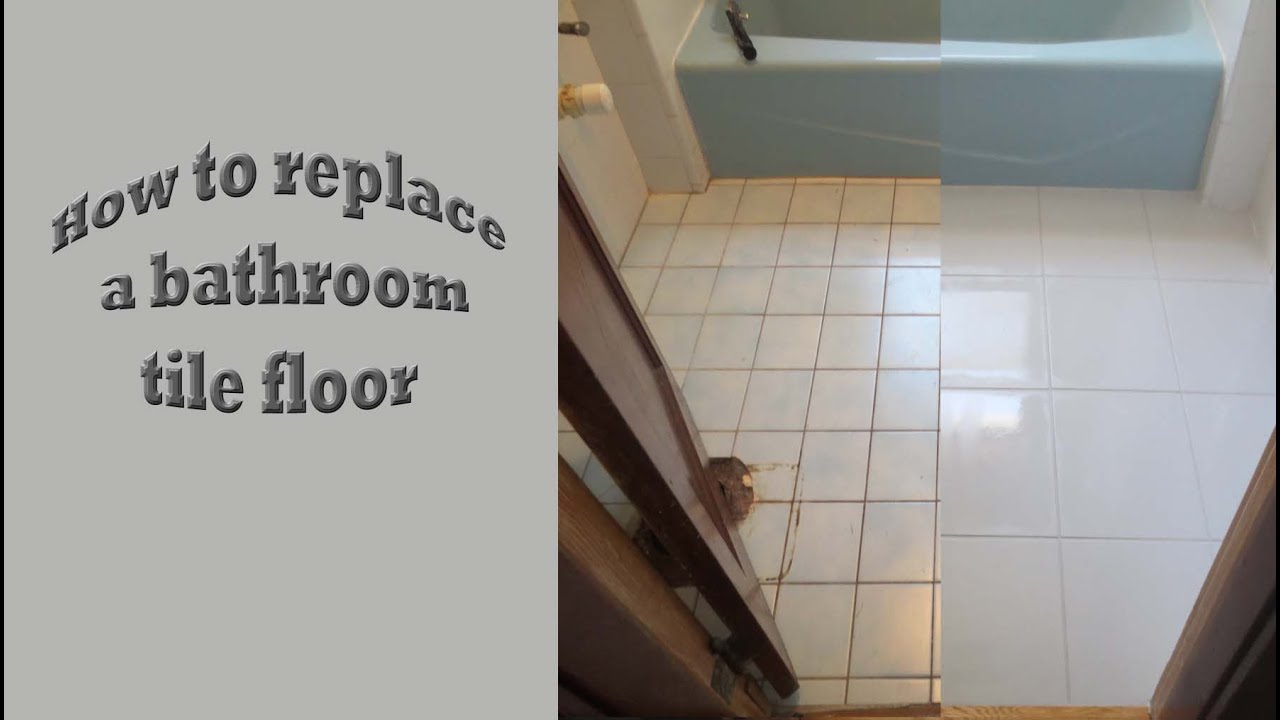
- Outdated Appearance: If your bathroom tiles have an outdated or unappealing appearance that detracts from the overall aesthetic of the space, it may be time for an upgrade. Replacing old or worn tiles with fresh, modern ones can instantly refresh the look of your bathroom and enhance its overall appeal.
- Difficulty Cleaning: If you find that your bathroom tiles are becoming increasingly difficult to clean or maintain, it may be a sign that they need to be replaced. Worn or damaged tiles can trap dirt, grime, and bacteria, making them challenging to clean effectively and leading to hygiene concerns.
Tools and Materials You’ll Need
Before embarking on the task of removing bathroom tiles, it’s essential to gather the necessary tools and materials to ensure a smooth and successful removal process. By being prepared, you can minimize disruption and achieve professional-looking results.
Safety Gear: Safety should be a top priority when removing bathroom tiles, as the process can generate dust, debris, and sharp edges. Be sure to wear appropriate safety gear, including safety goggles, gloves, and a dust mask, to protect yourself from injury and exposure to harmful substances.
Tile Removal Tools: The key to successful tile removal is having the right tools for the job. Some essential tools for removing bathroom tiles include a hammer, chisel, pry bar, and tile scraper. Depending on the extent of the removal and the type of tiles, you may also need a rotary hammer drill or a tile saw.
Protective Coverings: To protect surrounding surfaces and fixtures from damage during tile removal, it’s a good idea to cover them with protective materials such as drop cloths or plastic sheeting. This will help prevent scratches, chips, or other damage that can occur during the removal process.
Container for Debris: Removing bathroom tiles can generate a significant amount of dust and debris, so it’s important to have a container on hand to collect and dispose of the waste properly. A large plastic bucket or trash bin can be used to contain the debris and make cleanup easier.
Tile Adhesive Remover: In addition to removing the tiles themselves, you may also need to remove any adhesive or mortar residue left behind on the subfloor or walls. A tile adhesive remover or solvent can help soften and dissolve the adhesive, making it easier to scrape away and prepare the surface for new tiles.
Surface Preparation Materials: Once the tiles have been removed, the underlying surface may need to be cleaned and prepared before installing replacement tiles. Depending on the condition of the surface, you may need materials such as a degreaser, sandpaper, or patching compound to ensure a smooth and level base for the new tiles.
Step-by-Step Guide to Removing Bathroom Tiles
Removing bathroom tiles can be a labor-intensive process, but with the right techniques and approach, it can be done efficiently and effectively. By following these step-by-step instructions, you can ensure a successful tile removal process and prepare the surface for replacement tiles.
Prepare the Area: Before starting the tile removal process, clear the area of any obstacles and protect surrounding surfaces and fixtures with protective coverings. This will help prevent damage and make cleanup easier once the tiles have been removed.
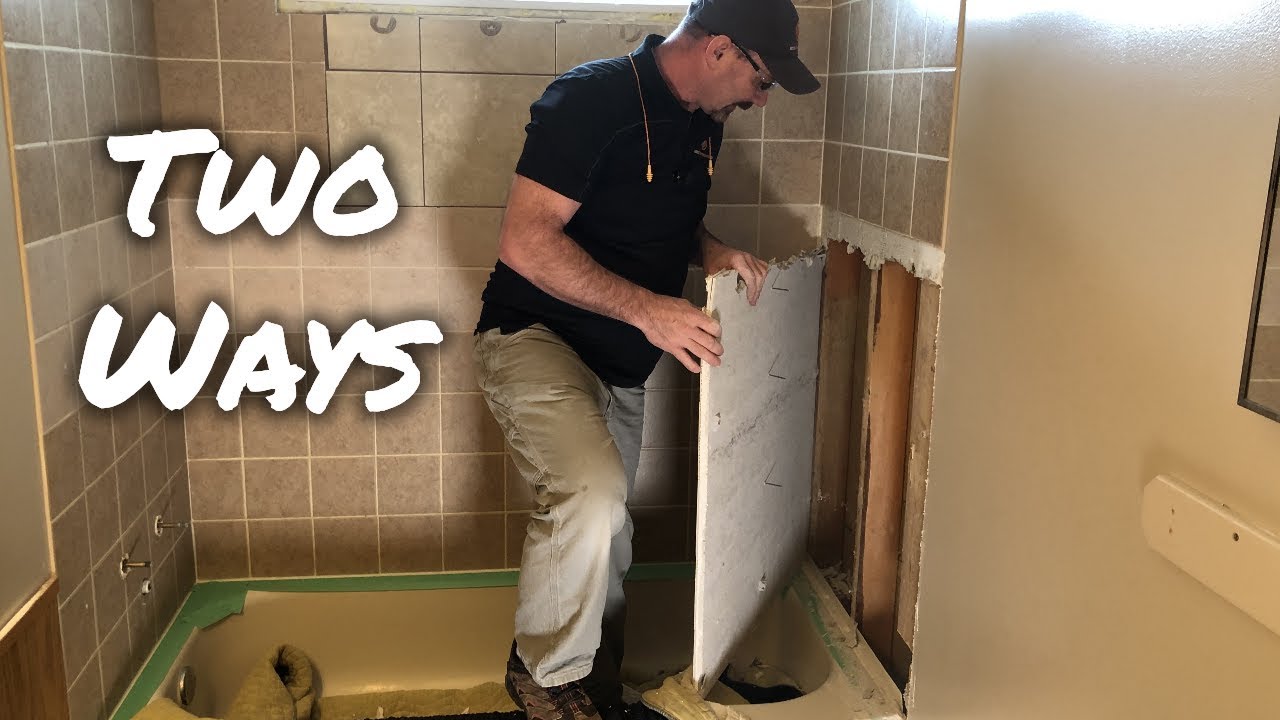
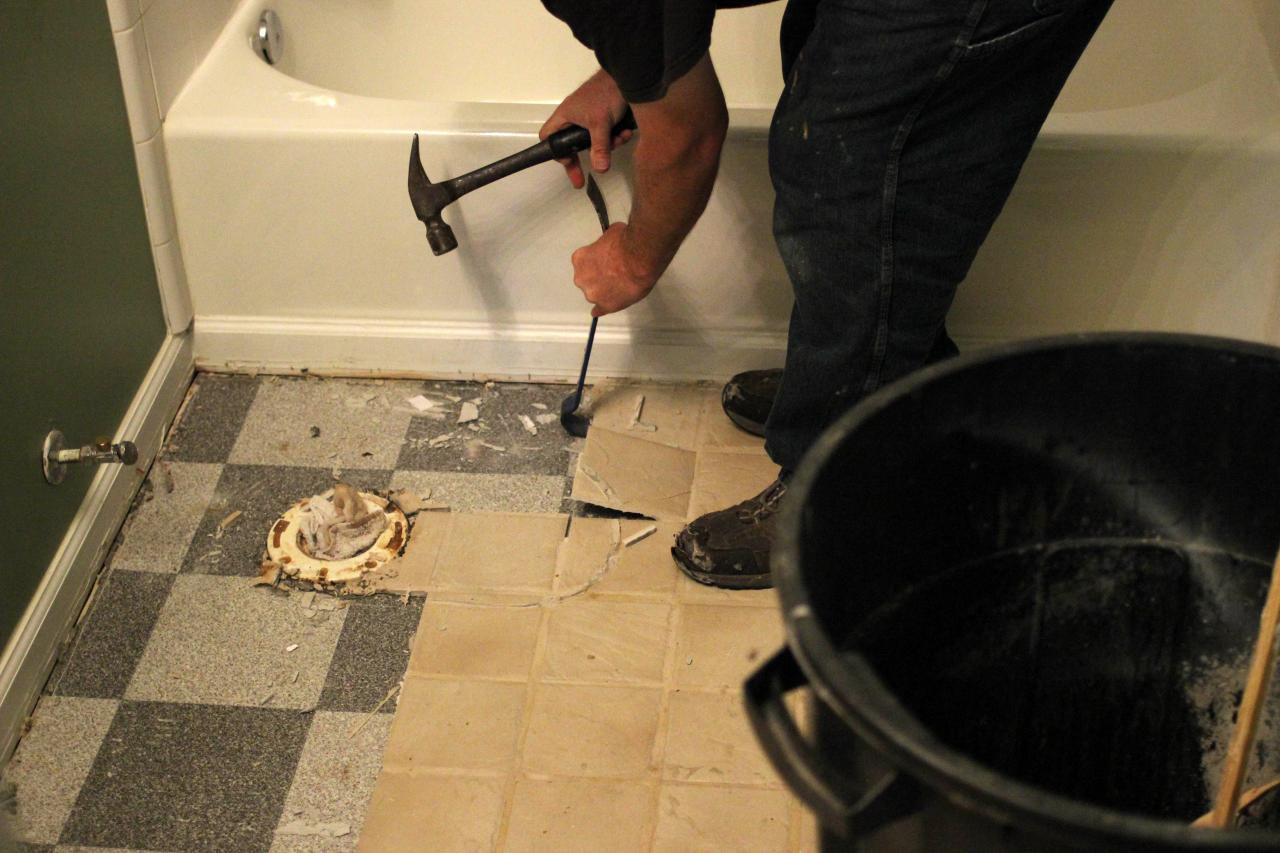
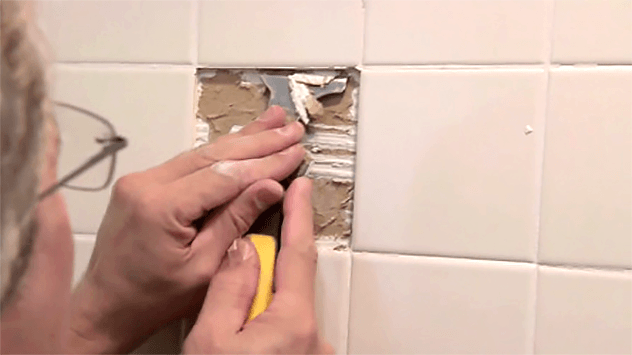
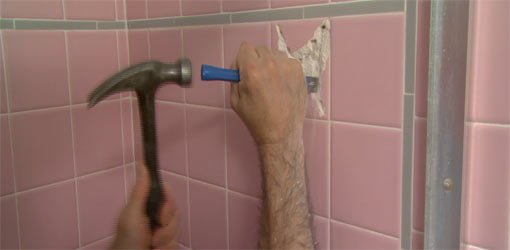
Start with a Test Area: Begin by removing a small section of tiles as a test area to assess the condition of the tiles and the difficulty of removal. Use a hammer and chisel to carefully chip away at the grout and pry up the tiles, taking care not to damage the surrounding tiles or the underlying surface.
Remove the Grout: Once you’ve tested the tiles, start by removing the grout from around the tiles using a grout saw or rotary tool with a grout removal attachment. Work carefully to avoid damaging the surrounding tiles and create clean, straight grout lines.
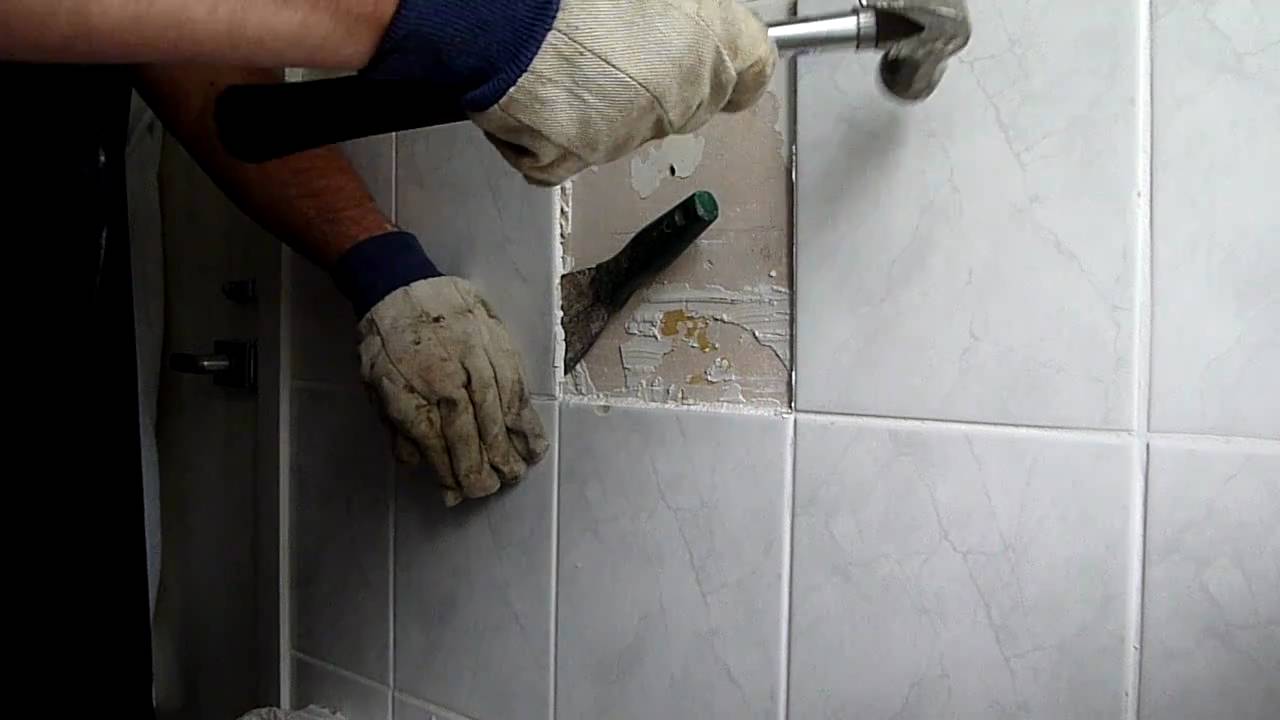
Loosen the Tiles: Use a hammer and chisel or a tile scraper to gently loosen the tiles from the surface. Start at the edges of the tiles and work your way inward, applying gentle pressure to avoid causing damage to the tiles or the underlying surface.
Pry Up the Tiles: Once the grout has been removed and the tiles have been loosened, use a pry bar or flathead screwdriver to pry up the tiles from the surface. Work carefully to avoid damaging the underlying surface and remove the tiles in small sections as needed.
Clean Up Debris: As you remove the tiles, collect any debris and dispose of it properly in a designated container. Use a vacuum cleaner or broom to clean up any remaining dust and debris from the surface and surrounding areas.
Prepare the Surface: Once all the tiles have been removed, use a tile adhesive remover or solvent to soften and dissolve any remaining adhesive or mortar residue on the surface. Scrape away the residue using a putty knife or scraper, and clean the surface thoroughly to prepare it for new tiles.
Inspect the Subfloor: Take this opportunity to inspect the subfloor or wall surface for any damage or unevenness that may need to be addressed before installing replacement tiles. Make any necessary repairs or adjustments to ensure a smooth and level base for the new tiles.
Selecting and Installing Replacement Tiles
Once the old tiles have been removed, it’s time to select and install replacement tiles to refresh the look of your bathroom. By following these tips and guidelines, you can ensure a seamless replacement process and achieve professional-looking results.
Choose the Right Tiles: When selecting replacement tiles, consider factors such as material, size, color, and style to ensure they complement the overall design of your bathroom. Choose tiles that are suitable for use in wet areas such as bathrooms and that meet your aesthetic preferences and budget.
Measure the Space: Before purchasing replacement tiles, measure the space where the tiles will be installed to determine the quantity and size of tiles needed. Take into account factors such as the size of the area, the layout of the space, and any special considerations such as trim pieces or decorative accents.
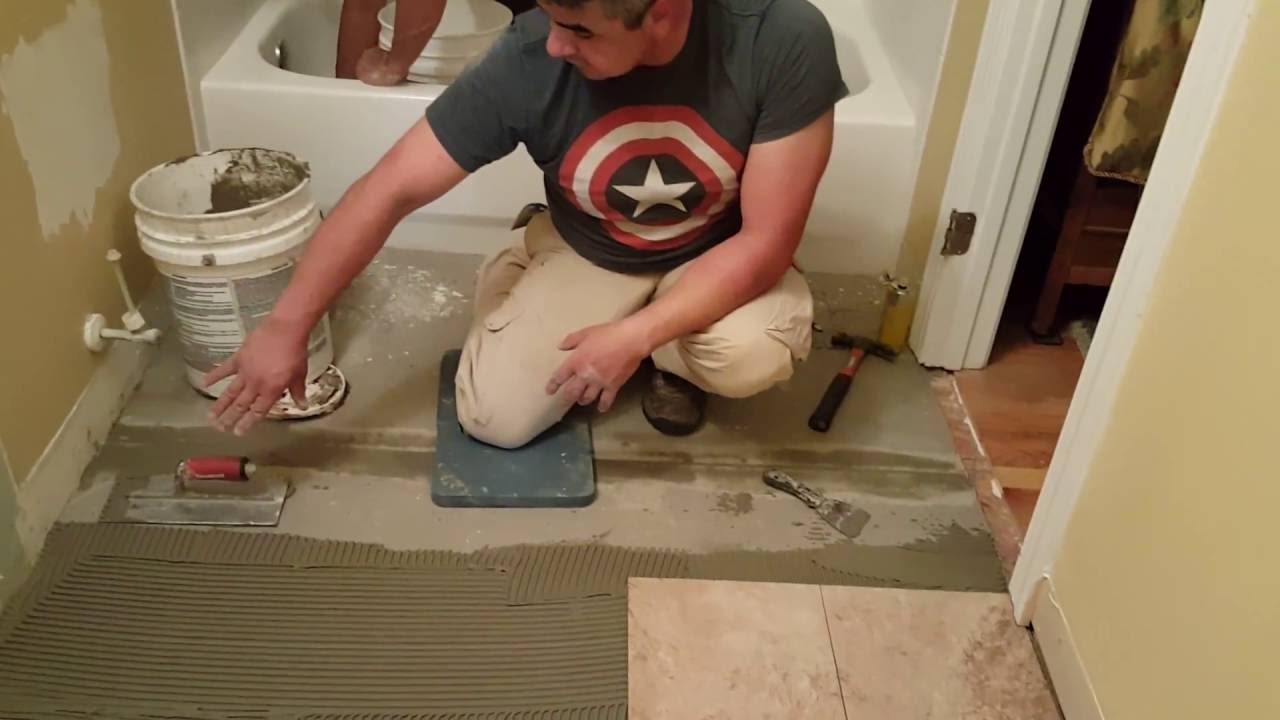
Prepare the Surface: Before installing the replacement tiles, ensure that the surface is clean, dry, and free of any debris or residue from the old tiles. Use a degreaser or cleaning solution to remove any dirt or grime, and sand down any rough or uneven areas to create a smooth and level base for the new tiles.
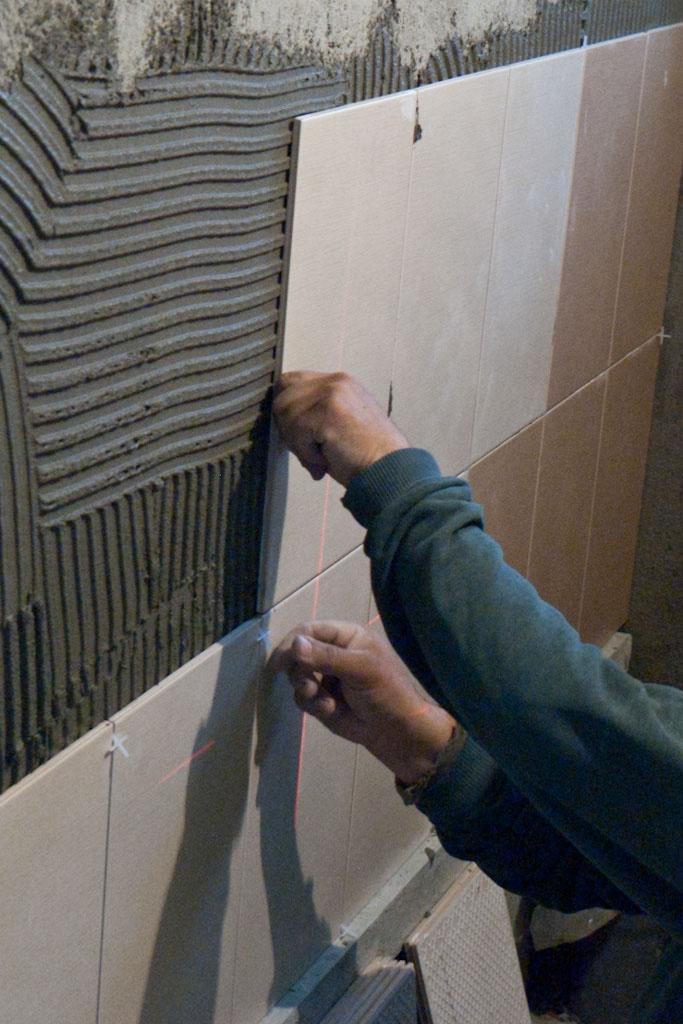
Lay Out the Tiles: Before applying adhesive, lay out the replacement tiles in the desired pattern or layout to ensure a uniform and visually pleasing result. Use spacers to maintain consistent spacing between tiles and create clean, straight grout lines.
Apply Tile Adhesive: Once the tiles are laid out, apply a thin layer of tile adhesive to the surface using a notched trowel. Work in small sections to prevent the adhesive from drying out before the tiles are installed, and be sure to follow the manufacturer’s instructions for proper application and drying times.
Install the Tiles: Carefully place the replacement tiles onto the adhesive, pressing them firmly into place and ensuring that they are aligned correctly with the surrounding tiles. Use a tile spacer to maintain consistent spacing between tiles, and adjust the position of the tiles as needed to achieve a uniform and visually pleasing result.
Grout the Tiles: Once the adhesive has dried, remove the tile spacers and grout the tiles using a grout float or rubber grout trowel. Apply the grout in small sections, working it into the spaces between the tiles and smoothing it out to create clean, straight grout lines.
Clean Up Excess Grout: After grouting, use a damp sponge or cloth to wipe away any excess grout from the surface of the tiles. Rinse the sponge frequently to ensure a clean and uniform finish, and take care not to disturb the grout lines or remove too much grout from between the tiles.
Grouting, Sealing, and Finishing Off Your Newly Tiled Bathroom
Once the replacement tiles have been installed, it’s time to complete the finishing touches to ensure a polished and professional-looking result. By following these final steps, you can grout, seal, and finish off your newly tiled bathroom with confidence.
Grouting the Tiles: After the adhesive has dried, it’s time to grout the tiles to create clean, straight grout lines and seal the spaces between the tiles. Mix the grout according to the manufacturer’s instructions and apply it to the tiles using a grout float or rubber grout trowel, working it into the spaces between the tiles and smoothing it out to create an even finish.
Cleaning Up Excess Grout: Once the grout has been applied, use a damp sponge or cloth to wipe away any excess grout from the surface of the tiles. Rinse the sponge frequently to ensure a clean and uniform finish, and take care not to disturb the grout lines or remove too much grout from between the tiles.
Sealing the Grout: To protect the grout from moisture and staining, it’s important to seal it after it has dried completely. Apply a coat of grout sealer to the grout lines using a small paintbrush or foam brush, working in small sections and wiping away any excess sealer from the surface of the tiles. Allow the sealer to dry completely before using the shower or sink.
Finishing Off: Once the grout has been sealed, take the time to inspect the newly tiled area for any remaining imperfections or areas that may need touch-ups. Use a damp cloth or sponge to clean the tiles remove any remaining dust or residue, and take care to avoid disturbing the grout lines.
Final Touches: With the grout sealed and the tiles clean, it’s time to add the final touches to your newly tiled bathroom. Reinstall any fixtures or accessories that were removed during the tiling process, such as towel bars, soap dishes, or toilet paper holders, and add any finishing touches such as decorative trim or accent tiles to enhance the overall look of the space.

How to Remove Ceramic Wall Tile Without Damaging Drywall

Easy Ways to Replace Bathroom Tiles

Strat to finish Replace old bath tile floor with new porcelain tile
How to Remove & Replace One Bathroom Tile

Replace Bathroom Tiles

How to Remove Old Shower Tile

How to replace old bathroom floor tiles
How to Replace Damaged Shower Surround Tile
How to Remove a Bathroom Wall Tile
Related Posts:


