Choosing the right ceiling light fixture for your bathroom is crucial for both functionality and aesthetics. From understanding the various types of fixtures to selecting the right design style, this guide covers all the essentials you need to know. We’ll explore different types of bathroom ceiling lights, lighting intensity options, energy efficiency, moisture-resistant ratings, design styles, installation processes, dimming capabilities, and proper placement for optimal illumination.
Types of Bathroom Ceiling Lights
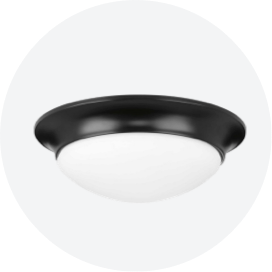
- Flush Mount Lights: These fixtures are mounted directly against the ceiling, making them ideal for bathrooms with low ceilings. They provide even, general lighting and come in various designs to match any decor.
- Semi-Flush Mount Lights: These hang slightly below the ceiling, offering a bit more style and presence than flush mounts. They work well in bathrooms with higher ceilings and can add a touch of elegance.
- Recessed Lights: Also known as can lights or downlights, recessed lights are installed into the ceiling itself, providing a clean, modern look. They are great for providing general lighting and can be strategically placed to highlight specific areas.
- Pendant Lights: These hang from the ceiling on a rod or chain, adding a decorative element to your bathroom. While not typically used as the primary light source, they can add style and focused lighting in certain areas.
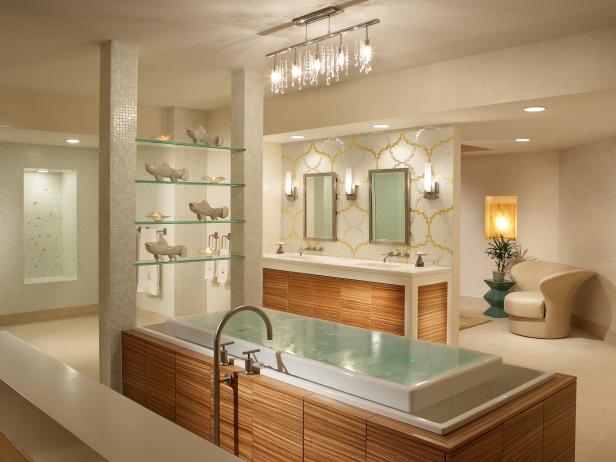
- Chandeliers: For a touch of luxury, consider a chandelier. These fixtures add a dramatic flair and work best in larger bathrooms with high ceilings. They provide both ambient and decorative lighting.
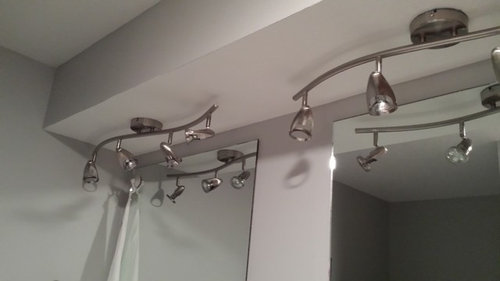
- Track Lighting: This type of lighting features multiple heads that can be adjusted to direct light where it’s needed most. Track lighting is versatile and can be used for both general and task lighting.

Lighting Intensity and Color Temperature Options
The right lighting intensity and color temperature can make a big difference in your bathroom’s ambiance and functionality. Here’s what to consider:
Lighting Intensity: Measured in lumens, lighting intensity refers to the brightness of the light. For general bathroom lighting, aim for 75-100 lumens per square foot. Task areas, like around the vanity, may require higher intensity.
Soft White (2700K-3000K): This color temperature provides a warm, cozy light that is flattering for skin tones. It’s ideal for creating a relaxing atmosphere in the bathroom.
Bright White (3500K-4100K): This range offers a more neutral, vibrant light that is excellent for task lighting. It helps in applying makeup, shaving, or any other detailed tasks.
Daylight (5000K-6500K): Offering a very bright, cool light, this temperature mimics natural daylight. It’s great for bathrooms where precise lighting is needed, but it can be too harsh for general use.
Dimmable Lights: Consider lights with dimming capabilities. This allows you to adjust the intensity based on the time of day or your mood, providing flexibility and energy savings.
Smart Lighting: Smart bulbs and fixtures allow you to control the intensity and color temperature through an app or voice assistant. This can provide customized lighting settings for different times and activities.
Energy Efficiency and LED Technology
Choosing energy-efficient lighting is not only better for the environment but also helps reduce your energy bills. Here’s why LED technology is a popular choice:
LED Lifespan: LED bulbs can last up to 25,000 hours, significantly longer than traditional incandescent or even compact fluorescent bulbs. This means fewer replacements and lower maintenance costs.
Energy Savings: LEDs use up to 75% less energy than incandescent bulbs, making them a cost-effective option. They convert more electricity into light rather than heat, which also makes them safer.
Instant On: Unlike some energy-saving bulbs, LEDs light up instantly to full brightness. This is particularly useful in bathrooms where you need immediate illumination.
Color Temperature Options: LEDs come in a range of color temperatures, allowing you to choose the perfect lighting for your bathroom. They can also be dimmable, offering versatility in creating the desired ambiance.
Eco-Friendly: LEDs are free of toxic elements like mercury, found in some older types of bulbs. This makes them a safer choice for both your home and the environment.
Smart Integration: Many LED lights are compatible with smart home systems, allowing for remote control, scheduling, and automation. This can enhance convenience and further improve energy efficiency.
Moisture-Resistant and Waterproof Ratings
Bathrooms are high-moisture environments, so it’s crucial to choose light fixtures that can withstand humidity and potential water exposure. Here’s what to look for:
Damp Rated: Fixtures with a damp rating are suitable for areas with high humidity, such as bathrooms. They are designed to resist moisture but should not be directly exposed to water.
Wet Rated: For areas where the fixture might be exposed to water, such as above a shower or bathtub, a wet rating is essential. These fixtures are sealed to prevent water ingress and are safe to use in wet conditions.
Ingress Protection (IP) Ratings: IP ratings indicate the level of protection against solids and liquids. For bathroom lighting, look for fixtures with an IP44 rating or higher. The first digit indicates protection against solids, and the second digit against liquids.
Corrosion Resistance: In addition to moisture, bathrooms can have high levels of steam and cleaning chemicals. Choose fixtures made from materials that resist corrosion, such as stainless steel or coated metals.
Sealed Units: Ensure the fixtures are sealed properly to prevent moisture from entering. This not only protects the light itself but also reduces the risk of electrical issues.
Maintenance: Regularly check and clean the fixtures to remove any buildup of moisture or dust. This helps maintain their longevity and ensures they remain safe to use.
Design Styles
The design style of your bathroom light fixtures should complement the overall decor of your space. Here are some popular styles to consider:
Modern: Modern fixtures feature clean lines, and minimalistic design, and often incorporate materials like chrome, glass, and polished metals. They provide a sleek and contemporary look that suits modern bathrooms.
Traditional: Traditional light fixtures often have ornate details, warm finishes like brass or bronze, and classic shapes. They add a timeless elegance to bathrooms with classic or vintage decor.
Industrial: Industrial design incorporates raw materials like metal, wood, and exposed bulbs. These fixtures add a rugged, urban feel and work well in loft-style or contemporary bathrooms.
Rustic: Rustic fixtures often feature natural materials like wood and wrought iron, with a focus on a cozy, farmhouse aesthetic. They add warmth and character to the bathroom.
Transitional: Transitional design blends elements of both traditional and modern styles. These fixtures are versatile and can suit a wide range of bathroom decors, offering a balanced and harmonious look.
Scandinavian: Scandinavian fixtures emphasize simplicity, functionality, and natural materials. They typically feature light wood finishes, white tones, and clean lines, creating a serene and airy atmosphere.
Installation Process and Requirements
Installing bathroom ceiling lights involves several steps and considerations to ensure safety and functionality. Here’s a guide to help you through the process:
Turn Off Power: Before starting any electrical work, turn off the power at the circuit breaker to ensure safety. Use a voltage tester to confirm that the power is off.
Prepare Tools and Materials: Gather the necessary tools and materials, including a ladder, screwdriver, wire stripper, electrical tape, and the new light fixture. Check the fixture’s instructions for any specific tools needed.
Remove Old Fixture: Carefully remove the existing light fixture. Unscrew the fixture from the ceiling, disconnect the wires, and remove any mounting hardware. Keep the screws and brackets if they can be reused.
Install Mounting Bracket: Attach the mounting bracket for the new fixture to the electrical box in the ceiling. Ensure it is securely fastened and can support the weight of the new light.
Connect Wires: Connect the wires from the new fixture to the corresponding wires in the electrical box. Typically, black (or red) wires connect to black, white to white, and green (or bare) to the ground wire. Use wire nuts and electrical tape to secure the connections.
Attach Fixture: Attach the new fixture to the mounting bracket according to the manufacturer’s instructions. Ensure all screws are tight and the fixture is stable. Restore power at the circuit breaker and test the light to ensure it works correctly.
Dimming Capabilities and Smart Lighting Features
Adding dimming capabilities and smart lighting features to your bathroom can enhance functionality and create a customizable ambiance. Here’s how to incorporate these features:
Dimmable Fixtures: Choose light fixtures and bulbs that are compatible with dimmer switches. Dimmable LEDs are a popular choice as they offer energy efficiency and long life.
Dimmer Switches: Install a dimmer switch to control the light intensity. Ensure the switch is compatible with the type of bulbs you are using. Dimmer switches come in various styles, including slide, rotary, and touch.
Smart Bulbs: Replace standard bulbs with smart bulbs that can be controlled via an app or voice assistant. Smart bulbs offer dimming capabilities, color temperature adjustments, and scheduling options.
Smart Switches: If you prefer using standard bulbs, install smart switches. These allow you to control the lights remotely, set schedules, and integrate with other smart home devices.
Voice Control: Integrate your bathroom lighting with voice assistants like Amazon Alexa or Google Assistant. This allows you to control the lights with simple voice commands, adding convenience and accessibility.
Automated Scenes: Set up automated lighting scenes for different times of the day or activities. For example, create a “morning routine” scene with bright, energizing light or a “relaxation” scene with dimmed, warm light.
Proper Placement for Optimal Illumination
Proper placement of bathroom ceiling lights is crucial for achieving optimal illumination and avoiding shadows or glare. Here are some tips for effective lighting placement:
General Lighting: Install a central ceiling light to provide overall illumination for the bathroom. This ensures the entire space is evenly lit and can serve as the primary light source.
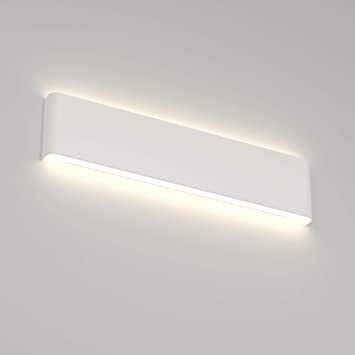
Task Lighting: Add task lighting around the vanity area for activities like shaving, makeup application, and grooming. Use sconces or vertical fixtures on either side of the mirror to minimize shadows.
Shower Lighting: Consider installing a recessed light above the shower or bathtub area. Ensure it has a wet rating for safety. This provides focused lighting and enhances visibility in the shower.
Accent Lighting: Use accent lighting to highlight architectural features or decorative elements in the bathroom. This can include LED strips under cabinets, around mirrors, or along the baseboards.
Night Lighting: Install low-level lighting for nighttime use. This can include motion-activated LED strips or dimmable lights that provide enough illumination for safe navigation without disturbing sleep.
Layered Lighting: Combine different types of lighting to create a layered effect. Use a mix of general, task, and accent lighting to achieve a balanced and functional lighting scheme in the bathroom.
Bathroom Lighting Fixtures
Related Posts:
- Modern Bathroom Lights Over Mirror
- Rust Proof Bathroom Light Fixtures
- Bathroom Light With Bluetooth Speaker
- 2 Pin Bathroom Light Bulb
- Brushed Chrome Bathroom Light Fixtures
- Bathroom Light Fixtures Gold
- Bathroom Light Over Sink
- Ip65 Led Bathroom Lighting
- Vintage Looking Bathroom Light Fixtures
- Waterproof Bathroom Light Fittings


