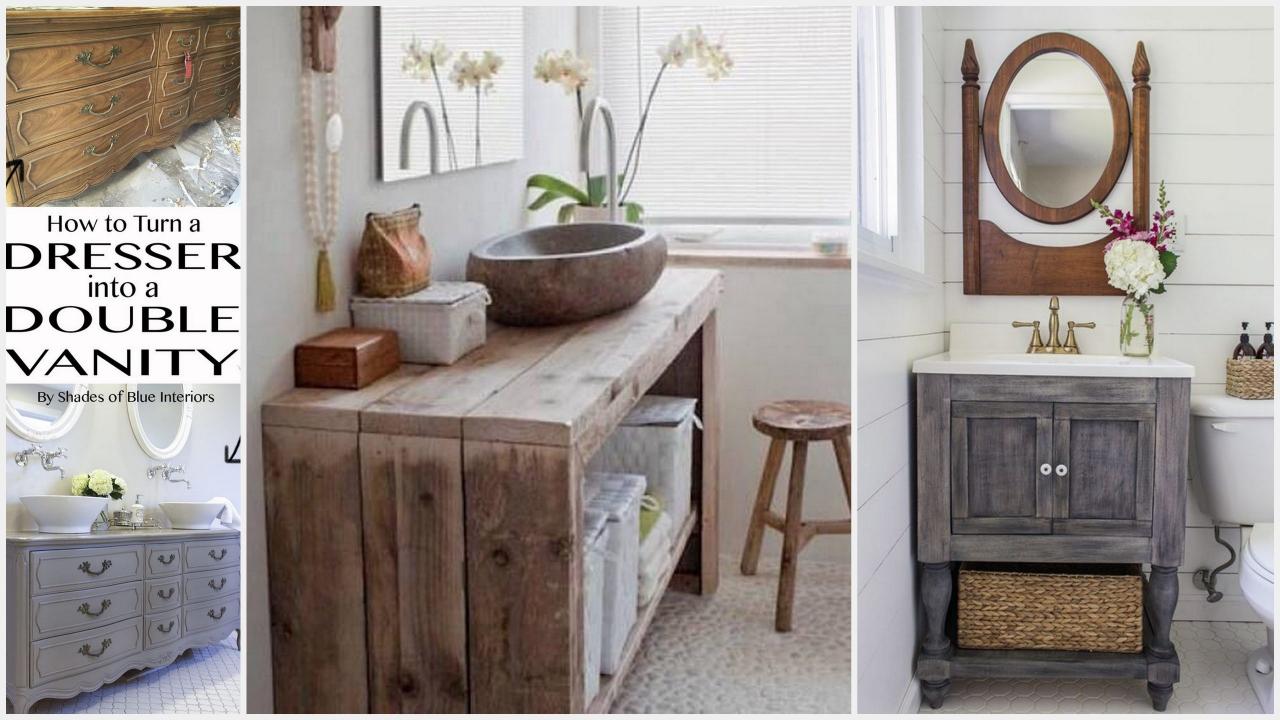
Repurposed Furniture as a Budget-Friendly Vanity
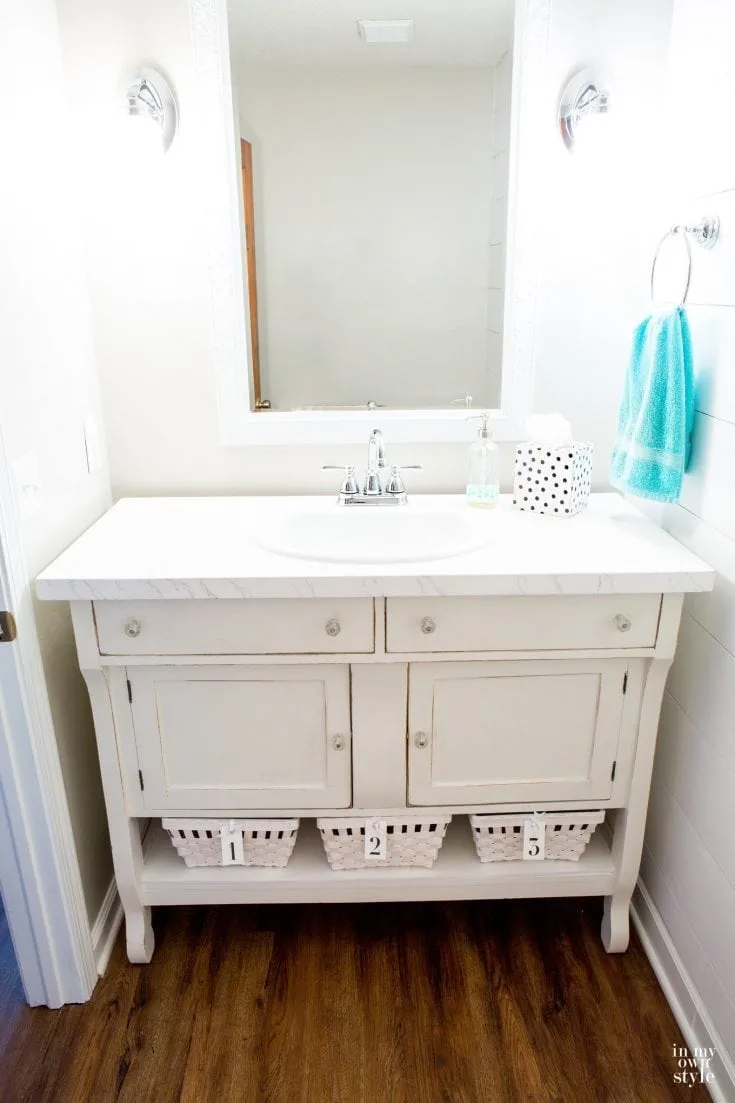
One of my favorite ways to create a bathroom vanity on a budget is by repurposing old furniture. It’s not only cost-effective, but it also adds a unique, personalized touch to the bathroom. The possibilities are endless, from using an old dresser to converting a vintage table. Here’s how you can turn that old furniture piece into a beautiful bathroom vanity.
- Find the Perfect Piece: The first step is finding the right piece of furniture to repurpose. I usually start by looking at thrift stores, flea markets, or even my garage for old furniture that could work. Dressers, desks, or console tables are great options because they already have drawers or storage. When choosing a piece, I make sure it fits the bathroom space and can hold a sink or countertop.
- Customize to Fit Your Style Once you’ve found your furniture, it’s time to customize it to match your bathroom’s style. Whether it’s sanding it down to expose natural wood, painting it a bold color, or distressing it for a rustic look, this is your chance to get creative. I love painting old dressers in soft pastel colors for a vintage vibe, but you can choose whatever works for your space.
- Cut Holes for Plumbing: One of the trickiest parts of turning furniture into a vanity is making room for the sink and plumbing. I recommend measuring carefully before cutting. For my repurposed dresser vanity, I used a jigsaw to cut a hole in the top for the sink and in the back of the pipes. It sounds complicated, but it’s just about patience and precision.
- Add a Countertop: You can either keep the original top of the furniture piece or replace it with a new countertop. I’ve found that marble or stone remnants work well and can often be found at a discount. If you’re looking to save even more, you can go for laminate or butcher block. In one project, I used a butcher block top, sealed it well, and it turned out beautifully.
- Update the Hardware: Sometimes all it takes to completely transform an old piece of furniture is updating the hardware. I like to swap out old knobs or handles with new, modern ones. For a vintage look, I’ve used antique brass pulls, while for a more contemporary feel, sleek matte black handles work wonders. This small change makes a big difference.
- Seal the Wood: Bathrooms are humid environments, so it’s important to protect your repurposed furniture from moisture. I always apply a waterproof sealant to the wood to prevent damage over time. This step not only protects the vanity but also keeps it looking fresh and new for years to come.

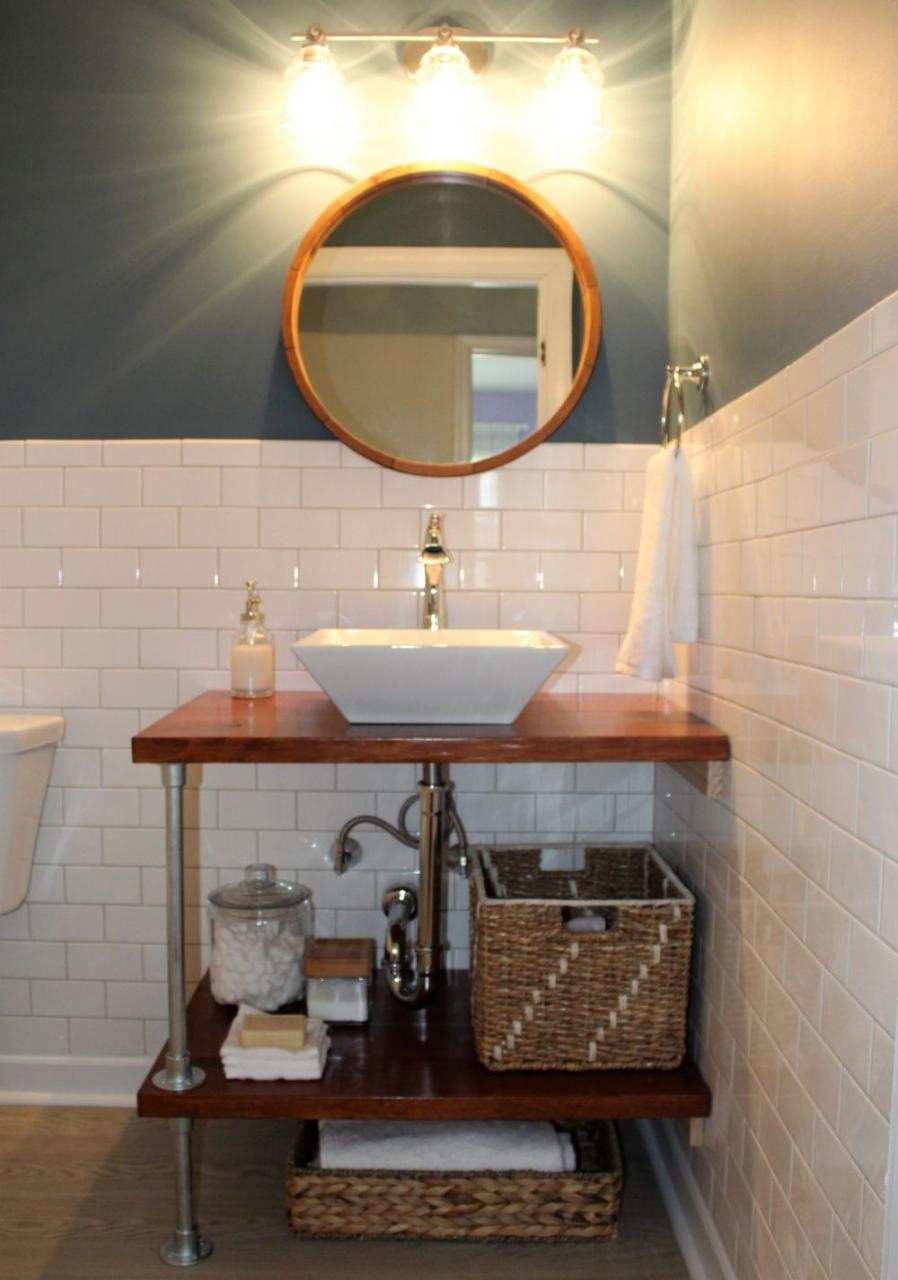
DIY Floating Vanity Shelves for Small Spaces
When space is tight, floating vanity shelves can be the perfect solution. They offer the same functionality as a traditional vanity but with a more open and airy feel. Plus, floating shelves are budget-friendly and relatively easy to install. Here’s how I’ve created my own floating vanity shelves for a small bathroom space.
Choose the Right Wood
The first thing to decide when building floating shelves is what type of wood you want to use. I typically go for solid wood, like oak or pine, because it’s sturdy and looks great. If you’re on a strict budget, you can also opt for plywood or reclaimed wood. I love using reclaimed wood because it’s affordable and adds character to the space.
Measure Your Space
Before cutting any wood, I always measure the space carefully. You want to ensure that the shelves fit perfectly and leave enough room for a sink and faucet. I like to keep the shelves at least 24 inches wide to accommodate the essentials, but you can adjust the width and depth based on your needs.
Install the Brackets
To ensure the shelves are sturdy, it’s important to use heavy-duty brackets. I prefer hidden brackets that make the shelves appear to float. These can be found at most hardware stores and are relatively easy to install. I make sure to attach the brackets to the wall studs for maximum support, especially since the shelf will hold a sink and toiletries.
Stain or Paint the Shelves
Once the shelves are cut and installed, it’s time to finish them. I’ve stained floating shelves to give them a rich, warm tone, or painted them white for a clean, modern look. Either way, I always seal the wood with a waterproof finish to protect it from moisture in the bathroom.
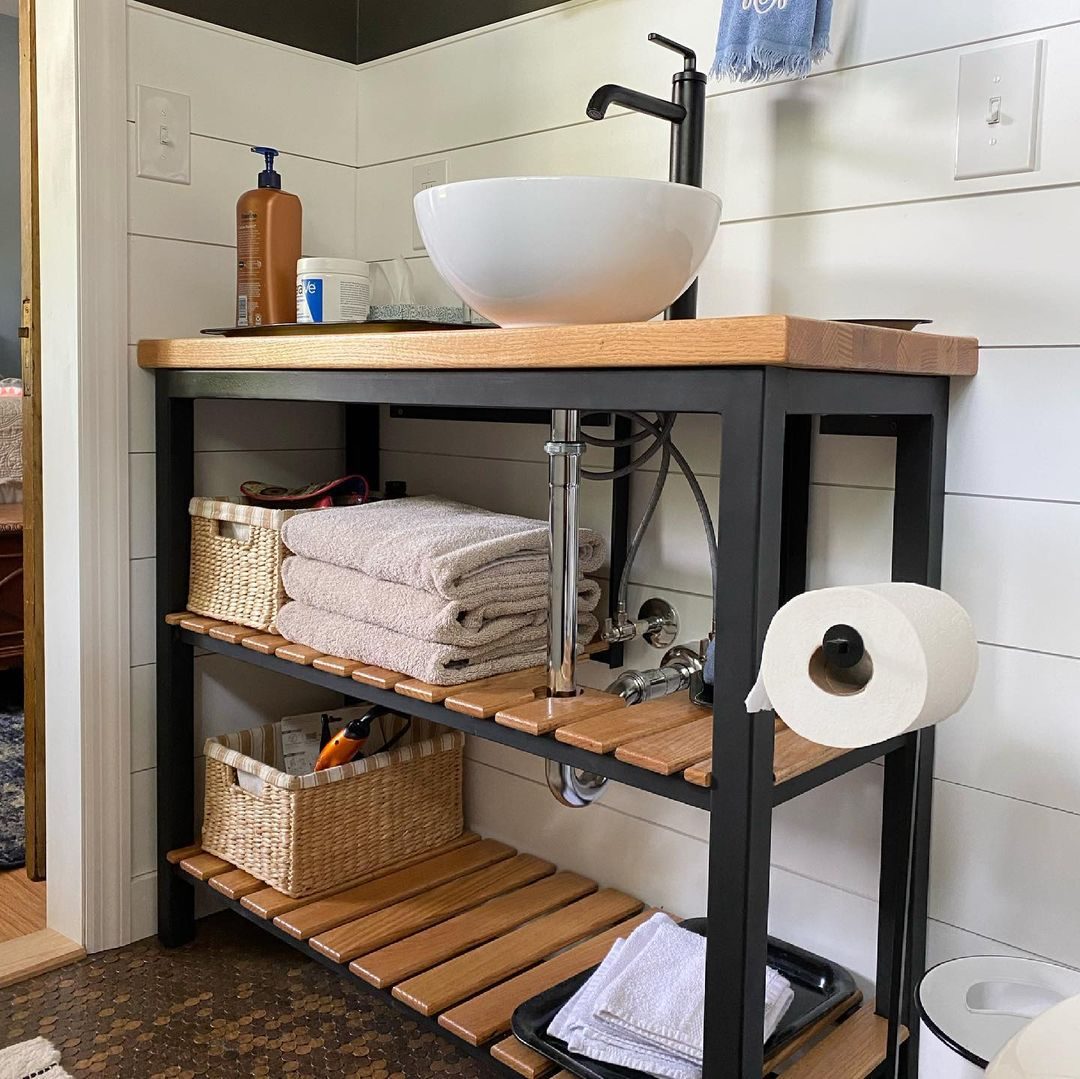
Add a Vessel Sink
For a stylish and space-saving option, I love pairing floating shelves with a vessel sink. Vessel sinks sit on top of the shelf rather than being recessed, which not only looks modern but also saves space. There are affordable vessel sinks available in a variety of materials like glass, ceramic, or stone, so you can find one that fits your style and budget.
Maximize Storage
While floating shelves don’t offer the same storage as a traditional vanity, I like to get creative with storage solutions. I’ve used baskets or bins underneath the shelves to store towels and toiletries. You can also hang hooks or small shelves on the wall for extra storage, making the most of the limited space.
Upcycling Old Cabinets into Stylish Vanities
One of my go-to budget vanity ideas is upcycling old cabinets. You can easily transform an outdated cabinet into a stylish bathroom vanity with just a little creativity. It’s a great way to give new life to an old piece and save money in the process. Here’s how I’ve upcycled cabinets into chic vanities for a fraction of the cost.
Find an Old Cabinet
The first step is finding an old cabinet that’s the right size for your bathroom. I’ve found some great options at thrift stores, garage sales, or even online marketplaces. Look for a cabinet with solid construction, even if the style or color isn’t perfect. I’ve learned that a little paint can go a long way in transforming the look.
Sand and Prep the Cabinet
Before making any changes, I always sand the cabinet to remove any old paint or varnish. This creates a smooth surface for painting or staining. I also remove the cabinet doors and hardware to make it easier to work on. Prepping the cabinet properly is key to getting a professional-looking finish.
Paint or Stain the Cabinet
Once the cabinet is prepped, it’s time to paint or stain it. I love using bold paint colors like navy blue or emerald green to give the vanity a modern look. For a more rustic feel, I’ve stained the wood in a rich, dark tone. Whatever finish you choose, be sure to seal it to protect the cabinet from moisture.
Add a Countertop
If the cabinet doesn’t already have a countertop, you can easily add one. I’ve used inexpensive laminate countertops for a budget-friendly option, or you can go for something more luxurious like quartz or marble if you find a remnant piece. Adding a new countertop instantly updates the look of the cabinet and makes it feel like a custom piece.
Update the Hardware
Swapping out the hardware is another easy way to upgrade an old cabinet. I’ve replaced outdated knobs with modern brass pulls or even used vintage hardware for a more eclectic look. Changing the hardware is a quick and inexpensive way to give the cabinet a fresh, updated feel.
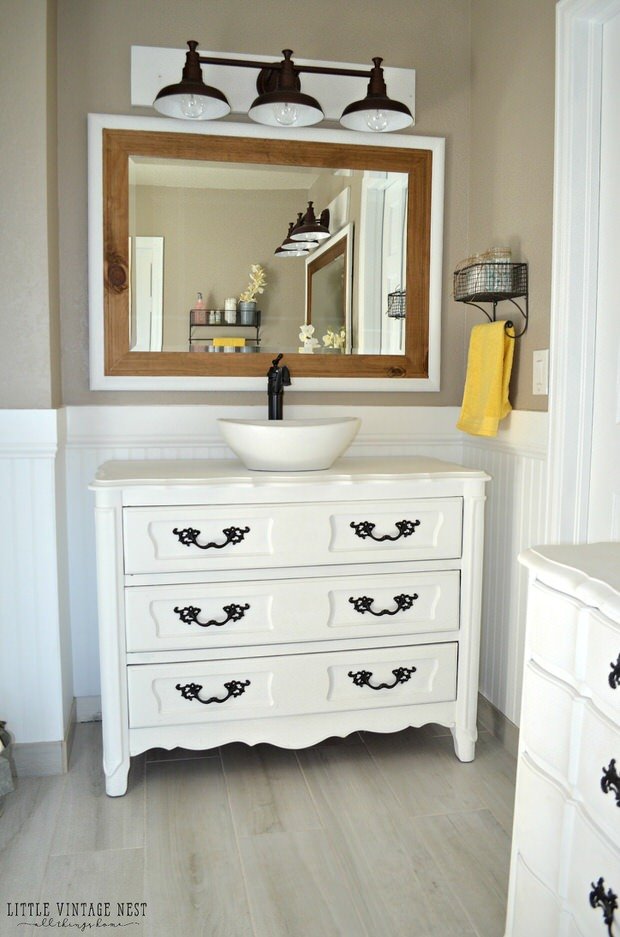
Install a Sink and Faucet
Finally, you’ll need to cut a hole in the cabinet for the sink and faucet. I’ve found that vessel sinks work well for upcycled cabinets because they sit on top of the countertop, reducing the amount of cutting required. Choose a faucet that complements the style of your cabinet, and you’ll have a one-of-a-kind vanity at a fraction of the cost.
Affordable Ready-to-Assemble (RTA) Vanity Kits
If you’re looking for a budget-friendly vanity that’s easy to install, ready-to-assemble (RTA) kits are a fantastic option. I’ve used these kits in several bathroom remodels, and they offer a lot of value for the price. Here’s what I’ve learned about choosing and assembling RTA vanity kits for an affordable bathroom update.
Choose the Right Kit for Your Space
The first thing I do when selecting an RTA vanity kit is measure my bathroom space. These kits come in a variety of sizes, so it’s important to choose one that fits your space and storage needs. I’ve seen options ranging from small vanities perfect for powder rooms to larger double vanities for a master bathroom.
Consider the Style and Finish
RTA vanity kits come in many different styles and finishes, so it’s easy to find one that matches your bathroom décor. I’ve chosen sleek white vanities for a modern look, as well as wood-finished options for a more traditional feel. Many kits also include matching countertops and sinks, which can save even more money.
Easy Assembly
One of the best things about RTA vanity kits is that they’re designed for easy assembly. Even if you’re not a DIY expert, the instructions are usually straightforward. I’ve been able to put together these vanities with just a few basic tools in a matter of hours. It’s a quick and affordable way to update your bathroom without hiring a professional.
Customization Options
While RTA kits are ready to assemble, there’s still room for customization. I’ve swapped out the included hardware for something more unique, or added a custom countertop for a more personalized look. You can also paint the vanity if you want to change the color. These kits are a great base for creating a customized bathroom vanity on a budget.
Affordable Countertop Options
Many RTA vanity kits come with a pre-installed countertop, but you can also choose your own. I’ve used laminate countertops as a budget-friendly option, but you can also find affordable stone or quartz remnants at local fabricators. A new countertop can make even a basic vanity feel more luxurious.
Storage and Functionality
RTA vanities come with a variety of storage options, from cabinets to drawers. I’ve chosen kits with plenty of storage for toiletries and towels, which helps keep the bathroom organized and clutter-free. Some vanities also include built-in open shelving, which can be a stylish way to display towels or decorative items.
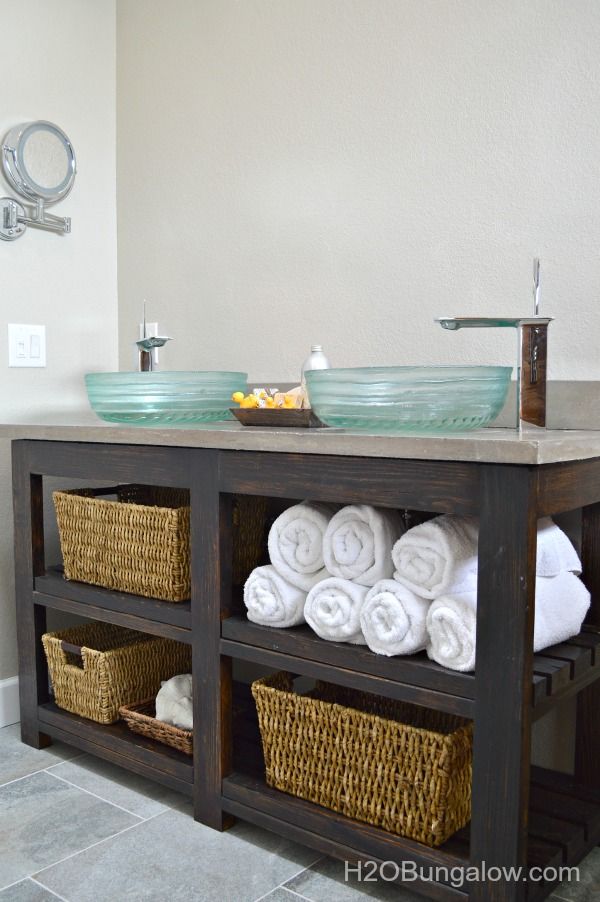
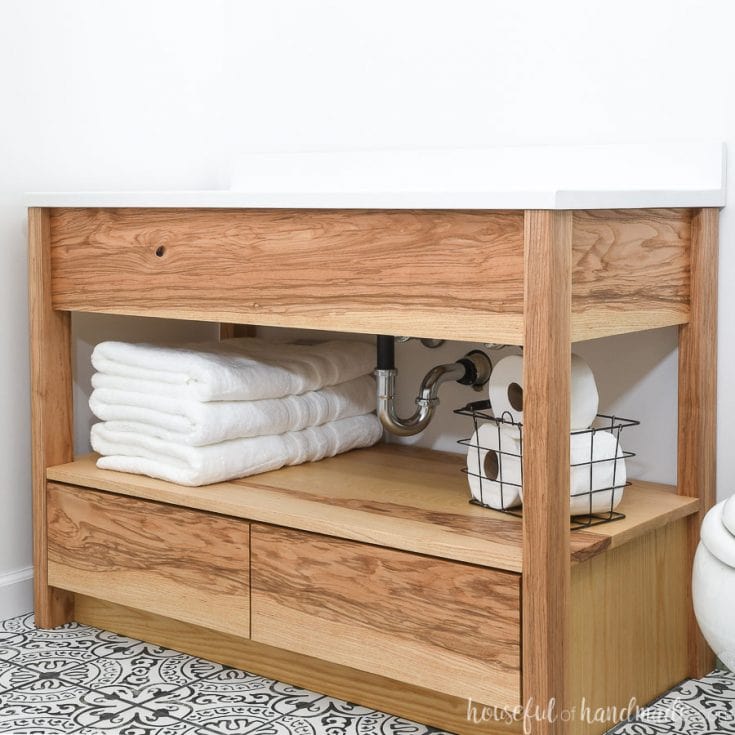
Using Open Shelving for a Minimalist Vanity Look
Open shelving is one of the simplest and most affordable ways to create a minimalist vanity. I’ve used this approach in small bathrooms where space is at a premium, and it’s both functional and stylish. Here’s how you can create a minimalist vanity using open shelving on a budget.
Choose Simple Shelving
The key to a minimalist look is keeping things simple. I like to use basic wooden shelves, either painted white or left natural. Floating shelves are a great option because they don’t take up much visual space and create a clean, uncluttered look. I’ve also used metal brackets for an industrial vibe, but you can choose whatever suits your bathroom’s style.
Maximize Vertical Space
In a small bathroom, I’ve found that maximizing vertical space is essential. Installing shelves above the sink or toilet can create additional storage without taking up valuable floor space. I’ve even used narrow shelves that fit into tight corners for added functionality. The key is to make the most of every inch without overcrowding the space.
Keep It Minimal
A minimalist vanity means keeping clutter to a minimum. I usually keep just the essentials on the open shelves, like hand soap, a toothbrush holder, and a few neatly folded towels. You can also use small baskets or bins to keep items organized while maintaining a clean look. I’ve learned that less is more when it comes to minimalist design.
Add Decorative Elements
Just because the shelves are functional doesn’t mean they can’t be beautiful too. I like to add a few decorative elements like small plants, candles, or a framed mirror to soften the look. These accents bring warmth to the space without making it feel cluttered. I’ve found that balancing function with aesthetics is key to creating a minimalist vanity that still feels inviting.
Use Neutral Colors
To keep the space feeling light and airy, I always stick to neutral colors when designing a minimalist vanity. White, gray, and natural wood tones create a calm, serene atmosphere. In one project, I used white shelves with black metal brackets for a modern, monochrome look. It’s amazing how much a simple color palette can elevate a space.
Affordable and Stylish
One of the best things about open shelving is that it’s incredibly affordable. I’ve found shelves at home improvement stores for a fraction of the cost of a traditional vanity, and the installation is easy enough to do on your own. This makes open shelving a great option if you’re looking for a budget-friendly, minimalist bathroom vanity.
Second-Hand Finds: Thrift Store Vanity Makeovers
Thrift stores are a goldmine when it comes to finding budget-friendly vanity solutions. I’ve found some of my favorite bathroom vanities by shopping second-hand and giving them a little makeover. Here’s how you can turn thrift store finds into stunning bathroom vanities.
Hunting for the Perfect Piece
The first step in a thrift store makeover is finding the right piece. I always keep an open mind and look for solid wood furniture that can be transformed. In the past, I’ve found dressers, tables, and even old cabinets that work perfectly as vanities. The key is looking past the worn exterior and seeing the potential.
Clean and Prep the Furniture
Once I’ve brought my thrift store find home, the first thing I do is give it a good cleaning. I wipe down the furniture with a mild cleaner to remove any dirt or grime. If the piece has any scratches or dents, I’ll sand them down to create a smooth surface. Prepping the furniture is essential before making any cosmetic changes.
Paint or Stain for a Fresh Look
One of the easiest ways to update a thrift store find is by giving it a fresh coat of paint or stain. I love using bold colors to make the vanity stand out, or sometimes I’ll go for a classic white or gray for a more subtle look. I always use a durable, moisture-resistant paint to protect the vanity from bathroom humidity.
Swap Out the Hardware
Sometimes all it takes to update an old piece is new hardware. I’ve replaced outdated knobs and pulls with modern brass or matte black hardware for an instant refresh. It’s amazing how a small change like swapping the handles can make a thrift store find look high-end.
Add a Countertop
If the thrift store piece doesn’t have a countertop, you can easily add one. I’ve used butcher blocks, stone remnants, or even tile to create a unique countertop on a budget. In one project, I found a marble remnant for a steal and used it to top a vintage dresser. It completely transformed the piece into a stunning vanity.
Thrift Store Vanity Success
In the end, I’ve found that thrift store vanity makeovers are not only affordable but also incredibly rewarding. There’s something special about taking an old, forgotten piece of furniture and turning it into a beautiful, functional part of your bathroom. Plus, it’s a great way to save money and add personality to your space.
Paint and Hardware Updates for a Budget Vanity Refresh
If your bathroom vanity is in good condition but just needs a little refresh, a simple paint and hardware update can make all the difference. I’ve done this with several of my vanities, and it’s one of the most affordable ways to give your bathroom a makeover. Here’s how you can update your vanity with just a few easy changes.
Choose a New Paint Color
The easiest way to refresh a vanity is by giving it a fresh coat of paint. I love experimenting with bold colors like navy blue, forest green, or even black for a dramatic look. If you prefer something more subtle, soft neutrals like white, gray, or beige work beautifully. I always choose a durable, moisture-resistant paint to protect the vanity from bathroom humidity.
Prep the Vanity for Painting
Before painting, I always prep the vanity by cleaning it thoroughly and lightly sanding the surface. This ensures that the paint adheres well and gives a smooth finish. If the vanity has any dents or scratches, I’ll fill them with wood filler before sanding to create an even surface. Taking the time to prep the vanity properly makes a big difference in the final result.
Paint with Precision
When it comes to painting the vanity, I like to use a small roller for the larger flat surfaces and a brush for the smaller, more detailed areas. Applying thin, even coats of paint helps avoid drips and gives a smooth, professional finish. I’ve found that two coats are usually enough to get a solid, even color, but it depends on the type of paint you’re using.
Update the Hardware
While the paint dries, I usually start updating the hardware. Swapping out old knobs and pulls for new ones is a quick and easy way to modernize the vanity. I’ve used brass hardware for a touch of glam, matte black for a contemporary look, and even vintage-style pulls for a more eclectic feel. It’s amazing how new hardware can completely change the look of the vanity.
Add a New Faucet
If you’re looking to go a step further, replacing the faucet is another great way to update your vanity. I’ve found affordable faucets at home improvement stores that look sleek and modern without breaking the bank. Whether you choose a classic chrome finish or something trendier like matte black or gold, a new faucet can elevate the entire look of your vanity.
Budget-Friendly Refresh
In the end, updating your vanity with paint and hardware is one of the most budget-friendly ways to give your bathroom a fresh look. It’s a quick weekend project that can make a huge difference in the overall style of your space. I’ve done this on several vanities, and it’s always amazing how a little paint and new hardware can completely transform the look without spending a fortune.

DIY Bathroom Vanity Ideas
Creative DIY Bathroom Vanity Projects
Related Posts:
- 6 Drawer Bathroom Vanity
- Antique Bathroom Vanity Set
- Master Bathroom Vanity Mirrors
- Kokols 23 Bathroom Vanity Set
- Bathroom Vanity Splashback Ideas
- 36 Bathroom Vanity With Drawers
- Kraftmaid Bathroom Vanity Catalog Pdf
- Bathroom Vanities Kansas City
- Vintage Style Bathroom Vanity Lights
- Homemade Bathroom Vanity Ideas


