Understanding the American Standard Bathroom Faucet Cartridge
The American Standard bathroom faucet cartridge is a critical component of your faucet’s functionality. Understanding its function and importance is essential for maintaining a well-functioning bathroom faucet. Let’s talk about the details of the American Standard bathroom faucet cartridge, explaining its role and why it is crucial to your faucet’s performance.
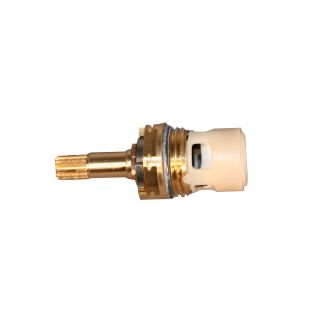
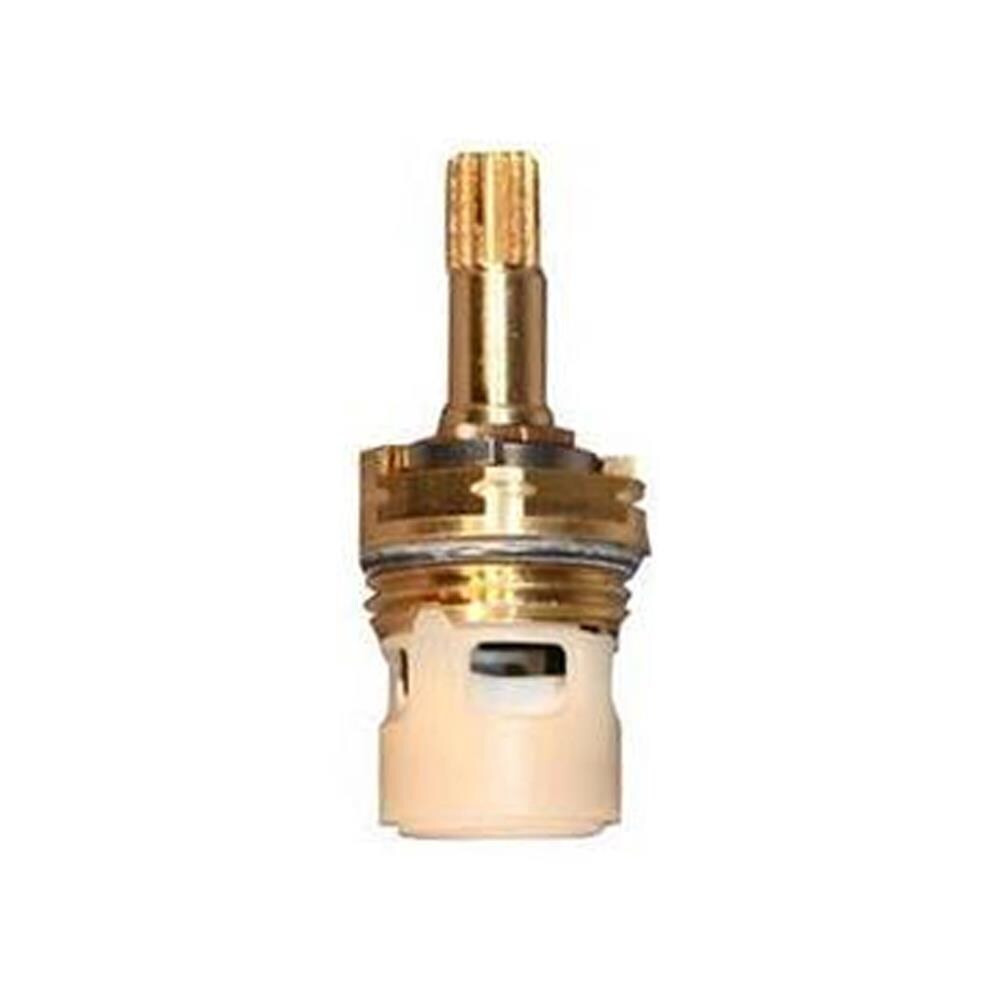
- What is the American Standard Bathroom Faucet Cartridge? The American Standard bathroom faucet cartridge is a valve mechanism responsible for controlling the flow of water in your faucet. It acts as the internal control system that allows you to adjust the water temperature and regulate water flow. This cartridge is designed to withstand regular use and ensure a smooth operation for years to come.
- The Importance of a Well-Functioning Cartridge: A properly functioning American Standard bathroom faucet cartridge ensures a consistent water flow and temperature, allowing you to enjoy a comfortable and convenient experience. A faulty or worn-out cartridge can lead to issues such as leaks, inconsistent water flow, or difficulty in adjusting the water temperature. To avoid these problems, it is essential to understand the signs of a malfunctioning cartridge and replace it promptly.
- Signs of a Malfunctioning Cartridge: There are a few common signs that indicate a malfunctioning American Standard bathroom faucet cartridge. These include leaking or dripping faucets, inconsistent water flow, difficulty in turning the faucet handle, or sudden changes in water temperature. If you notice any of these signs, it is likely time to replace your cartridge.
- The Process of Replacing the Cartridge: Replacing the American Standard bathroom faucet cartridge may seem like a daunting task, but with the right knowledge and tools, it can be a straightforward process. In the next section, we will provide you with a step-by-step guide on removing the old cartridge from your faucet, selecting the right replacement cartridge, and installing it correctly.
Removing the Old Cartridge from Your American Standard Bathroom Faucet
If you’ve noticed signs of a malfunctioning American Standard bathroom faucet cartridge, it’s time to replace it. Removing the old cartridge is the first step in this process. Follow this detailed step-by-step guide on how to remove the old cartridge from your American Standard bathroom faucet, ensuring a smooth and successful replacement.
Gather the Necessary Tools: Before starting the removal process, gather the necessary tools to make the job easier. You will typically need an adjustable wrench, pliers, and a cartridge removal tool specific to your faucet model. It’s important to have these tools readily available before beginning the process.
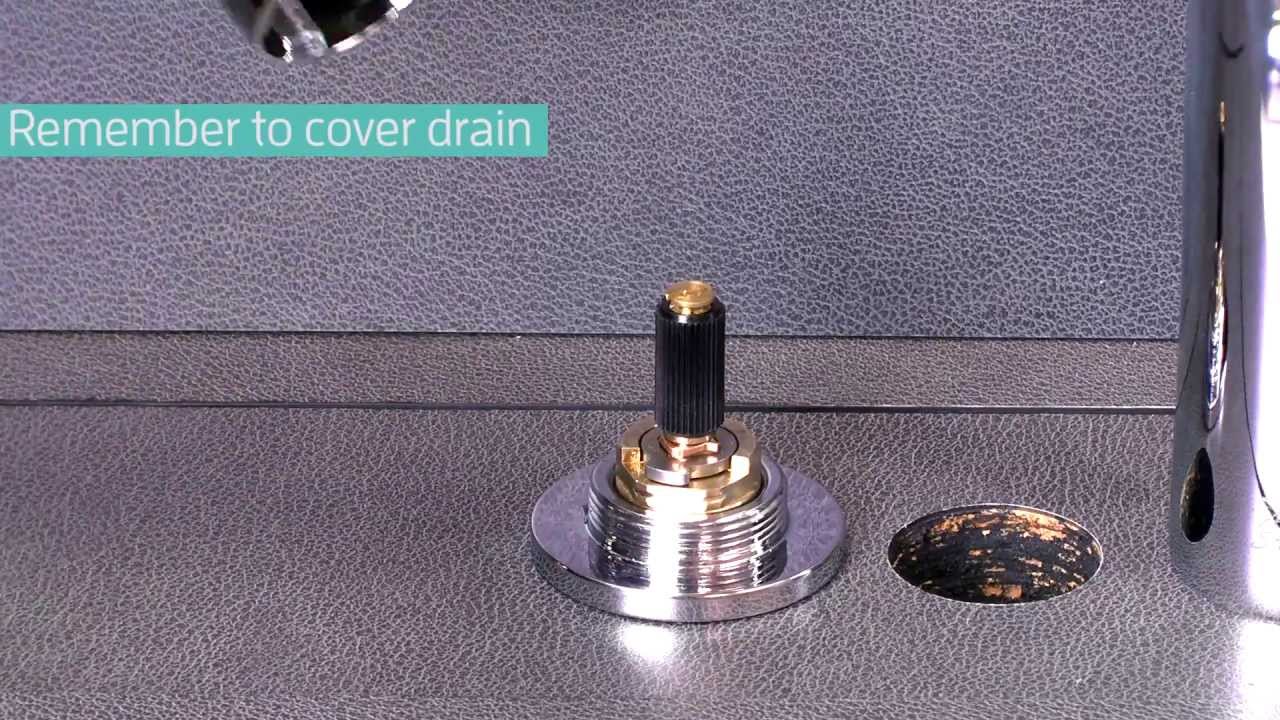
Shut Off the Water Supply: Before removing the cartridge, it’s crucial to turn off the water supply to your faucet. Locate the shut-off valves under the sink and turn them clockwise to shut off the water flow. Once the water is turned off, open the faucet handles to release any remaining water pressure.
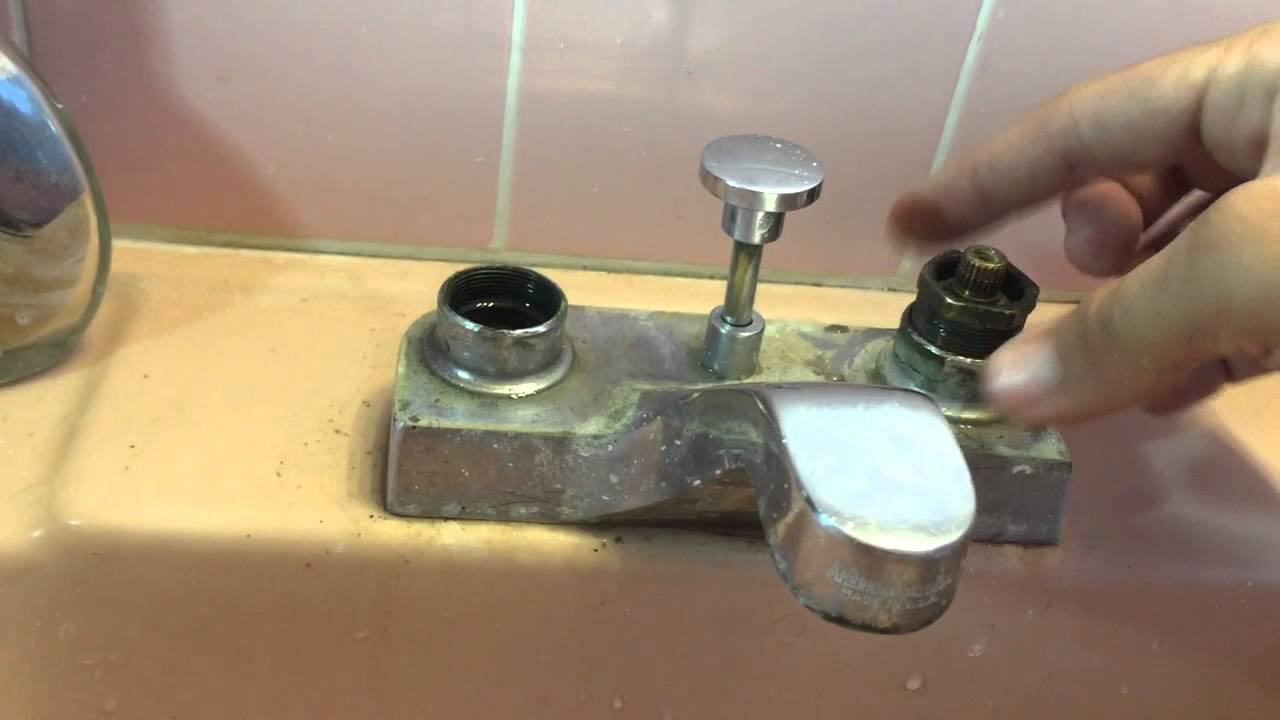
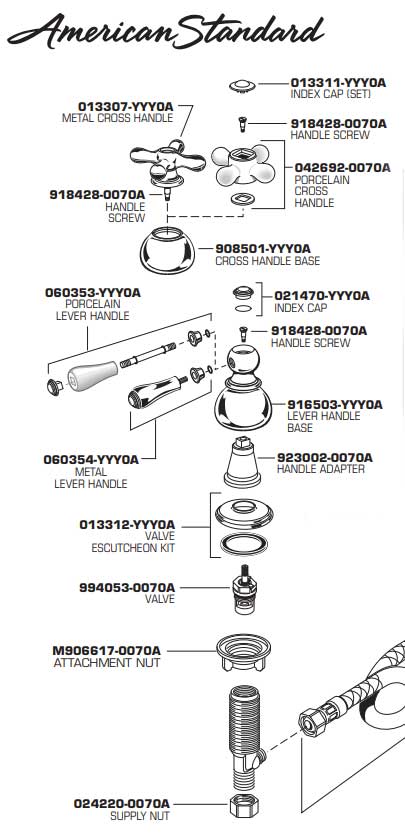
Remove the Handle and Trim: To access the cartridge, you’ll need to remove the handle and trim. Look for a small set screw on the handle base and use an Allen wrench to loosen and remove it. Once the set screw is removed, you should be able to lift the handle off. Next, remove the trim by unscrewing it counterclockwise or prying it off gently with a flathead screwdriver.
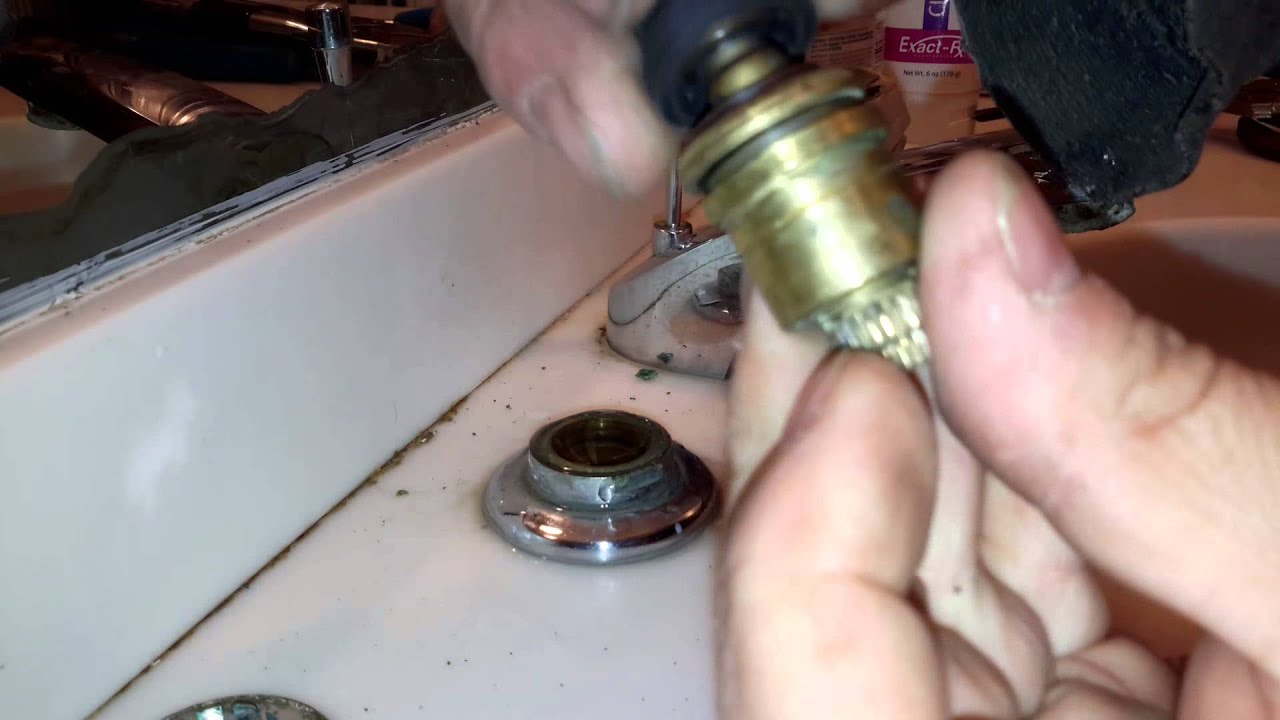
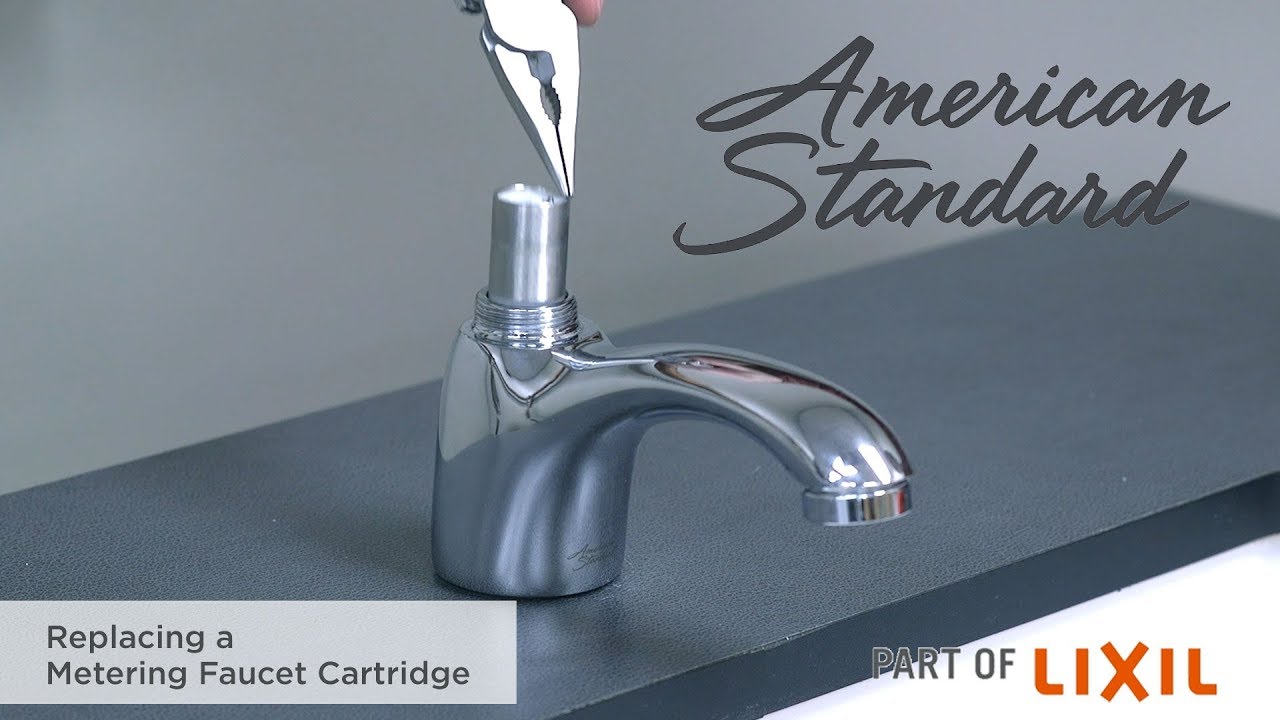
Remove the Cartridge: With the handle and trim removed, you can now access the cartridge. Depending on your faucet model, you may need to use pliers or a cartridge removal tool to twist and pull out the cartridge. Follow the manufacturer’s instructions or consult the user manual for your specific faucet model to ensure you remove the cartridge correctly.
Inspect and Clean: Once the old cartridge is removed, take a moment to inspect it for any signs of damage or wear. Additionally, clean the cartridge housing and surrounding area to remove any debris or mineral buildup. This step will help ensure a proper installation of the new cartridge.
Replace the Cartridge: After inspecting and cleaning the cartridge housing, it’s time to replace the old cartridge with a new one. Refer to the manufacturer’s instructions or consult the user manual for your faucet model to ensure you install the new cartridge correctly. Insert the new cartridge into the housing, making sure it is aligned properly. Use the reverse process of removing the cartridge to secure it in place.
Selecting the Right Replacement Cartridge for Your American Standard Bathroom Faucet
Selecting the right replacement cartridge for your American Standard bathroom faucet is essential for a successful faucet repair or replacement. With numerous options available in the market, it’s important to choose a cartridge that matches your faucet model and meets your specific requirements. Below we provide you with a comprehensive guide on how to select the right replacement cartridge for your American Standard bathroom faucet.
Identify Your Faucet Model: The first step in selecting the right replacement cartridge is to identify your faucet model. This information can usually be found on the faucet itself or in the user manual that came with your faucet. Note down the model number, as this will help you find the appropriate cartridge for your specific faucet.
Check the Cartridge Type: American Standard bathroom faucets use different types of cartridges, such as ceramic disc cartridges or compression cartridges. It’s important to determine which type your faucet requires to ensure compatibility. Refer to the manufacturer’s instructions or consult the user manual for your faucet model to determine the cartridge type needed.
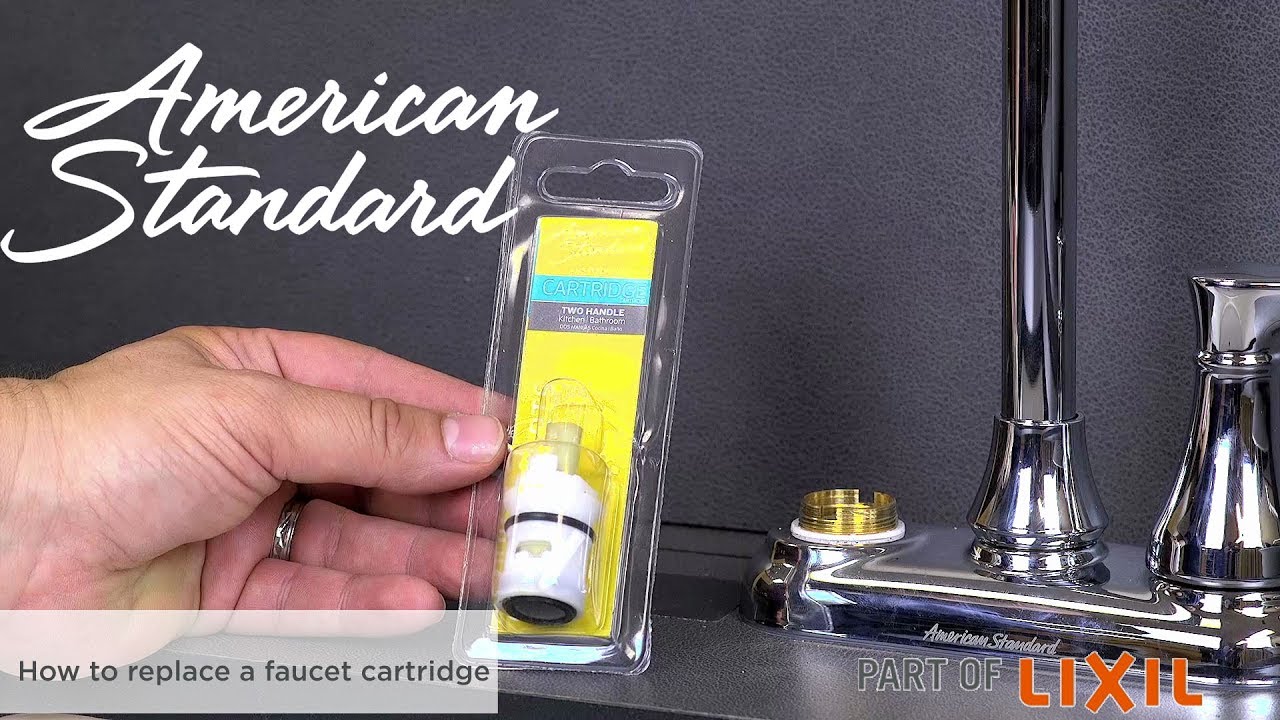
Consider OEM or Compatible Cartridges: When selecting a replacement cartridge, you have the option of choosing an Original Equipment Manufacturer (OEM) cartridge or a compatible cartridge from a third-party manufacturer. OEM cartridges are specifically designed by the original faucet manufacturer, ensuring a perfect fit and performance. Compatible cartridges, on the other hand, are manufactured by third-party companies and offer a more cost-effective alternative. Consider your budget and preferences when deciding between OEM and compatible cartridges.
Research and Compare: Before making a final decision, conduct some research and compare different replacement cartridge options. Read customer reviews, check product ratings, and compare prices from various retailers. This research will help you make an informed decision and select a replacement cartridge that is reliable, durable, and within your budget.
Consult a Professional: If you’re unsure about which replacement cartridge to choose, don’t hesitate to consult a professional plumber or contact American Standard customer support. They can provide valuable guidance and recommend the appropriate replacement cartridge for your specific faucet model.

Installing the New Cartridge
Installing a new cartridge is the final step in replacing your American Standard bathroom faucet cartridge. Proper installation is crucial for ensuring a well-functioning faucet and preventing any leaks or issues. Follow this walkthrough guide on how to install the new cartridge in your American Standard bathroom faucet, ensuring a successful replacement.
Gather the Necessary Tools: Before starting the installation process, gather the necessary tools to make the job easier. You will typically need an adjustable wrench, pliers, a cartridge installation tool (if required by your faucet model), and a plumber’s tape. Ensure you have these tools readily available before beginning the installation.
Prepare the Cartridge: Before installing the new cartridge, it’s important to prepare it properly. Remove any protective coverings or packaging, and inspect the cartridge for any visible defects or damages. Additionally, apply a thin layer of plumber’s tape to the threads of the cartridge, ensuring a tight seal and preventing any potential leaks.
Insert the Cartridge: With the cartridge prepared, it’s time to insert it into the faucet housing. Refer to the manufacturer’s instructions or consult the user manual for your faucet model to ensure you insert the cartridge correctly. Align the cartridge properly and gently push it into the housing, making sure it is seated securely.
Secure the Cartridge: Once the cartridge is inserted, secure it in place by following the manufacturer’s instructions or using the appropriate installation tool. Some cartridges may require twisting or locking mechanisms to ensure a tight fit. Use pliers or the cartridge installation tool, if necessary, to secure the cartridge firmly.
Reassemble the Faucet: After securing the cartridge, reassemble the faucet by following the reverse process of disassembly. Replace the trim by screwing it clockwise or snapping it into place, depending on your faucet model. Next, reattach the handle by tightening the set screw with an Allen wrench. Ensure everything is securely in place before moving on.
Turn on the Water Supply: Once the faucet is reassembled, it’s time to turn on the water supply. Locate the shut-off valves under the sink and turn them counterclockwise to allow water to flow to the faucet. Slowly turn on the faucet handles to allow water to run through and check for any leaks or issues. If everything looks good, you have successfully installed the new cartridge.
Common Issues and Solutions
Replacing an American Standard bathroom faucet cartridge is a relatively straightforward process, but sometimes issues may arise during or after the replacement. Understanding common problems and having troubleshooting tips at hand can help you overcome these challenges and ensure a successful cartridge replacement. We will provide you with some common issues and their solutions when replacing an American Standard bathroom faucet cartridge.
Leaking or Dripping Faucet: If you notice a leaking or dripping faucet after replacing the cartridge, there may be a few possible causes. First, ensure that the cartridge is properly installed and seated securely. If the cartridge is not aligned correctly or not tightened enough, it can cause leaks. Additionally, check the cartridge housing for any debris or mineral buildup that may affect the seal. Clean the housing thoroughly before reinstalling the cartridge.
Difficulty in Turning the Faucet Handle: If you’re experiencing difficulty in turning the faucet handle after replacing the cartridge, it may be due to improper installation or alignment of the cartridge. Make sure the cartridge is inserted correctly and aligned properly with the handle mechanism. If the handle is misaligned, it can put strain on the cartridge, causing difficulty in turning. Adjust the cartridge position if needed and ensure a smooth operation.
Inconsistent Water Flow: Inconsistent water flow can occur after replacing the cartridge if there is debris or mineral buildup in the faucet aerator. Remove the aerator and clean it thoroughly to ensure unobstructed water flow. Additionally, check the cartridge for any clogs or blockages. If you notice any buildup, clean the cartridge or replace it if necessary.
Sudden Changes in Water Temperature: If you’re experiencing sudden changes in water temperature after replacing the cartridge, it may be due to incorrect installation or calibration of the cartridge. Ensure that the hot and cold water lines are properly connected to the cartridge. If the temperature adjustment is not working correctly, refer to the manufacturer’s instructions or consult the user manual for your specific faucet model to troubleshoot and calibrate the temperature control properly.
Persistent Issues: If you’re experiencing persistent issues even after replacing the cartridge, it may be necessary to seek professional help. Contact a licensed plumber or reach out to American Standard customer support for further assistance. They can provide expert advice, diagnose any underlying problems, and offer solutions specific to your situation.

American Standard 994053-0070A Bath u0026 Kitchen Faucet Replacement Valve Cartridge

How to fix a dripping American Standard Bathroom Faucet
American Standard 994053-0070A
Flash Shower Rough-in Valves: Removing the Cartridge

Canu0027t disassemble american standard bathroom faucet to change the
American Standard 2-Handle Plastic Faucet/Tub/Shower Cartridge for
Replacing a Metering Faucet Cartridge
Related Posts:
- Bathroom Faucets Peerless
- Bathroom Faucet Quick Connect
- Satin Nickel Bathroom Faucet
- American Patriot Widespread Chrome Bathroom Faucet
- Bathroom Faucets And Fixtures
- Moen Monticello Bathroom Faucet Cartridge Replacement
- Jado Bathroom Faucets Parts
- Moen Bathroom Faucet Replacement Cartridge
- Moen Bathroom Faucet Diagram
- Bathroom Faucets Vintage Style


