Tools and Materials Needed for Replacing a Faucet Valve
Replacing a bathroom faucet valve is a manageable DIY project that can save you the cost of hiring a plumber. However, having the right tools and materials is crucial to ensure a smooth and successful replacement process. Here’s a comprehensive list of what you’ll need to get the job done.
- Adjustable Wrench: An adjustable wrench is essential for loosening and tightening various nuts and bolts during the replacement process. Its adjustable feature allows it to fit different sizes of fasteners, making it versatile and indispensable.
- Basin Wrench: A basin wrench is specifically designed for working in tight spaces, such as under sinks. Its long handle and pivoting jaw make it easier to reach and turn nuts that are otherwise difficult to access with a regular wrench.
- Screwdrivers: You will need both flathead and Phillips screwdrivers for removing screws from the faucet handles, escutcheon plates, and other components. Ensure that the screwdrivers are the correct size to avoid stripping the screws.
- Plumber’s Tape: Also known as Teflon tape, plumber’s tape is used to seal threaded connections and prevent leaks. Wrap it around the threads of the new valve to ensure a watertight seal.
- Plumber’s Putty or Silicone Caulk: Plumber’s putty or silicone caulk is used to create a watertight seal around the base of the faucet. This prevents water from seeping under the faucet and causing damage to your countertop or vanity.
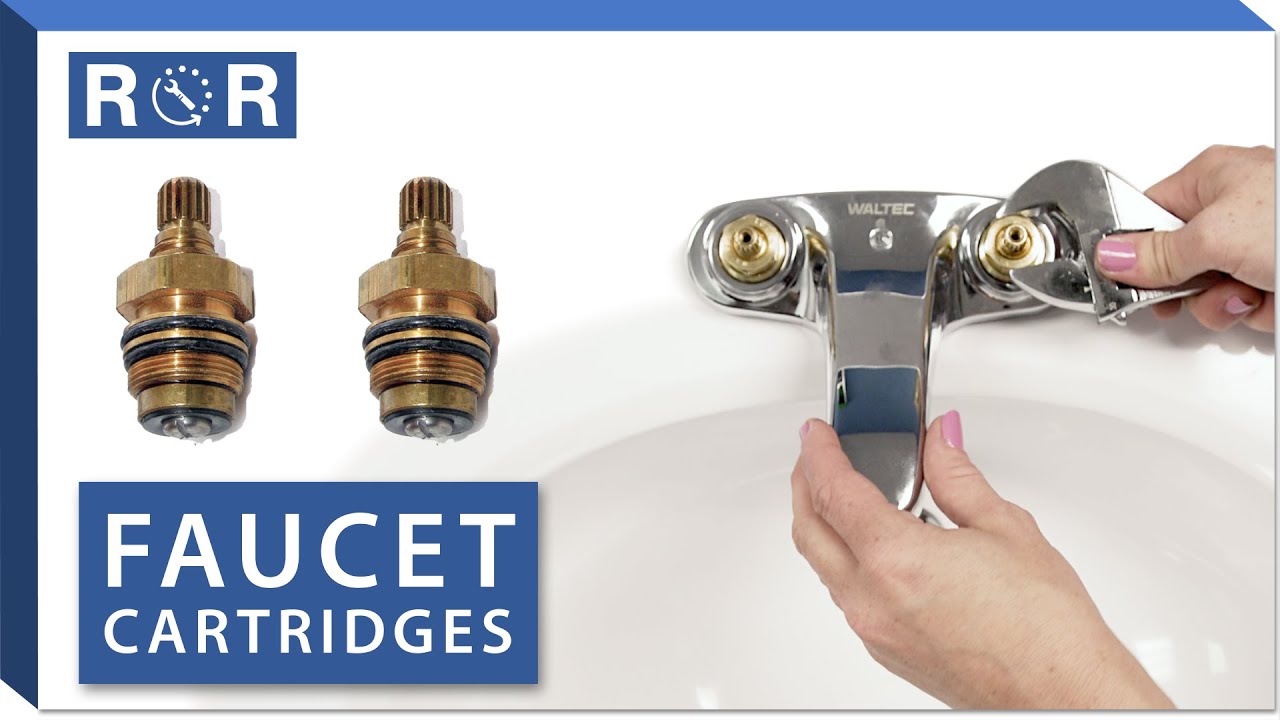
- Replacement Valve: Make sure you have the correct replacement valve for your specific faucet model. Consult the faucet’s manual or bring the old valve to the hardware store to find an exact match.
- Towels and Bucket: Having towels and a bucket on hand is essential for catching any water that might spill during the replacement process. This helps keep your work area clean and prevents water damage to your bathroom floor.
Preparing Your Bathroom for the Replacement Process
Proper preparation is crucial when replacing a bathroom faucet valve. Ensuring that your workspace is clean, organized, and ready for the task can save you time and prevent potential issues. Here’s a step-by-step guide to preparing your bathroom for the replacement process.
Clear the Area
Start by clearing the area around the sink. Remove any toiletries, decorations, or other items from the countertop and underneath the sink. This will give you ample space to work and prevent any items from getting damaged or dirty.
Turn Off the Water Supply
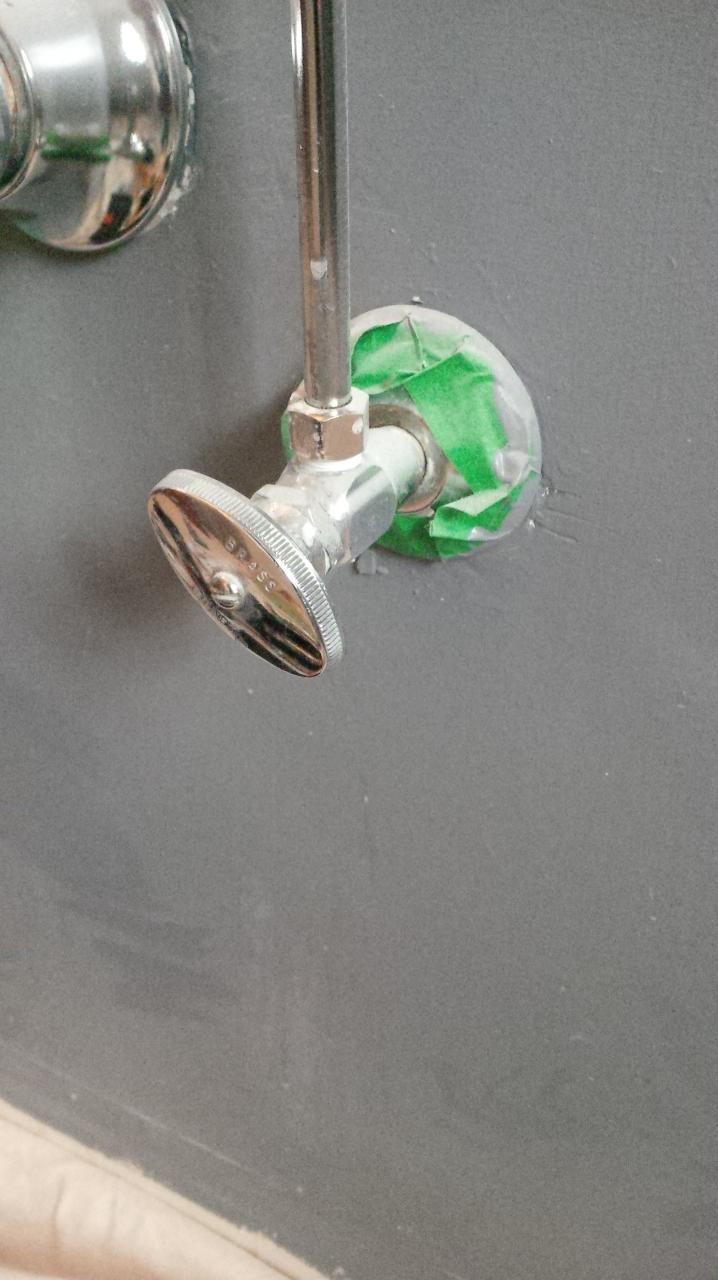
Locate the shut-off valves under the sink and turn them off to stop the flow of water. If your sink doesn’t have individual shut-off valves, you may need to turn off the main water supply to your home. This is a critical step to avoid water leaks and flooding during the replacement process.
Drain the Faucet
After turning off the water supply, turn on the faucet to drain any remaining water from the lines. This will help minimize water spills and make the removal of the old valve easier. Keep a bucket handy to catch any water that might still be in the pipes.
Gather Your Tools and Materials
Before you begin, make sure you have all the necessary tools and materials within reach. This includes the adjustable wrench, basin wrench, screwdrivers, plumber’s tape, plumber’s putty or silicone caulk, the replacement valve, and towels or a bucket. Having everything organized and accessible will streamline the process.
Protect Your Work Area
Place a towel or a sheet of plastic under the sink to protect the cabinet from water and debris. This will make cleanup easier and prevent any potential damage to your bathroom vanity. You might also want to place a towel on the countertop to protect it from scratches or other damage.
Check the Replacement Valve
Before you start, double-check that you have the correct replacement valve for your faucet. Compare it to the old valve to ensure it’s the right size and type. This can prevent delays and frustration if you discover you have the wrong part halfway through the process.
Step-by-Step Guide to Removing the Old Faucet Valve
Removing the old faucet valve is a crucial step in replacing your bathroom faucet valve. Doing it correctly ensures a smooth installation of the new valve. Follow this step-by-step guide to remove the old faucet valve safely and efficiently.
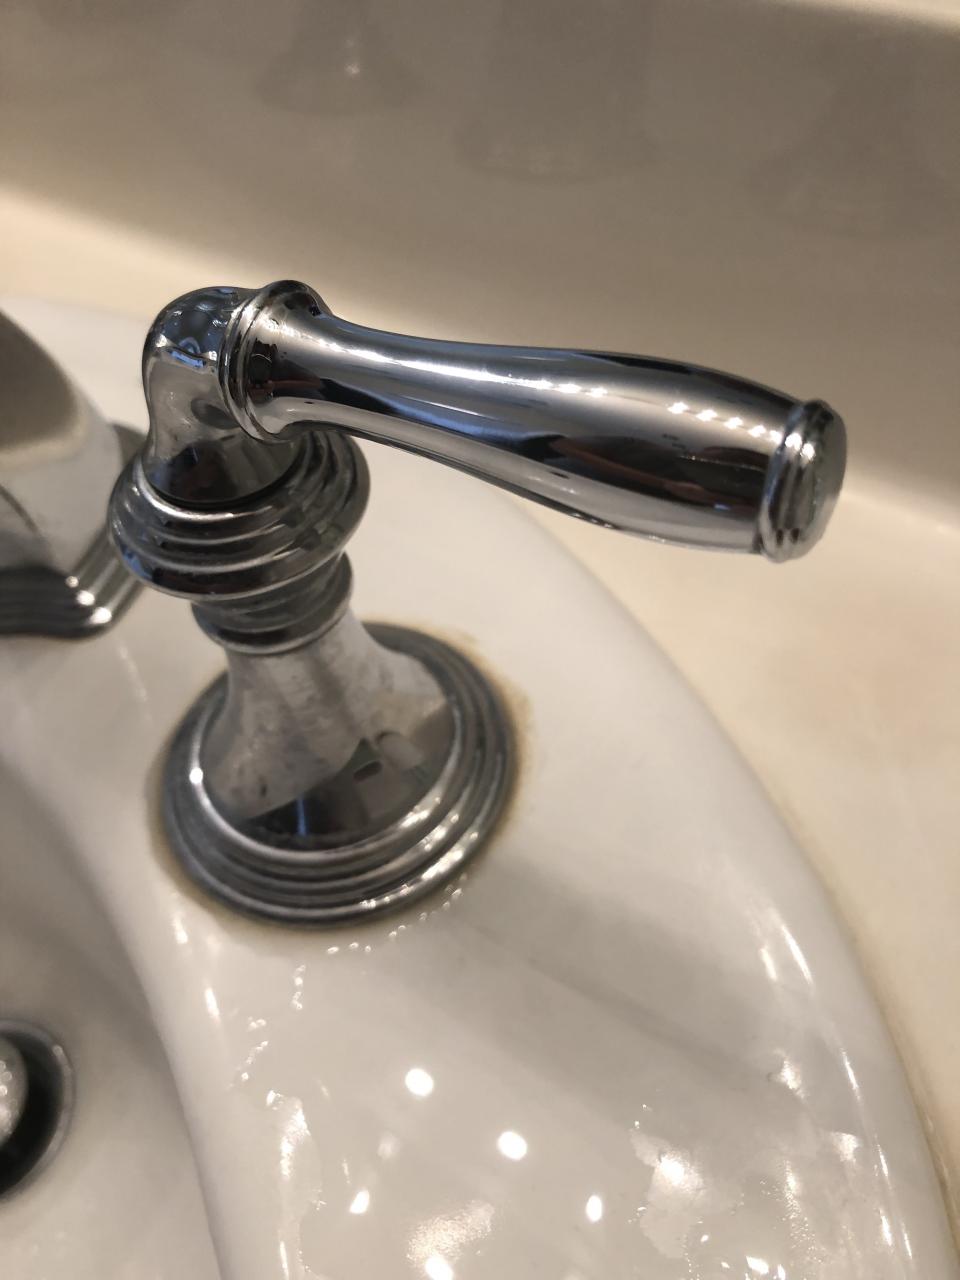
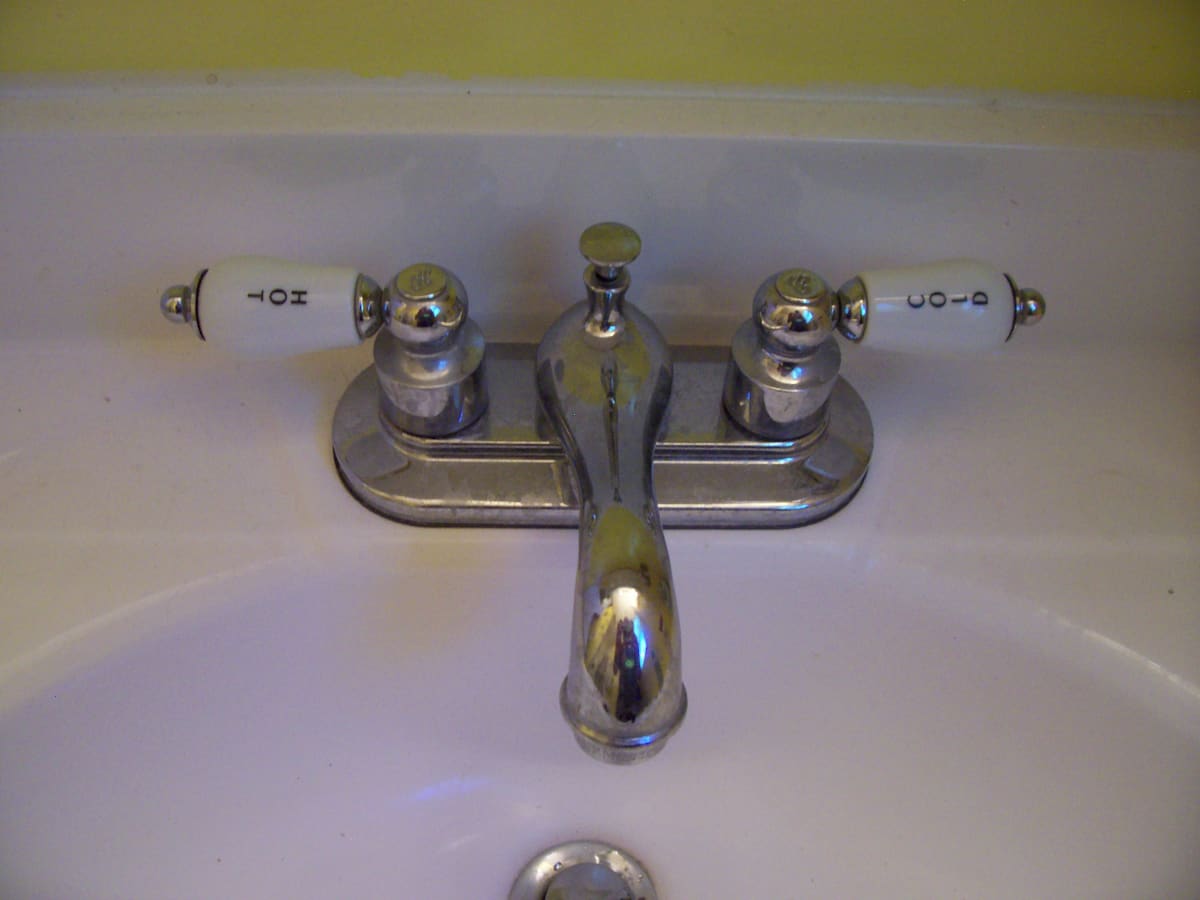
Remove the Faucet Handles
Start by removing the faucet handles. Use a flathead or Phillips screwdriver to remove the screws holding the handles in place. Once the screws are removed, gently lift the handles off. If they are stuck, use a handle puller to avoid damaging the faucet.
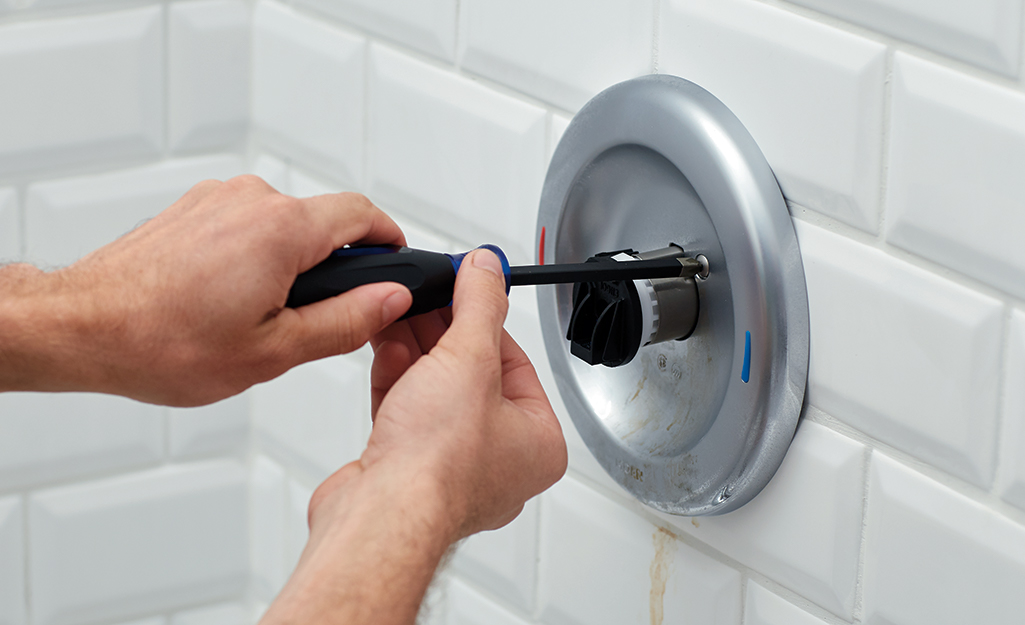
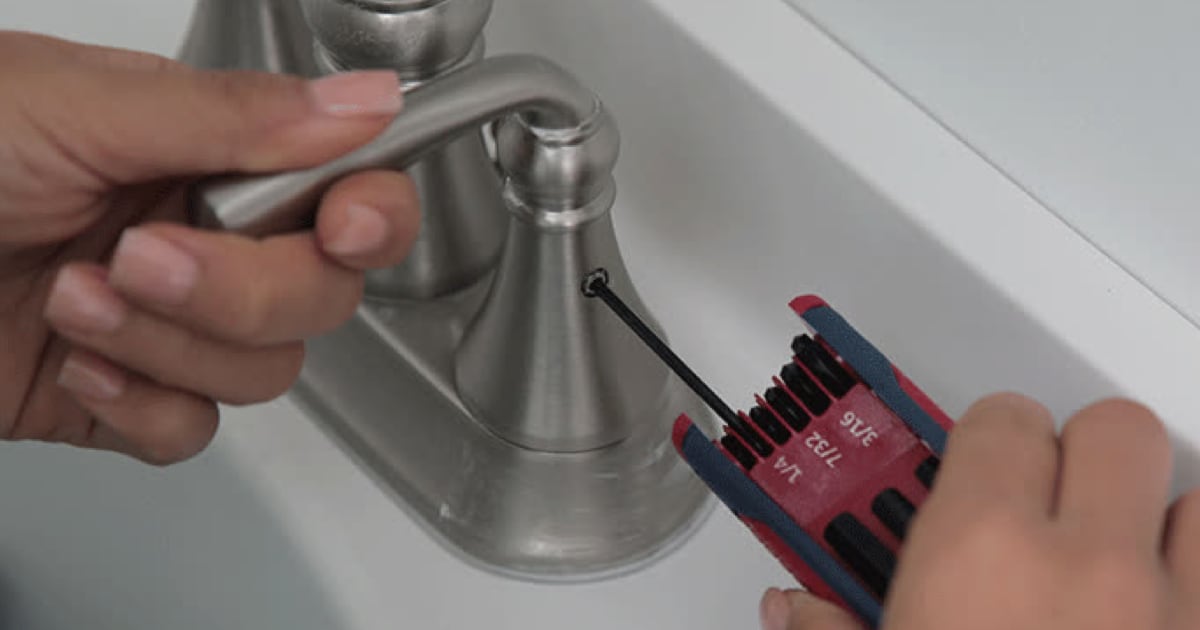
Remove the Escutcheon Plate
The escutcheon plate covers the valve and is located behind the handles. Use a screwdriver to remove the screws holding the escutcheon plate in place. Carefully lift the plate off, exposing the valve underneath. Set the plate and screws aside for reinstallation.
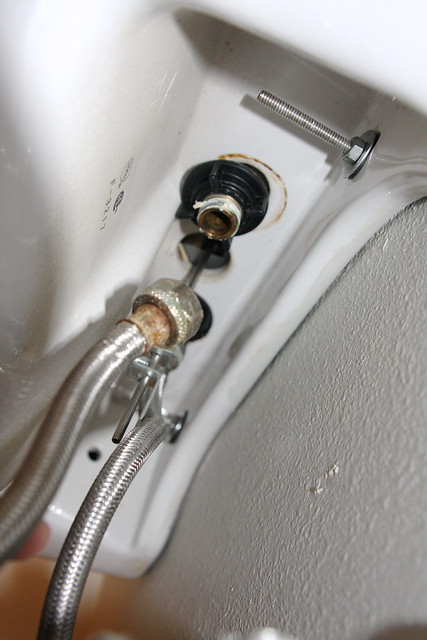
Disconnect the Water Supply Lines
Use an adjustable wrench to disconnect the water supply lines from the valve. Place a bucket under the connections to catch any remaining water. Turn the nuts counterclockwise to loosen and remove them. Be sure to keep track of any washers or seals that come off with the connections.
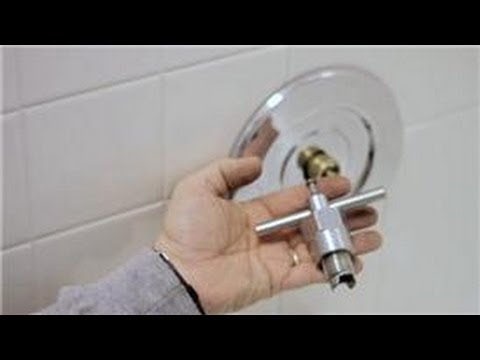
Remove the Valve Retaining Nut
The valve is held in place by a retaining nut. Use a basin wrench to reach and turn the retaining nut counterclockwise. This tool is designed for tight spaces and will make it easier to access the nut. Once the nut is loose, remove it and set it aside.
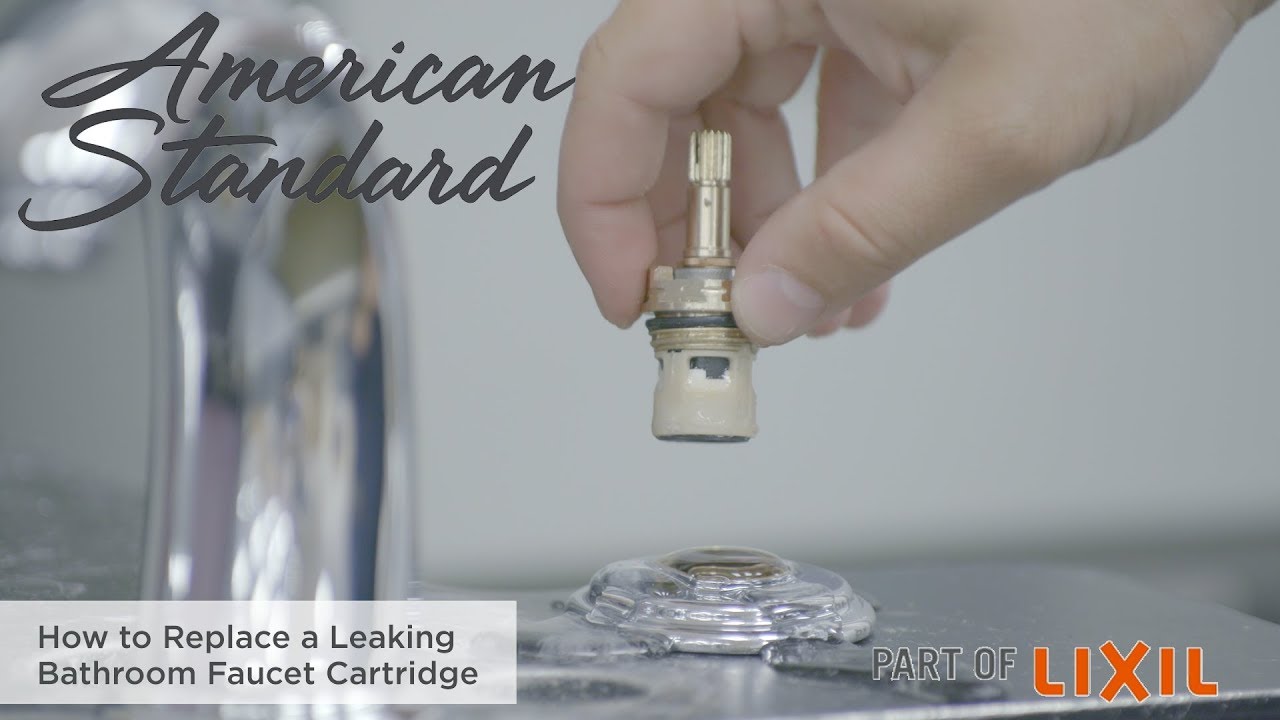
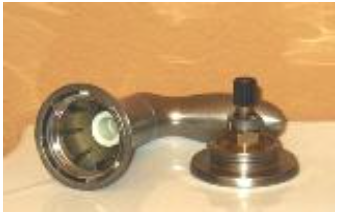
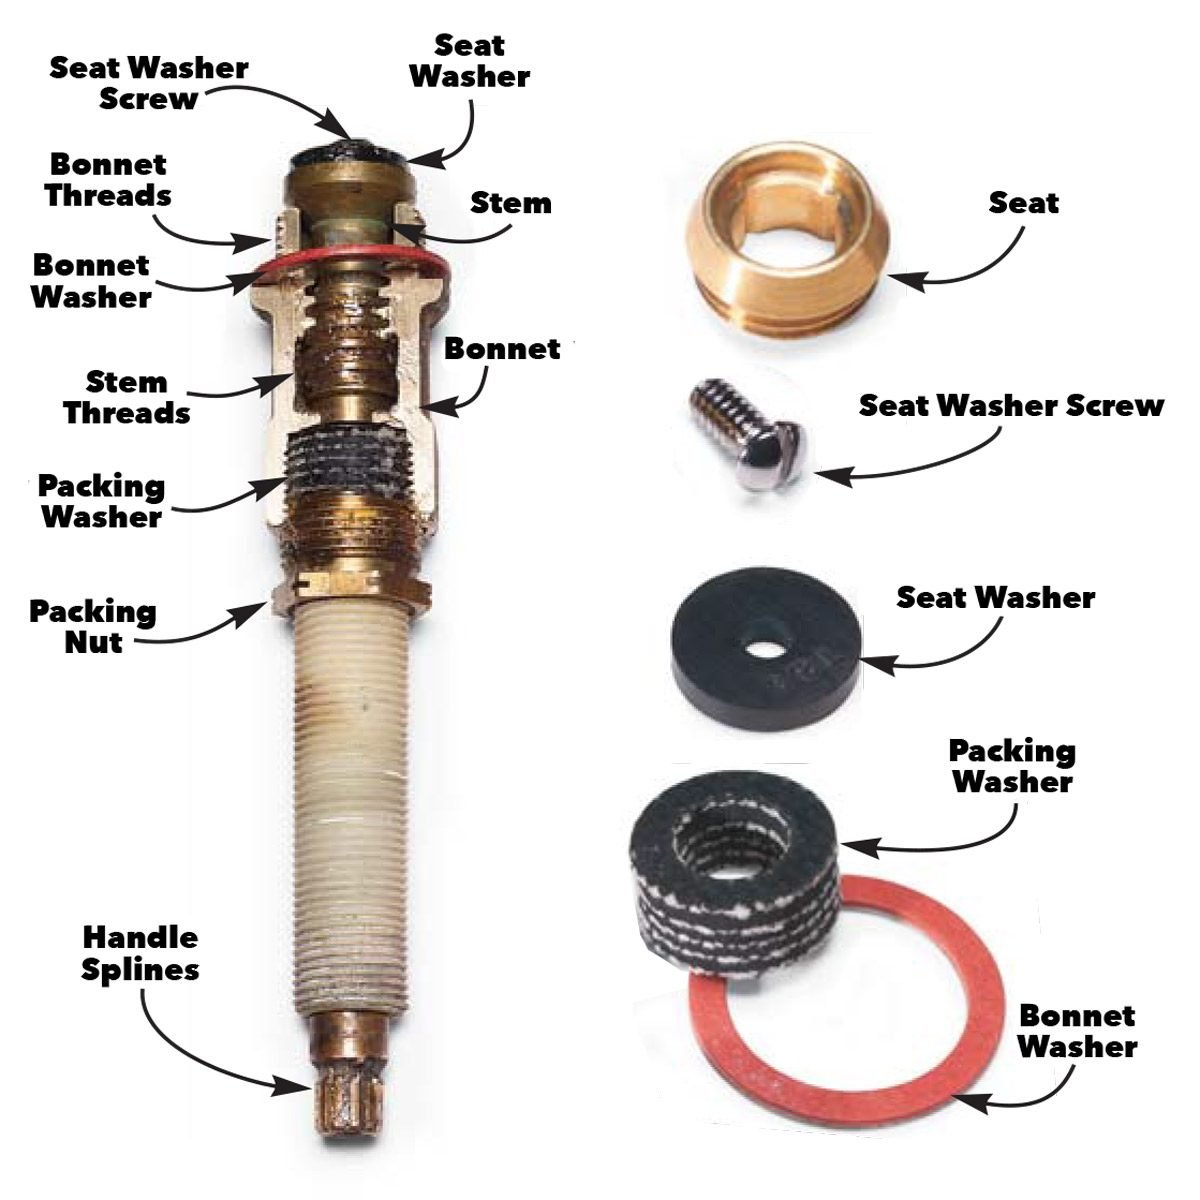
Extract the Old Valve
With the retaining nut removed, you can now pull out the old valve. Grip the valve firmly and pull it straight out from the faucet body. If the valve is stuck, gently wiggle it to loosen it. Be careful not to damage the faucet body or other components.
Clean the Area
Before installing the new valve, take a moment to clean the area where the old valve was installed. Remove any debris, mineral deposits, or old plumber’s tape from the threads. This ensures a clean, smooth installation for the new valve and helps prevent leaks.
Installing the New Faucet Valve: A Detailed Walkthrough
Installing a new faucet valve is the next step after removing the old one. Proper installation ensures that your faucet functions correctly and prevents leaks. Here’s a detailed walkthrough to guide you through the installation process.
Apply Plumber’s Tape
Start by wrapping plumber’s tape around the threads of the new valve. This helps create a watertight seal and prevents leaks. Wrap the tape in a clockwise direction to match the threading of the valve. Ensure that the tape covers all the threads evenly.
Insert the New Valve
Insert the new valve into the faucet body where the old valve was removed. Push the valve in firmly to ensure it is seated correctly. Make sure the valve is aligned properly with the faucet handles and the water supply lines.
Secure the Valve with the Retaining Nut
Use the basin wrench to tighten the retaining nut onto the new valve. Turn the nut clockwise until it is snug, but be careful not to overtighten it. Over-tightening can damage the valve or faucet body. Ensure the valve is secure but still able to move if adjustments are needed.
Reconnect the Water Supply Lines
Reconnect the water supply lines to the new valve using the adjustable wrench. Tighten the nuts clockwise until they are secure. Again, avoid over-tightening to prevent damaging the connections. Ensure that the washers or seals are in place to prevent leaks.
Reattach the Escutcheon Plate
Place the escutcheon plate back over the valve and secure it with the screws. Use a screwdriver to tighten the screws, ensuring the plate is flush against the wall or sink surface. This helps protect the valve and adds a finished look to your faucet.
Reinstall the Faucet Handles
Place the faucet handles back onto the valve stems and secure them with the screws. Use the appropriate screwdriver to tighten the screws until the handles are secure. Test the handles to ensure they move freely and operate the valve correctly.
Testing and Adjusting Your New Faucet Valve
After installing your new faucet valve, it’s essential to test and adjust it to ensure it functions correctly and efficiently. Proper testing and adjustment can prevent leaks and ensure smooth operation. Here’s how to test and adjust your new faucet valve.
Turn on the Water Supply
Start by turning on the water supply. Open the shut-off valves under the sink or the main water supply valve if you turned it off. Allow the water to flow into the faucet and check for any leaks around the connections and the valve itself.
Test the Faucet Handles
Turn on the faucet handles to test the flow of water. Check both hot and cold water to ensure they are functioning correctly. Make sure the handles turn smoothly and that the water flows steadily without any interruptions or fluctuations.
Check for Leaks
Inspect all connections for leaks. Pay close attention to the area around the new valve, the water supply lines, and the base of the faucet. If you notice any leaks, turn off the water supply and tighten the connections. Apply additional plumber’s tape if necessary to seal any gaps.
Adjust the Valve
If the water pressure is too high or too low, you may need to adjust the valve. Use an adjustable wrench to make slight adjustments to the retaining nut or the valve itself. Test the water flow again after each adjustment until you achieve the desired pressure and flow rate.
Test the Temperature Control
Test the temperature control by adjusting the faucet handles from hot to cold and vice versa. Ensure that the water temperature changes smoothly and that there are no sudden fluctuations. This is especially important for maintaining a comfortable and safe water temperature.
Final Inspection
Conduct a final inspection to ensure everything is functioning correctly. Check for any remaining leaks, test the handles for smooth operation, and ensure the water pressure and temperature are consistent. Make any necessary adjustments and tighten any loose connections.
Troubleshooting Common Issues After Replacing a Faucet Valve
Even with careful installation, you may encounter some issues after replacing a faucet valve. Knowing how to troubleshoot these common problems can save you time and frustration. Here are some tips for identifying and resolving issues that may arise.
Low Water Pressure
If you experience low water pressure after installing the new valve, check for debris or mineral deposits in the aerator. Remove the aerator from the faucet and clean it thoroughly. If the problem persists, ensure that the water supply lines are not kinked or obstructed.
Leaks Around the Valve
Leaks around the valve are often due to loose connections or inadequate sealing. Check all connections and tighten any that are loose. Apply additional plumber’s tape to the threads of the valve if necessary. Ensure that the washers or seals are properly seated and not damaged.
Faucet Handles Difficult to Turn
If the faucet handles are difficult to turn, it may be due to improper installation or overtightening. Loosen the retaining nut slightly and test the handles again. Ensure that the valve is properly aligned and that the handles are securely attached without being overly tight.
Inconsistent Water Temperature
Inconsistent water temperature can be caused by an incorrectly installed valve or a faulty valve. Double-check the installation to ensure the valve is properly seated and aligned. If the problem persists, the valve itself may be defective and require replacement.
Dripping Faucet
A dripping faucet is often the result of a worn-out or damaged washer or seal. Inspect the washers and seals around the valve and replace any that appear damaged. Ensure that the valve is properly tightened and that the seals are creating a watertight seal.
Noisy Faucet
A noisy faucet, such as whistling or banging sounds, can be caused by high water pressure or loose components. Check the water pressure and adjust it if necessary. Tighten any loose connections and ensure that all components are securely in place.
Replace the Valve in a Two Handle Faucet
How to Fix a Leaking Bathtub Faucet
How to Replace a Bathtub Faucet
How to Repair (Not Replace) Any Leaking Bathroom Faucet
How to replace an old soldered faucet valve
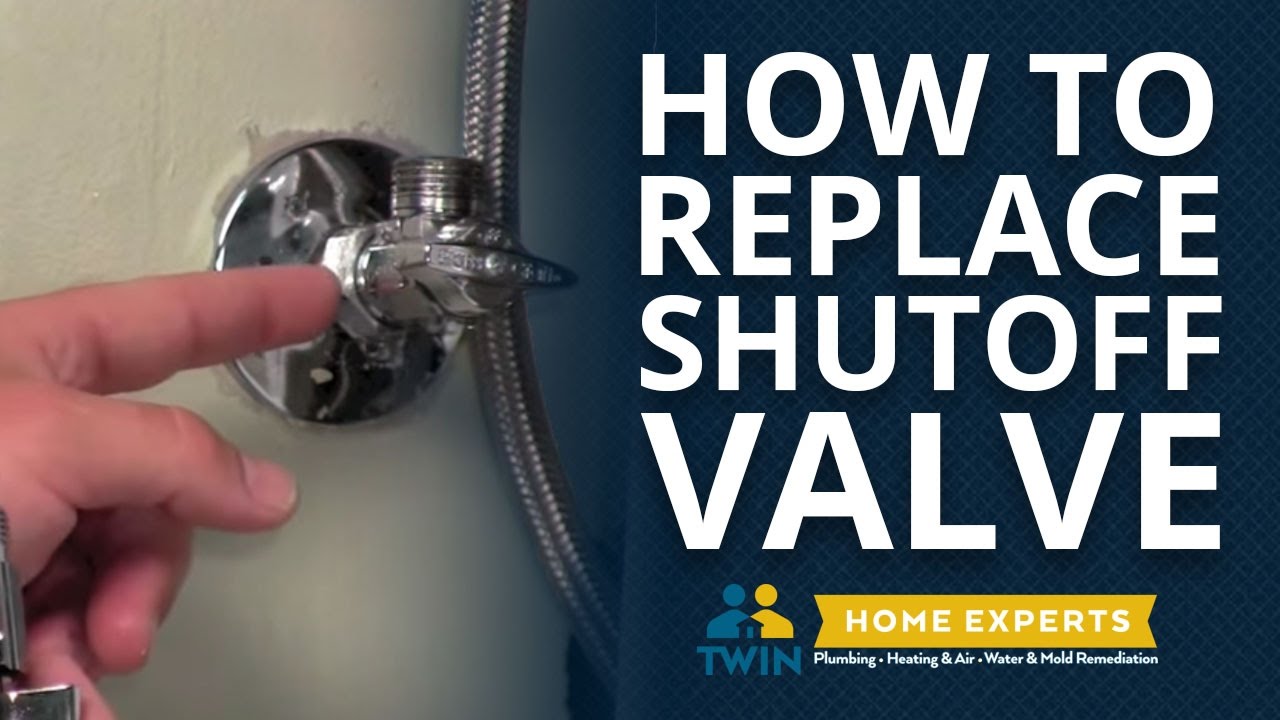
How to Replace a Shut-Off Valve Under Your Sink
How to Fix a Bathroom Faucet

Faucet Parts & Repair
Related Posts:
- Spout Bathroom Faucets
- Peerless Single Handle Bathroom Faucet Repair
- Bathroom Faucet Single Handle Brushed Nickel
- Kohler 4 Inch Bathroom Faucet
- Replacing Moen Bathroom Faucet
- Pfister Avalon Bathroom Faucet
- Kohler Bathroom Faucet Installation Instructions
- Single Handle Bathroom Faucet Installation
- How To Fix A Leaky Bathroom Faucet Video
- Delta Bathroom Faucet Single Hole


