Understanding the intricacies of bathroom sink plumbing connections is crucial for any homeowner or DIY enthusiast. Properly connecting the various components ensures a leak-free and efficient plumbing system in your bathroom. From the water supply lines to the drain assembly, each connection plays a vital role in maintaining the functionality of your sink.
Let’s discuss through the essential aspects of bathroom sink plumbing connections, providing step-by-step instructions and valuable insights to help you confidently navigate this important aspect of home maintenance.
Water Supply Lines: Connecting the Faucet
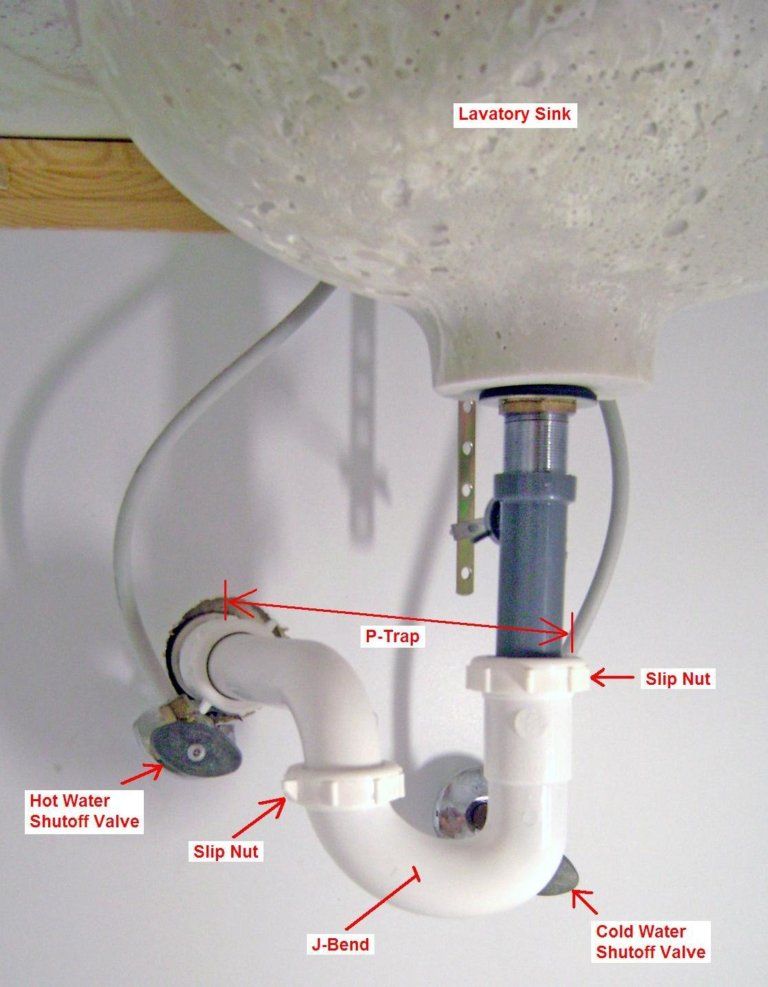
The first step in bathroom sink plumbing connections is connecting the water supply lines to the faucet. This involves attaching the supply lines to the hot and cold water valves under the sink. Before proceeding, ensure the water supply is shut off. Use adjustable wrenches to tighten the connections securely, ensuring no leaks. It’s recommended to use flexible braided supply lines for easy installation and added durability.
Once the supply lines are connected, turn on the water supply valves and check for leaks. If there are no signs of leakage, your faucet’s water supply connections are successfully established. To ensure proper functionality, remember to test both the hot and cold water individually.
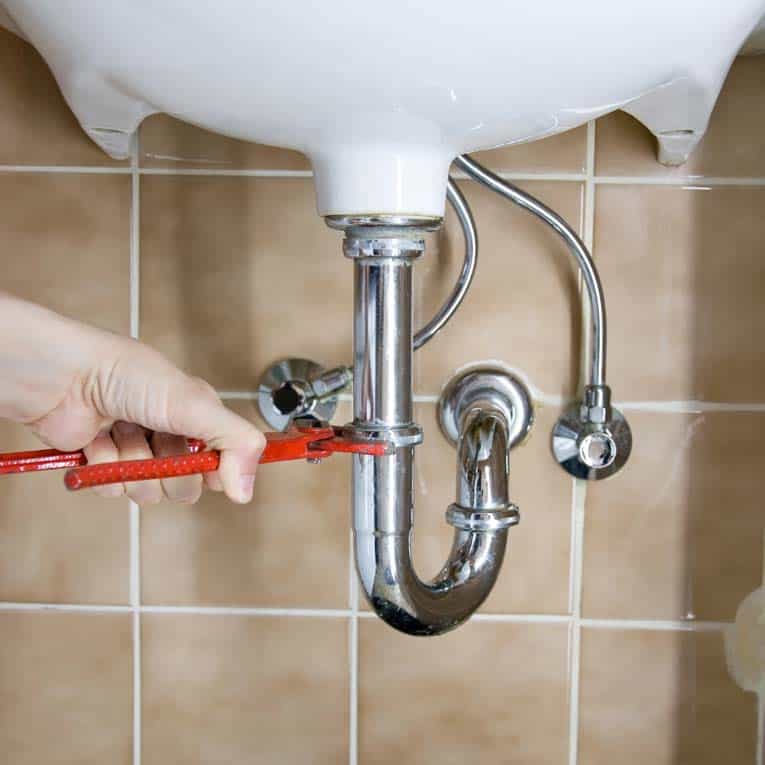
Drain Assembly: Connecting the Sink to the Drain Pipe
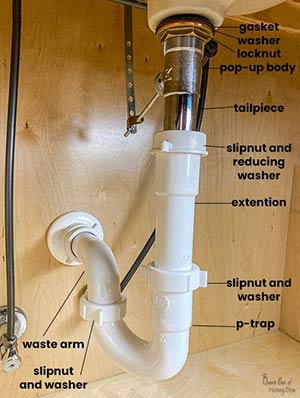
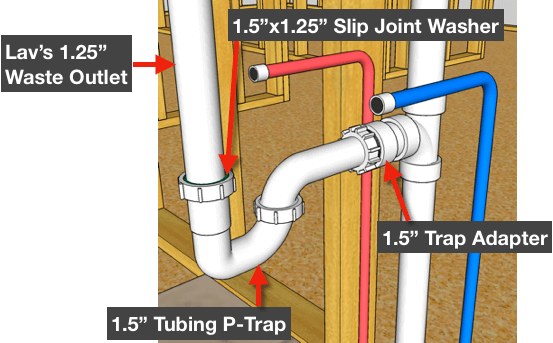
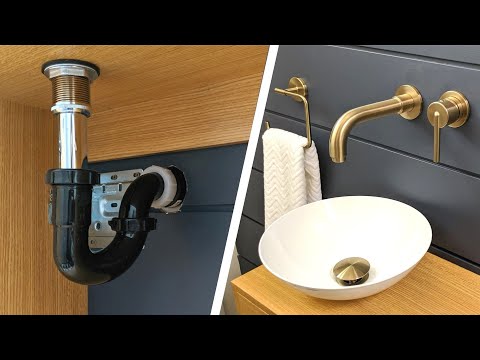
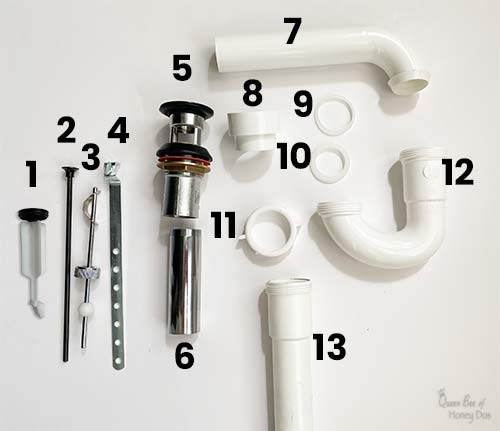
The drain assembly is another critical aspect of bathroom sink plumbing connections. It involves connecting the sink to the drain pipe to ensure efficient water drainage. Start by attaching the tailpiece, a vertical pipe extending from the sink’s drain, to the sink drain opening using a slip nut and washer. Tighten the slip nut with pliers, ensuring a secure connection.
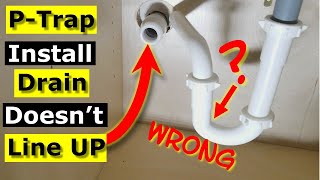
Next, connect the P-trap, a curved pipe that traps debris and prevents sewer gases from entering your bathroom to the tailpiece. Align the P-trap with the drain pipe opening, ensuring it maintains a slight downward slope for proper drainage. Use slip nuts and washers to secure the connections, tightening them by hand and then using pliers to ensure a snug fit.
Once all the connections are in place, run water down the drain and check for leaks. If there are no leaks and the water flows smoothly, you have established the drain assembly connections.
Sink Stopper: Connecting the Lift Rod and Lever Assembly
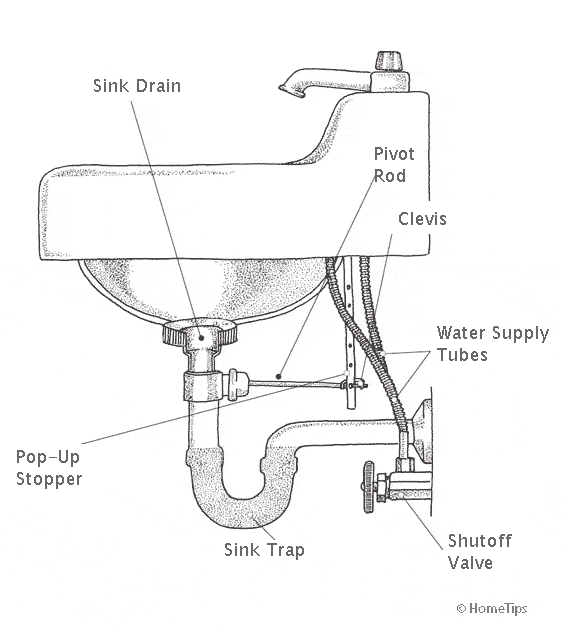
The sink stopper is an essential component that controls water flow down the drain. Connecting the lift rod and lever assembly ensures the smooth operation of the sink stopper. Begin by inserting the lift rod through the designated hole on the back of the faucet, allowing it to extend downward.
Next, connect the lift rod to the clevis strap, a metal strip with holes attached to the sink stopper’s pivot rod. Adjust the length of the lift rod to ensure the sink stopper opens and closes correctly when you operate the lever assembly.
Secure the connections by tightening the screws or adjusting the nut on the clevis strap. Test the sink stopper by operating the lever assembly and ensuring it moves up and down smoothly, allowing water to drain or stay in the sink as desired.
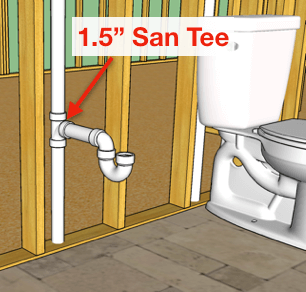
Overflow Drain: Connecting the Overflow Drain to the Drain Pipe
Many bathroom sinks have an overflow feature that prevents water from overflowing if the drain gets clogged. Connecting the overflow drain to the main drain pipe is essential to ensure proper drainage. Begin by inserting the overflow pipe into the designated opening on the sink and aligning it with the overflow drain hole.
Secure the connection by tightening the nut or screw holding the overflow pipe. Next, connect the other end of the overflow pipe to the main drain pipe using slip nuts and washers. Ensure the connections are tight but not overly tightened to avoid damaging the pipes.
To test the overflow drain connection, fill the sink with water and check if it drains properly through the main and overflow drain. If there are no issues and the water drains efficiently, your overflow drain connection is successfully established.
Sealants and Teflon Tape: Ensuring Leak-Free Connections
To ensure leak-free connections, it is essential to use sealants and Teflon tape in the appropriate areas. Apply the plumber’s putty or silicone sealant around the sink drain opening before connecting the tailpiece to create a watertight seal. This prevents water from leaking out of the drain.
Additionally, apply Teflon tape to the threaded connections, such as between the water supply lines and the faucet or the drain pipe and the P-trap. Wrap the tape tightly around the threads clockwise to create a tight seal and prevent leaks.
Using sealants and Teflon tape appropriately can significantly reduce the risk of leaks in your bathroom sink plumbing connections, ensuring a reliable and efficient plumbing system.
Regular Maintenance and Inspections: Ensuring Longevity
Regular maintenance and inspections are crucial for maintaining the longevity and functionality of your bathroom sink plumbing connections. Periodically check all the connections for any signs of leaks, corrosion, or loose fittings. Tighten any loose connections, replace worn-out washers or gaskets, and address any issues promptly to prevent further damage.
Additionally, it’s essential to keep the area under your sink clean and free from debris or moisture. Regularly inspect the P-trap and remove any accumulated debris to maintain proper drainage.
Seeking Professional Help: Knowing When to Call a Plumber
While many bathroom sink plumbing connections can be handled as a DIY project, knowing your limits is important. If you encounter complex plumbing issues, lack the necessary tools, or are unsure about any aspect of the installation or repair, it’s best to seek professional help.
A licensed plumber has the expertise and experience to handle more complicated plumbing tasks and can ensure proper installation and repair. Calling a professional plumber can save you time, prevent costly mistakes, and provide peace of mind knowing that your bathroom sink plumbing connections are in capable hands.
In conclusion, mastering bathroom sink plumbing connections are essential for maintaining a functional and leak-free plumbing system. You can achieve reliable and efficient connections by understanding the step-by-step process of connecting the water supply lines, drain assembly, sink stopper, and overflow drain and utilizing sealants and Teflon tape.
Regular maintenance, inspections, and knowing when to seek professional help are also vital in ensuring the longevity and proper functioning of your bathroom sink plumbing connections. With the knowledge and confidence gained from this comprehensive guide, you can easily tackle bathroom sink plumbing connections and enjoy a well-functioning system in your bathroom.
How To Plumb a Bathroom (with multiple plumbing diagrams
How to Plumb a Drain – Sink Drain Pipes
How to Connect a Bathroom Sink Drain – HomeTips
The Parts of the Plumbing of the Bathroom Sink
:max_bytes(150000):strip_icc()/what-is-under-the-bathroom-sink-3973574-03-c2c800c743054899aca9bdcc0535db34.jpg)
P-Trap Installation Drain Doesnu2019t Line Up Bathroom Sink Pipe
How to Replace the Drain Trap on a Sink
:max_bytes(150000):strip_icc()/replacing-a-sink-p-trap-2718773-06-8f078779324546f9afc1c132719de271.jpg)
9 Bathroom sink plumbing ideas plumbing, sink plumbing, plumbing
How To Plumb a Bathroom (with multiple plumbing diagrams
How to Install a Bathroom Sink Drain : 4 Steps (with Pictures
How To Install Bathroom Sink Drain u2022 Queen Bee of Honey Dos
Types of Plumbing Traps and How They Work – BestLife52

Related Posts:
- Small Bathroom Sink Basins
- Bathroom Sinks Without Cabinets
- Bathroom Sink Units 800mm
- Bathroom Sink Under Cabinet
- Bathroom Sink Stopper Installation
- Affordable Bathroom Sinks
- Bathroom Sink Plug Hole Leaking
- Bathroom Sink Vessel Faucets
- Replace Bathroom Sink Faucet Knobs
- Small Modern Bathroom Sink


