Setting up the drainage system in your bathroom sink can be challenging. It requires careful consideration of several factors, including the size of the sink, the type of drain, and the location of the sink. In this guide, we will take you through setting up your bathroom sink drain step-by-step.
Choosing the Right Drain
Before you begin installing your bathroom sink drain, you must choose the right drain type. Two main types of drains are available in the market: pop-up drains and grid drains.
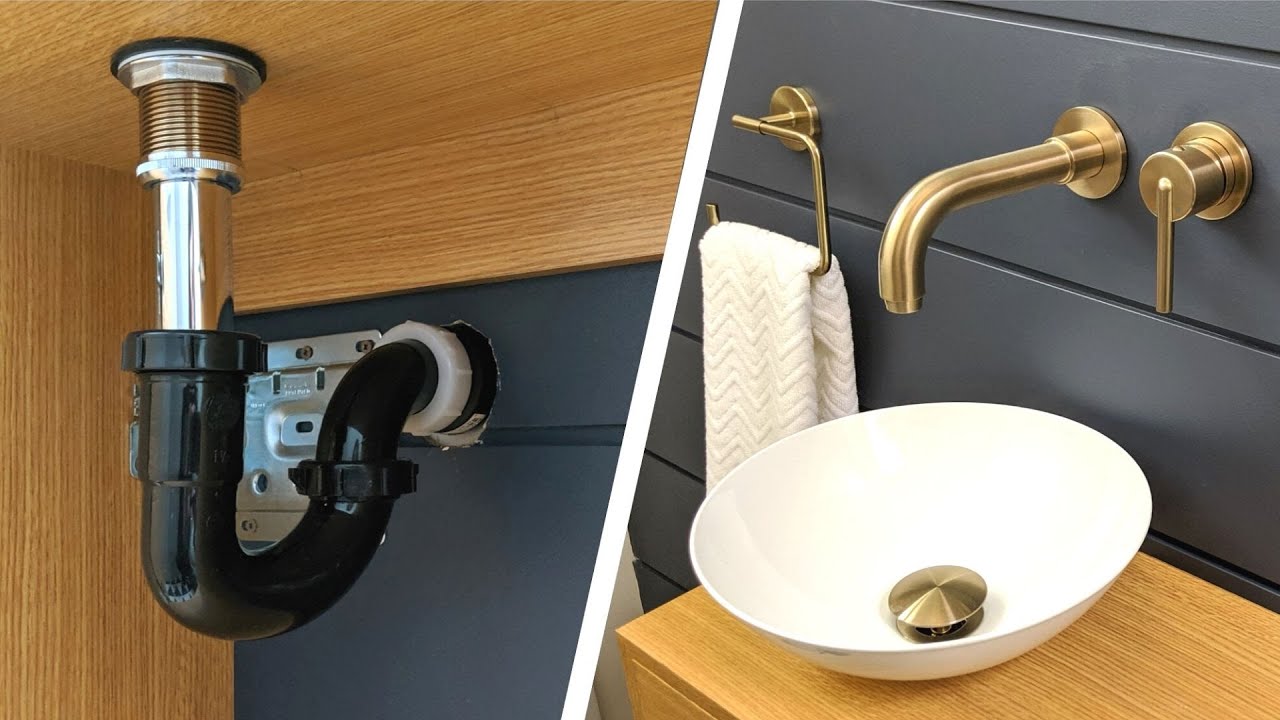
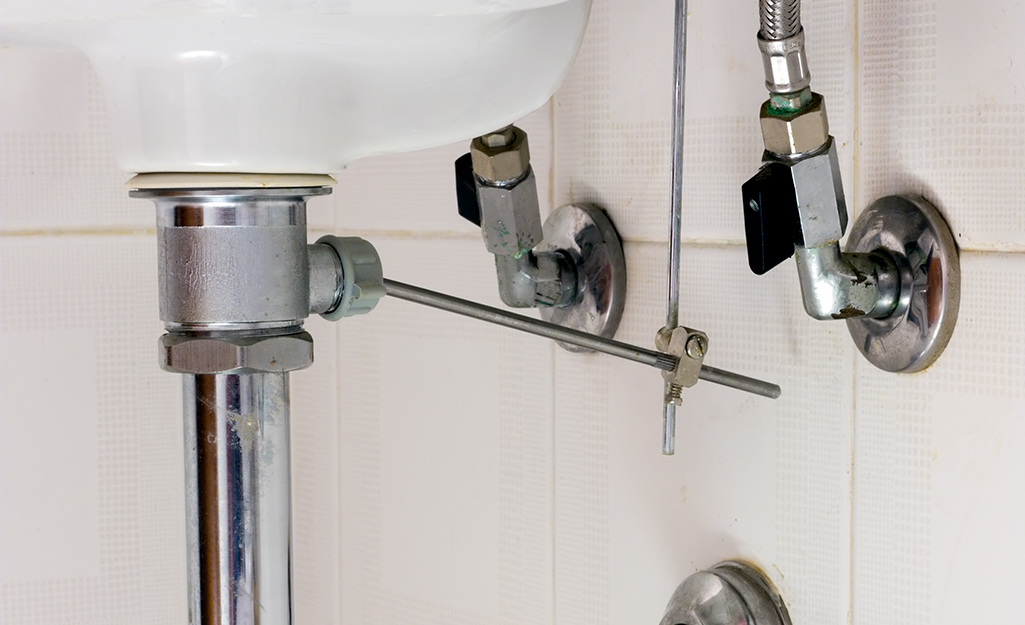
Pop-up drains are the most common type of drain used in bathroom sinks. They have a stopper that can be opened and closed by pushing or pulling a lever. This type of drain is easy to use and requires minimal maintenance.
Grid drains, however, are designed to allow water to flow freely through the drain without a stopper. They are commonly used in sinks without an overflow hole. Grid drains are easy to clean and require minimal maintenance, but they are unsuitable for overflow sinks.
Installing the Drain Pipe
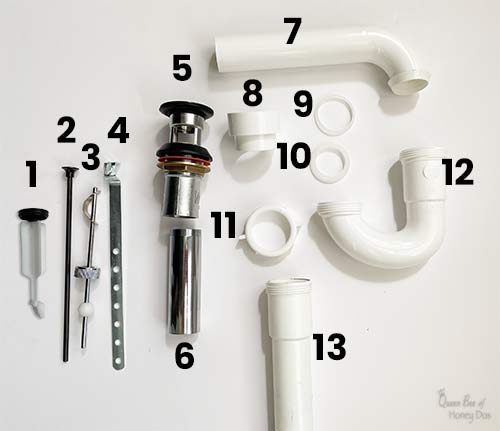
Once you have chosen the type of drain, you need to install the drain pipe. The drain pipe is the sink part that connects the drain to the main drainage system. It is usually made of PVC or ABS plastic and has various sizes and shapes.
To install the drain pipe, you need to remove the old drain pipe (if there is one) and clean the area around the sinkhole. Apply a layer of plumber’s putty around the drain hole to create a watertight seal. Insert the drain pipe into the hole and tighten the locknut to secure it.
Connecting the Drain and the Tailpiece
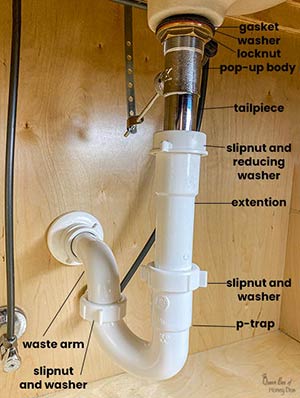
The next step is to connect the drain and the tailpiece. The tailpiece is the straight pipe that connects the drain to the P-trap. It is usually made of chrome-plated brass or PVC plastic.
To connect the drain and the tailpiece, apply the plumber’s tape to the threads on both ends of the tailpiece. Insert one end of the tailpiece into the drain and the other into the P-trap. Tighten the nuts with pliers to secure the connections.
Installing the P-Trap
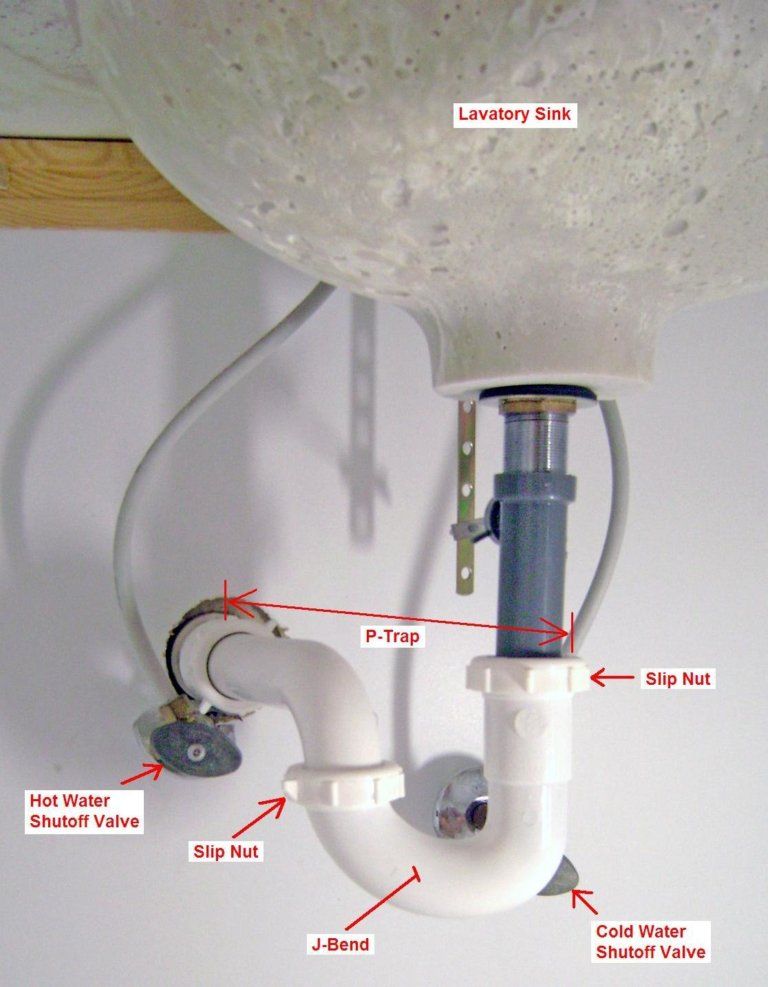
The P-trap is a curved pipe that prevents sewer gases from entering your bathroom through the sink drain. It is an essential component of your bathroom sink drainage system.
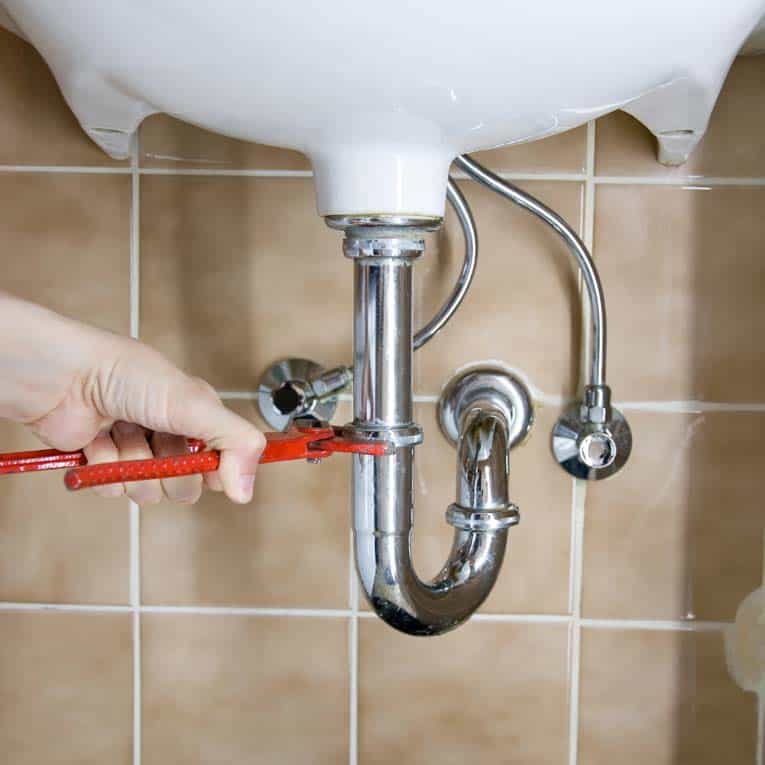
To install the P-trap, you need to connect one end of the trap to the tailpiece and the other end to the main drainage system. Apply the plumber’s tape to the threads on both sides of the P-trap and tighten the nuts with pliers to secure the connections.
Testing the Drainage System
Once you have completed the installation of your bathroom sink drainage system, you need to test it to ensure it is functioning correctly. Fill the sink with water and let it drain. Check for leaks around the connections, and ensure the water flows smoothly through the drain.
Setting up your bathroom sink drain requires careful consideration and proper installation. Choosing the right type of drain, installing the drain pipe, connecting the drain and the tailpiece, installing the P-trap, and testing the drainage system is essential to setting up your bathroom sink drain. By following these steps, you can ensure that your bathroom sink drainage system functions correctly and efficiently.
Bathroom Sink Plumbing

How To Install Bathroom Sink Drain u2022 Queen Bee of Honey Dos
How to Connect a Bathroom Sink Drain – HomeTips
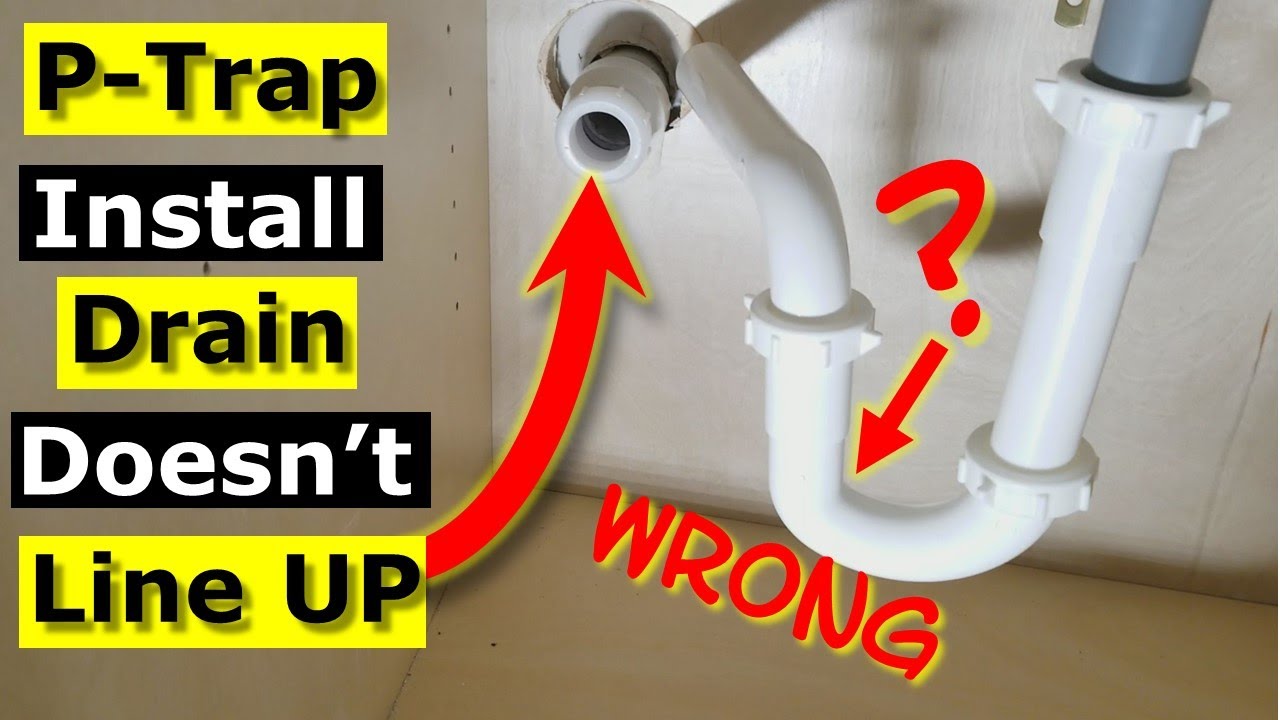
P-Trap Installation Drain Doesnu2019t Line Up Bathroom Sink Pipe
Installing a Bathroom Sink Drain Body – Efficient Plumbing

The Parts of the Plumbing of the Bathroom Sink
:max_bytes(150000):strip_icc()/what-is-under-the-bathroom-sink-3973574-03-c2c800c743054899aca9bdcc0535db34.jpg)
Bathroom sink plumbing installation
How To Install Bathroom Sink Drain u2022 Queen Bee of Honey Dos
9 Bathroom sink plumbing ideas plumbing, sink plumbing, plumbing
How to Connect a Bathroom Sink Drain? DIY Guide for You!

How to Install a Pop-Up Drain Stopper in a Bathroom Sink
/bathroom-sink-drain-installation-2718843-03-6fee5b9d9f7d475abfe06a95ddb1f695.jpg)
How To Install A Sink Drain – Kitchen Infinity
:no_upscale()/cdn.vox-cdn.com/uploads/chorus_asset/file/19495086/drain_0.jpg)
How to Install a Pop-Up Drain
Related Posts:
- Bathroom Sink Cabinets 36
- Bathroom Sink Plug Replacement
- Bathroom Sink Faucets Separate Hot And Cold
- Bathroom Sink Pipe Size
- DIY Bathroom Sink Ideas
- Commercial Bathroom Sink Countertop
- Bathroom Sink Counter Organizer
- Bathroom Sink Outlet
- Bathroom Sink Drain Stopper Broken
- Bathroom Sink Clogged Past The P Trap


