Anatomy of a Bathroom Sink Drain Without Overflow
When it comes to plumbing fixtures in your home, understanding the basics of how they work is crucial. The bathroom sink drain is no exception, and having a good grasp of its anatomy can help you troubleshoot issues and even undertake installations or repairs yourself. Let’s discuss the key components of a bathroom sink drain without an overflow:
- Sink Drain Pipe: This is the pipe that connects your sink to the rest of the plumbing system. It carries wastewater away from the sink and directs it towards the sewer or septic system. Sink drain pipes are typically made of PVC (polyvinyl chloride) or metal, such as brass or stainless steel.
- P-Trap: The P-trap is a curved section of pipe located beneath the sink drain. Its distinctive shape resembles the letter “P” when viewed from the side. The purpose of the P-trap is to prevent sewer gases from entering your home by creating a water seal. It also traps debris, preventing it from clogging the drainpipe.
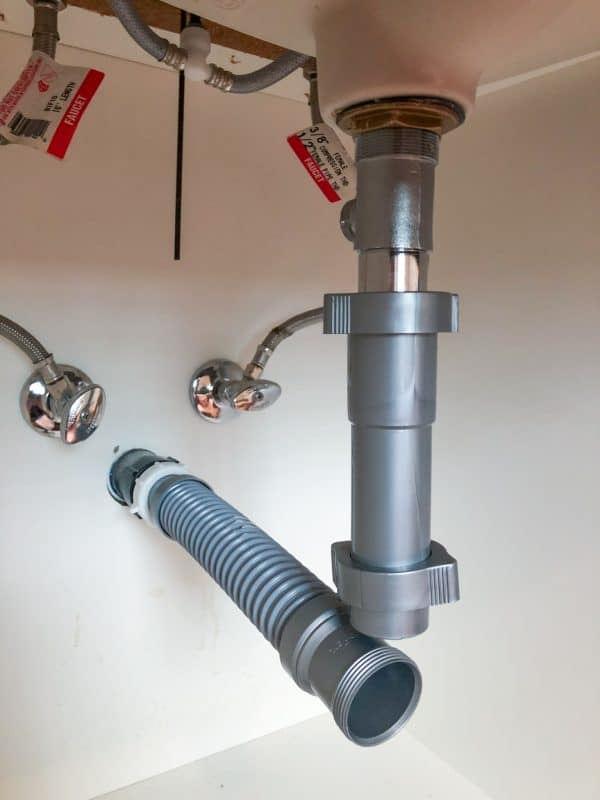
- Tailpiece: The tailpiece is a short vertical pipe that connects the sink drain to the P-trap. It is usually made of the same material as the drainpipe and is secured in place with slip nuts or compression fittings.
- Trap Arm: Also known as the waste arm, the trap arm is the horizontal pipe that connects the P-trap to the drainpipe in the wall or floor. Its length and angle are crucial for ensuring proper drainage and preventing leaks.
- Pop-Up Drain Assembly: This is the mechanism that allows you to open and close the sink drain to control the flow of water. It consists of a stopper, lift rod, and linkage assembly. When the lift rod is raised, the stopper closes, preventing water from draining out of the sink. Lowering the lift rod opens the stopper, allowing water to flow freely.

Essential Tools and Materials
Installing a bathroom sink drain without an overflow may seem like a daunting task, but with the right tools and materials, it can be a straightforward DIY project. Before you begin, gather the following essentials:
Adjustable Wrench: This versatile tool will come in handy for tightening and loosening nuts and bolts throughout the installation process.
Pipe Wrench: A pipe wrench is essential for gripping and turning pipes, fittings, and connectors. Choose one with smooth jaws to avoid damaging the finish on your plumbing fixtures.
Plumber’s Putty: Plumber’s putty is a soft, moldable substance used to create a watertight seal between sink surfaces and drain fittings. It’s especially useful for sealing around the drain flange and tailpiece.
Plumbing Tape: Also known as Teflon tape or thread seal tape, plumbing tape is used to create a leak-proof seal between threaded pipe fittings. Wrap it around the threads of pipe joints before assembly to prevent leaks.
Hacksaw or Tubing Cutter: You may need to cut pipes or tubing to size during the installation process. A hacksaw or tubing cutter will make quick work of this task.
Safety Glasses and Gloves: Protect your eyes and hands from debris, sharp edges, and chemicals with safety glasses and gloves.
Bucket and Towels: Keep a bucket and towels on hand to catch any water or debris that may spill during the installation process.
Bathroom Sink Drain Kit: Purchase a bathroom sink drain kit that includes all the necessary components, such as the drain flange, tailpiece, P-trap, trap arm, and pop-up drain assembly. Make sure the kit is compatible with your sink and plumbing setup.
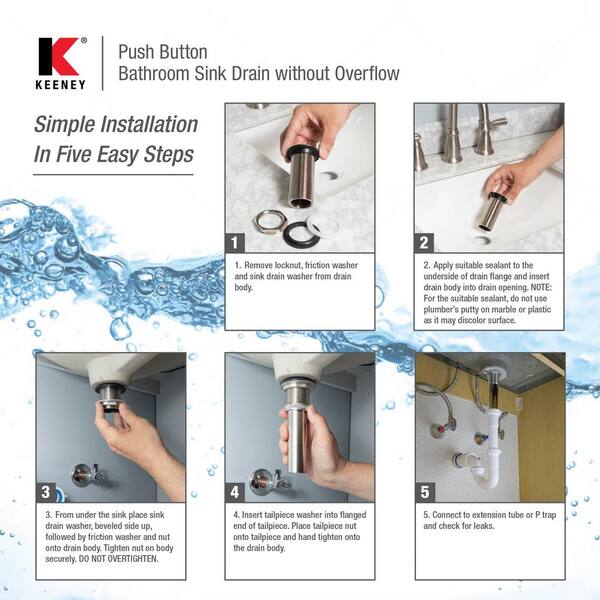
How to Install a Bathroom Sink Drain Without Overflow
Installing a bathroom sink drain without overflow may seem like a daunting task, but with the right tools and a little know-how, it’s a DIY project that you can tackle with confidence. Follow these step-by-step instructions to install your new sink drain:
Prepare the Work Area: Before you begin, clear out the area beneath the sink and place a bucket or towels to catch any water or debris that may spill during the installation process.
Remove the Old Drain: Start by disconnecting the existing drain assembly. Use an adjustable wrench to loosen the slip nuts connecting the P-trap to the tailpiece and trap arm. Once the nuts are loosened, carefully remove the P-trap and set it aside. Next, use a wrench to loosen the nut connecting the tailpiece to the sink drain. Once the nut is removed, you should be able to pull the old drain assembly out of the sink.
Prepare the New Drain: Before installing the new drain assembly, apply plumber’s putty to the underside of the drain flange. Roll the putty into a rope shape and press it onto the flange, ensuring that it creates a tight seal.
Insert the New Drain: Insert the new drain assembly into the sink drain opening from above. Make sure the drain flange is centered and flush with the sink surface.
Secure the Drain Flange: From beneath the sink, thread the tailpiece onto the drain body and hand-tighten the nut. Use an adjustable wrench to snugly tighten the nut, ensuring a secure connection. Wipe away any excess putty that squeezes out around the drain flange.
Install the P-Trap: Position the P-trap beneath the sink drain, aligning it with the tailpiece and trap arm. Slide the slip nuts onto the ends of the pipes and hand-tighten them onto the corresponding fittings. Use a wrench to snugly tighten the slip nuts, taking care not to overtighten and damage the pipes.
Connect the Trap Arm: Finally, connect the trap arm to the waste pipe in the wall or floor. Slide the slip nut onto the end of the trap arm and hand-tighten it onto the waste pipe fitting. Use a wrench to snugly tighten the slip nut, ensuring a secure connection.

Troubleshooting Tips and Common Mistakes to Avoid
While installing a bathroom sink drain without overflow is a relatively straightforward process, there are a few common mistakes to avoid and troubleshooting tips to keep in mind:
Improper Sealant Application: When applying the plumber’s putty or silicone sealant to create a watertight seal around the drain flange, be sure to apply it evenly and press it firmly into place. Failure to do so can result in leaks.
Overtightening Connections: It’s important to tighten the slip nuts and other fittings securely to prevent leaks, but be careful not to overtighten them, as this can damage the pipes and fittings.
Incorrect Alignment: Ensure that all pipes and fittings are properly aligned before tightening the connections. Misalignment can cause leaks and compromise the integrity of the drain system.
Forgetting to Install the P-Trap: The P-trap plays a crucial role in preventing sewer gases from entering your home and must be installed correctly. Double-check that the P-trap is securely connected to the tailpiece and trap arm.
Ignoring Leaks: If you notice any leaks after installing the sink drain, don’t ignore them. Address them promptly by tightening connections or replacing damaged components to prevent water damage and mold growth.

Additional Considerations and Upgrades for Your Bathroom Sink Drain Installation
Once you’ve installed a basic bathroom sink drain without overflow, there are several additional considerations and upgrades you may want to consider:
Upgrade to a Decorative Drain Flange: Consider replacing the standard drain flange with a decorative option to add a touch of style to your sink. Decorative drain flanges are available in a variety of finishes and designs to complement your bathroom decor.
Install a Pop-Up Drain Stopper: If your sink is equipped with a basic drain plug, consider upgrading to a pop-up drain stopper for added convenience. Pop-up drain stoppers are operated by a lift rod and allow you to easily open and close the drain with the push of a button.
Add a Sink Drain Strainer: Prevent clogs and debris buildup in your sink drain by installing a sink drain strainer. These handy devices sit inside the drain opening and catch hair, food particles, and other debris before it can enter the drainpipe.
Consider a Water-Saving Drain: Save water and reduce your environmental footprint by installing a water-saving drain assembly. These innovative drains feature built-in aerators or flow restrictors that reduce water usage without sacrificing performance.
Upgrade to a Touchless Drain: For added convenience and hygiene, consider upgrading to a touchless drain assembly. These hands-free devices use motion sensors to automatically open and close the drain, reducing the spread of germs and bacteria.
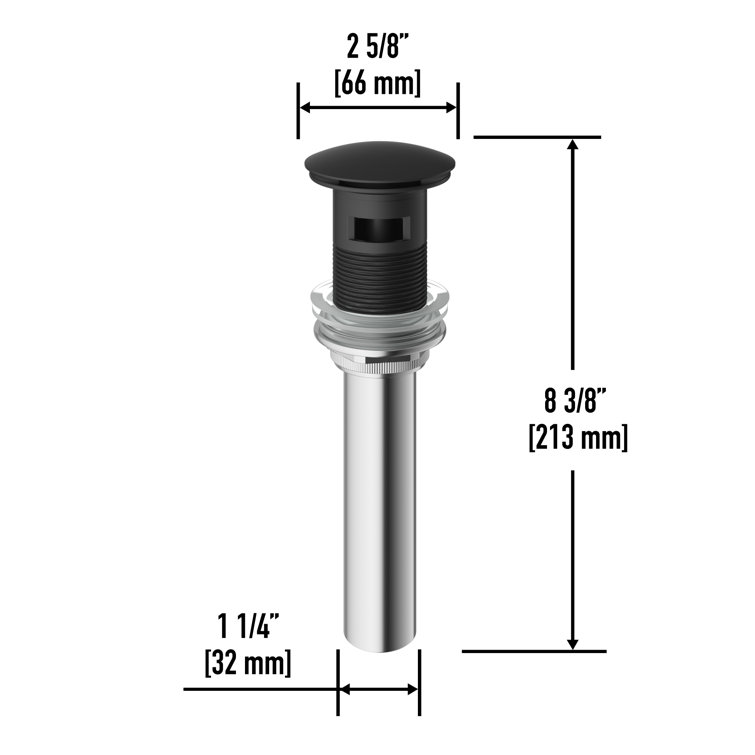
KEENEY 1-1/4 in. Push Button Bathroom Sink Drain without Overflow

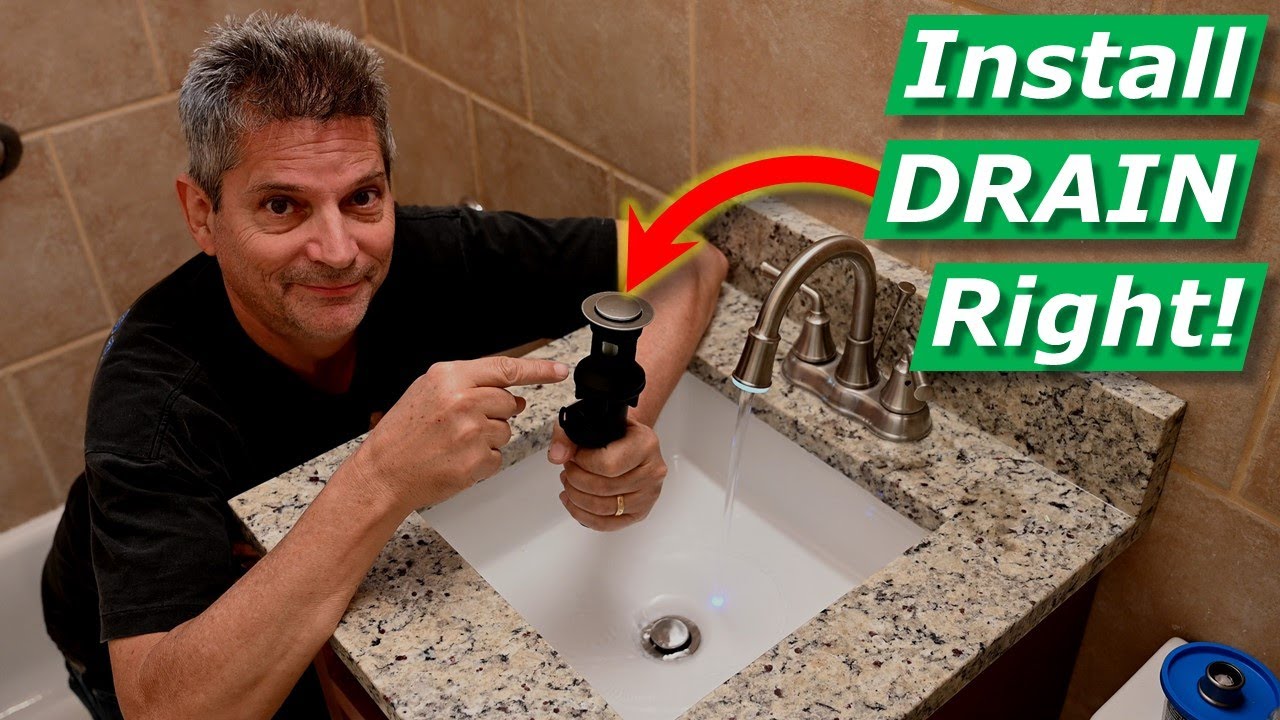
How To Install Bathroom Sink Drain/Faucet, No Leaks Under Gasket, Threads [SOLVED]
How to Install a Vessel Sink Drain without Overflow
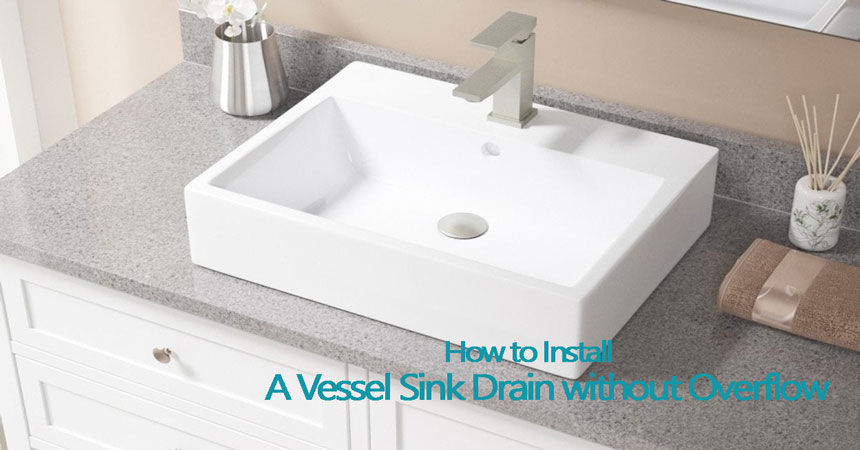
How to Install a Vessel Sink Drain without Overflow – MaterialSix.com

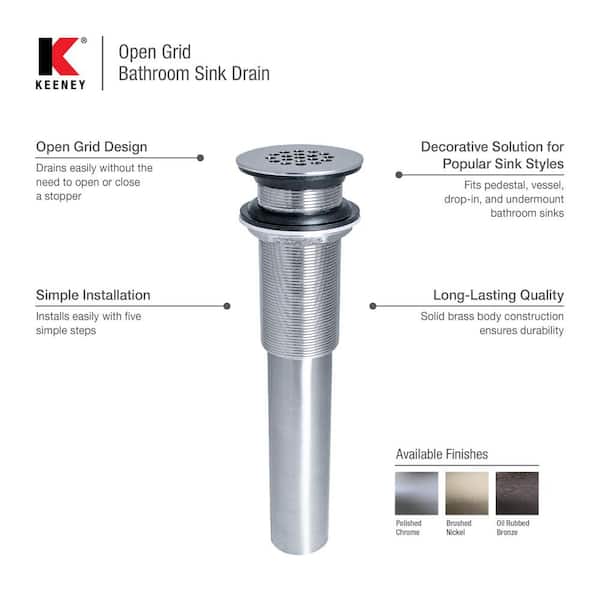
KEENEY 1-1/4 in. Open Grid Bathroom Sink Drain without Overflow
VIGO Pop-Up Bathroom Sink Drain with Overflow u0026 Reviews Wayfair
KIBI USA Pop-Up Bathroom Sink Drain with Overflow u0026 Reviews Wayfair

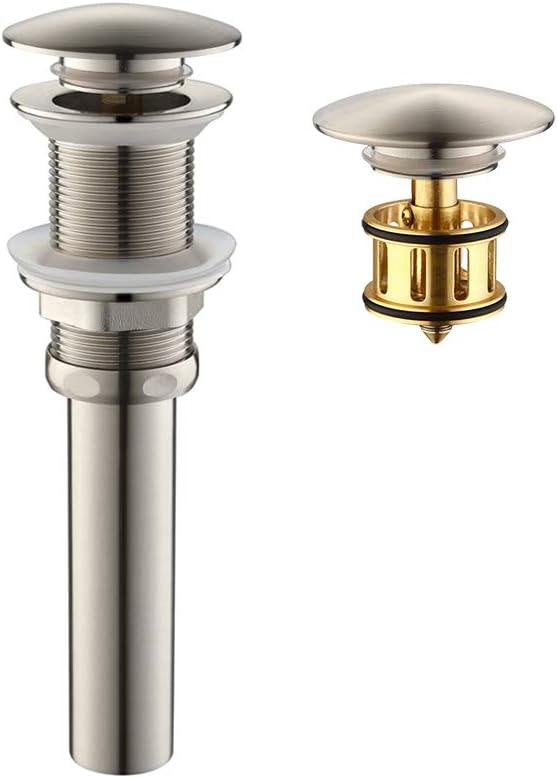
HOMELODY Vessel Sink Drain,1 5/8″ Bathroom Sink Drain with Removable Brass Strainer Basket, Anti-clogging Pop Up Drain Stopper Brushed Nickel without
Related Posts:
- Bathroom Sink Faucet Porcelain Cross Handles
- Commercial Bathroom Sink Dimensions
- Bathroom Sinks Duravit
- Bespoke Bathroom Sink Cabinets
- Off White Bathroom Sink
- Bathroom Sink Drain Stopper Mechanism
- L Shaped Bathroom Sink
- Bathroom Sink Trap Size
- Universal Bathroom Sink Stopper
- Bathroom Sink Drain Repair


