A Step-by-Step Guide to Fixing Bathroom Tiles on Walls
Fixing bathroom tiles on walls can be a daunting task for many homeowners. However, with the right knowledge and step-by-step guidance, it is a project that can be accomplished. Follow this comprehensive guide on how to fix bathroom tiles on walls, it covers everything from the necessary tools to the final touches. By following these steps, you can transform your bathroom into a beautiful and functional space.
- Assessing the Wall Condition: Before diving into the tile installation process, it is essential to assess the condition of the wall. Check for any cracks, moisture issues, or loose paint. Addressing these issues beforehand will ensure a solid foundation for the tiles and prevent any future problems. Repair any damages, patch up cracks, and make sure the surface is dry and free from dust and debris.
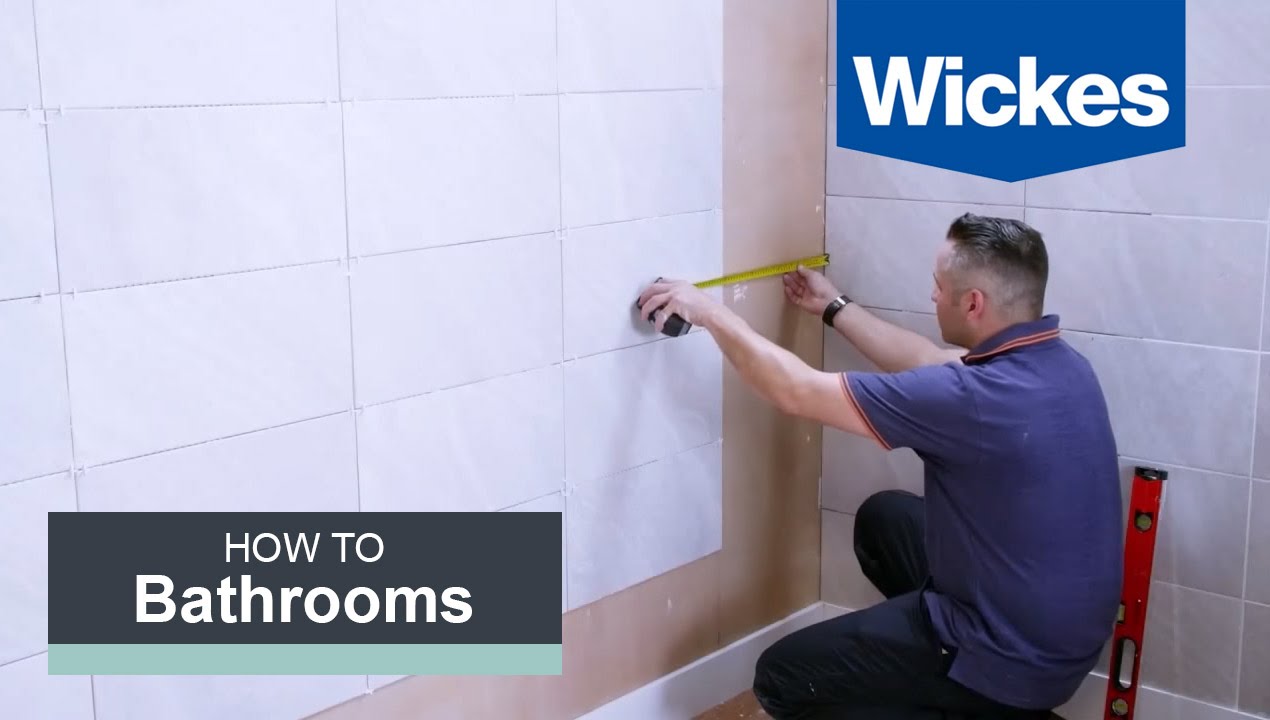
- Measuring and Planning: Proper planning is crucial to achieve a visually appealing tile installation. Measure the area you want to tile and determine the layout, taking into consideration any architectural features or fixtures. Use a pencil and a straightedge to create reference lines on the wall, ensuring even and symmetrical tile placement.
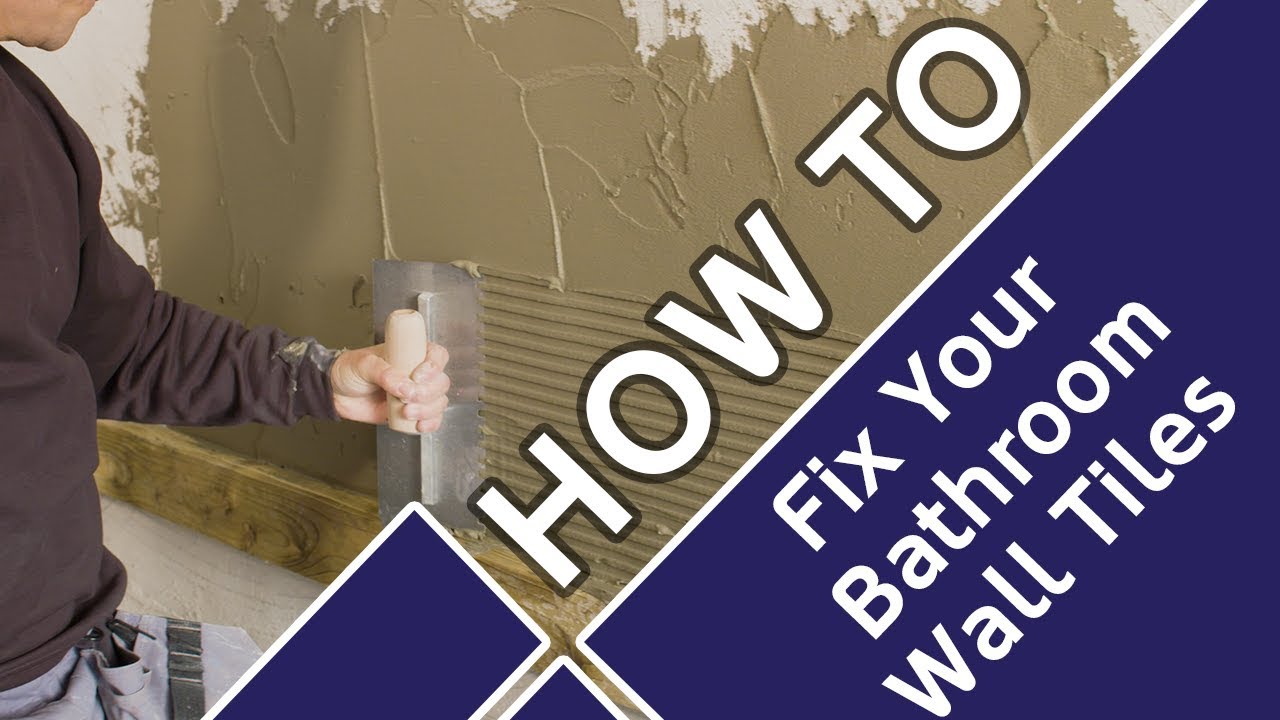
- Applying the Tile Adhesive: Once the wall is prepared, it’s time to apply the tile adhesive. Choose a high-quality adhesive suitable for your specific tile material. Follow the manufacturer’s instructions for mixing the adhesive and applying it to the wall using a notched trowel. Start from the bottom and work your way up, ensuring even coverage and a consistent layer of adhesive.
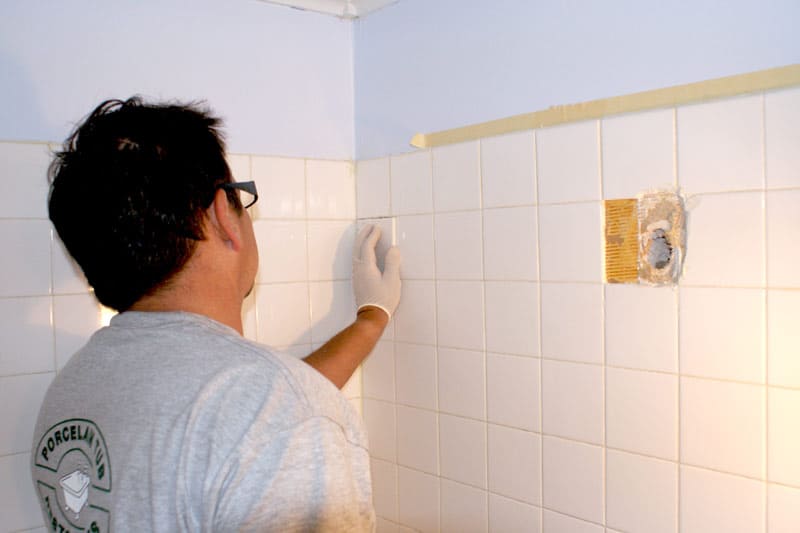
- Setting the Tiles: With the adhesive applied, it’s time to set the tiles on the wall. Press each tile firmly into the adhesive, aligning it with the reference lines. Use tile spacers to maintain consistent spacing between the tiles, ensuring a professional finish. Continue this process, working in small sections to prevent the adhesive from drying out before the tiles are set.
- Cutting and Trimming Tiles: Inevitably, some tiles will need to be cut or trimmed to fit around edges, corners, or fixtures. Measure the required dimensions carefully and use a tile cutter or wet saw to make precise cuts. Take your time during this step to ensure accurate cuts and minimize wastage.
- Grouting and Cleaning: Once the tiles are set and the adhesive has cured, it’s time to apply the grout. Choose a grout color that complements your tiles and mix it following the manufacturer’s instructions. Use a rubber grout float to spread the grout over the tiles, working it into the spaces between them. Remove any excess grout with a damp sponge, taking care not to disturb the newly set tiles. Allow the grout to cure for the recommended time before cleaning the tiles with a soft cloth.
How to Properly Clean and Prepare Your Bathroom Walls for Tile Installation
Before embarking on a bathroom tile installation project, it is crucial to properly prepare the surface to ensure a strong and durable bond between the tiles and the wall. Let me guide you through the process of cleaning and preparing your bathroom walls for tile installation. By following these steps, you can create an ideal surface that will promote adhesion and result in a successful tile installation.
- Clearing the Area: Begin by removing any furniture, fixtures, or decorations from the bathroom walls. This will allow you to have a clear and unobstructed workspace. Cover the floor and any remaining fixtures with drop cloths or plastic sheets to protect them from dust and debris.
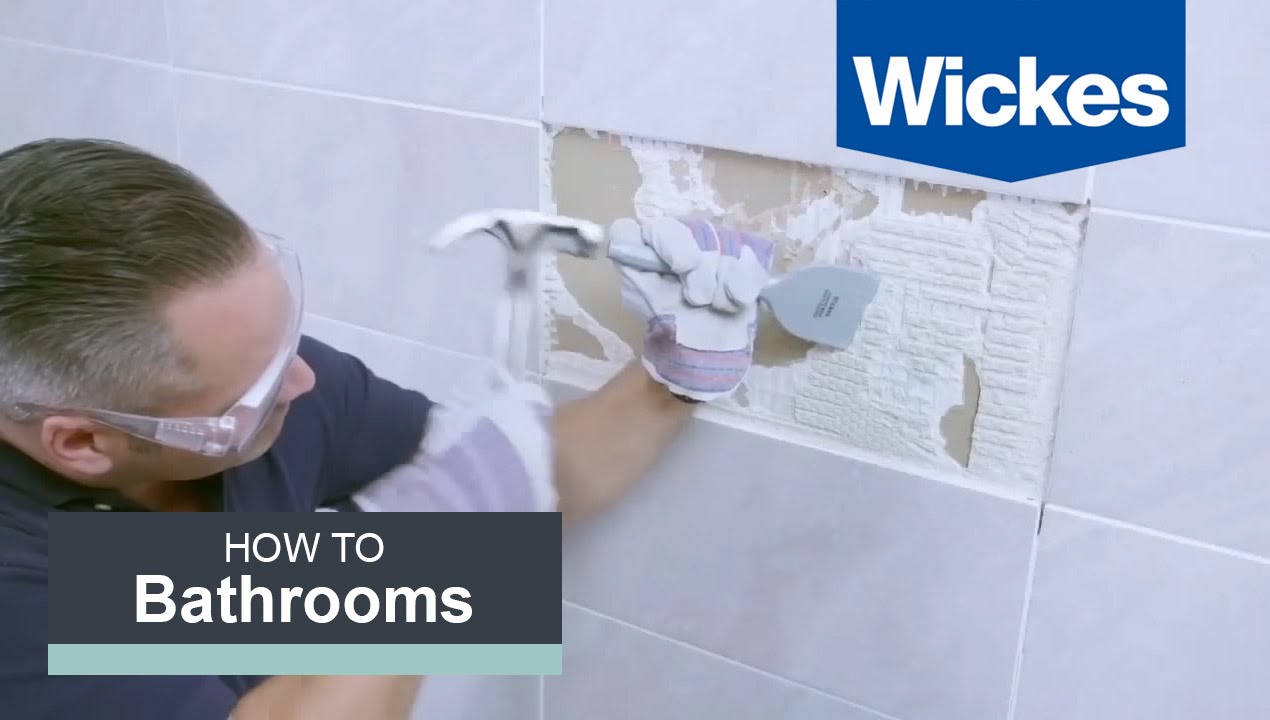
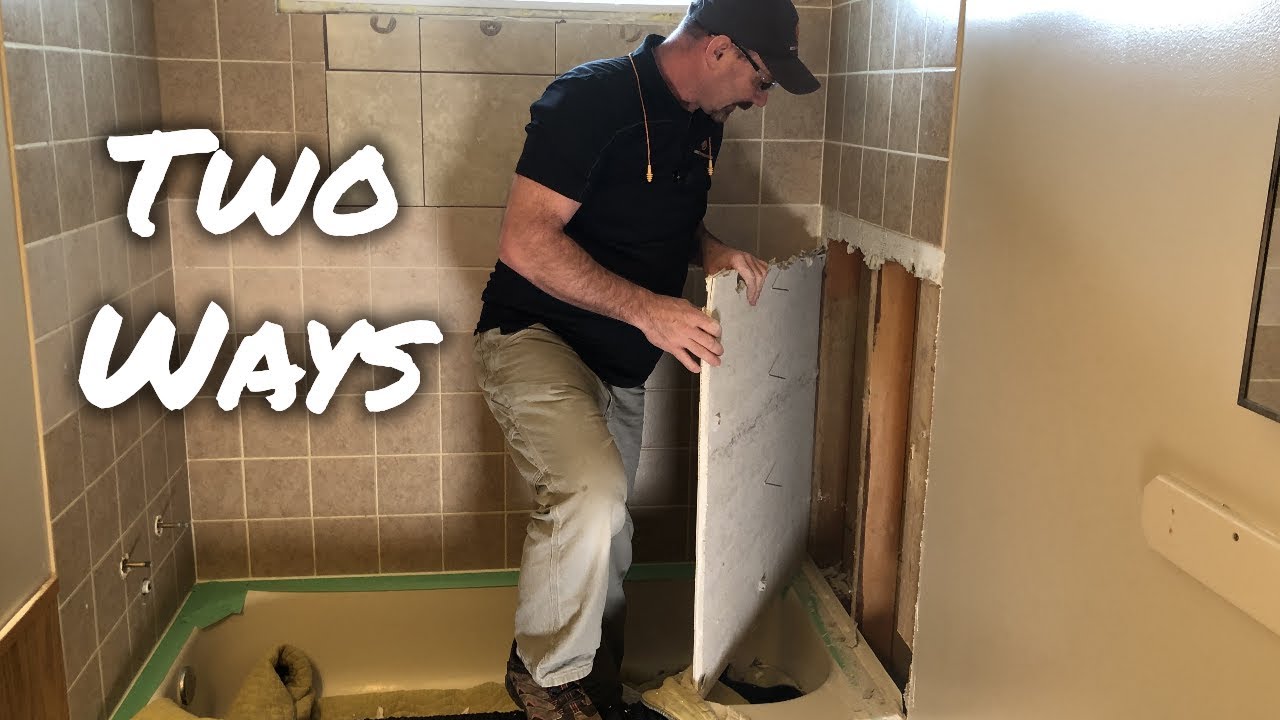
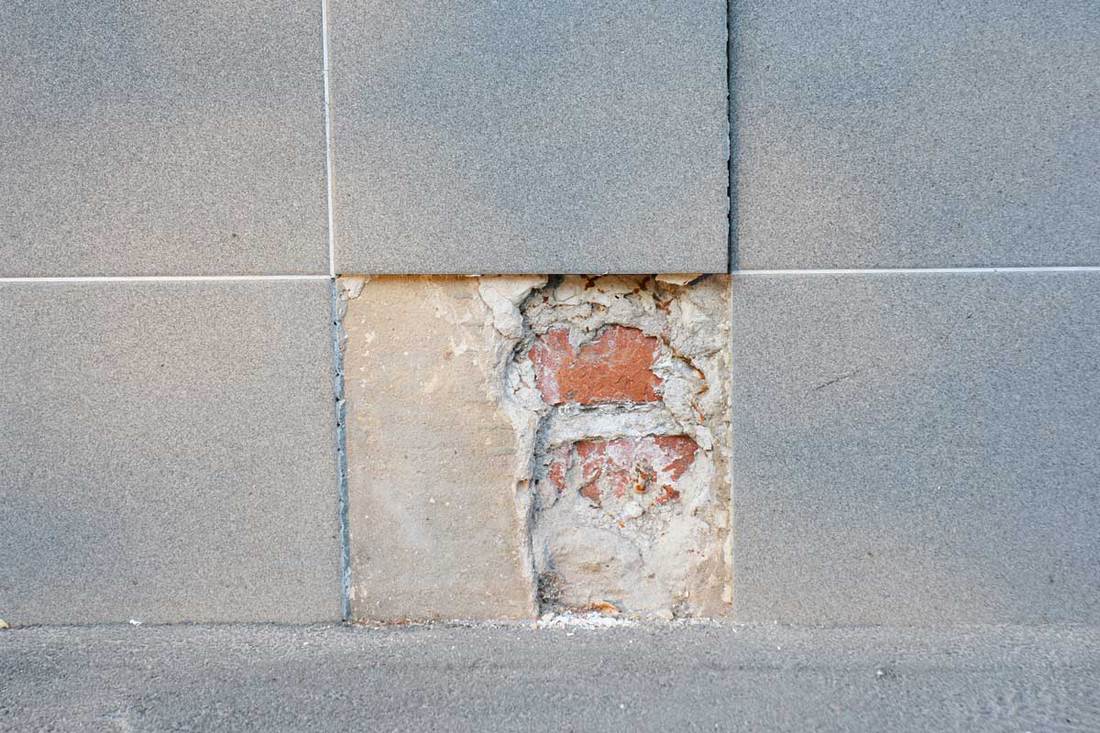
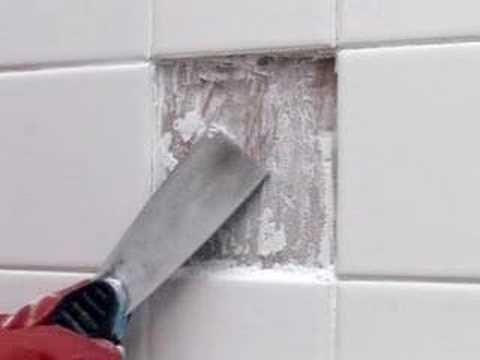
- Removing Existing Tiles: If there are already tiles on the bathroom walls that need to be replaced, you will need to remove them. Start by using a hammer and chisel to break a tile near an edge or corner. Once a piece has been removed, you can use a pry bar or putty knife to carefully lift and remove the remaining tiles. Be cautious to avoid damaging the underlying wall surface.
- Repairing Damages: Inspect the wall surface for any damages such as cracks, holes, or uneven areas. Use a putty knife to fill in any cracks or holes with a suitable wall filler or spackle. Smooth out the repaired areas and allow them to dry completely. For larger repairs, consider using a patching compound and follow the manufacturer’s instructions for application and drying times.
- Cleaning the Walls: Properly cleaning the walls is essential to remove any dirt, grease, or residue that may hinder adhesion. Start by using a mild detergent or cleaner mixed with water to scrub the walls. Pay close attention to areas near sinks, toilets, or showers that tend to accumulate soap scum or mold. Rinse the walls thoroughly with clean water and allow them to dry completely before proceeding.
- Sanding the Walls: To create a smooth and even surface, it may be necessary to sand the walls. Use a medium-grit sandpaper or sanding block to gently sand the walls in a circular motion. This will help remove any remaining rough patches, bumps, or uneven areas. After sanding, wipe down the walls with a damp cloth to remove any dust or debris.
- Priming the Walls: Priming the walls is an important step to promote adhesion and ensure a strong bond between the tiles and the wall surface. Choose a high-quality primer suitable for your specific wall material. Apply the primer using a roller or brush, following the manufacturer’s instructions for application and drying times. Allow the primer to dry completely before starting the tile installation.
Choosing the Right Materials
When it comes to fixing bathroom tiles on walls, selecting the right materials is crucial for a successful and long-lasting tile installation. Here is a comprehensive guide on choosing the best adhesives and grouts for your bathroom tile project. By understanding the different types and properties of these materials, you can make informed decisions and ensure a professional finish.
Adhesives:
Cement-Based Adhesive: Cement-based adhesives are commonly used for bathroom tile installations. They provide excellent bonding strength and are suitable for a wide range of tile materials. These adhesives come in powder form and need to be mixed with water before application. They are ideal for areas with high moisture levels, such as bathrooms. Follow the manufacturer’s instructions for mixing ratios and drying times.
Pre-Mixed Adhesive: Pre-mixed adhesives are ready-to-use and convenient options for small-scale tile installations. They come in a tub or bucket and eliminate the need for mixing. These adhesives are suitable for lightweight tiles and can be applied directly to the wall. However, they may not provide the same level of bond strength as cement-based adhesives, so consider the weight and size of your tiles before choosing this option.
Epoxy Adhesive: Epoxy adhesives are known for their exceptional strength and durability. They are resistant to moisture, chemicals, and temperature variations, making them ideal for bathroom tile installations. Epoxy adhesives come in two parts – a resin and a hardener – which need to be mixed before application. They have a longer curing time and require careful handling, so ensure that you follow the manufacturer’s instructions closely.
Grouts:
Cement-Based Grout: Cement-based grouts are the most commonly used type of grout for bathroom tile projects. They are available in a variety of colors and are suitable for most tile materials. Cement-based grouts need to be mixed with water and applied to the tile joints. They are porous and require sealing to prevent staining and moisture penetration. Follow the manufacturer’s instructions for mixing ratios, application, and sealing.
Epoxy Grout: Epoxy grouts offer superior stain resistance and are highly durable. They are resistant to moisture, chemicals, and discoloration, making them ideal for bathroom tile installations. Epoxy grouts are available in a wide range of colors and do not require sealing. They come in two parts – a resin and a hardener – which need to be mixed before application. Epoxy grouts have a longer curing time and require careful application, so follow the manufacturer’s instructions closely.
Silicone-Based Grout: Silicone-based grouts are flexible and resistant to water, making them suitable for areas with high moisture levels, such as showers. They are available in various colors and do not require sealing. Silicone-based grouts come in a tube and can be applied directly to the tile joints. They are easy to work with and offer good resistance to mold and mildew. Follow the manufacturer’s instructions for application and drying times.
Tips and Techniques for a Flawless Installation
Now that you have prepared the surface and chosen the right materials, it’s time to dive into the installation process. Properly installing the tiles on your bathroom walls is crucial for achieving a flawless and durable result. Below we provide you with expert tips and techniques to ensure a successful tile installation. By following these guidelines, you can create a visually stunning and professionally finished bathroom.
Dry Layout: Before applying adhesive, it is recommended to do a dry layout of the tiles. Lay out the tiles on the floor or a flat surface to get a visual representation of how they will look on the wall. This step allows you to make any adjustments or modifications to the tile placement before permanently fixing them. It is particularly useful when dealing with intricate patterns or layouts.
Applying Adhesive: Using a notched trowel, apply the adhesive to the wall in small sections. Start at the bottom and work your way up, ensuring even coverage. Hold the trowel at a 45-degree angle and spread the adhesive in smooth, consistent strokes. Avoid applying too much adhesive at once, as it may dry out before you can install the tiles. Work in manageable sections to maintain control and accuracy.
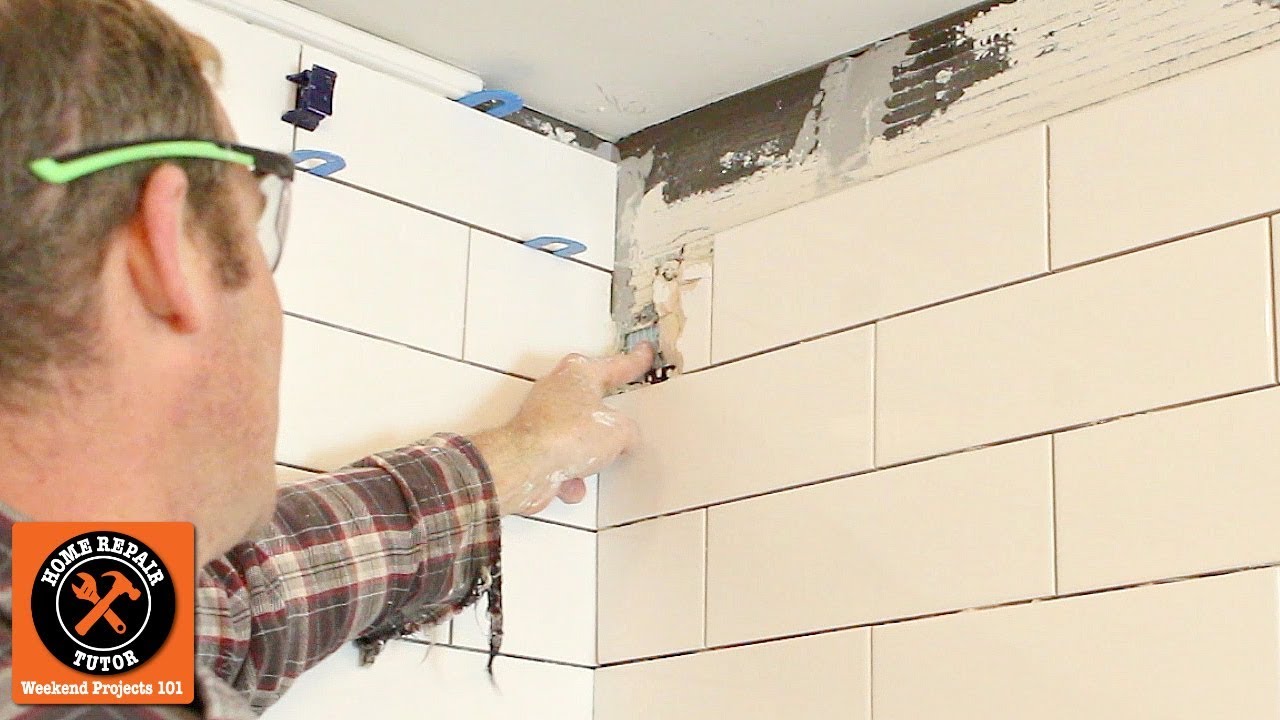
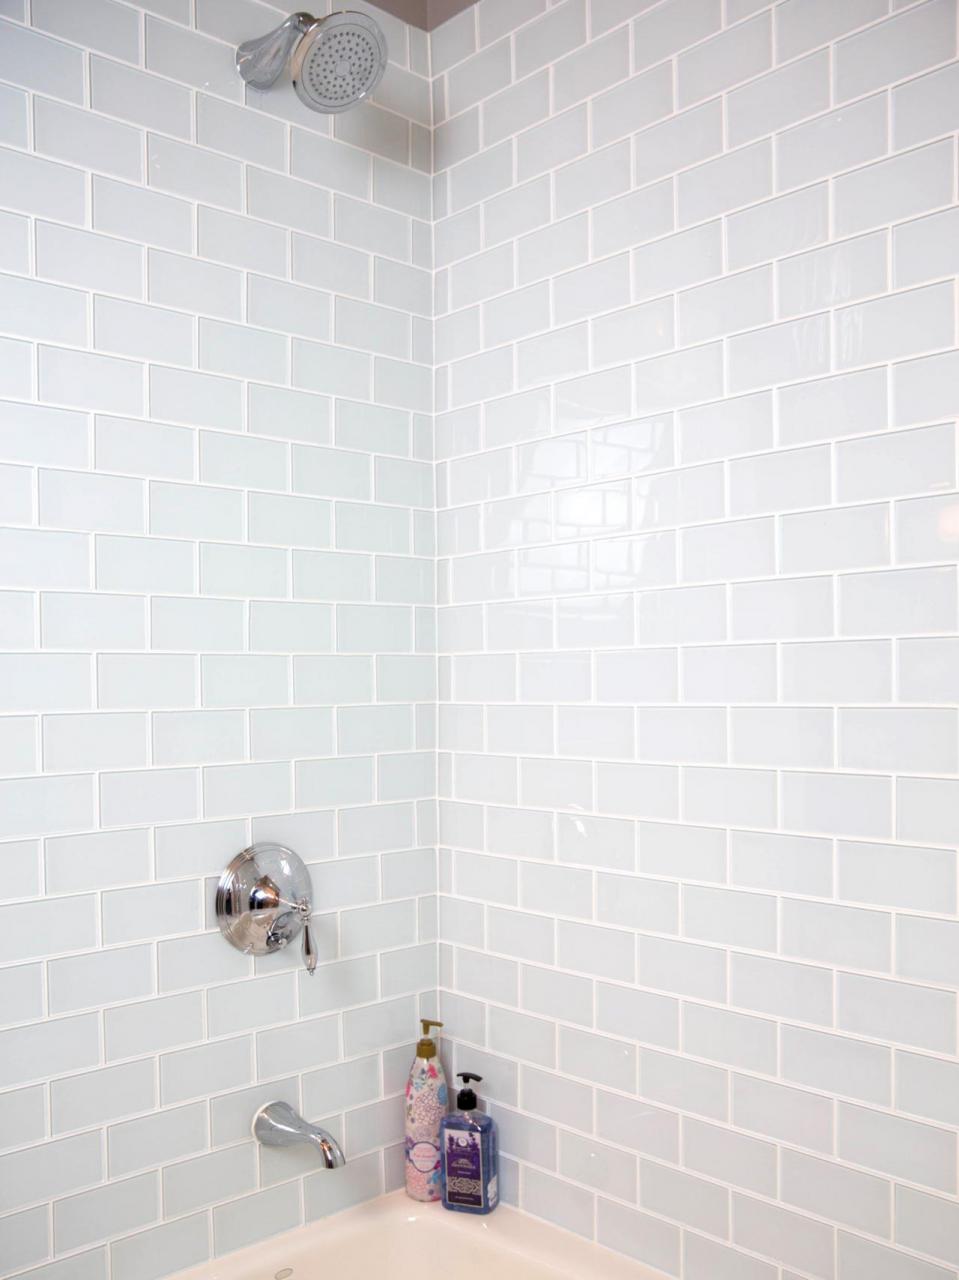
Tile Placement: Begin placing the tiles on the wall, starting from the bottom and working your way up. Press each tile firmly into the adhesive, ensuring it aligns with the reference lines. Use tile spacers to maintain consistent spacing between the tiles. This will create even grout lines and a professional finish. Adjust the tiles as needed to ensure they are level and in line with the surrounding tiles.
Cutting and Trimming: As you reach the edges, corners, or fixtures, you will likely need to cut or trim some tiles to fit properly. Measure the required dimensions carefully and use a tile cutter, wet saw, or tile nippers to make precise cuts. Take your time during this step to ensure accurate cuts and minimize wastage. Use tile edge trim or bullnose tiles for a clean and finished look along exposed edges.
Checking Alignment: Periodically check the alignment of the tiles as you progress. Use a level or straightedge to ensure they are plumb and level both vertically and horizontally. Adjust the tiles as needed to maintain a uniform and visually pleasing installation. Pay special attention to corners and transitions between walls to ensure a seamless look.
Grout Cleanup: Once the adhesive has cured, it’s time to remove the tile spacers and proceed with grouting. Use a grout float to spread the grout over the tiles, working it into the spaces between them. Remove any excess grout with a damp sponge, taking care not to disturb the newly set tiles. Allow the grout to cure for the recommended time before giving the tiles a final wipe with a clean, damp cloth.

Finishing Touches: Grouting, Sealing, and Cleaning
After successfully installing the tiles on your bathroom walls, there are a few crucial finishing touches that will enhance the overall appearance and longevity of the tile job. Let’s discuss the importance of grouting, sealing, and cleaning to ensure a professional and long-lasting finish. By following these steps, you can complete your bathroom tile project with confidence and enjoy the beauty of your newly tiled walls.
Grouting: Grouting is the process of filling the gaps between the tiles with a grout mixture. It not only provides a clean and finished look but also helps to prevent moisture penetration and tile movement. Start by mixing the grout according to the manufacturer’s instructions, ensuring a smooth and lump-free consistency. Using a rubber grout float, spread the grout diagonally across the tiles, ensuring that it fills the gaps. Remove any excess grout using the float at a 45-degree angle. Allow the grout to dry for the recommended time before proceeding.
Sealing: Sealing the grout is an essential step that protects it from moisture, stains, and discoloration. It is especially important in bathroom areas prone to high humidity and moisture levels. Once the grout has cured, apply a grout sealer using a small brush or applicator. Follow the manufacturer’s instructions for application and drying times. Be sure to wipe off any excess sealer from the tiles to avoid leaving a residue. Allow the sealer to dry completely before using the bathroom or exposing it to water.
Cleaning: Regular cleaning is essential to maintain the cleanliness and appearance of your tiled bathroom walls. Use a mild, non-abrasive cleaner specifically designed for tiles. Avoid using harsh chemicals or abrasive scrub brushes that could damage the tiles or grout. Regularly wipe down the tiles with a soft cloth or sponge to remove soap scum, grime, and any buildup. Pay special attention to areas around sinks, showers, and toilets where dirt and moisture tend to accumulate. By maintaining a regular cleaning routine, you can keep your tiled walls looking fresh and beautiful.
Maintenance: In addition to regular cleaning, there are a few maintenance practices that can help prolong the life and beauty of your tiled walls. Avoid using abrasive cleaning tools or harsh chemicals that can damage the tiles or grout. Use caution when moving heavy objects or furniture against the tiled walls to prevent chipping or cracking. If you notice any loose or damaged tiles or grout, repair them promptly to prevent further damage. By practicing proper maintenance, you can enjoy the beauty and functionality of your tiled bathroom walls for years to come.
Ceramic Tile Repair Services Maryland Washington DC N. VA
How To Fix Bathroom Wall Tiles – Tile Mountain
Bathroom Tiles Falling Off – What to Do? – Home Decor Bliss
How to Install a Shower Tile Wall Tile a Bathroom Shower
Collins DIY Survival Demos – How to Fix a Broken Tile
repair – Cracked bathroom tile – runs almost entire length of the
Bath remodel, Kids bathroom makeover, Kitchen and bath
Related Posts:


