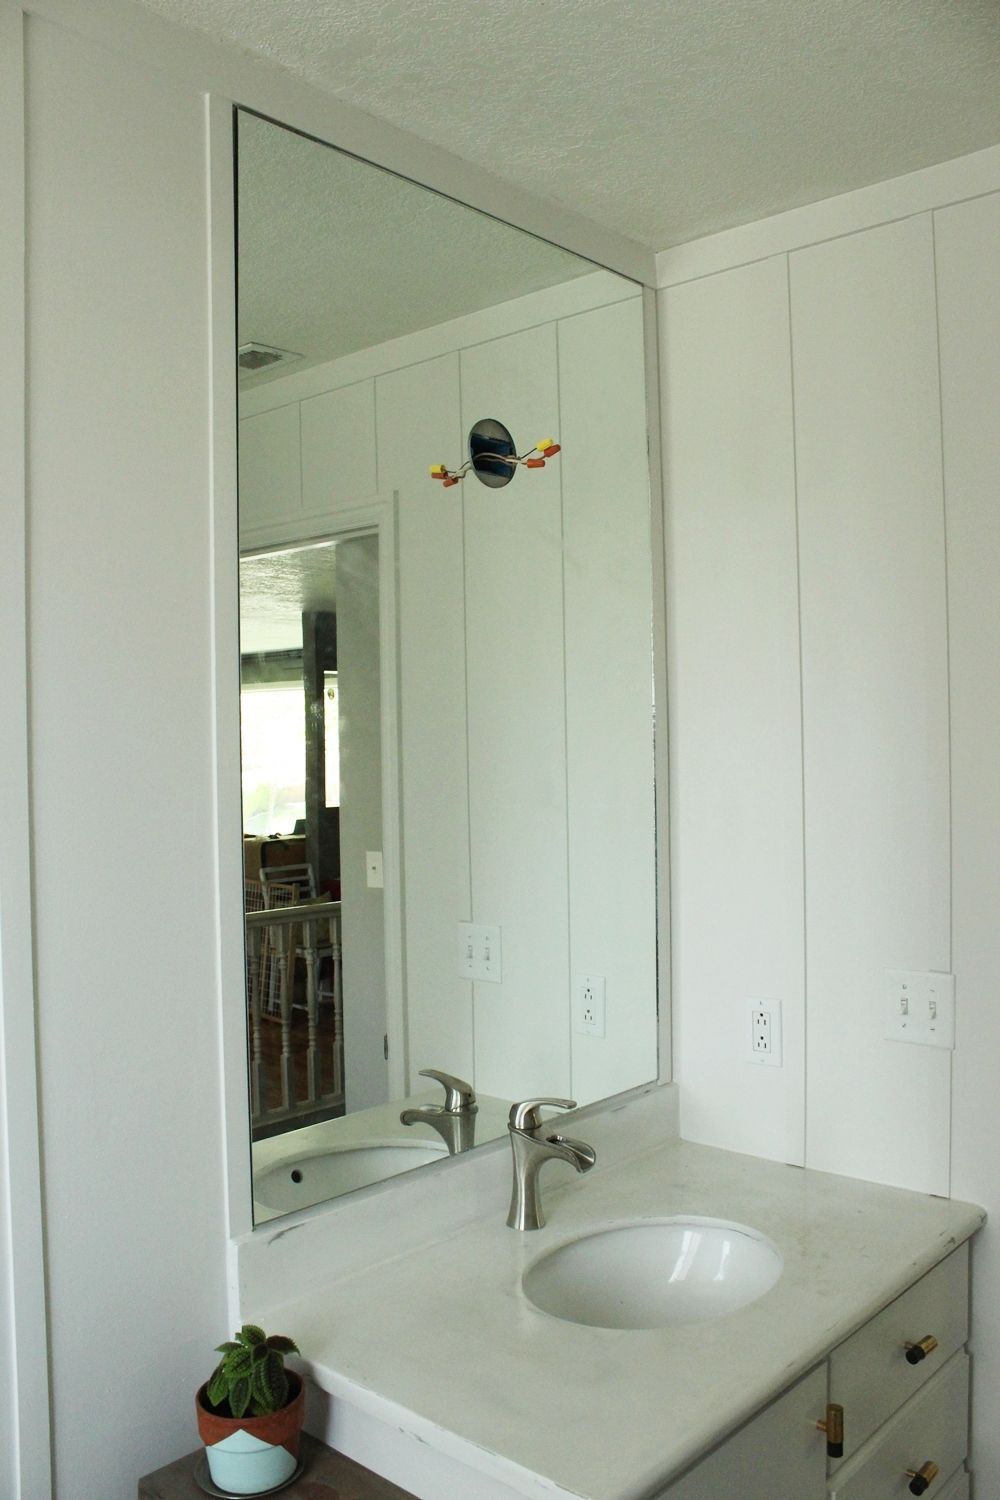
Choosing the right mirror for your bathroom can elevate the aesthetics and functionality of the space. There are various factors to consider when selecting a mirror, including style, size, shape, and additional features. Here’s a guide to help you make the best choice.
Consider the Style of Your Bathroom: The mirror should complement the existing decor of your bathroom. For a modern look, opt for sleek, frameless mirrors. Traditional bathrooms may benefit from ornate, framed mirrors. Match the mirror’s finish with your bathroom fixtures for a cohesive look.
Determine the Appropriate Size: Measure the wall space where you plan to install the mirror. A mirror that is too small can look out of place, while an overly large mirror can overwhelm the space. A general rule of thumb is to choose a mirror that is no wider than the vanity or sink.
Choose the Shape That Suits Your Space: Mirrors come in various shapes, including rectangular, square, oval, and round. Rectangular and square mirrors are classic choices that fit most spaces. Oval and round mirrors add a softer, more unique touch and work well in smaller bathrooms.
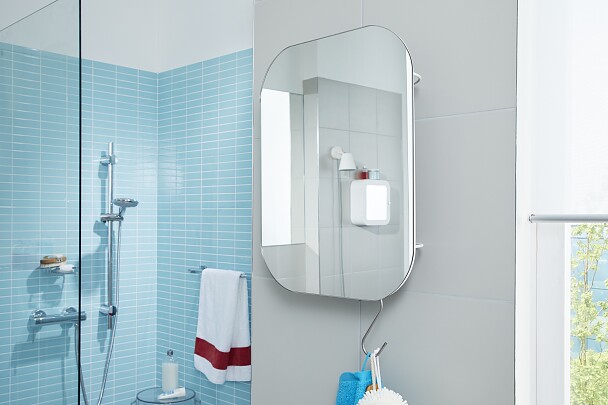
Decide on Additional Features: Some mirrors come with built-in lighting, anti-fog features, or storage options. LED-lit mirrors are perfect for makeup application and shaving, while anti-fog mirrors are practical for steamy bathrooms. Mirrors with shelves or cabinets provide extra storage in small bathrooms.
Reflect on the Placement: Think about where you’ll be placing the mirror. Above the sink is the most common placement, but you might also consider a full-length mirror on a different wall. Ensure the mirror is placed at a comfortable height for all users.
Consider the Weight: The weight of the mirror is crucial, especially when installing without drilling. Lightweight mirrors are easier to secure with adhesive products, reducing the risk of them falling.
Essential Tools and Materials for a No-Drill Installation
Installing a bathroom mirror without drilling requires the right tools and materials to ensure a secure and professional finish. Here’s a list of what you’ll need and why each item is essential.
Adhesive Products
High-quality adhesive products like mirror adhesive or double-sided mounting tape are critical. These products are designed to hold the weight of the mirror securely on the wall. Make sure to choose one that is specifically labeled for mirrors.
Level
A level ensures that your mirror is perfectly horizontal. This tool is essential to avoid a crooked installation, which can affect the mirror’s functionality and aesthetics. Digital or bubble levels both work well for this purpose.
Measuring Tape
Accurate measurements are necessary to ensure the mirror is centered and placed correctly. A measuring tape helps you determine the exact dimensions of your mirror and the space where it will be installed.
Pencil and Painter’s Tape
Use a pencil to mark the wall where you’ll place the mirror. Painter’s tape can help you create guidelines without damaging the paint. These marks are crucial for precise placement and alignment.
Cleaning Supplies
Before installation, clean the wall surface with a mild detergent to remove dust, grease, and other residues. A clean surface ensures better adhesion. You’ll also need to clean the back of the mirror.
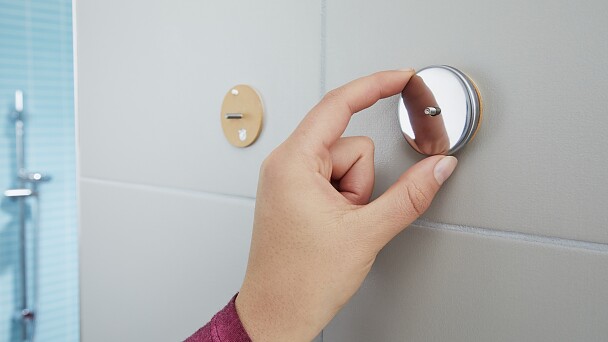
Optional: Suction Cups
Suction cups can be useful to hold the mirror in place temporarily while the adhesive sets. This helps prevent the mirror from slipping or falling during the initial installation phase.
Step-by-Step Guide to Installing a Mirror Without Drilling
Installing a bathroom mirror without drilling is a straightforward process if you follow the right steps. Here’s a detailed guide to help you achieve a secure and professional-looking installation.
Prepare the Wall Surface
Start by cleaning the wall surface where the mirror will be installed. Use a mild detergent and water to remove any dirt, grease, or residue. Allow the wall to dry completely before proceeding.
Measure and Mark the Placement
Use a measuring tape to determine the exact placement of the mirror. Mark the top and bottom edges with a pencil. Use a level to ensure these marks are perfectly horizontal. Painter’s tape can help create straight guidelines.
Apply the Adhesive
Follow the manufacturer’s instructions to apply the adhesive to the back of the mirror. If using mirror adhesive, apply it in a zigzag pattern or small, evenly-spaced dots. For double-sided mounting tape, place strips along the edges and in the center.
Position the Mirror
Carefully position the mirror against the wall, aligning it with the marks you made earlier. Press the mirror firmly against the wall, applying even pressure across the entire surface to ensure good contact with the adhesive.
Secure the Mirror Temporarily
If needed, use suction cups or painter’s tape to hold the mirror in place while the adhesive sets. This step is especially important for larger or heavier mirrors. Follow the adhesive’s instructions regarding setting time.
Final Adjustments and Cleaning
Once the adhesive has been set, remove any temporary supports. Check the mirror to ensure it is securely attached and make any necessary adjustments. Clean the mirror’s surface with a glass cleaner to remove fingerprints and smudges.
Top Adhesive Products for Securing Your Mirror
Choosing the right adhesive product is crucial for a successful no-drill mirror installation. Here are some of the top adhesive products available, along with their features and benefits.
3M Command Strips
3M Command Strips are popular for their ease of use and strong holding power. They come in various sizes and can hold a significant amount of weight. The strips can be removed cleanly, making them ideal for renters or temporary installations.
Loctite Power Grab Mirror Adhesive
Loctite Power Grab is specifically formulated for mirrors and provides a strong, permanent bond. It works on various surfaces, including painted walls, tile, and glass. This adhesive is also water-resistant, making it suitable for bathroom use.
Gorilla Heavy Duty Mounting Tape
Gorilla Mounting Tape is a double-sided tape known for its industrial-strength holding power. It can hold up to 30 pounds, making it suitable for medium to large mirrors. The tape is also weatherproof, adding to its durability.
Scotch Mirror Mounting Tape
Scotch Mirror Mounting Tape is designed specifically for mounting mirrors. It offers a strong bond and is moisture-resistant, which is essential for bathroom installations. The tape is easy to apply and provides a clean, permanent hold.
DAP Liquid Nails Mirror Adhesive
DAP Liquid Nails is a versatile adhesive that works well for mirrors. It provides a strong, durable bond and is designed to withstand moisture and temperature changes, ensuring your mirror stays securely in place.
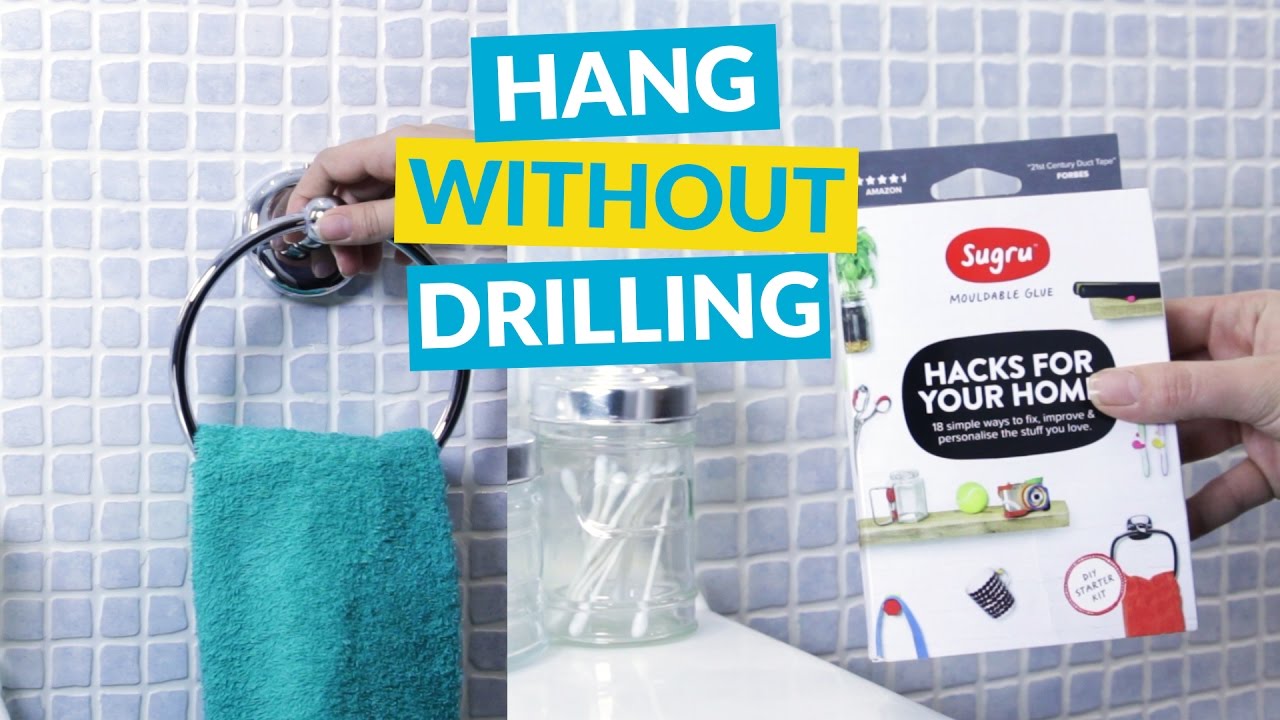
Sugru Moldable Glue
Sugru is a unique, moldable glue that can be shaped to fit various surfaces. It adheres well to glass, tile, and other common bathroom materials. Once cured, it forms a strong, rubber-like bond that is resistant to water and heat.
Tips for Ensuring a Level and Secure Fit
Ensuring a level and secure fit for your bathroom mirror is crucial for both aesthetics and safety. Here are some tips to help you achieve a professional-looking installation.
Use a Level
A level is essential for making sure your mirror is perfectly horizontal. Digital levels provide precise readings, but traditional bubble levels are also effective. Check the level at the top and bottom of the mirror during installation.
Create a Template
Make a template of your mirror using paper or cardboard. Tape it to the wall to visualize the placement and make adjustments before applying adhesive. This step helps ensure the mirror is positioned correctly.
Mark the Wall
Use a pencil and painter’s tape to mark the top and bottom edges of the mirror on the wall. These marks act as guidelines during installation, helping you place the mirror accurately and avoid misalignment.
Apply Adhesive Evenly
Apply the adhesive or mounting tape evenly across the back of the mirror. Uneven application can cause the mirror to sit crooked or create pressure points that may lead to cracks. Follow the manufacturer’s instructions for the best results.
Use Temporary Supports
Use suction cups, painter’s tape, or a helper to hold the mirror in place while the adhesive sets. Temporary supports prevent the mirror from slipping and ensure it remains level until the adhesive cures fully.
Double-Check Before Finalizing
Before pressing the mirror firmly against the wall, double-check its alignment with your level and marks. Make any necessary adjustments while the adhesive is still pliable. Once set, most adhesives cannot be repositioned without damaging the wall or mirror.
Maintaining and Troubleshooting Your No-Drill Mirror Installation
Maintaining your no-drill mirror installation ensures it stays secure and looks great. Here are some tips for maintenance and troubleshooting common issues.
Regular Cleaning
Clean your mirror regularly with a non-abrasive glass cleaner and a soft cloth to keep it sparkling. Avoid using harsh chemicals that can damage the adhesive or mirror surface. Wipe the edges and frame to prevent dust buildup.
Check Adhesive Integrity
Periodically check the adhesive to ensure it is still holding the mirror securely. Look for any signs of loosening, such as gaps between the mirror and the wall or movement when touched. Address any issues promptly to prevent accidents.
Prevent Moisture Damage
In a bathroom, moisture can weaken adhesive bonds over time. Ensure your bathroom is well-ventilated to reduce humidity. Use an exhaust fan or open a window after showers to keep the air dry and protect the adhesive.
Reinforce if Necessary
If you notice the mirror starting to loosen, you may need to reinforce the adhesive. Apply additional adhesive or mounting tape to the back of the mirror, following the same installation steps. Ensure the mirror is clean and dry before reapplying.
Handling Weight Issues
If your mirror is too heavy for the adhesive, consider adding additional support. Lightweight mirrors are ideal for no-drill installations, but if you need to use a heavier mirror, consult with a professional for alternative mounting solutions.
Addressing Surface Issues
Uneven or textured walls can affect adhesive performance. If your mirror is not adhering properly, consider using a backboard or mounting plate to create a smooth, flat surface. Attach the mirror to the backboard using adhesive, then mount the board to the wall.
Mirror without drilling – tesa
Simple Ways to Hang a Mirror on a Wall Without Nails
How to Hang a Heavy Mirror Without Nails: 4 Alternative Ways
3 Simple Ways to Hang a Mirror on a Wall Without Nails – wikiHow
How To Put Mirrors On Walls Without Nails – Home Decor Bliss
How to Hang a Bathroom Mirror Without Nails, Screws or Drilling
How To Put Mirrors On Walls Without Nails – Home Decor Bliss
How to Hang a Heavy Mirror (DIY) Family Handyman
Mirror without drilling – tesa
How To Hang A Frameless Mirror [March 2021] – Your Guide to
We use cookies on our website to give you the most relevant experience by remembering your preferences and repeat visits. By clicking “Accept All”, you consent to the use of ALL the cookies. However, you may visit "Cookie Settings" to provide a controlled consent.
This website uses cookies to improve your experience while you navigate through the website. Out of these, the cookies that are categorized as necessary are stored on your browser as they are essential for the working of basic functionalities of the website. We also use third-party cookies that help us analyze and understand how you use this website. These cookies will be stored in your browser only with your consent. You also have the option to opt-out of these cookies. But opting out of some of these cookies may affect your browsing experience.
Necessary cookies are absolutely essential for the website to function properly. These cookies ensure basic functionalities and security features of the website, anonymously.
Cookie
Duration
Description
cookielawinfo-checkbox-analytics
11 months
This cookie is set by GDPR Cookie Consent plugin. The cookie is used to store the user consent for the cookies in the category "Analytics".
cookielawinfo-checkbox-functional
11 months
The cookie is set by GDPR cookie consent to record the user consent for the cookies in the category "Functional".
cookielawinfo-checkbox-necessary
11 months
This cookie is set by GDPR Cookie Consent plugin. The cookies is used to store the user consent for the cookies in the category "Necessary".
cookielawinfo-checkbox-others
11 months
This cookie is set by GDPR Cookie Consent plugin. The cookie is used to store the user consent for the cookies in the category "Other.
cookielawinfo-checkbox-performance
11 months
This cookie is set by GDPR Cookie Consent plugin. The cookie is used to store the user consent for the cookies in the category "Performance".
viewed_cookie_policy
11 months
The cookie is set by the GDPR Cookie Consent plugin and is used to store whether or not user has consented to the use of cookies. It does not store any personal data.
Functional cookies help to perform certain functionalities like sharing the content of the website on social media platforms, collect feedbacks, and other third-party features.
Performance cookies are used to understand and analyze the key performance indexes of the website which helps in delivering a better user experience for the visitors.
Analytical cookies are used to understand how visitors interact with the website. These cookies help provide information on metrics the number of visitors, bounce rate, traffic source, etc.
Advertisement cookies are used to provide visitors with relevant ads and marketing campaigns. These cookies track visitors across websites and collect information to provide customized ads.


 Related Posts:


