Installing a bathroom light fixture may seem like a daunting task, but with the right preparation and guidance, it can be a straightforward process. Here we provide you with a step-by-step guide on how to prepare for the installation of a bathroom light fixture, ensuring a smooth and successful project.
Assessing the Existing Wiring: Before beginning any electrical work, it is crucial to assess the existing wiring in your bathroom. Check if there is an existing electrical box or wiring that can support the new light fixture. If not, you may need to consult a professional electrician to install the necessary wiring or upgrade the existing electrical system.
Gathering the Required Tools and Materials: To ensure a hassle-free installation, gather all the necessary tools and materials beforehand. This may include a screwdriver, wire strippers, wire nuts, electrical tape, a voltage tester, a ladder, and of course, the new light fixture. Having everything at hand will save you time and frustration during the installation process.
Turning off the Power: Safety should always be a top priority when working with electricity. Before starting any electrical work, turn off the power to the bathroom circuit at the main electrical panel. Double-check that the power is indeed off by using a voltage tester to confirm there is no electrical current running through the wires.
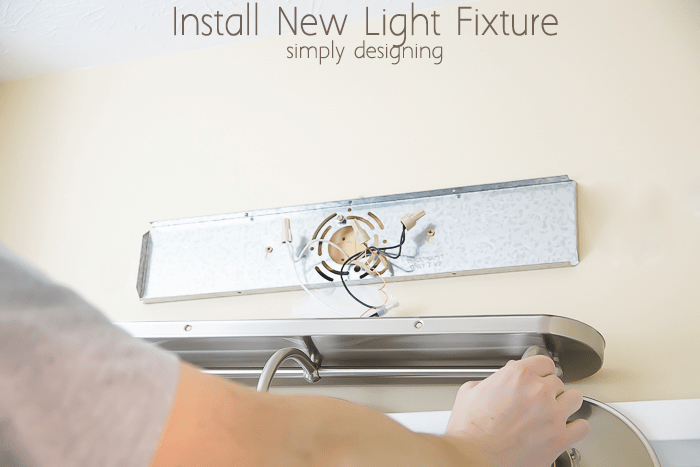
Removing the Old Light Fixture: Once the power is off, carefully remove the old light fixture. Start by unscrewing any screws or bolts that hold it in place. Gently disconnect the wiring, ensuring no damage to any of the electrical connections. If necessary, take a picture of the old fixture’s wiring configuration to help with the installation of the new one.
Preparing the Mounting Surface: After removing the old fixture, inspect the mounting surface for any damage or loose screws. Repair or replace any damaged parts and tighten any loose screws. Ensure that the mounting surface is clean and free from debris before proceeding with the installation of the new light fixture.
Choosing the Right Bathroom Light Fixture
Choosing the right bathroom light fixture goes beyond aesthetics and style. It also involves considering factors such as the size of the bathroom, the desired lighting level, and the compatibility with existing wiring. Here are some tips and considerations to help you select the perfect bathroom light fixture for your space.
Assessing the Bathroom Size and Layout: The size and layout of your bathroom will play a significant role in determining the type and size of the light fixture you should choose. For smaller bathrooms, consider compact fixtures that provide ample lighting without overwhelming the space. In larger bathrooms, you have more flexibility to choose larger or multiple fixtures to achieve the desired lighting effect.
Determining the Lighting Needs: Think about the purpose and functionality of the bathroom when selecting a light fixture. For example, if you primarily use the bathroom for grooming and applying makeup, consider fixtures with bright and even lighting. On the other hand, if you prefer a more relaxed and cozy ambiance, opt for fixtures with dimmable features or warm-toned bulbs.
Considering the Style and Design: The style and design of the light fixture should complement the overall aesthetic of your bathroom. Whether your bathroom has a modern, traditional, or eclectic design, there are plenty of options to choose from. Explore different finishes, shapes, and materials that align with your taste and the existing decor in your bathroom.
Checking the Fixture’s Compatibility with Existing Wiring: Before making a final decision, ensure that the chosen light fixture is compatible with the existing wiring in your bathroom. Check the voltage requirements and the type of wiring connection needed. If you are unsure, consult an electrician who can guide you in choosing a fixture that works seamlessly with your electrical system.
Considering Energy Efficiency: In today’s environmentally conscious world, energy efficiency is an essential consideration when choosing any fixture. Opt for light fixtures that are ENERGY STAR certified or LED-based to save energy and reduce your electricity bills. These fixtures not only provide excellent illumination but also have a longer lifespan, reducing the need for frequent replacements.
Installing the Wiring and Switch
Installing the wiring and switch for a bathroom light fixture may seem intimidating, especially for beginners. However, with proper guidance and precautions, it can be a manageable task. Here is a beginner’s guide on how to install the wiring and switch for your bathroom light fixture effectively.
Planning the Wiring Route:
Before starting the installation, plan the route for the wiring. Determine the location of the electrical box and the switch. It is essential to choose an appropriate and safe route that allows easy access to the necessary connections. Avoid running the wiring near water sources or through areas prone to moisture.
Turning off the Power:
As mentioned earlier, safety should always be a priority when working with electricity. Before starting any electrical work, turn off the power to the bathroom circuit at the main electrical panel. Use a voltage tester to confirm that there is no electrical current running through the wires.
Installing the Electrical Box:
Begin by installing the electrical box for the light fixture. Choose a box that is compatible with the chosen fixture and can safely support its weight. Follow the manufacturer’s instructions for mounting the box securely to the wall or ceiling. Ensure that the box is level and secure before proceeding with the wiring.
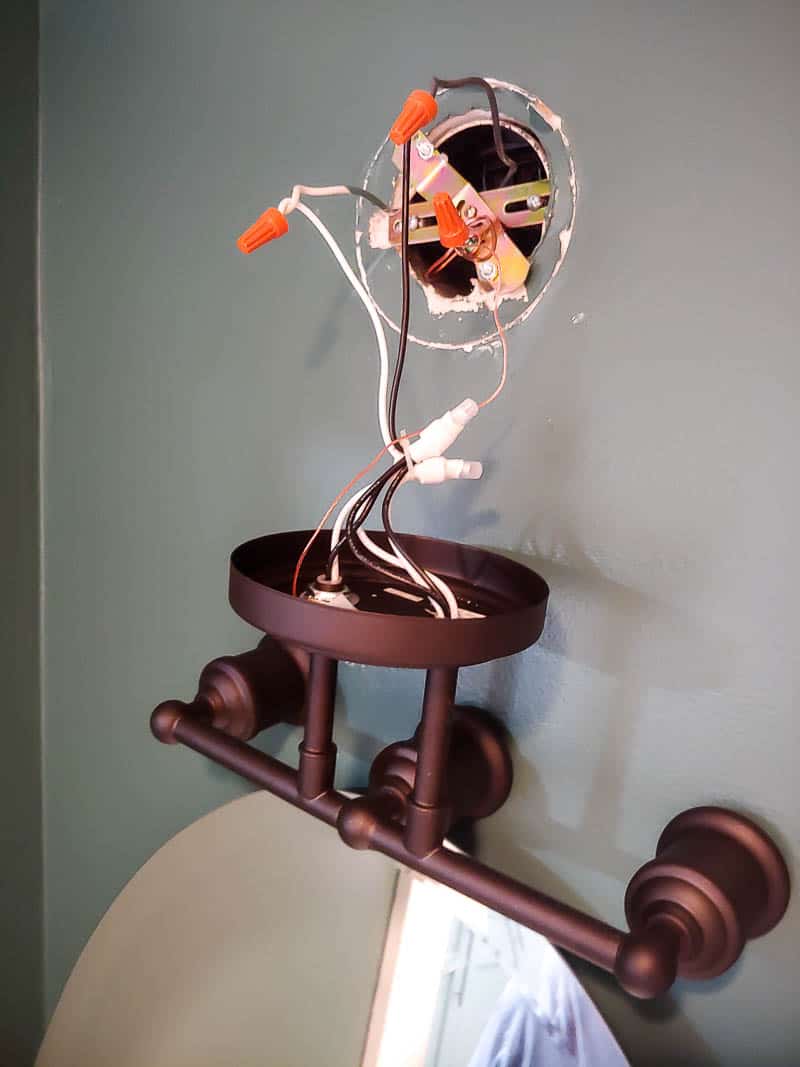
Wiring the Light Fixture:
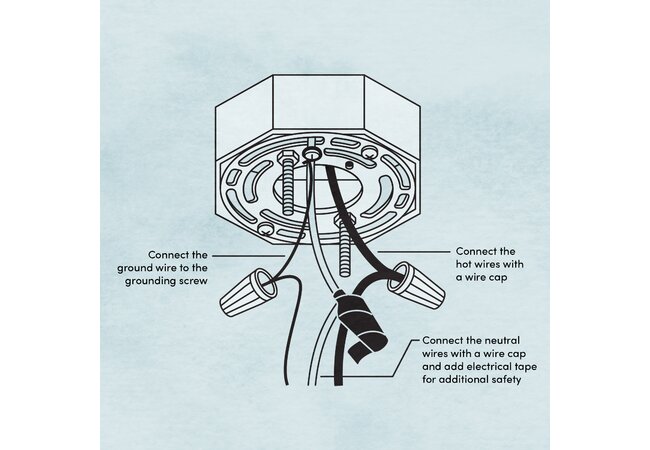
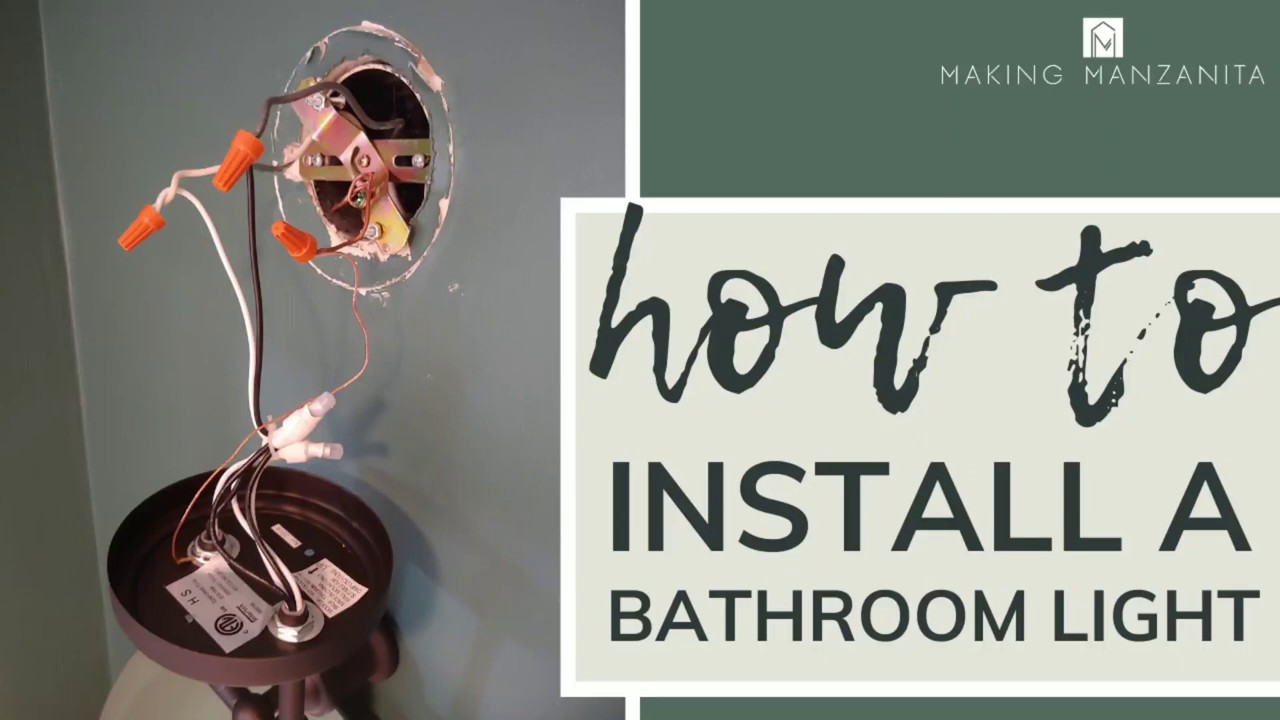
Carefully read the manufacturer’s instructions for the light fixture wiring. Strip the wires and connect them to the corresponding wires in the electrical box using wire nuts. Follow the color-coding or labeling on the wires to ensure proper connections. Use electrical tape to secure the wire nuts and prevent any loose connections.
Installing the Switch:
To control the bathroom light fixture, you will need to install a switch. Choose a switch that suits your preference and aligns with the electrical wiring in your bathroom. Follow the manufacturer’s instructions to install the switch properly. Connect the appropriate wires to the switch terminal, ensuring secure connections.
Mounting the Light Fixture: Expert Tips and Tricks
Mounting the light fixture is the final step in the installation process and requires careful attention to detail. A securely mounted fixture ensures both safety and proper illumination in your bathroom. Here are several tips and tricks to help you mount your bathroom light fixture like a pro.
Marking the Mounting Holes:
Start by marking the mounting holes on the wall or ceiling according to the dimensions and specifications provided by the manufacturer. Use a pencil or a marker to make precise marks that align with the electrical box. Double-check the alignment and levelness before proceeding with drilling.
Drilling the Mounting Holes:
Using an appropriate drill bit, carefully drill the mounting holes according to the marked positions. Ensure that the drill bit matches the type of surface you are drilling into, whether it is drywall, tile, or another material. Take your time and maintain a steady hand to avoid any damage or mistakes.
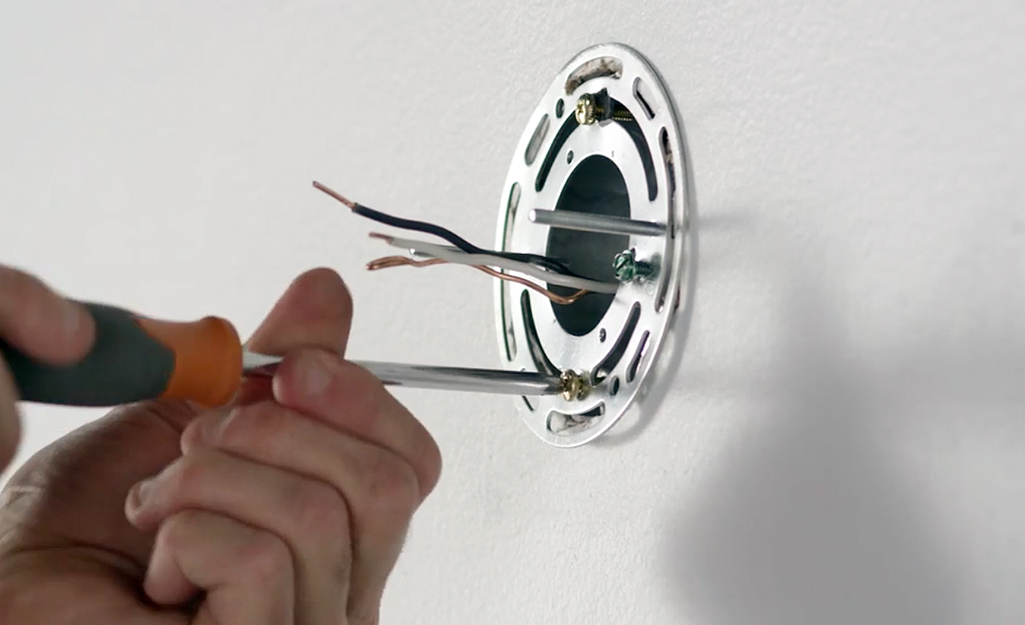
Attaching the Mounting Bracket:
After drilling the holes, attach the mounting bracket to the wall or ceiling using screws or bolts provided with the light fixture. Make sure the bracket is secure and level. Use a level tool to check for any deviations and adjust as necessary.
Wiring the Light Fixture:
Before mounting the light fixture, complete the wiring connections as outlined in the manufacturer’s instructions. Ensure that all connections are secure and properly insulated with wire nuts and electrical tape. Test the electrical connections using a voltage tester to confirm that there is no current running through the wires.
Attaching the Light Fixture:
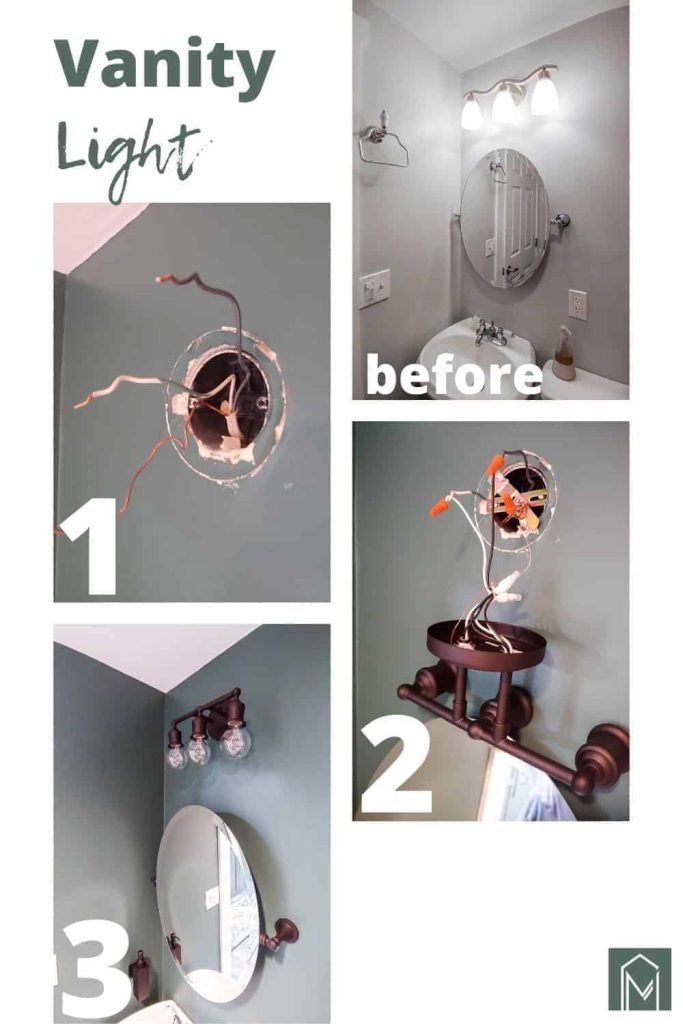
With the wiring complete, carefully lift the light fixture and align it with the mounting bracket. Securely attach the fixture to the bracket using the provided screws or other mounting hardware. Ensure that the fixture is level and properly aligned with the surrounding area.
Final Touches: Testing and Troubleshooting for a Perfectly Illuminated Bathroom
After successfully installing the bathroom light fixture, it is crucial to perform the final touches to ensure proper functionality and safety. Follow this guide to help you through the testing and troubleshooting process to achieve a perfectly illuminated bathroom.
Testing the Light Fixture:
Once the installation is complete, turn on the power to the bathroom circuit and test the newly installed light fixture. Check if the fixture illuminates properly and if the switch operates smoothly. Ensure that the lighting level meets your desired needs and that there are no flickering or dimming issues.
Checking for Loose Connections:
After testing the light fixture, inspect all the wiring connections for any signs of looseness or instability. Make sure that the wire nuts are securely fastened and that there are no exposed wires. Tighten any loose connections and apply electrical tape if necessary to ensure a safe and reliable electrical system.
Verifying Proper Grounding:
Grounding is an essential safety measure in any electrical installation. Verify that the light fixture is properly grounded by checking for a grounding wire or screw on the fixture. Ensure that the grounding wire is securely connected to the electrical box or terminal as per the manufacturer’s instructions.
Adjusting the Lighting Angle:
To achieve the desired lighting effect, adjust the angle or direction of the light fixture if necessary. Some fixtures allow you to tilt or rotate the lighting element to focus the light in a specific area. Experiment with different angles to find the optimal position that suits your bathroom layout and lighting needs.
Seeking Professional Help:
If you encounter any persistent issues or if you are unsure about any aspect of the installation, do not hesitate to seek professional help. An experienced electrician can assist you in troubleshooting and resolving any electrical problems, ensuring a safe and functional bathroom lighting system.
Install a New Bathroom Light Fixture Simply Designing with Ashley
How To Install A Bathroom Light Fixture
How to Mount a Light On Top of a Mirror Bathroom Vanity
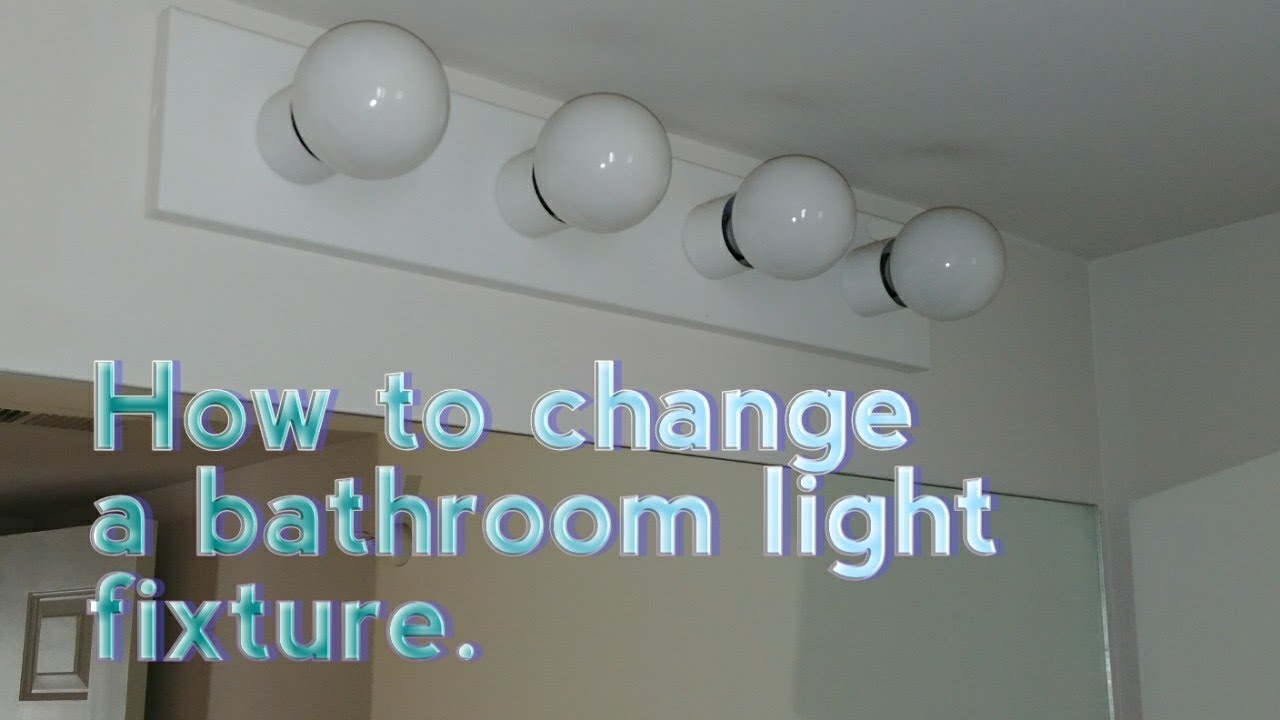
How to replace a bathroom light fixture. DIY
How To Install A Vanity Light (Video Tutorial) – Making Manzanita
Bathroom Upgrade Part 1: Splitting the Vanity Light Pneumatic Addict
We use cookies on our website to give you the most relevant experience by remembering your preferences and repeat visits. By clicking “Accept All”, you consent to the use of ALL the cookies. However, you may visit "Cookie Settings" to provide a controlled consent.
This website uses cookies to improve your experience while you navigate through the website. Out of these, the cookies that are categorized as necessary are stored on your browser as they are essential for the working of basic functionalities of the website. We also use third-party cookies that help us analyze and understand how you use this website. These cookies will be stored in your browser only with your consent. You also have the option to opt-out of these cookies. But opting out of some of these cookies may affect your browsing experience.
Necessary cookies are absolutely essential for the website to function properly. These cookies ensure basic functionalities and security features of the website, anonymously.
Cookie
Duration
Description
cookielawinfo-checkbox-analytics
11 months
This cookie is set by GDPR Cookie Consent plugin. The cookie is used to store the user consent for the cookies in the category "Analytics".
cookielawinfo-checkbox-functional
11 months
The cookie is set by GDPR cookie consent to record the user consent for the cookies in the category "Functional".
cookielawinfo-checkbox-necessary
11 months
This cookie is set by GDPR Cookie Consent plugin. The cookies is used to store the user consent for the cookies in the category "Necessary".
cookielawinfo-checkbox-others
11 months
This cookie is set by GDPR Cookie Consent plugin. The cookie is used to store the user consent for the cookies in the category "Other.
cookielawinfo-checkbox-performance
11 months
This cookie is set by GDPR Cookie Consent plugin. The cookie is used to store the user consent for the cookies in the category "Performance".
viewed_cookie_policy
11 months
The cookie is set by the GDPR Cookie Consent plugin and is used to store whether or not user has consented to the use of cookies. It does not store any personal data.
Functional cookies help to perform certain functionalities like sharing the content of the website on social media platforms, collect feedbacks, and other third-party features.
Performance cookies are used to understand and analyze the key performance indexes of the website which helps in delivering a better user experience for the visitors.
Analytical cookies are used to understand how visitors interact with the website. These cookies help provide information on metrics the number of visitors, bounce rate, traffic source, etc.
Advertisement cookies are used to provide visitors with relevant ads and marketing campaigns. These cookies track visitors across websites and collect information to provide customized ads.


 Related Posts:


