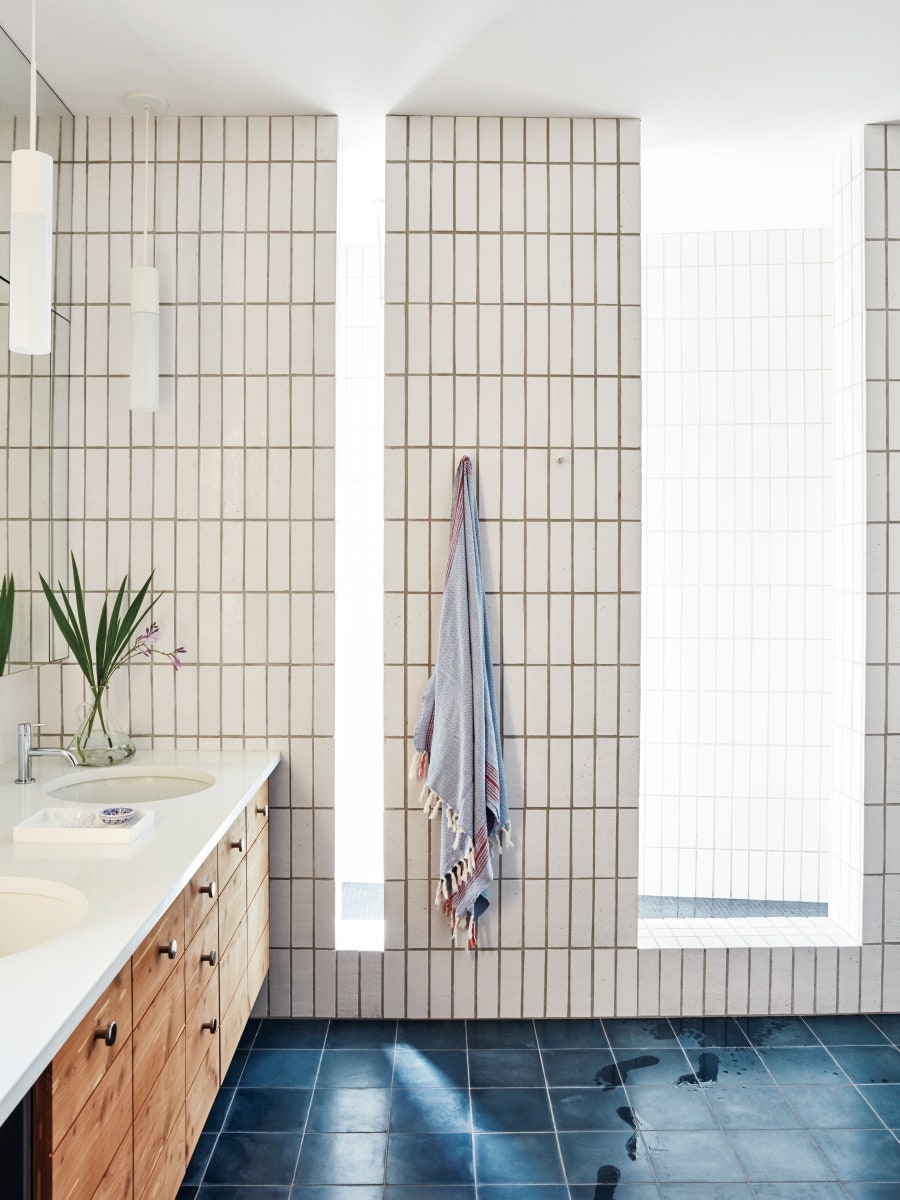
The Importance of Proper Grouting in Bathroom Tile Showers
Grouting plays a crucial role in the overall aesthetics, functionality, and longevity of bathroom tile showers. It not only enhances the visual appeal but also prevents water leakage and mold growth. Proper grouting ensures that the tiles are securely bonded and provides a seamless finish. Let’s explore the importance of proper grouting in bathroom tile showers and its impact on the overall shower experience.
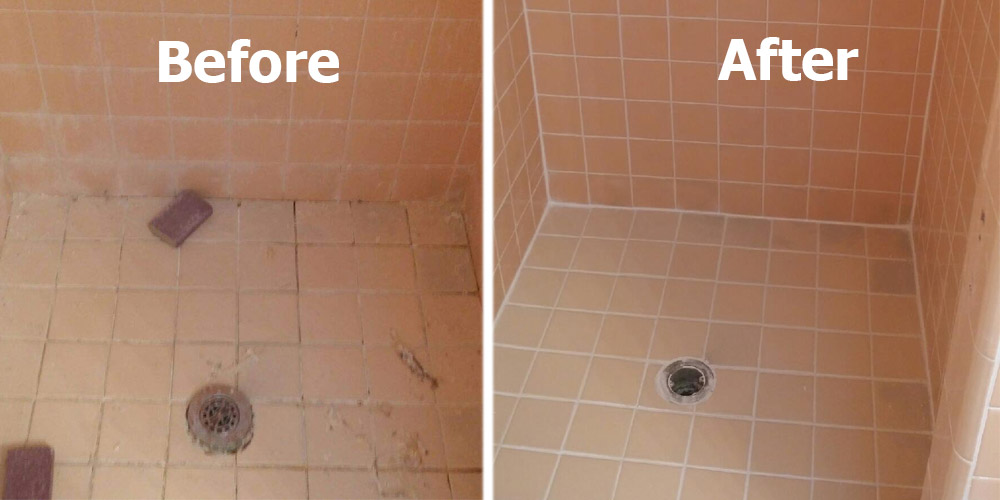
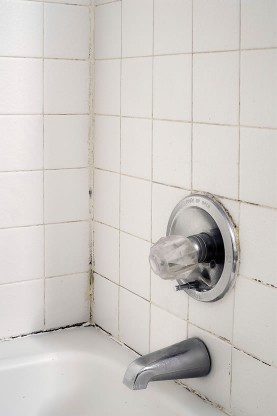
One of the primary reasons why proper grouting is essential is to prevent water penetration. Grout acts as a barrier between the tiles, preventing water from seeping through and causing damage to the underlying structure. Without adequate grouting, water can infiltrate the shower walls, leading to mold growth, rotting of the walls, and costly repairs. Thus, ensuring a proper grout seal is crucial to maintaining a waterproof and durable bathroom tile shower.
Another significant benefit of proper grouting is that it enhances the overall aesthetic appeal of the shower. Grout comes in various colors, allowing homeowners to choose a shade that complements their tiles and bathroom decor. With a precise and neat grout application, the shower tiles appear visually appealing and create a cohesive and polished look. Proper grouting not only adds beauty but also adds value to the bathroom space.
In addition to aesthetics and waterproofing, proper grouting also contributes to the durability of the bathroom tile shower. Grout fills the gaps between the tiles, providing structural support and preventing tile movement. Without this support, tiles can shift, crack, or even detach from the surface, leading to an unstable shower. With the right grouting technique, the tiles remain firmly in place, ensuring a long-lasting and sturdy shower installation.
Furthermore, proper grouting facilitates easier maintenance and cleaning of bathroom tile showers. The grout lines act as a barrier against dirt, grime, and soap scum accumulation. Regular cleaning becomes more efficient and effective when the grout lines are sealed correctly. Properly grouted tiles are less prone to staining, discoloration, and the growth of mildew or bacteria. This not only saves time and effort but also promotes a hygienic and healthy shower environment.
Last, proper grouting provides a seamless finish to bathroom tile showers. When the grout lines are precisely applied and leveled, they create a smooth and even surface. This not only enhances the visual appeal but also ensures a comfortable and enjoyable shower experience. Uneven or rough grout lines can be unappealing and uncomfortable to touch, detracting from the overall shower experience.
Step-by-Step Guide to Grouting Bathroom Tiles for a Seamless Finish
Grouting bathroom tiles is a crucial step in the installation process that requires precision and attention to detail. It not only ensures a secure bond between the tiles but also provides a seamless finish. Below we provide a step-by-step guide to help you achieve the perfect grouting for your bathroom tiles, resulting in a beautiful and polished shower.
Preparation is key before starting the grouting process. Begin by thoroughly cleaning the tiled surface to remove any debris, dust, or adhesive residue. Ensure that the tiles are dry before proceeding to the next step. It is also essential to gather the necessary tools, including a grout float, a grout sponge, and a bucket of clean water.
Once the preparation is complete, mix the grout according to the manufacturer’s instructions. Use a margin trowel or a mixing paddle attachment on a drill to achieve a smooth and consistent grout mixture. Let the grout mixture rest for a few minutes to allow for proper hydration.
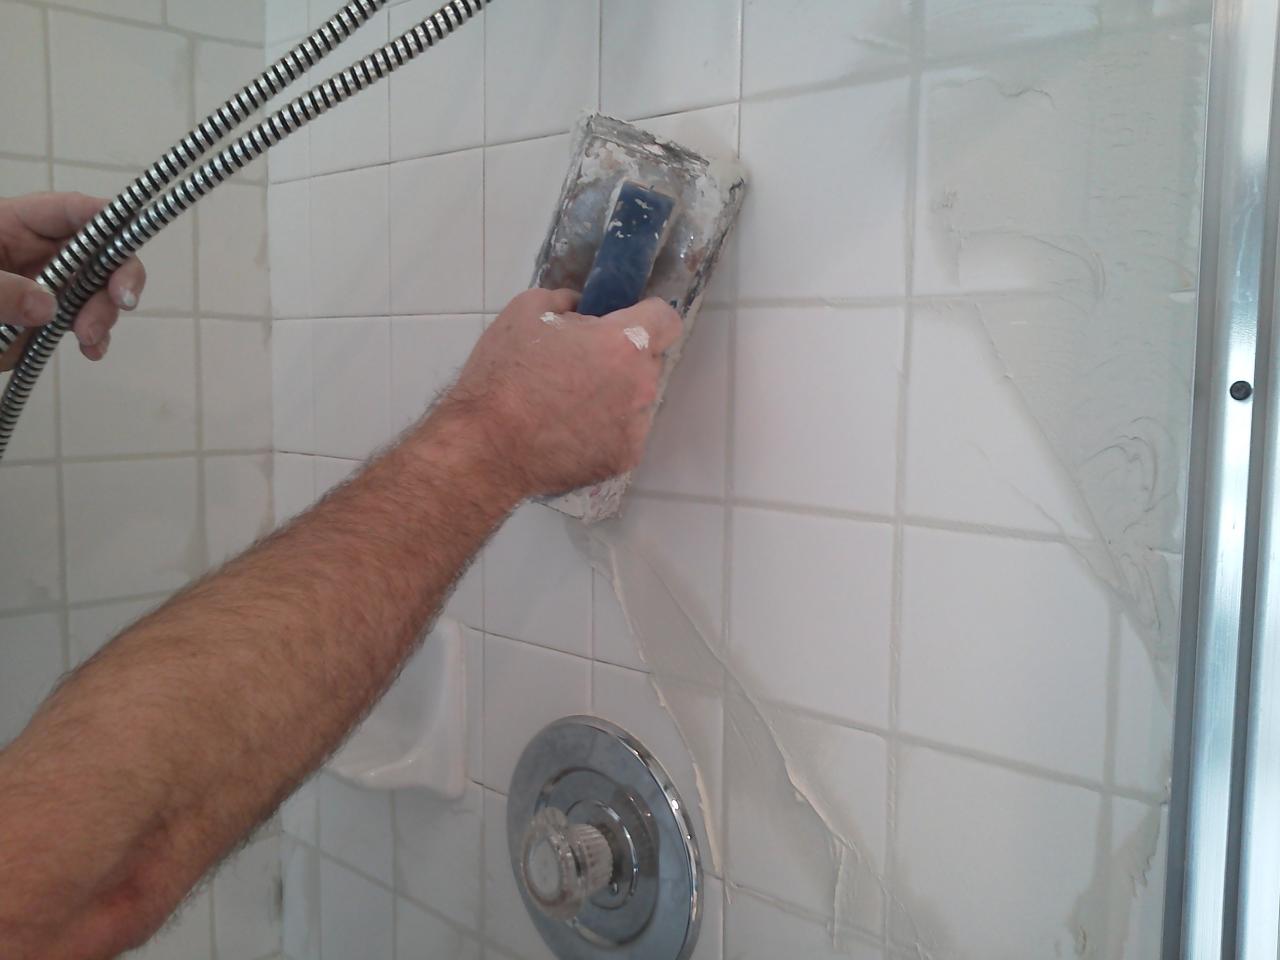
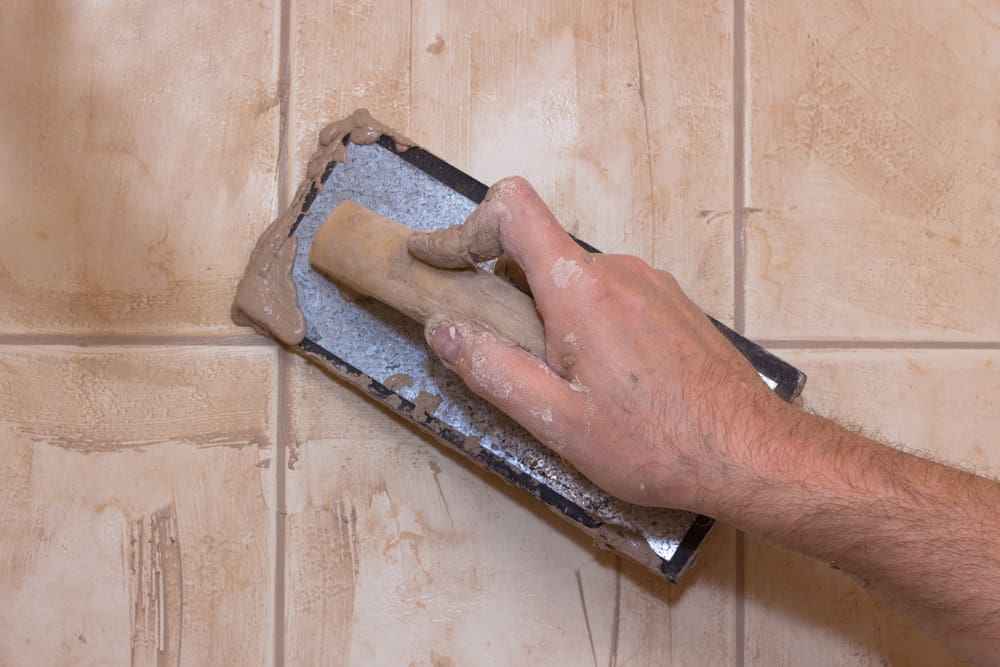
With the grout mixed and ready, it’s time to apply it to the tiles. Begin by scooping a generous amount of grout onto the grout float. Hold the float at a 45-degree angle and spread the grout diagonally across the tiles, ensuring that the grout fills the gaps. Work in small sections to prevent the grout from drying too quickly.
After applying the grout, use the grout float to remove any excess grout from the tile surface. Hold the float at a 90-degree angle and scrape off the excess grout, working diagonally across the tiles. This step helps to create smooth and even grout lines while ensuring that the tiles are not damaged in the process.
Once the excess grout is removed, allow the grout to set for the time specified by the manufacturer. It is crucial to follow the recommended drying time to ensure proper bonding and prevent premature grout cracking. Avoid walking on or using the shower until the grout is fully cured.
After the grout has dried, it’s time to clean the tiles and remove any grout haze. Dampen a grout sponge in clean water and gently wipe the surface of the tiles in a circular motion. Rinse the sponge frequently and continue until the tiles are clean and the grout lines are smooth and clear. Allow the grout to cure fully before using the shower.
Choosing the Right Grout Color for Your Bathroom Tile Shower
Selecting the right grout color for your bathroom tile shower is an important decision that can significantly impact the overall look and feel of the space. The grout color can complement or contrast with the tiles, creating different visual effects and enhancing the overall aesthetic appeal. Let’s explore tips and considerations to help you choose the perfect grout color for your bathroom tile shower.
Consider the overall design and style of your bathroom when choosing a grout color. If you prefer a clean and seamless look, selecting a grout color that matches closely with the tiles can create a cohesive and uniform appearance. This approach works well with monochromatic or minimalistic designs, where the focus is on the tiles themselves.
On the other hand, if you want to add visual interest and create a striking contrast, selecting a grout color that is different from the tiles can achieve that effect. For example, using a darker grout color with lighter tiles can create a bold and dramatic look, while using a lighter grout color with darker tiles can create a softer and more subtle contrast.
Consider the size and layout of the tiles when choosing a grout color. If you have large-format tiles, using a grout color that matches or closely complements the tiles can help create a seamless and expansive look. Conversely, if you have smaller tiles or intricate patterns, using a contrasting grout color can highlight the details and add depth to the design.
Take into account the maintenance aspect when selecting a grout color. Light-colored grout may require more frequent cleaning and may show stains or discoloration more easily. Dark-colored grout, on the other hand, can hide dirt and stains but may fade over time in areas exposed to direct sunlight. Consider your cleaning routine and preferences when making your decision.
It’s always a good idea to obtain grout color samples and test them against your tiles before making a final decision. Lighting conditions in your bathroom can affect how the grout color appears, so it’s essential to view the samples in different lighting situations. Place the samples against the tiles and observe how they interact with each other to ensure you achieve the desired look.
Lastly, trust your instincts and choose a grout color that you love. While it’s helpful to consider design principles and recommendations, ultimately, you should select a grout color that resonates with your style and preferences. After all, your bathroom should reflect your unique taste and personality.
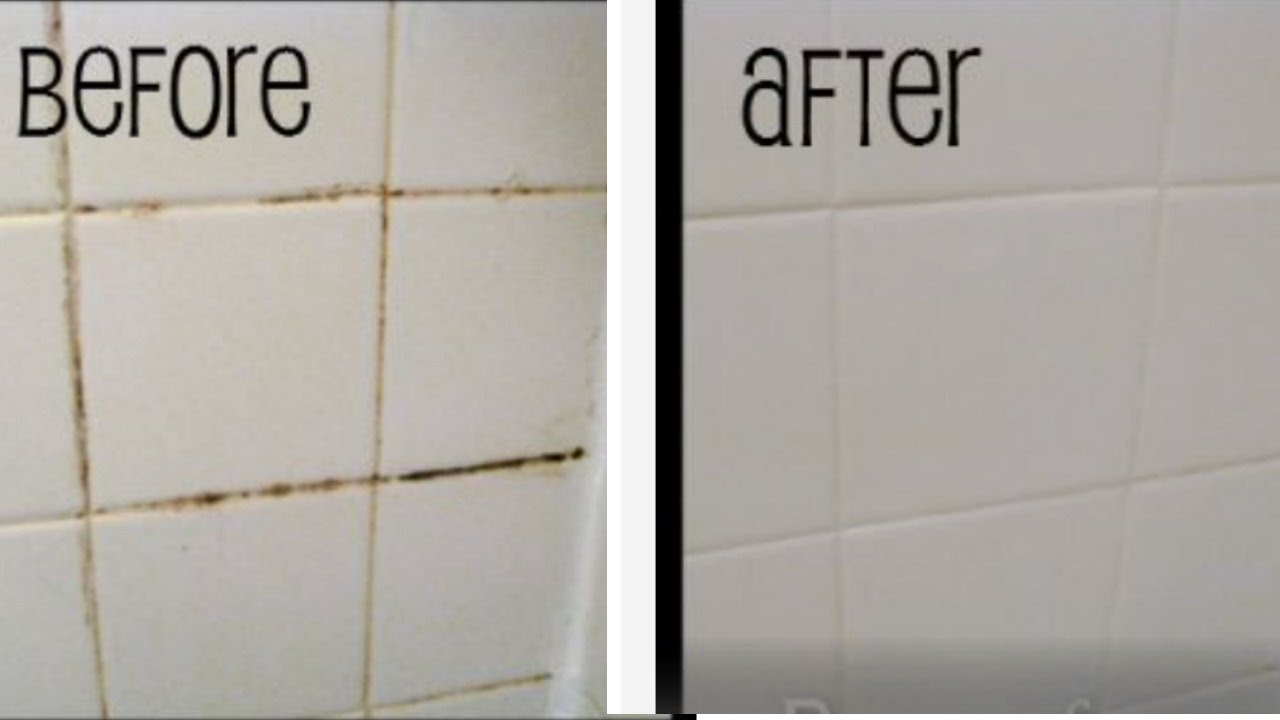
Tips and Tricks for Maintaining and Cleaning Grouted Bathroom Tiles
Proper maintenance and regular cleaning of grouted bathroom tiles are essential to preserve their appearance, prevent discoloration, and ensure their longevity. We will provide you with some valuable tips and tricks to help you effectively maintain and clean grouted bathroom tiles, keeping them looking fresh and vibrant.
Regularly sweep or vacuum the bathroom floor to remove any loose dirt, dust, or debris. This prevents them from getting ground into the grout lines during the cleaning process. Use a soft-bristle broom or a vacuum with a brush attachment to avoid scratching the tiles.
For routine cleaning, use a mild pH-neutral cleaner specifically formulated for tile and grout. Avoid harsh or acidic cleaners that can damage the grout or tiles over time. Dilute the cleaner according to the manufacturer’s instructions, and apply it to the tiles and grout using a soft sponge or mop. Gently scrub the surface in circular motions, paying extra attention to the grout lines.
For tougher stains or grout discoloration, you can use a homemade cleaning solution. Mix equal parts of baking soda and water to create a paste-like consistency. Apply the paste to the grout lines and let it sit for about 10-15 minutes. Then, scrub the grout lines with a soft brush or an old toothbrush. Rinse the area thoroughly with clean water to remove any residue.
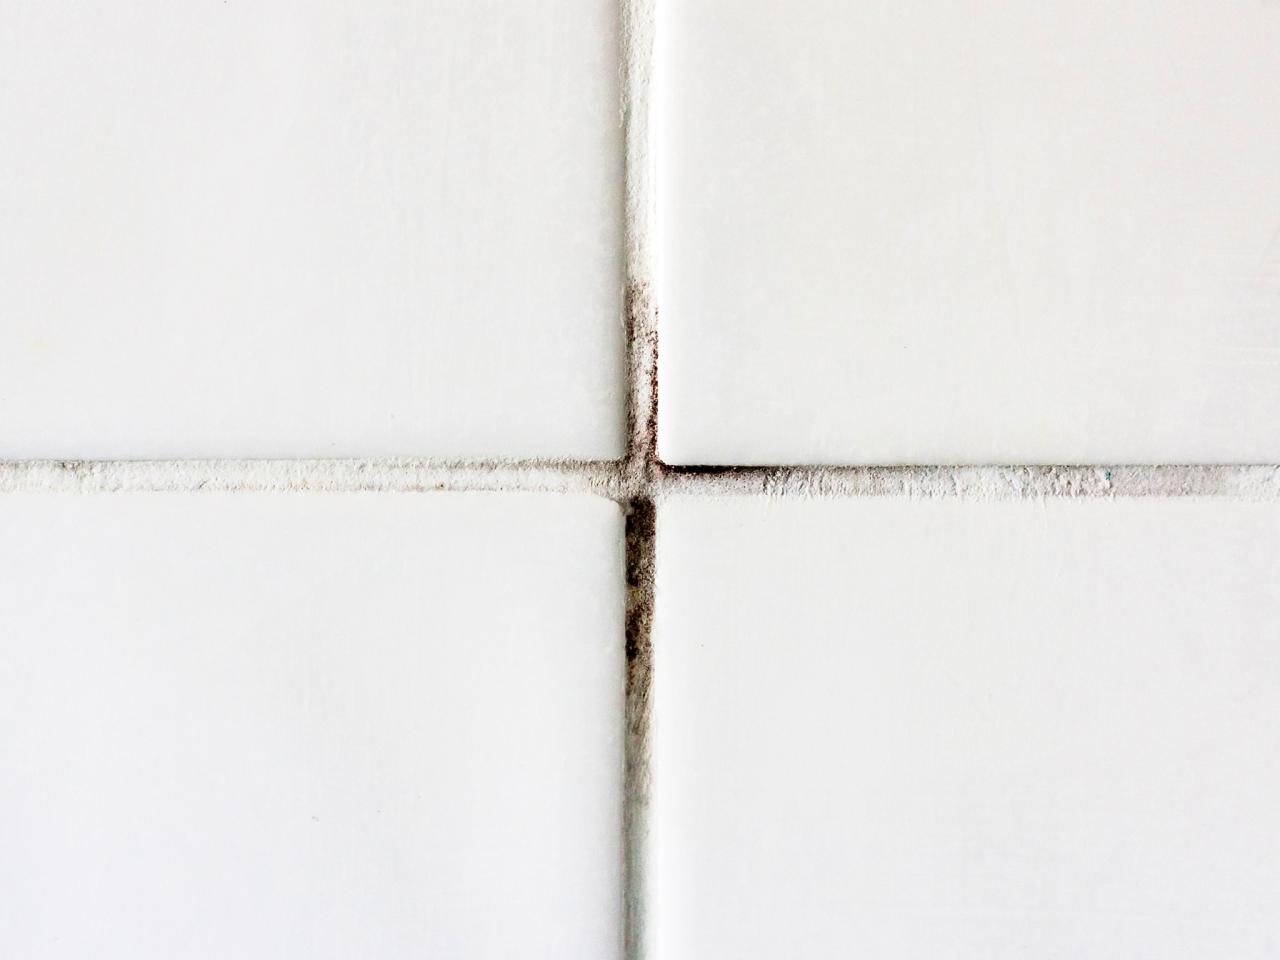
To prevent the growth of mold or mildew in the grout lines, it’s important to keep the bathroom well-ventilated. After showering or bathing, open windows or run exhaust fans to reduce moisture and humidity levels. This helps to inhibit the growth of mold and mildew, which can be both unsightly and harmful to your health.
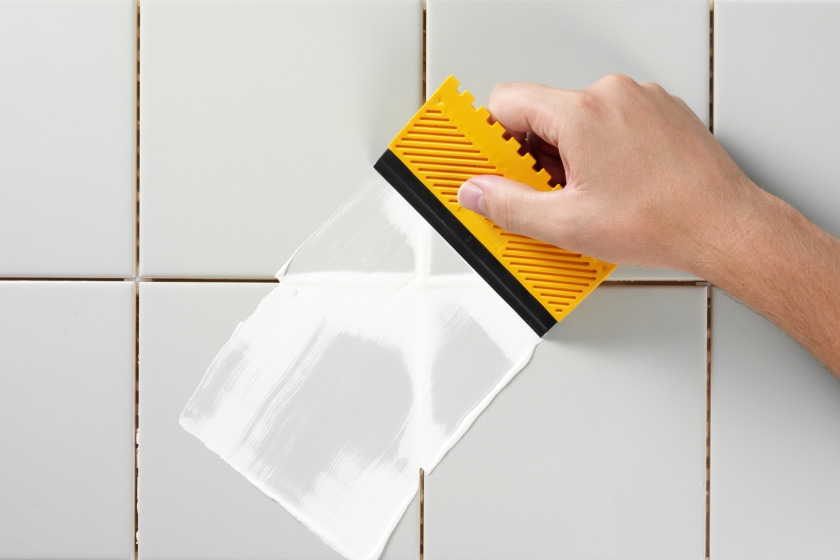
Sealing the grout lines periodically can provide an extra layer of protection against staining and moisture absorption. Consult the manufacturer’s guidelines to determine the appropriate frequency of resealing. Make sure to clean and dry the grout lines thoroughly before applying the sealer. Apply the sealer evenly using a brush or roller, and wipe off any excess sealer from the tiles.
In case of stubborn stains or extensive grout damage, it may be necessary to consider professional grout cleaning or repair services. Professionals have specialized tools and techniques to effectively clean and restore grout lines, ensuring optimal results. Consult with a reputable tile and grout cleaning company to assess the condition of your grout and determine the best course of action.
Common Grouting Mistakes to Avoid in Your Bathroom Tile Shower Installation
When it comes to installing a bathroom tile shower, proper grouting is crucial for achieving a durable, waterproof, and visually appealing result. However, there are common grouting mistakes that can compromise the integrity and aesthetics of the installation. We will highlight some of these common grouting mistakes and guide how to avoid them, ensuring a successful bathroom tile shower installation.
One of the most significant mistakes to avoid is assuming that grout, tile, and sealers alone make a waterproof shower. While grout and tile play a role in the waterproofing process, it is essential to follow proper installation techniques and use additional components, such as shower pans, waterproofing membranes, and backer boards for the shower walls. Taking the time to correctly install these components according to the manufacturer’s instructions is crucial for achieving a truly waterproof bathroom tile shower.
Another common mistake is neglecting to plan ahead and thoroughly understand the project requirements. A bathroom renovation involves various components, including plumbing, electrical, flooring, and surface materials. Failing to consider these factors can lead to costly mistakes and potential issues down the line. It is essential to think through all aspects of the project and seek professional advice if needed to ensure a successful bathroom tile shower installation.
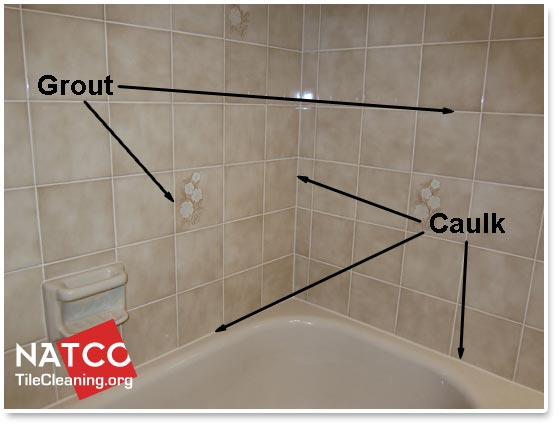
Messy caulking is another mistake that is often seen in bathroom tile shower installations. Caulking is the final step in the grouting process and helps to seal the edges and corners of the shower. However, improper application of caulk can result in an unattractive finish and compromised water resistance. It is crucial to apply caulk neatly and evenly, ensuring a tight seal and a professional-looking result.
Failing to use a batten when tiling walls is another common grouting mistake to avoid. Walls and floors are rarely perfectly straight, and starting to tile from the floor up without using a wooden batten can result in uneven and wonky rows. Using a batten helps to ensure that the tiles are laid in straight lines, both vertically and horizontally, creating a more visually pleasing and professional finish.
Dotting and dabbing adhesive is a mistake that should be avoided when grouting bathroom tiles. Dotting and dabbing refers to applying adhesive to the back of tiles by dotting small dollops in each corner, rather than evenly applying adhesive to the substrate. This uneven distribution of adhesive can lead to tiles that are not securely bonded and may result in loose or uneven tiles over time. It is important to apply adhesive evenly to the substrate to ensure a strong and durable tile installation.
Last, neglecting proper waterproofing measures is a significant mistake to avoid in bathroom tile shower installations. Waterproofing is crucial to prevent water damage, mold growth, and structural issues. It is essential to follow the recommended waterproofing guidelines and use appropriate waterproofing membranes and products to create a watertight barrier Skipping or compromising on waterproofing measures can lead to costly repairs and potential health hazards.
Easy Grout bathtub cleaning tip!- Mamiposa26
Tile Grout Repair
11 Tips to Grout Shower Tile
How to Regrout Bathroom Tile: 5 Easy Steps True Value
Regrouting with dark grey grout to modernise a boring shower
How To Professionally Regrout A Tile Shower
How to Grout Tile: A Beginneru0027s Guide u2013 The Created Home
How to Grout Tile in 6 Simple DIY Steps Architectural Digest
We use cookies on our website to give you the most relevant experience by remembering your preferences and repeat visits. By clicking “Accept All”, you consent to the use of ALL the cookies. However, you may visit "Cookie Settings" to provide a controlled consent.
This website uses cookies to improve your experience while you navigate through the website. Out of these, the cookies that are categorized as necessary are stored on your browser as they are essential for the working of basic functionalities of the website. We also use third-party cookies that help us analyze and understand how you use this website. These cookies will be stored in your browser only with your consent. You also have the option to opt-out of these cookies. But opting out of some of these cookies may affect your browsing experience.
Necessary cookies are absolutely essential for the website to function properly. These cookies ensure basic functionalities and security features of the website, anonymously.
Cookie
Duration
Description
cookielawinfo-checkbox-analytics
11 months
This cookie is set by GDPR Cookie Consent plugin. The cookie is used to store the user consent for the cookies in the category "Analytics".
cookielawinfo-checkbox-functional
11 months
The cookie is set by GDPR cookie consent to record the user consent for the cookies in the category "Functional".
cookielawinfo-checkbox-necessary
11 months
This cookie is set by GDPR Cookie Consent plugin. The cookies is used to store the user consent for the cookies in the category "Necessary".
cookielawinfo-checkbox-others
11 months
This cookie is set by GDPR Cookie Consent plugin. The cookie is used to store the user consent for the cookies in the category "Other.
cookielawinfo-checkbox-performance
11 months
This cookie is set by GDPR Cookie Consent plugin. The cookie is used to store the user consent for the cookies in the category "Performance".
viewed_cookie_policy
11 months
The cookie is set by the GDPR Cookie Consent plugin and is used to store whether or not user has consented to the use of cookies. It does not store any personal data.
Functional cookies help to perform certain functionalities like sharing the content of the website on social media platforms, collect feedbacks, and other third-party features.
Performance cookies are used to understand and analyze the key performance indexes of the website which helps in delivering a better user experience for the visitors.
Analytical cookies are used to understand how visitors interact with the website. These cookies help provide information on metrics the number of visitors, bounce rate, traffic source, etc.
Advertisement cookies are used to provide visitors with relevant ads and marketing campaigns. These cookies track visitors across websites and collect information to provide customized ads.


 Related Posts:


