Why DIY Bathroom Storage Shelves?
DIY bathroom storage shelves offer a practical and creative solution for organizing bathroom essentials. By building your shelves, you can customize the design to fit your space, style, and storage needs. This approach not only enhances functionality but also adds a personal touch to your bathroom decor.
- Customization and Personalization: One of the primary benefits of DIY bathroom storage shelves is the ability to customize them to your exact needs and preferences. Unlike store-bought shelves, DIY projects allow you to choose the dimensions, materials, and finishes that match your bathroom’s decor. This personalization ensures that the shelves perfectly fit your space and style.
- Cost-Effective Solution: Building your shelves can be a cost-effective alternative to purchasing ready-made options. By using materials you already have or sourcing affordable supplies, you can create high-quality storage solutions without spending a lot of money. DIY shelves also eliminate labor costs associated with professional installation.
- Sustainable Choice: DIY bathroom storage shelves can be an eco-friendly option. By repurposing materials such as reclaimed wood or upcycling old furniture, you reduce waste and the demand for new products. This sustainable approach not only benefits the environment but also adds a unique character to your shelves.
- Enhanced Functionality: DIY projects allow you to design shelves that cater specifically to your storage needs. Whether you require extra space for toiletries, towels, or decorative items, you can create shelves with the right size and number of compartments. This tailored functionality ensures that your bathroom remains organized and clutter-free.
- Sense of Accomplishment: Completing a DIY project like building bathroom shelves can provide a great sense of accomplishment. The process of planning, constructing, and installing your shelves offers a rewarding experience and a tangible result that you can enjoy daily. This sense of pride can enhance your connection to your living space.
- Creative Expression: DIY bathroom storage shelves offer a canvas for creative expression. You can experiment with various designs, colors, and materials to create shelves that reflect your personality and taste. Whether you prefer a rustic, modern, or eclectic style, DIY projects provide endless opportunities to showcase your creativity.
Essential Tools and Materials for DIY Bathroom Shelves
Before embarking on a DIY bathroom storage shelf project, gathering the necessary tools and materials is crucial. The right equipment ensures a smooth building process and a sturdy, long-lasting result. This list covers the essentials you’ll need to create functional and stylish bathroom shelves.
Basic Tools
Tape Measure: A tape measure is essential for accurately measuring your space and materials.
Level: A level ensures that your shelves are installed straight and even.
Saw: A handsaw or circular saw is necessary for cutting wood or other materials to size.
Drill: A power drill is useful for creating holes and driving screws.
Screwdriver: Both flathead and Phillips screwdrivers may be needed for assembly.
Hammer: A hammer is useful for tasks like nailing or adjusting components.
Safety Equipment
Safety Glasses: Protect your eyes from dust and debris during cutting and drilling.
Gloves: Gloves protect your hands from splinters and sharp edges.
Dust Mask: A dust mask helps prevent inhalation of particles during sanding or sawing.
Materials for the Shelves
Wood: Common choices include pine, oak, or reclaimed wood. Ensure the wood is sturdy and suitable for bathroom conditions.
Brackets: Metal or wood brackets provide support for wall-mounted shelves.
Screws and Nails: Use appropriate screws and nails for securing shelves and brackets.
Anchors: Wall anchors are necessary for securing shelves to drywall or plaster.
Paint or Stain: Choose paint or stain to finish your shelves and protect them from moisture.
Additional Supplies
Sandpaper: Sandpaper smooths rough edges and prepares surfaces for painting or staining.
Wood Glue: Wood glue can provide additional support for joints and connections.
Putty or Wood Filler: Use putty or wood filler to fill gaps or imperfections in the wood.
Painter’s Tape: Painter’s tape helps achieve clean lines during painting.
Measuring and Cutting Tools
Square: A square helps ensure precise angles and cuts.
Clamps: Clamps hold pieces together while glue dries or while you work on assembly.
Pencil: A pencil is useful for marking measurements and placement on the wood.
Finishing Supplies
Brushes or Rollers: Use brushes or rollers to apply paint or stain evenly.
Drop Cloth: Protect your workspace from spills and debris with a drop cloth.
Rags: Keep rags handy for wiping off excess stains or cleaning up spills.
Creative Design Ideas for Bathroom Storage Shelves
Designing bathroom storage shelves offers a chance to explore various styles and configurations that enhance both aesthetics and functionality. From minimalist designs to eclectic combinations, the right shelving can transform your bathroom into an organized and visually appealing space.
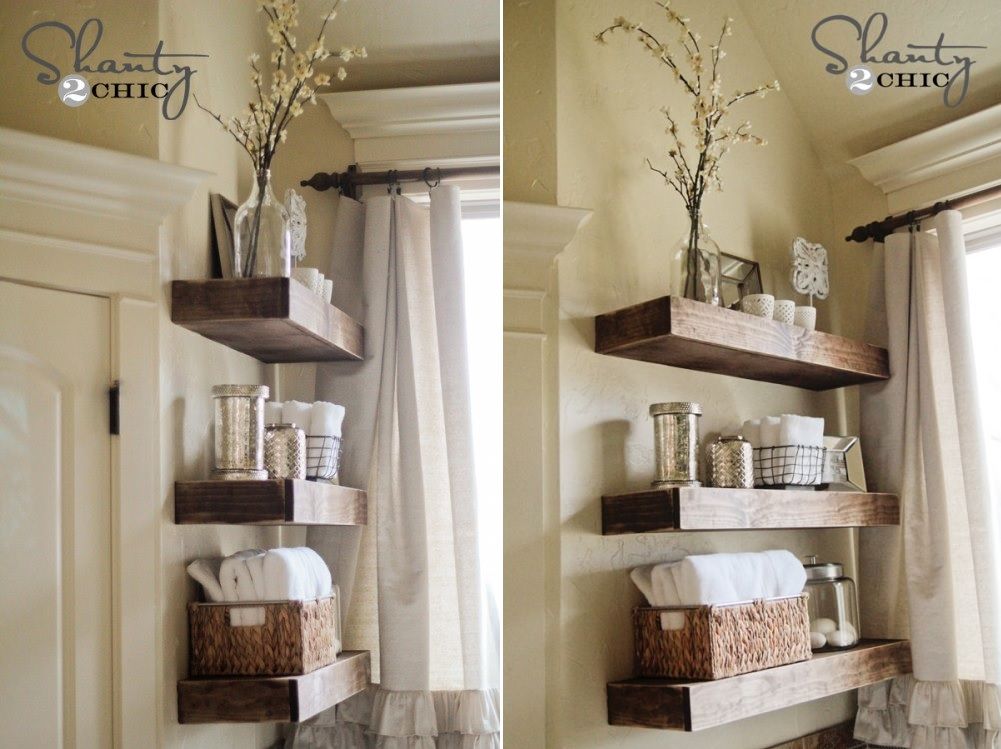
Floating Shelves
Floating shelves create a sleek and modern look by appearing to “float” on the wall without visible brackets. They provide ample storage without taking up floor space, making them ideal for small bathrooms. Use them to display decorative items or store essentials like towels and toiletries.
Corner Shelves
Maximize unused space with corner shelves. These shelves fit neatly into the corners of your bathroom, providing storage without intruding into the room. Corner shelves are perfect for holding small items like soaps, candles, or plants, and they can be installed at various heights to suit your needs.
Reclaimed Wood Shelves
Reclaimed wood shelves add rustic charm and character to any bathroom. Using wood from old furniture or pallets gives your shelves a unique, weathered look. This eco-friendly option not only reduces waste but also adds a touch of history and personality to your space.
Industrial Pipe Shelves
Combine wood shelves with industrial-style metal pipes for a trendy, urban look. The pipes serve as both support and decorative elements, giving the shelves a rugged yet stylish appearance. Industrial pipe shelves are durable and versatile, making them suitable for various bathroom styles.
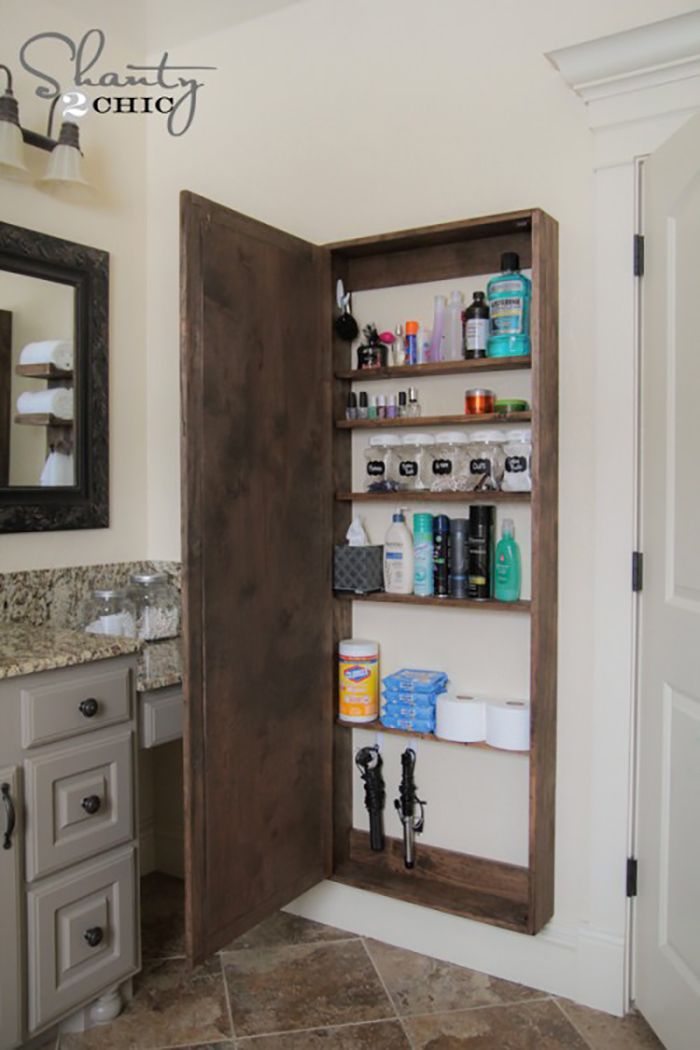
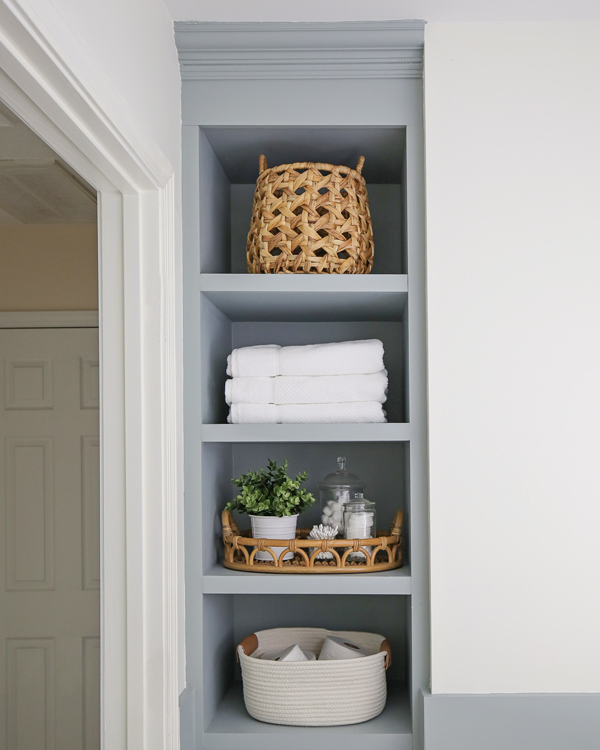
Built-In Shelving
For a seamless and integrated look, consider built-in shelving. These shelves can be custom-fitted into alcoves or recesses in your bathroom walls, providing a clean and cohesive design. Built-in shelves are ideal for creating a streamlined appearance and can be designed to match the overall decor of your bathroom.
Glass Shelves
Glass shelves offer a contemporary and elegant solution for bathroom storage. They create a sense of openness and light, making them perfect for small bathrooms. Glass shelves can be used to display decorative items or store essentials, and they pair well with various design styles, from modern to traditional.
Step-by-Step Guide to Building Floating Bathroom Shelves
Floating bathroom shelves are a popular choice for their sleek and minimalist appearance. This step-by-step guide will walk you through the process of building and installing your floating shelves, offering a practical and stylish storage solution for your bathroom.
Measure and Plan
Start by measuring the space where you want to install the shelves. Determine the length, width, and height of the shelves, ensuring they will fit comfortably in your bathroom. Consider what items you plan to store on the shelves and make sure they can support the weight.
Cut the Wood
Using your measurements, cut the wood to the desired size for your shelves. A circular saw or handsaw can be used for this task. Sand the edges of the cut wood to ensure they are smooth and free of splinters. If you’re using a different material, adjust the cutting method accordingly.
Assemble the Shelves
Create the shelf structure by attaching a back support to the shelf base. This can be done using wood glue and screws for added stability. Ensure that the back support is flush with the base to create a seamless look when mounted on the wall. Allow the glue to dry completely before proceeding.
Install the Mounting Brackets
Mark the wall where you plan to install the shelves, using a level to ensure the markings are straight. Drill holes for the brackets and insert wall anchors if needed. Attach the brackets to the wall securely, making sure they are level and aligned with the measurements of your shelves.
Mount the Shelves
Align the shelf with the brackets and slide it into place. Secure the shelf to the brackets using screws, ensuring that it is stable and level. Double-check that the shelf is properly anchored and can support the weight of the items you plan to store.
Finishing Touches
Once the shelves are installed, finish them with paint, stain, or a clear sealant to protect against moisture and wear. Allow the finish to dry completely before placing items on the shelves. Decorate the shelves with bathroom essentials and decorative items to complete the look.
Upcycling and Repurposing: Transforming Everyday Items into Shelves
Upcycling and repurposing everyday items into bathroom shelves offer a creative and eco-friendly approach to storage solutions. This practice not only reduces waste but also adds unique and personalized touches to your bathroom decor. Here are some inventive ideas for transforming common objects into stylish shelves.
Old Ladders
Repurpose an old wooden ladder into a unique shelving unit. Lean the ladder against the wall and secure it for stability. Use the rungs to hold towels, toiletries, or decorative items. This rustic and charming solution adds vertical storage without the need for extensive modifications.
Vintage Crates
Transform vintage wooden crates into wall-mounted shelves. Attach the crates to the wall with sturdy brackets, arranging them in a staggered or symmetrical pattern. These crates provide a rustic and industrial look, perfect for storing bathroom essentials or displaying decorative items.
Drawer Shelves
Convert old drawers into stylish shelves. Remove the drawer pulls and paint or stain the drawers to match your bathroom decor. Mount the drawers on the wall with the open side facing out, creating a unique and functional display for toiletries, towels, or plants.
Bookshelf to Bathroom Shelf
Repurpose a small bookshelf or wall-mounted unit as a bathroom storage solution. Paint or stain the bookshelf to complement your bathroom’s color scheme and attach it securely to the wall. This option provides ample storage for toiletries, towels, and decorative items.
Wooden Pallets
Use wooden pallets to create rustic and sturdy bathroom shelves. Cut the pallets to the desired size and sand them down to remove any rough edges. Mount the pallets on the wall with brackets or directly into the studs for added support. These shelves are ideal for a farmhouse or industrial-style bathroom.
Reclaimed Wood Boards
Repurpose reclaimed wood boards into simple and elegant shelves. Cut the boards to the desired length, sand them, and finish them with paint or stain. Attach the boards to the wall using brackets or metal supports. Reclaimed wood shelves add character and warmth to your bathroom decor.
Finishing Touches: Decorating and Organizing Your DIY Shelves
Once your DIY bathroom storage shelves are built and installed, the final step is to decorate and organize them effectively. Thoughtful styling and arrangement can enhance both the functionality and visual appeal of your shelves, transforming them into a focal point in your bathroom.
Organize Essentials
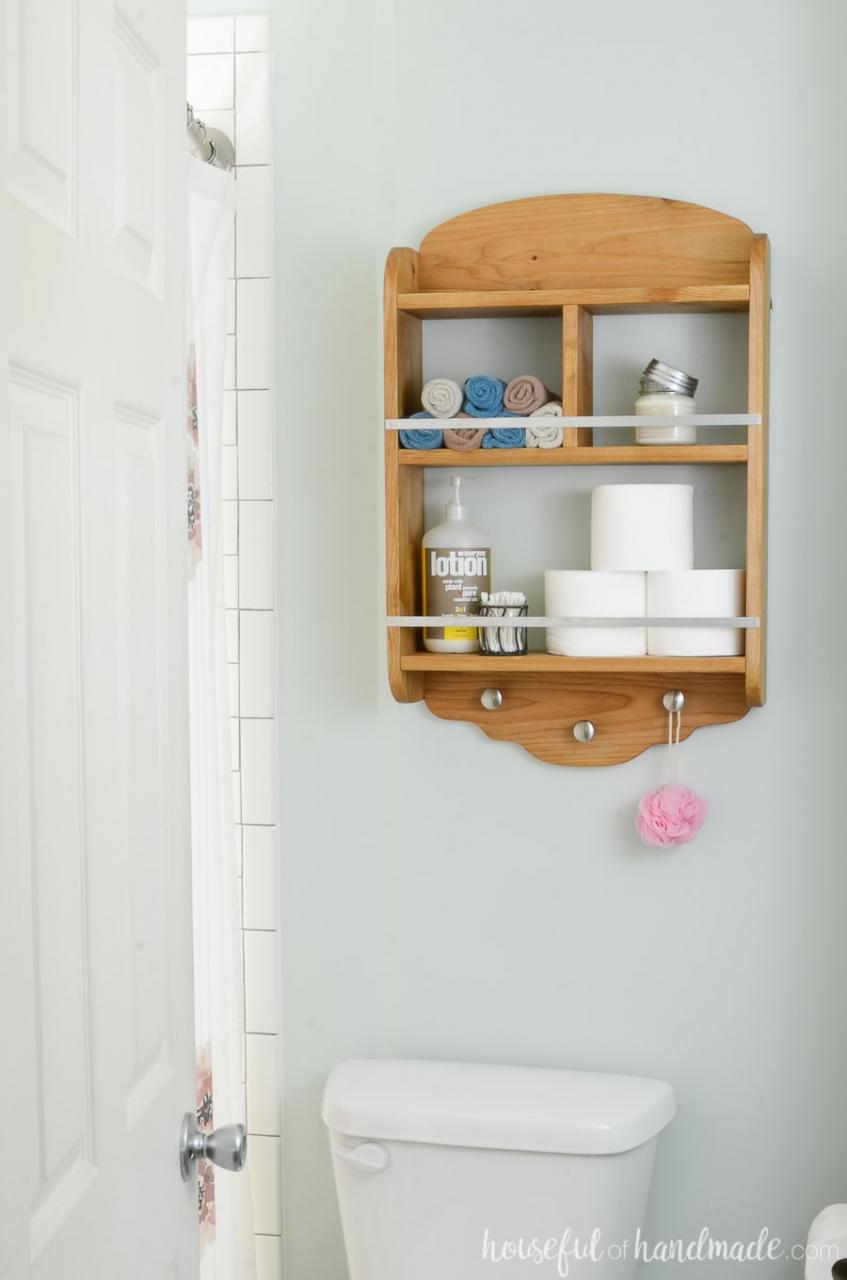
Start by organizing bathroom essentials on your shelves. Group similar items together, such as toiletries, towels, and grooming supplies. Use baskets or containers to keep smaller items tidy and accessible. Clear storage bins can help maintain a clean look while allowing you to see the contents easily.
Add Decorative Elements
Incorporate decorative elements to enhance the visual appeal of your shelves. Add items like candles, small plants, or decorative jars to create a balanced and attractive display. Choose decor that complements your bathroom’s color scheme and overall design to create a cohesive look.
Use Labels and Tags
Labels and tags can help keep your shelves organized and functional. Use chalkboard labels, adhesive tags, or hang tags to identify the contents of baskets and containers. This labeling system makes it easy to find items and maintain order on your shelves.
Vary Heights and Textures
Create visual interest by varying the heights and textures of the items on your shelves. Mix and match different shapes, sizes, and materials to create a dynamic and layered look. For example, combine glass jars, woven baskets, and metal containers for a balanced and eclectic arrangement.
Maintain a Balanced Layout
Ensure that your shelves have a balanced and uncluttered layout. Avoid overcrowding by leaving some open space between items. This spacing not only makes the shelves look more organized but also allows each item to stand out. Symmetry can create a more formal look, while asymmetry can add a relaxed and casual feel.
Refresh Seasonally
Update the decor on your shelves seasonally to keep your bathroom looking fresh and inviting. Rotate decorative items, change out towels, and add seasonal accents like flowers or holiday-themed decor. This regular refresh keeps your bathroom looking updated and prevents the decor from becoming stale.

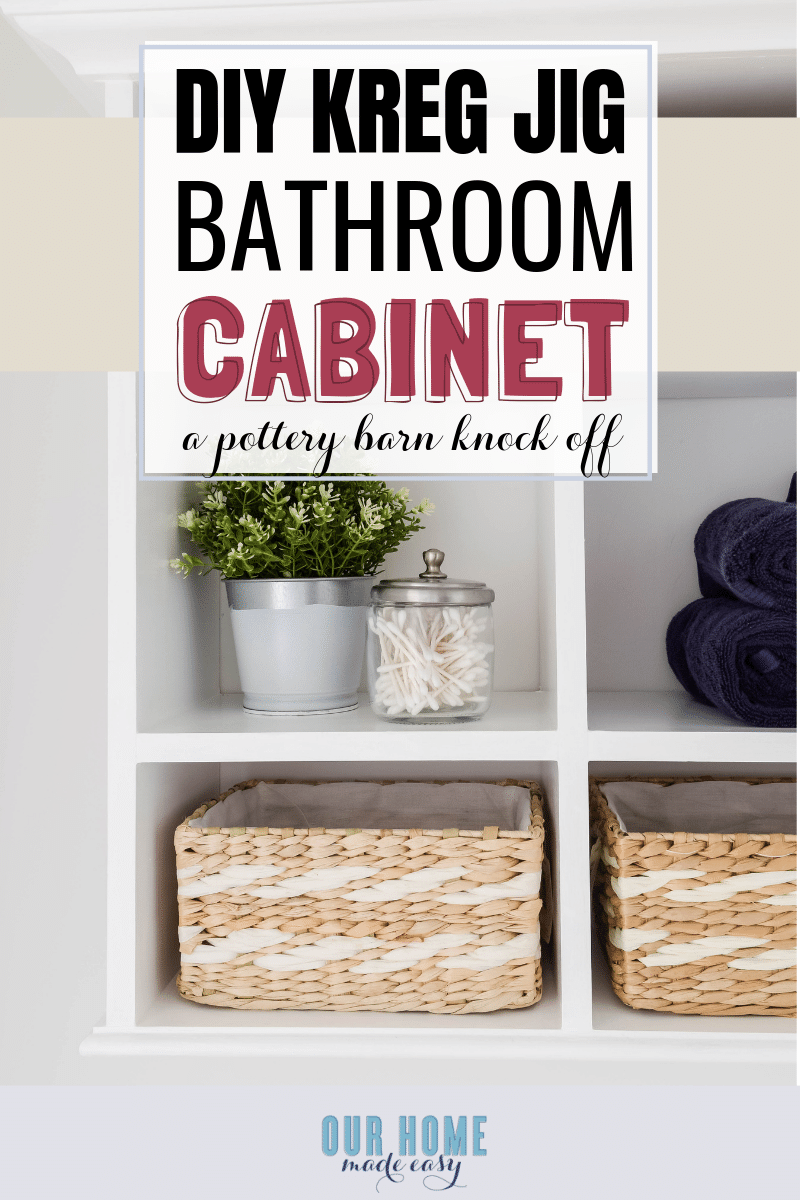
DIY Built In Bathroom Shelves and Cabinet
DIY Bathroom Cabinet – Liz Marie Blog

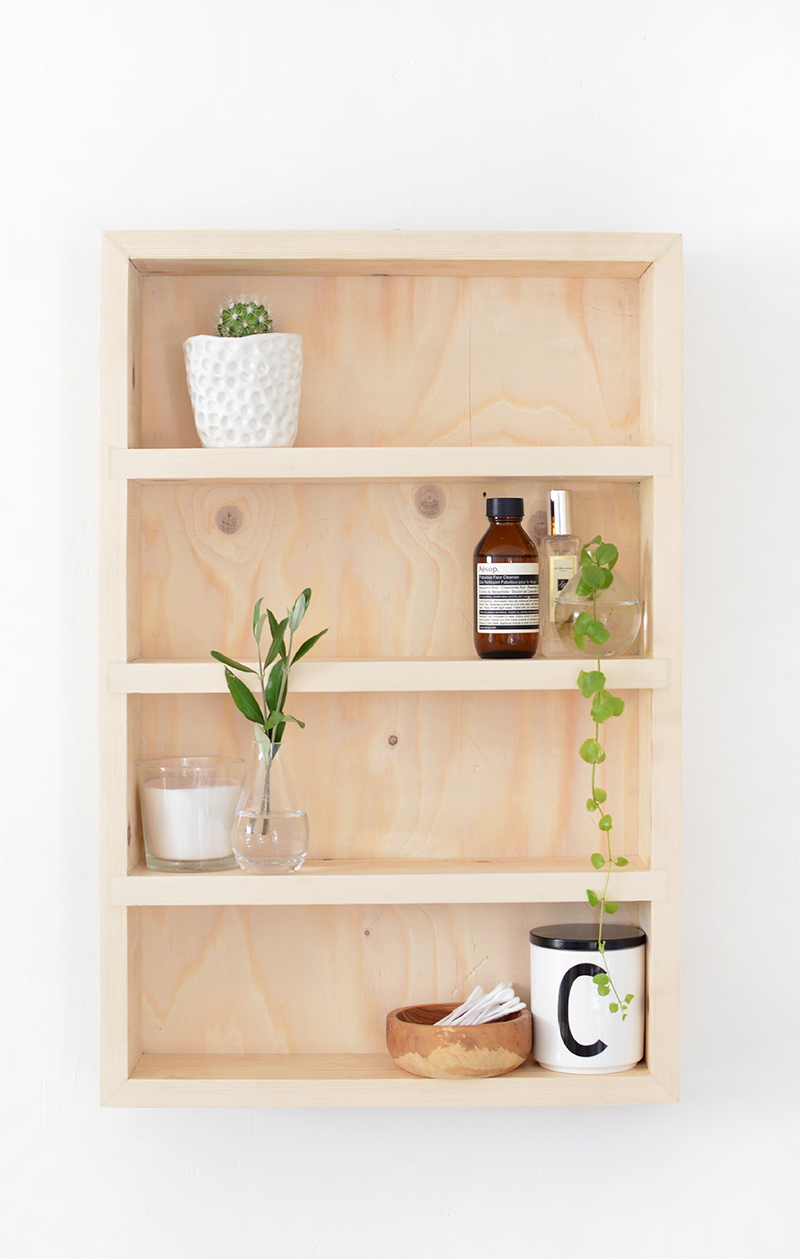
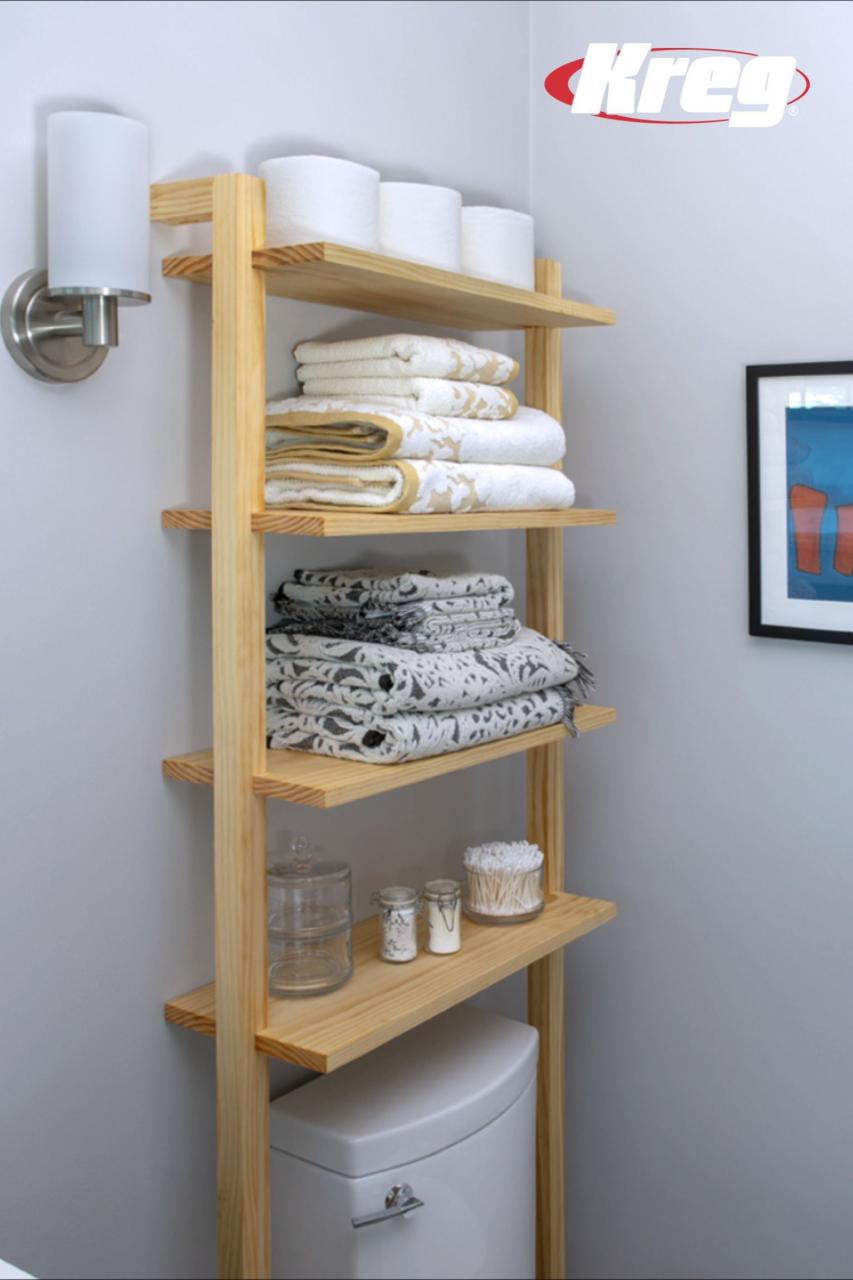
DIY Bathroom Shelves To Increase Your Storage Space
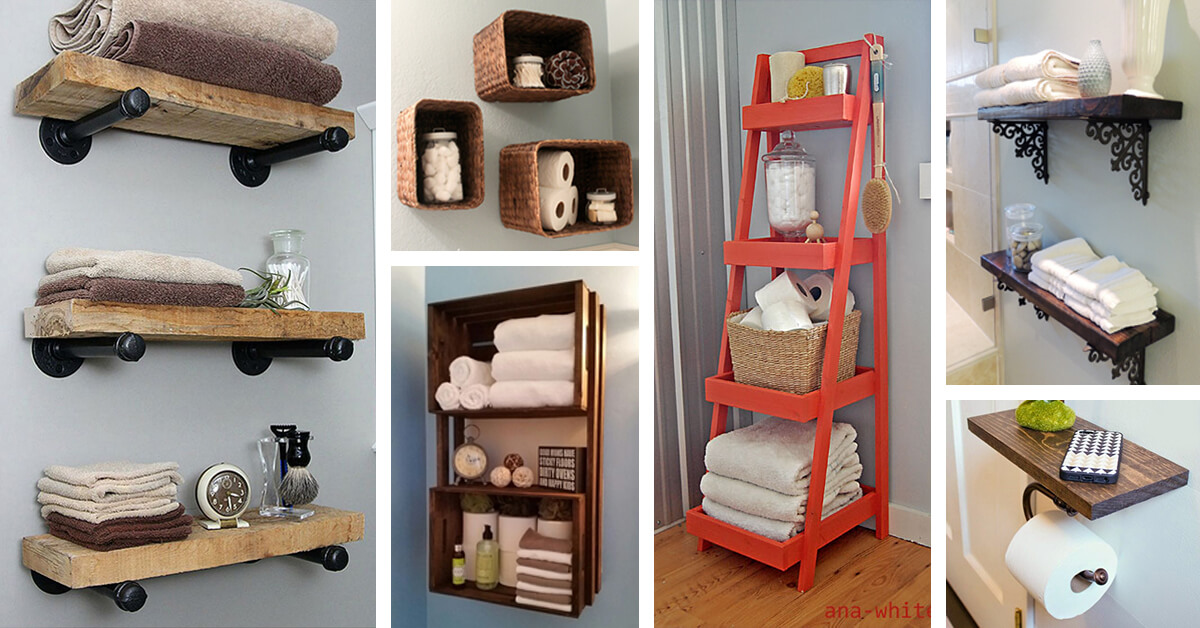
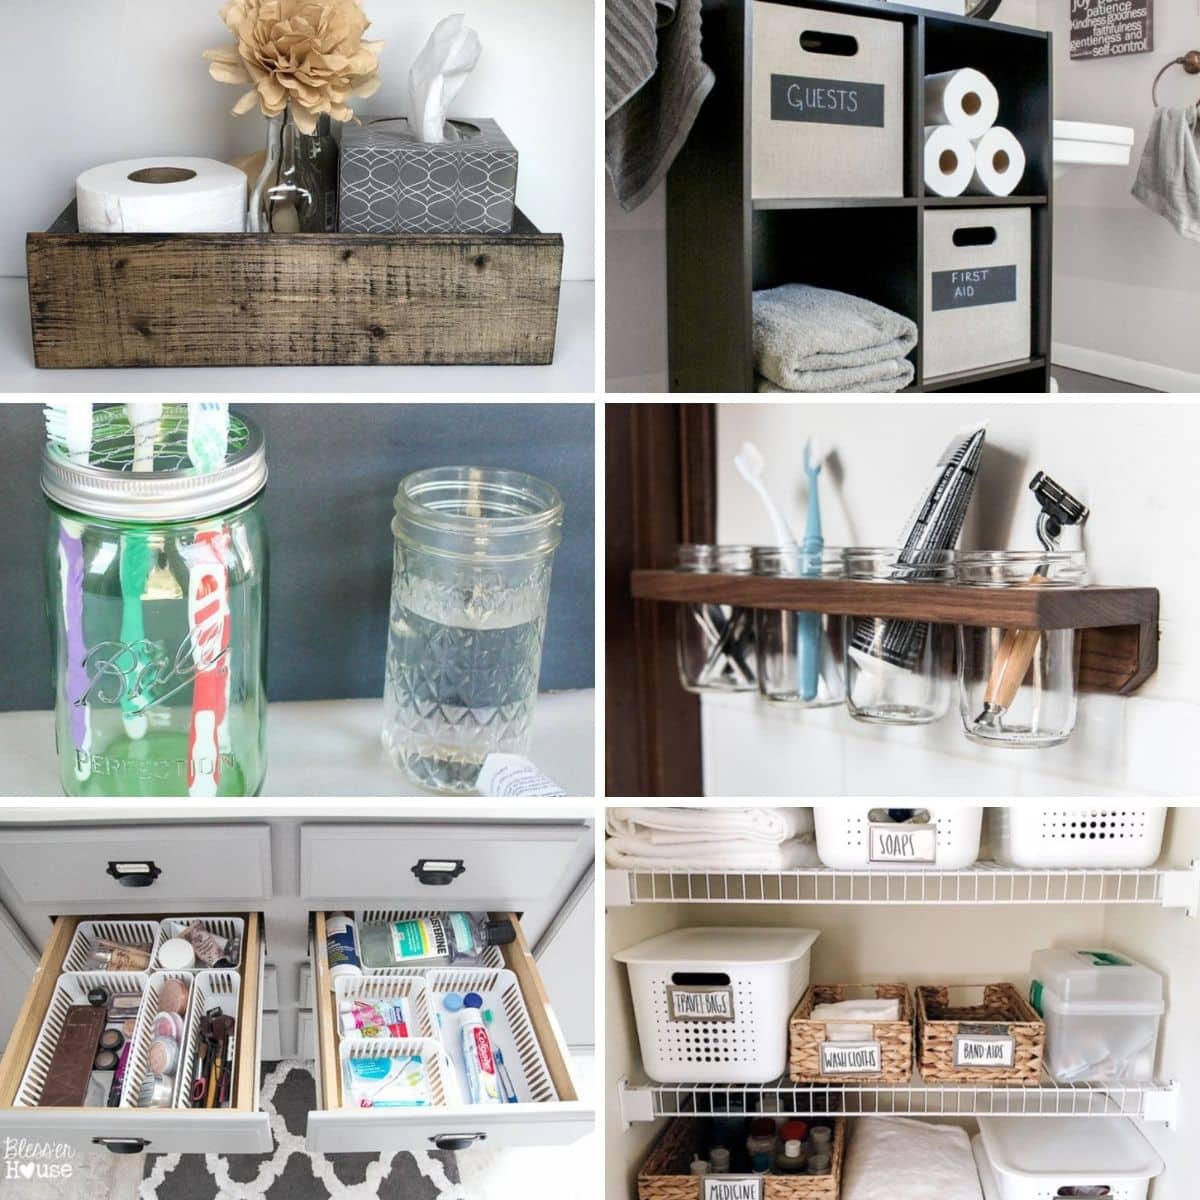
DIY Bathroom Storage and Organizing Ideas

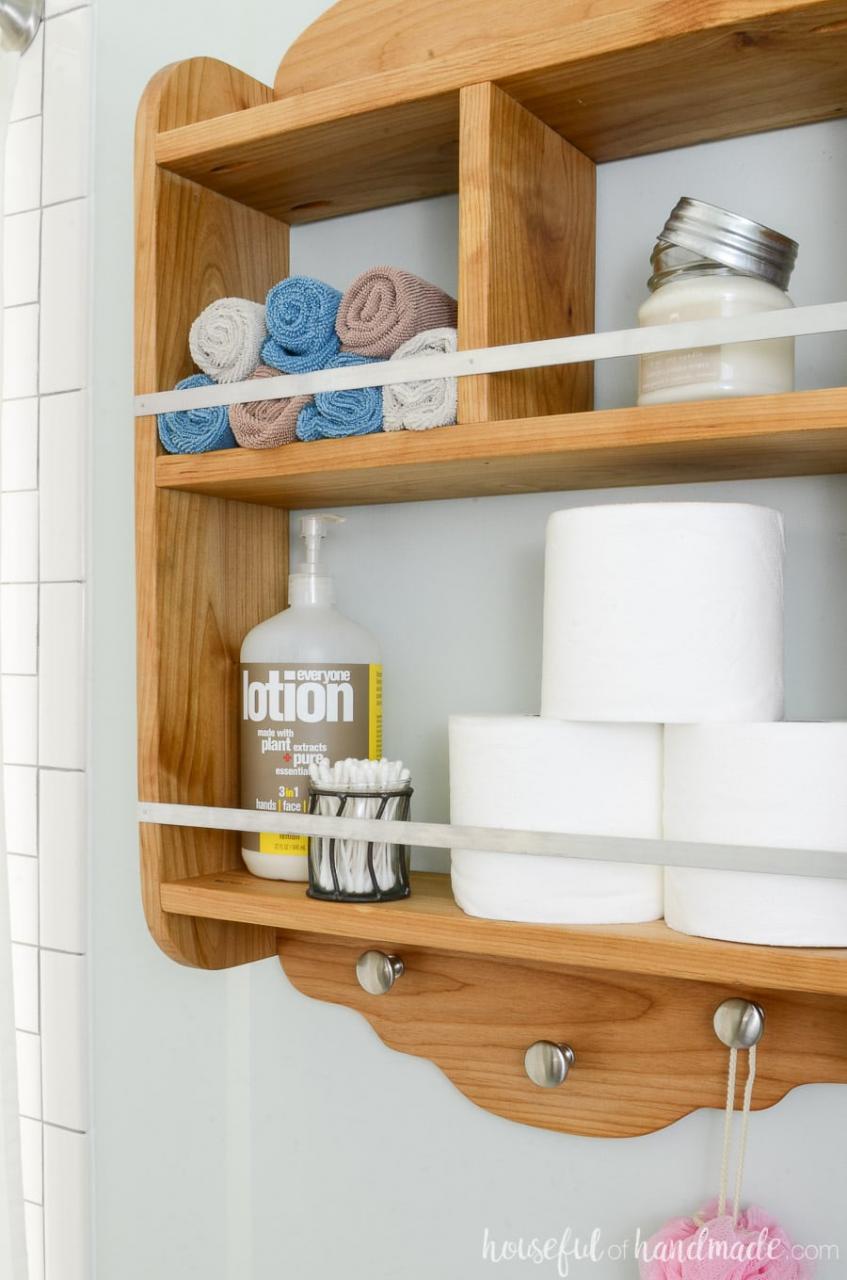
DIY Bathroom Storage Shelves – Houseful of Handmade
DIY Bathroom Shelves To Increase Your Storage Space

DIY Bathroom Wall Cabinet u2013 Our Home Made Easy
Tidy DIY Bathroom Organization Ideas
Related Posts:
- Bathroom Storage Cabinet With Doors
- Pine Bathroom Storage
- Tesco Bathroom Storage Cabinets
- Bathroom Storage Ideas for a Small Bathroom
- Tall Bathroom Storage Rack
- Bathroom Storage Basket With Lid
- Tongue and Groove Bathroom Storage Unit Pine
- Crate and Barrel Bathroom Storage
- Kartell Bathroom Storage
- Yellow Bathroom Storage Cabinet


