Choosing the Right Paint for Your Bathroom Vanity
When it comes to painting your bathroom vanity, selecting the right paint is crucial for achieving a durable and visually appealing finish. With so many options available, it can be overwhelming to make a decision. Here are some factors to consider when choosing the right paint for your bathroom vanity.
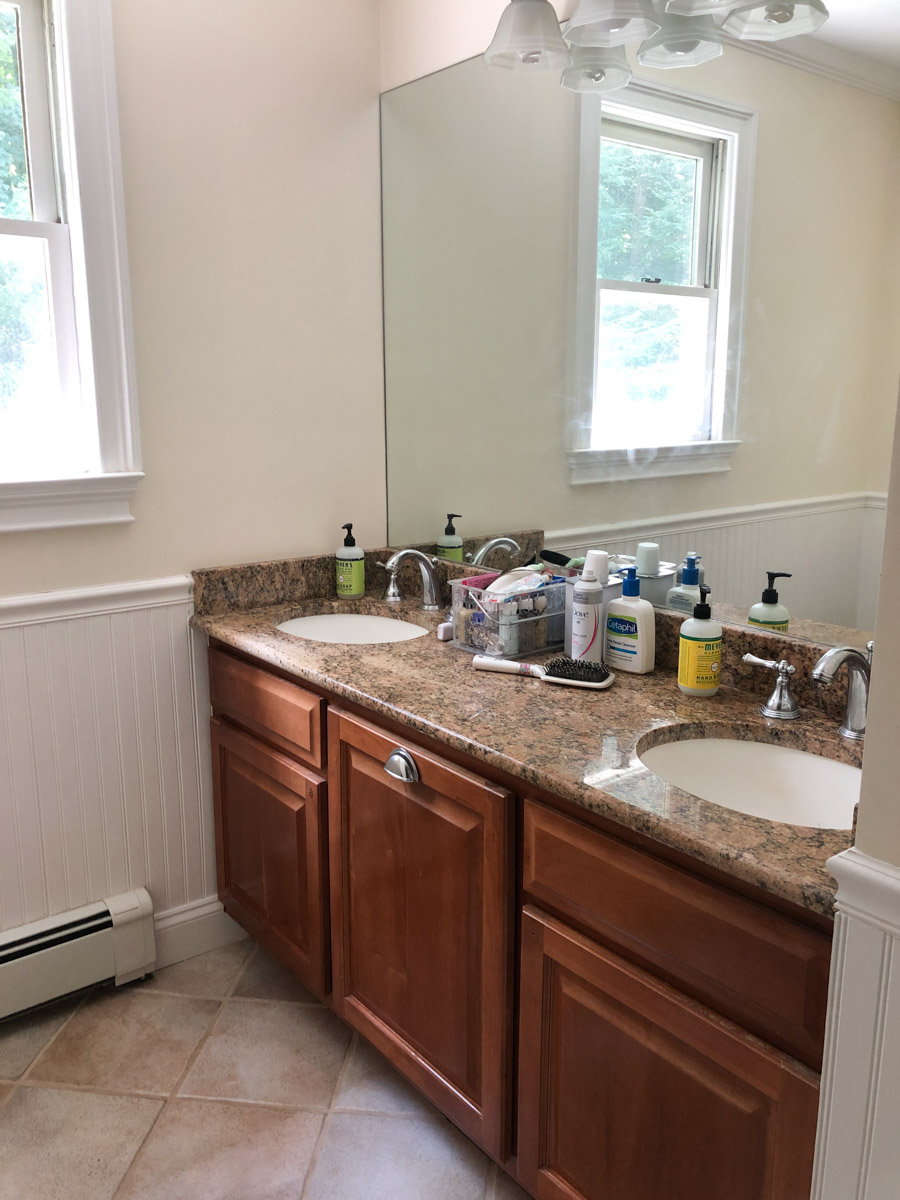
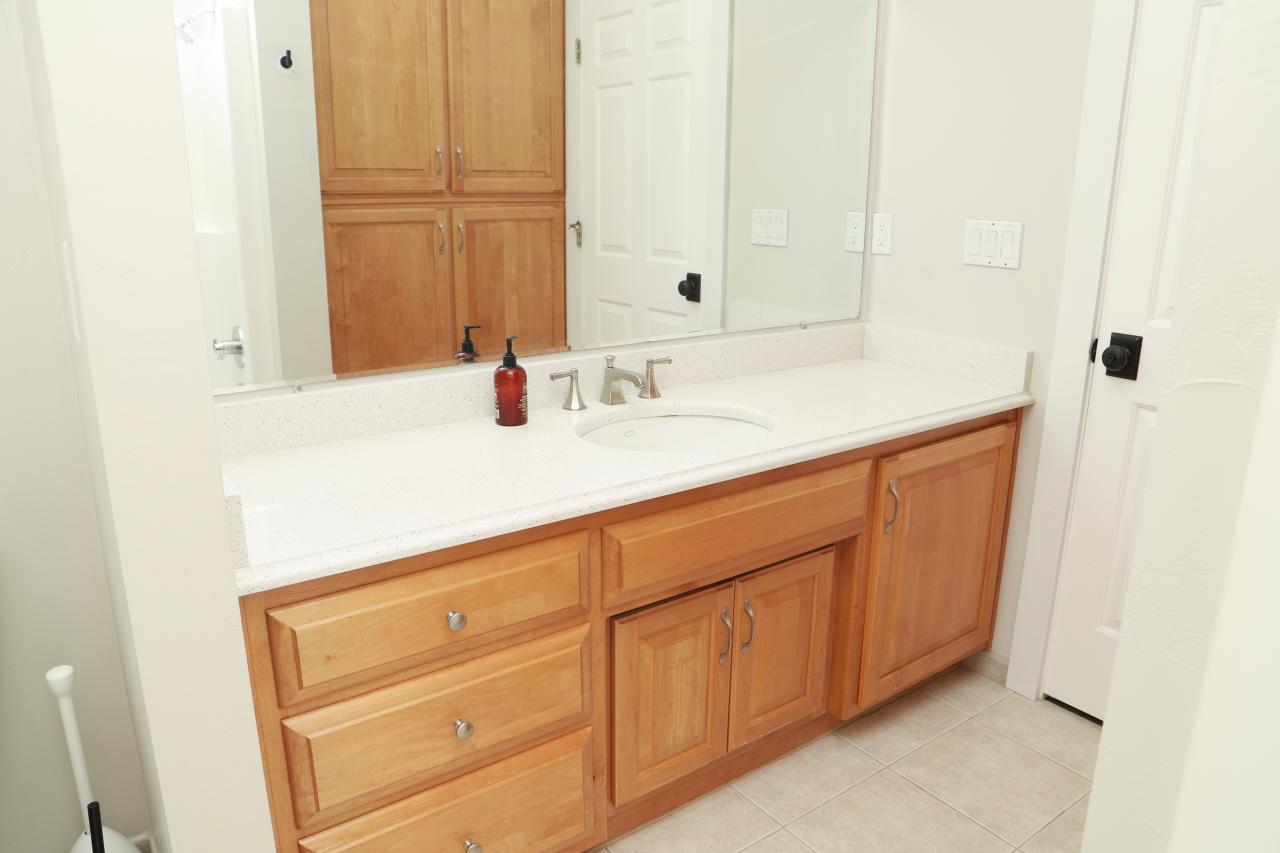
- Consider the Material: The type of material your vanity is made of will influence the paint you choose. For wooden vanities, opt for a paint that is specifically designed for wood surfaces, such as oil-based or acrylic latex paint. If your vanity has a laminate or melamine surface, look for a paint that is formulated to adhere to these materials.
- Think about the Bathroom Environment: Bathrooms are prone to high humidity, moisture, and temperature fluctuations, so it’s important to choose a paint that can withstand these conditions. Look for paints that are moisture-resistant, mildew-resistant, and have a high-gloss or semi-gloss finish, as these finishes are easier to clean and more resistant to moisture damage.
- Consider the Color: The color of your bathroom vanity can greatly impact the overall aesthetic of your bathroom. Lighter colors can make a small bathroom appear larger and more spacious, while darker colors can add drama and sophistication. Consider the color scheme of your bathroom and choose a paint color that complements it.
- Test Samples: Before committing to a paint color, it’s a good idea to test samples on a small, inconspicuous area of your vanity. This will allow you to see how the paint looks under different lighting conditions and how it matches with the rest of your bathroom decor.
- Quality Matters: Investing in high-quality paint is essential for achieving a long-lasting and professional-looking finish. Cheap paints may not provide adequate coverage, durability, or resistance to moisture and stains. Look for reputable brands that offer paints specifically designed for bathroom use.
Prepping Your Bathroom Vanity for Painting
Proper preparation is key to ensuring a successful and long-lasting paint job on your bathroom vanity. By taking the time to prep the surface, you’ll create a smooth and clean canvas for your paint. Here are some steps to follow when prepping your bathroom vanity for painting.
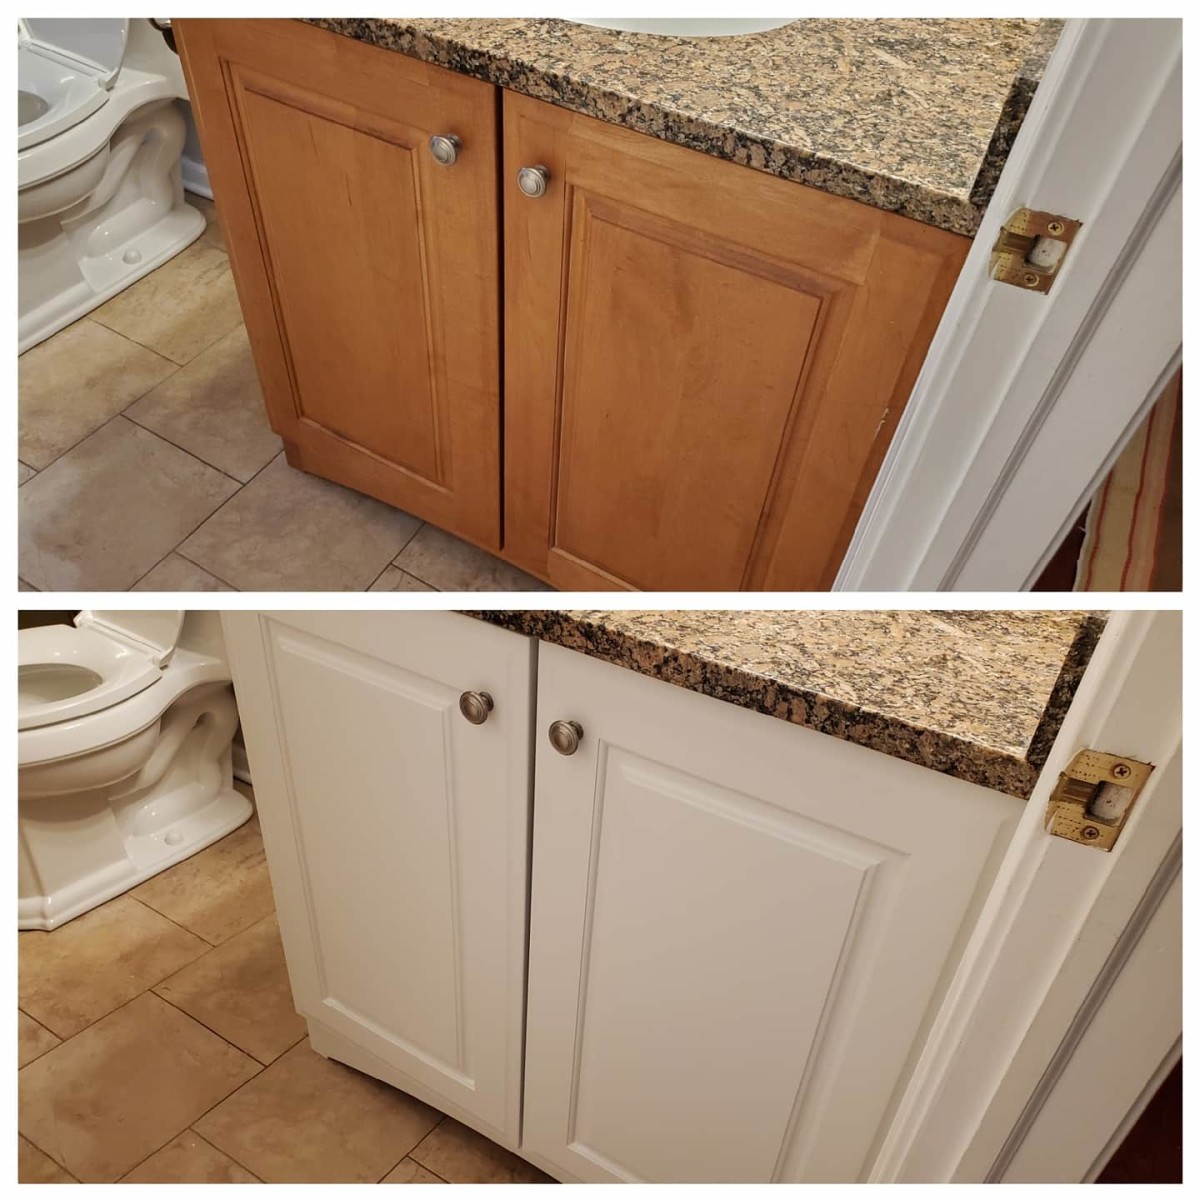
Remove Hardware and Clean: Start by removing any hardware, such as handles, knobs, and hinges, from your vanity. This will make it easier to paint and prevent them from getting damaged. Next, thoroughly clean the vanity surface using a mild detergent and water solution to remove any dirt, grime, or grease. Make sure to rinse it well and allow it to dry completely before proceeding.
Sand the Surface: Use a fine-grit sandpaper or sanding block to lightly sand the entire vanity surface. This will help create a rough texture for the paint to adhere to. Sanding will also help smooth out any imperfections or rough areas on the surface. Be sure to wipe away any dust or debris with a clean cloth after sanding.
Fill in Imperfections: If your vanity has any scratches, dents, or holes, use a wood filler or putty to fill them in. Follow the manufacturer’s instructions for proper application and drying time. Once the filler is dry, sand it down to create a smooth and even surface.
Prime the Surface: Applying a primer is essential for ensuring proper adhesion and a more even finish. Choose a primer that is specifically formulated for the type of paint you’ll be using. Apply the primer evenly using a brush or roller, following the manufacturer’s instructions for drying time.
Mask and Protect: Use painter’s tape to mask off any areas of the vanity that you don’t want to paint, such as the edges, mirrors, or countertops. Cover the floor and surrounding area with drop cloths or plastic sheets to protect them from paint splatters or spills.
Final Cleaning: Before applying the paint, give the vanity surface one last wipe-down to remove any dust or debris that may have accumulated during the prep process. Your vanity is now ready for painting!

Step-by-Step Guide to Painting Your Bathroom Vanity
Are you ready to give your bathroom vanity a fresh new look? Follow this step-by-step guide to painting your bathroom vanity and achieve a professional-looking finish.
Gather Your Supplies: Before you begin, make sure you have all the necessary supplies on hand. This includes paint, primer, brushes or rollers, painter’s tape, drop cloths or plastic sheets, sandpaper, and a clean cloth.
Prep the Area: Start by removing any hardware, such as handles, knobs, and hinges, from your vanity. Use painter’s tape to mask off any areas that you don’t want to paint, such as the edges, mirrors, or countertops. Cover the floor and surrounding area with drop cloths or plastic sheets to protect them from paint splatters or spills.
Clean and Sand the Surface: Thoroughly clean the vanity surface using a mild detergent and water solution to remove any dirt, grime, or grease. Rinse it well and allow it to dry completely. Use a fine-grit sandpaper or sanding block to lightly sand the entire vanity surface. Wipe away any dust or debris with a clean cloth.
Apply Primer: Applying a primer is essential for ensuring proper adhesion and a more even finish. Choose a primer that is specifically formulated for the type of paint you’ll be using. Apply the primer evenly using a brush or roller, following the manufacturer’s instructions for drying time.
Start Painting: Once the primer is dry, it’s time to start painting. Stir the paint thoroughly to ensure an even consistency. Begin by painting the edges and corners of the vanity with a brush, then switch to a roller for the larger flat surfaces. Apply the paint in thin, even coats, working from top to bottom.
Allow to Dry and Repeat: Follow the manufacturer’s instructions for drying time between coats. Apply additional coats as needed to achieve the desired coverage and color intensity. Be sure to allow each coat to dry completely before applying the next.
Reattach Hardware: Once the final coat of paint is dry, reattach the hardware, such as handles, knobs, and hinges, to your vanity. Make sure they are securely fastened and aligned properly.
Clean Up: Remove the painter’s tape and drop cloths or plastic sheets. Clean your brushes or rollers according to the manufacturer’s instructions. Dispose of any leftover paint or empty paint cans properly.
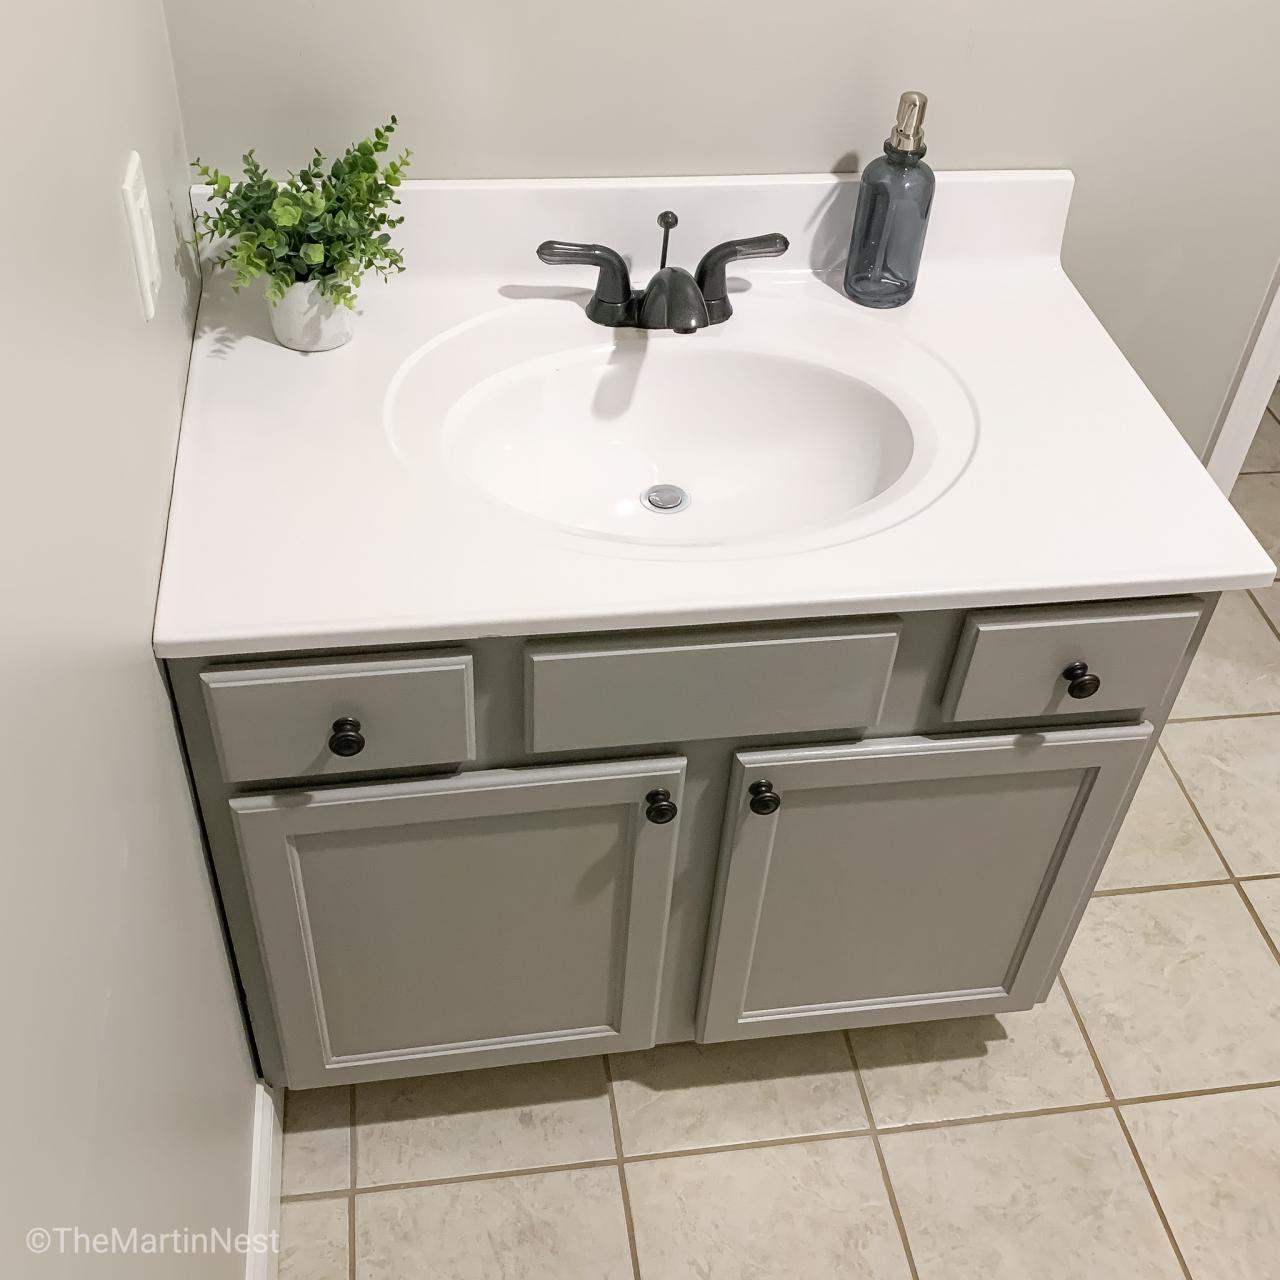
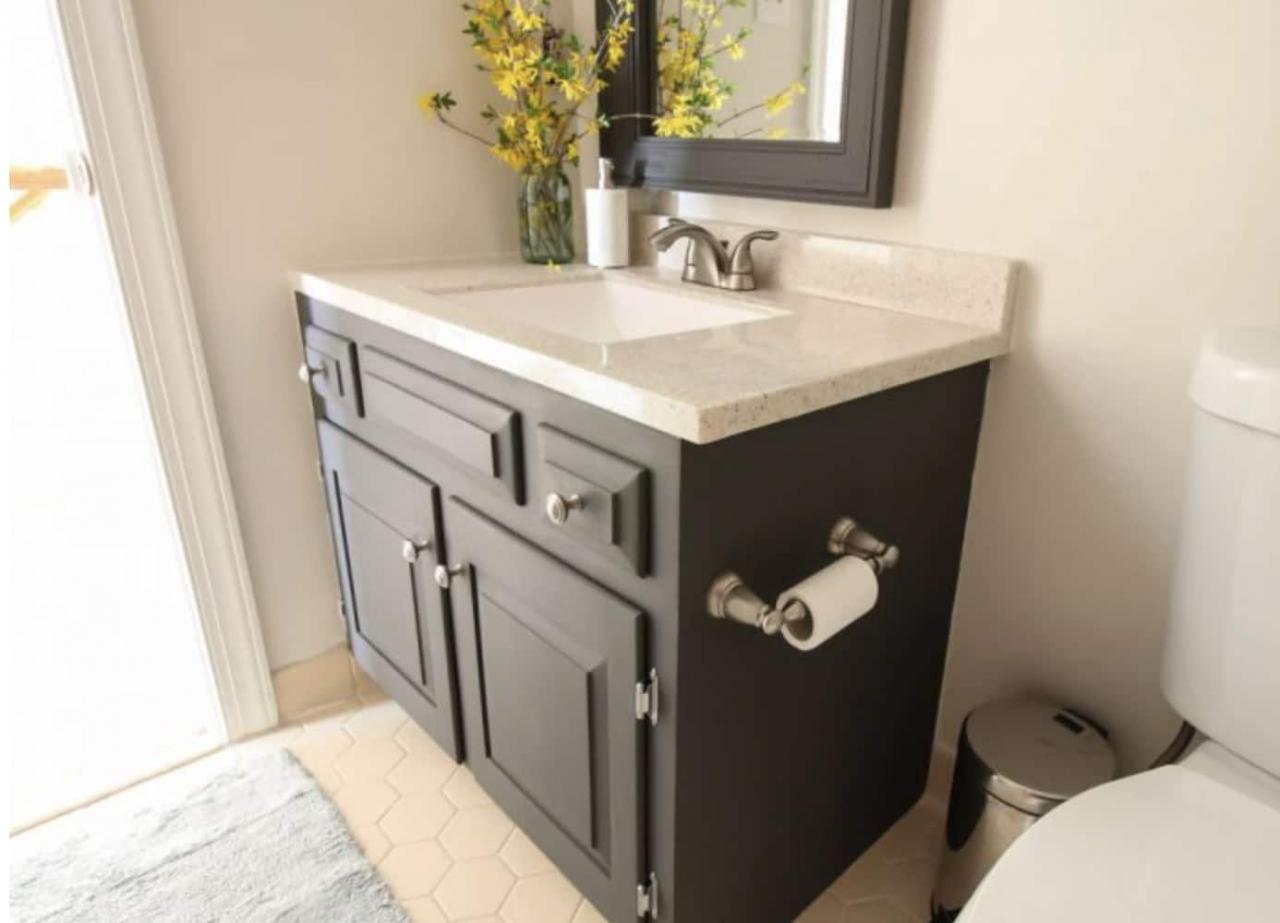
Enjoy Your Newly Painted Vanity: Once everything is cleaned up, step back and admire your freshly painted bathroom vanity. It’s now ready to be enjoyed for years to come.
Adding a Personal Touch: Creative Painting Ideas for Your Vanity
Looking to add a unique and personal touch to your bathroom vanity? Get creative with your painting ideas and transform your vanity into a stunning focal point. Here are some creative painting ideas to inspire you.
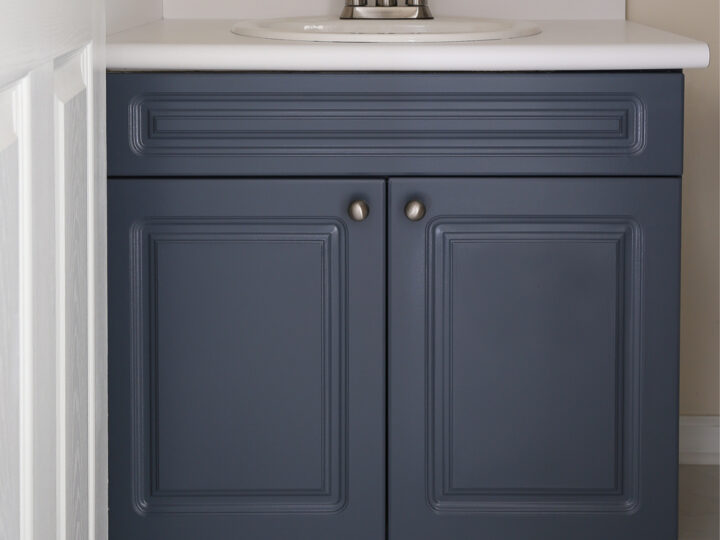
Two-Tone Elegance: Create a sophisticated look by painting the base of your vanity in one color and the doors or drawers in a contrasting color. This two-tone effect adds visual interest and can complement the overall color scheme of your bathroom.
Geometric Patterns: Add a modern and artistic touch to your vanity by painting geometric patterns on the doors or drawers. Use painter’s tape to create clean and precise lines, and experiment with different shapes and colors to create a unique design.
Ombre Effect: Achieve a trendy and gradient effect by painting your vanity using an ombre technique. Start with a lighter shade at the top and gradually transition to a darker shade at the bottom. This creates a visually stunning and dimensional look.
Stenciled Designs: Use stencils to create intricate designs or patterns on your vanity. From floral motifs to geometric shapes, stencils offer endless possibilities for customization. Mix and match different stencils and colors to create a one-of-a-kind design.
Chalkboard Finish: Transform your vanity into a functional and interactive piece by applying chalkboard paint. This allows you to write notes, and reminders, or even draw artwork directly on the vanity surface. It’s a fun and playful way to personalize your bathroom.
Faux Marble or Granite: Create the luxurious look of marble or granite without the expensive price tag. Use specialty paints and techniques to mimic the natural veining and textures of these materials. This adds a touch of elegance and sophistication to your vanity.
Tips for Maintaining the Painted Finish of Your Bathroom Vanity
Congratulations on successfully painting your bathroom vanity! Now, it’s important to take proper care of the painted finish to ensure its longevity and beauty. Here are some tips for maintaining the painted finish of your bathroom vanity.
Avoid Harsh Cleaners: When cleaning your vanity, avoid using harsh chemical cleaners or abrasive scrubbing pads. These can damage the painted surface and strip away the protective finish. Instead, opt for mild, non-abrasive cleaners and soft cloths or sponges.
Clean Regularly: Regular cleaning is essential for preventing the buildup of dirt, grime, and moisture on the painted surface. Wipe down your vanity regularly with a soft cloth or sponge and a mild detergent and water solution. Rinse it well and dry it thoroughly to prevent water spots or streaks.
Be Gentle: When cleaning or wiping down your vanity, be gentle to avoid scratching or damaging the paint. Use light pressure and gentle, circular motions. Avoid using rough or abrasive materials that can cause scratches.
Use Protective Mats or Trays: To protect the painted surface from water damage, use mats or trays in areas where water is frequently splashed or spilled, such as around the sink or faucet. This will help prevent water from seeping into the paint and causing damage.
Avoid Excessive Moisture: Excessive moisture can be detrimental to the painted finish of your bathroom vanity. Avoid leaving wet items on the surface for extended periods, as this can lead to water damage or discoloration. Wipe up any spills or splashes immediately to prevent moisture from seeping into the paint.
Handle with Care: Be mindful of how you handle and use your bathroom vanity. Avoid banging or scratching the surface with sharp objects or heavy items. Use caution when opening and closing doors or drawers to prevent any accidental damage to the painted finish.
Touch Up as Needed: Over time, normal wear and tear may cause small chips or scratches in the painted surface. Keep some extra paint on hand to touch up any areas that may need attention. Follow the manufacturer’s instructions for touch-up application and drying time.
Avoid Excessive Sunlight: Prolonged exposure to direct sunlight can cause the paint to fade or discolor over time. If your bathroom vanity is located near a window or receives a lot of natural light, consider using curtains or blinds to protect it from excessive sunlight.
Regular Maintenance: Perform regular maintenance checks on your bathroom vanity to ensure the painted finish is in good condition. Look for any signs of peeling, cracking, or damage, and address them promptly to prevent further issues.
Follow Manufacturer’s Instructions: Lastly, always follow the manufacturer’s instructions for cleaning and maintaining the specific type of paint you use on your bathroom vanity. Different paints may have different care requirements, so it’s important to adhere to their recommendations for best results.

Tips on How to Paint a Bathroom Vanity Like a Pro
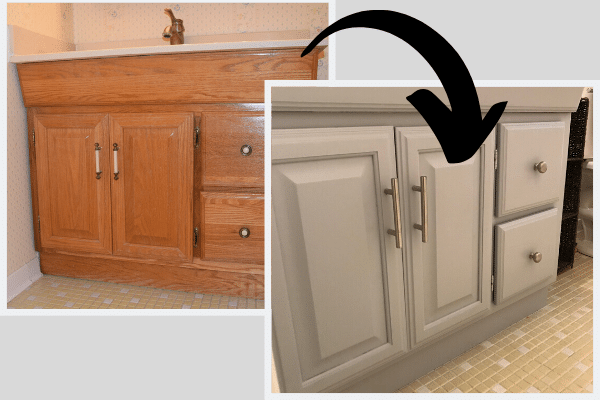
How To Paint A Bathroom Vanity – Love Remodeled
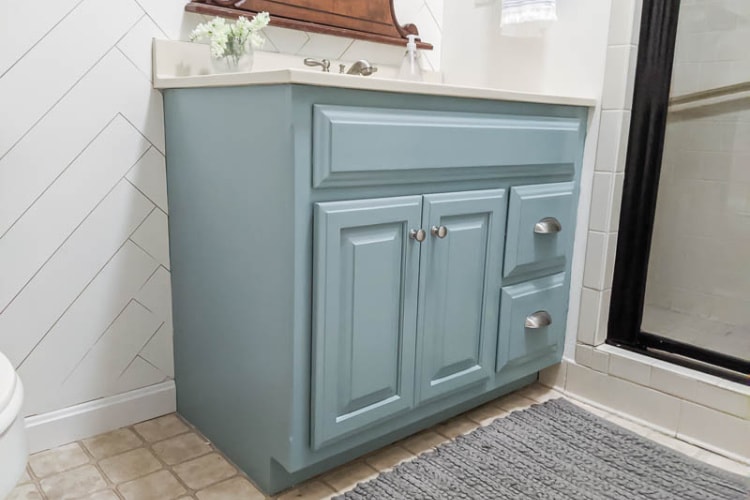
Transform Your Bathroom Vanity In A Weekend! –
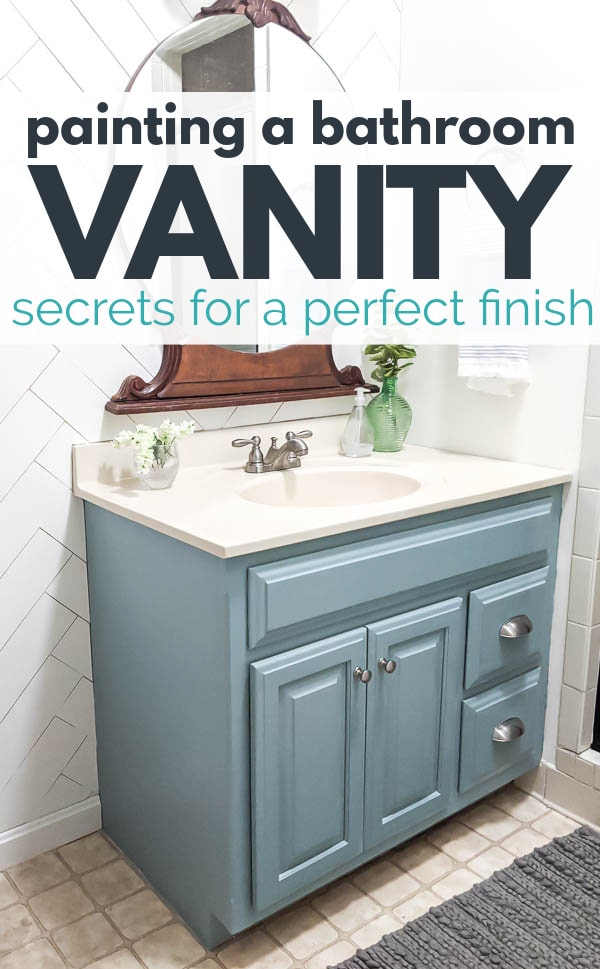
How to Paint a Bathroom Vanity: Secrets for a Perfect Finish
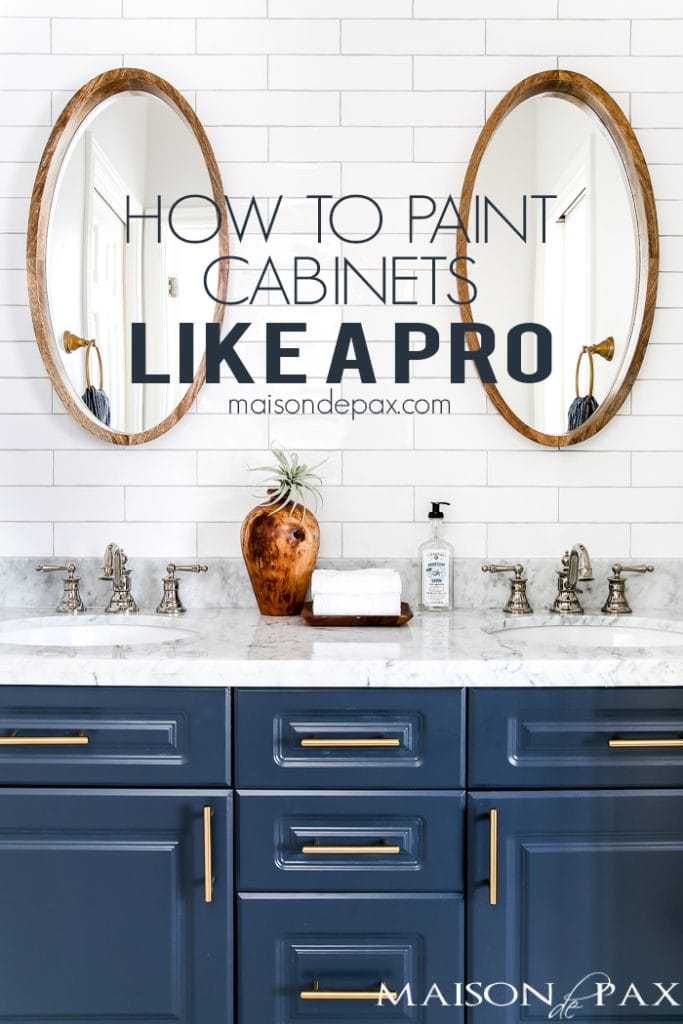
How to Paint Cabinets to Last: Painting a Bathroom Vanity – Maison
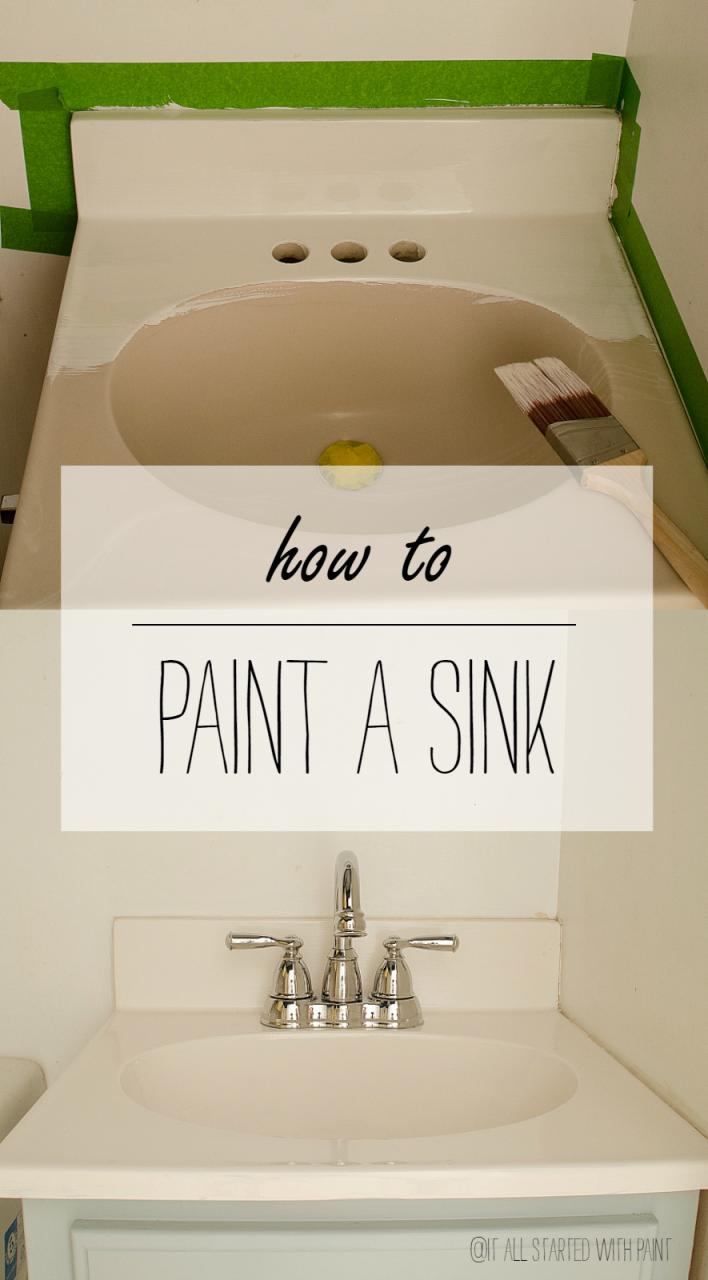
How To Paint A Sink
How to Paint a Bathroom Vanity Like a Pro – Dengarden
How to Paint a Bathroom Vanity – Angela Marie Made
Related Posts:


