Understanding Bathroom Vanity Rough In
When it comes to bathroom renovations or new construction, understanding the concept of bathroom vanity rough in is crucial. The rough in refers to the initial plumbing and electrical work that is done before the actual installation of the vanity. This guide will provide you with a comprehensive understanding of bathroom vanity rough in, including its purpose and key considerations.
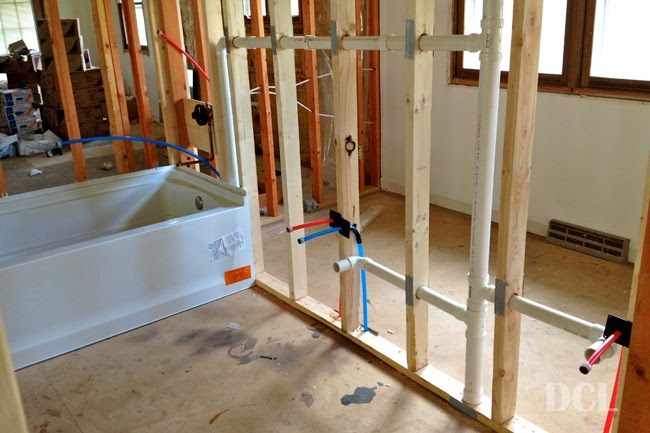
- What is Bathroom Vanity Rough In? Bathroom vanity rough in involves preparing the plumbing and electrical connections for the installation of a vanity. It includes determining the proper placement of water supply lines, drain pipes, and electrical outlets based on the design and dimensions of the vanity.
- Why is it Important? Proper bathroom vanity rough in is essential for a functional and aesthetically pleasing bathroom. It ensures that all the necessary plumbing and electrical connections are in the correct position, preventing any future issues or costly modifications.
- Factors to Consider in Bathroom Vanity Rough In
- Vanity Size: The dimensions of the vanity will determine the placement of water supply lines, drain pipes, and electrical outlets.
- Location of Existing Plumbing: The rough in should align with the existing plumbing to minimize any changes or modifications.
- Building Codes: It’s crucial to comply with local building codes and regulations when roughing in a bathroom vanity.
- Hiring a Professional vs. DIY? While some homeowners may choose to rough in a bathroom vanity themselves, it is recommended to hire a professional plumber or contractor for accurate measurements and proper installation. Professionals have the expertise and experience to ensure a seamless rough in process.
The Importance of Proper Bathroom Vanity Rough In Measurements
Proper measurements play a crucial role in the success of any bathroom renovation or construction project. When it comes to bathroom vanity rough in, accurate measurements are essential for ensuring a seamless installation. We will highlight the importance of proper bathroom vanity rough in measurements and provide insights on how to achieve accurate measurements.
Ensuring Proper Fit: Accurate measurements ensure that the vanity fits perfectly within the allocated space. This prevents any gaps or overcrowding, resulting in a polished and professional-looking bathroom.
Plumbing and Electrical Connections: Proper measurements are crucial for aligning water supply lines, drain pipes, and electrical outlets with the vanity. Incorrect measurements can lead to issues such as leaks, blockages, or the need for costly modifications.
Consideration of Vanity Style: Different vanity styles require specific measurements. For example, wall-mounted vanities require measurements for proper wall support, while freestanding vanities need measurements for proper positioning and stability.
Key Measurement Considerations:
- Width and Depth: Measure the width and depth of the vanity to ensure it fits comfortably in the designated space.
- Height: Measure the height from the floor to the top of the vanity to ensure it aligns with the desired level.
- Plumbing Connections: Measure the distance between the water supply lines and drain pipes to determine their placement within the vanity.
Seeking Professional Assistance: If you are unsure about taking accurate measurements, it is advisable to seek professional assistance. A professional plumber or contractor can ensure precise measurements and guide the rough in process.

Step-by-Step Guide to Achieving the Perfect Bathroom Vanity Rough In
Achieving the perfect bathroom vanity rough in requires careful planning and attention to detail. This step-by-step guide will walk you through the process of roughing in a bathroom vanity, ensuring a successful installation and optimal functionality.
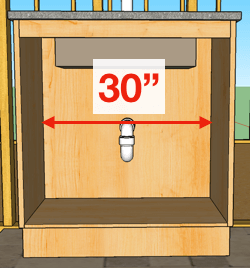
Measure the Space: Begin by measuring the available space for the vanity. Measure the width, depth, and height, ensuring that you have accurate dimensions to work with.
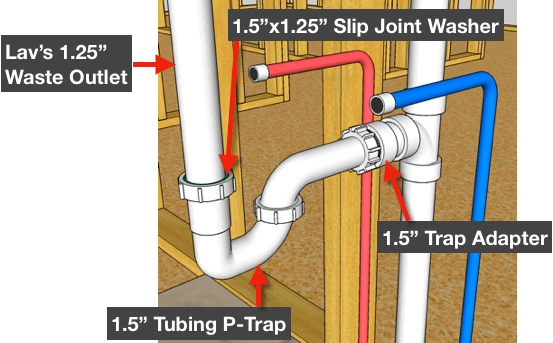
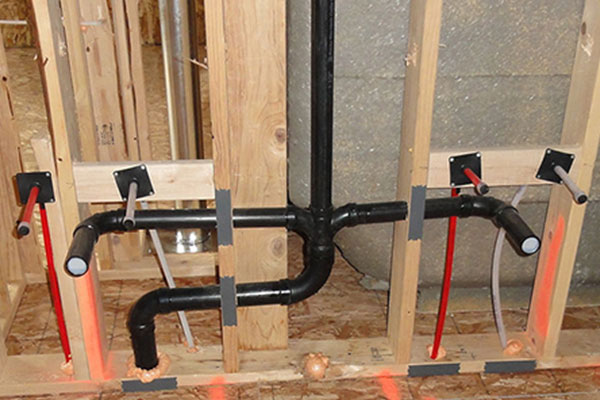
Determine Plumbing and Electrical Connections: Based on the vanity design and dimensions, determine the placement of water supply lines, drain pipes, and electrical outlets. Ensure that the connections align with the intended location of the vanity.
Mark the Wall: Use a pencil or masking tape to mark the desired position of the vanity on the wall. This will serve as a reference point during the rough in process.
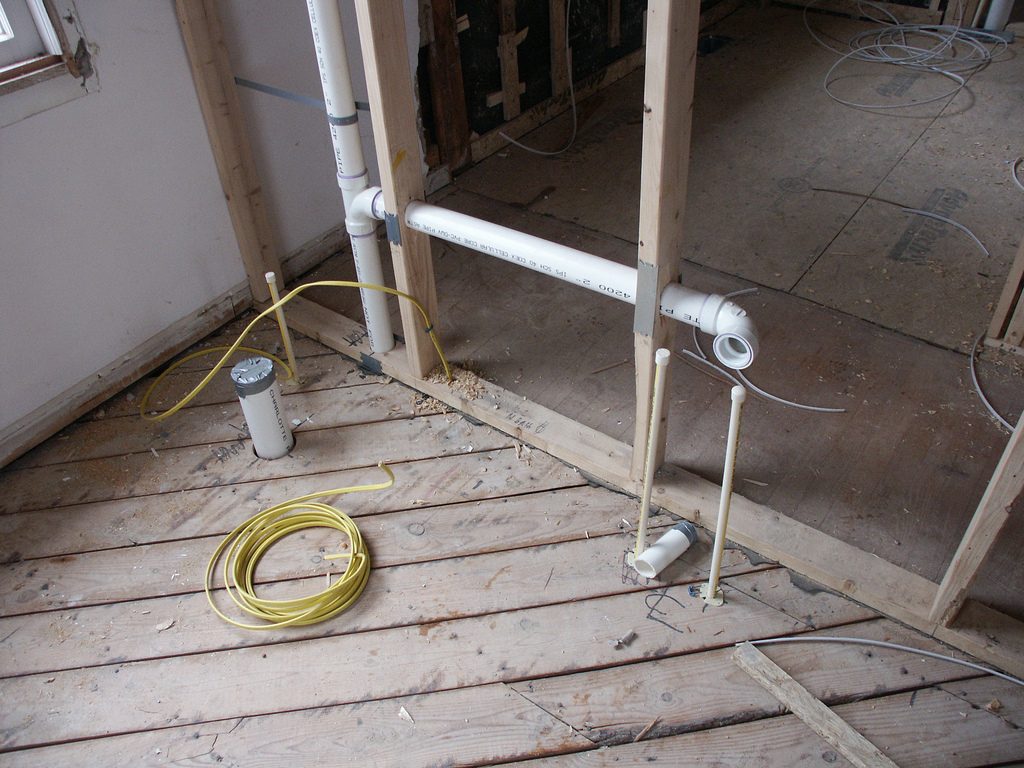
Install Water Supply Lines: Begin by shutting off the water supply to the bathroom. Install the water supply lines, ensuring that they are properly aligned with the marked location on the wall.
Install Drain Pipes: Install the drain pipes, ensuring that they are properly angled for efficient drainage. Use appropriate fittings and connectors to ensure a secure connection.
Install Electrical Outlets: If required, install electrical outlets in the designated location. Ensure that they are properly grounded and comply with electrical codes and regulations.
Test the Connections: Once all the plumbing and electrical connections are in place, turn on the water supply and check for any leaks. Test the electrical outlets to ensure proper functionality.
Make Adjustments if Necessary: If any issues or discrepancies are identified, make the necessary adjustments to the plumbing or electrical connections. It’s better to address these issues before proceeding with the vanity installation.
Common Mistakes to Avoid When Roughing In a Bathroom Vanity
Roughing in a bathroom vanity requires precision and attention to detail. However, certain common mistakes can compromise the functionality and aesthetics of your installation. Let’s highlight some of the most common mistakes to avoid when roughing in bathroom vanity, helping you achieve a seamless and professional result.
Inaccurate Measurements: Failing to take accurate measurements can lead to various issues, such as a vanity that doesn’t fit properly or misaligned plumbing and electrical connections. Always measure the available space and the dimensions of the vanity accurately before starting the rough in process.
Incorrect Placement of Plumbing Connections: Placing water supply lines and drain pipes in the wrong position can lead to leaks, blockages, or the need for costly modifications. Ensure that the plumbing connections align with the intended location of the vanity and comply with local building codes and regulations.
Improper Angling of Drain Pipes: Drain pipes should be properly angled to ensure efficient water flow and prevent blockages. Incorrect angling can lead to slow drainage or standing water in the sink. Double-check the alignment and slope of the drain pipes during the rough in process.
Insufficient Clearance for Plumbing: Failing to provide sufficient clearance for plumbing connections can make repairs or maintenance difficult in the future. Ensure that there is enough space behind the vanity for easy access to the water supply lines and drain pipes.
Neglecting Electrical Code Compliance: When installing electrical outlets for the vanity, it is essential to comply with electrical codes and regulations. Improper grounding or inadequate protection can pose a safety risk. Consult an electrician or refer to the local electrical codes to ensure proper installation.
Lack of Testing: Neglecting to test the plumbing and electrical connections before installing the vanity can lead to issues that are challenging to rectify later. Always test the connections for leaks, proper water flow, and electrical functionality before proceeding with the installation.
Tips and Tricks for Customizing Your Bathroom Vanity Rough In
Customizing your bathroom vanity rough in allows you to tailor the design and functionality of your vanity to your specific needs and preferences. Below are some valuable tips and tricks for customizing your bathroom vanity rough in, helping you create a personalized and functional space.
Determine Your Requirements: Before starting the rough in process, determine your specific requirements for the vanity. Consider factors such as storage space, countertop size, sink style, and any additional features you may need, such as a built-in makeup area or a seated vanity.
Optimize Storage Space: Make the most of your vanity by incorporating clever storage solutions. Consider features such as drawers, shelves, or pull-out organizers to maximize storage capacity and keep your bathroom organized.
Consider Plumbing Placement: By customizing the plumbing placement, you can optimize the functionality of your vanity. For example, placing the drain pipe slightly to one side can create more storage space underneath the sink.
Lighting Considerations: Incorporate adequate lighting above or around the vanity to ensure proper visibility for grooming tasks. Consider options such as sconces, pendant lights, or LED strips to create an ambient and functional lighting setup.
Incorporate Smart Technology: Explore the possibilities of integrating smart technology into your vanity. Consider features such as motion-activated lighting, touchless faucets, or built-in speakers for a modern and convenient bathroom experience.
Personalize the Design: Customize the design of your vanity to match your style and the overall aesthetic of your bathroom. Consider options such as unique materials, finishes, hardware, or decorative accents to create a personalized and visually appealing vanity.
Seek Professional Advice: If you are unsure about the customization process, consider seeking professional advice from a designer or contractor. They can provide valuable insights and suggestions based on your specific needs and budget.

How To Plumb a Bathroom (with multiple plumbing diagrams
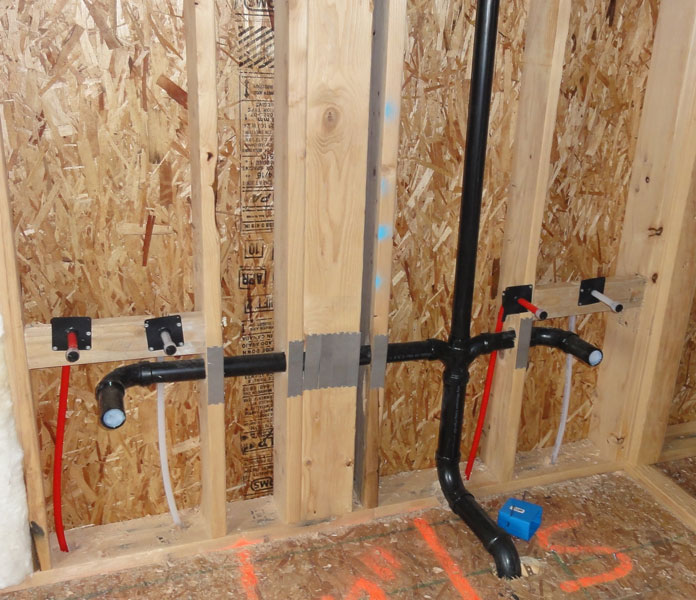
DIY / How to rough in plumbing for two vanities (part 1)

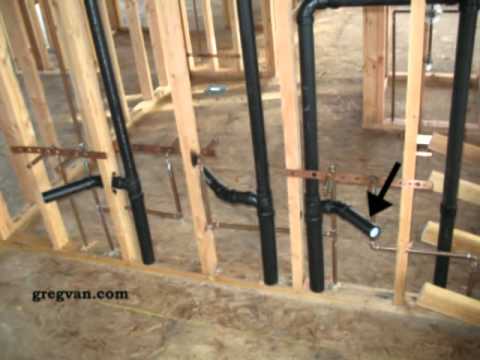
Raising sink drain pipes to fit new vanity plumbing area Terry
Double Bathroom Sink – Two Different Rough Plumbing Drain Methods
Installing a Vanity, Bathroom Vanity, Vanities, Bath Vanities
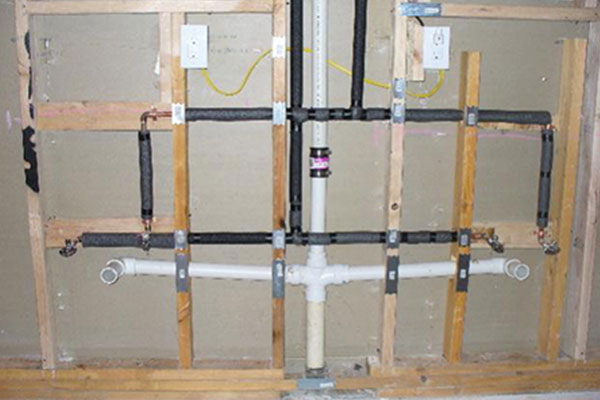
Double sink rough in. . . Plumbing Advice & Remodel
DIY / How to rough in plumbing for two vanities

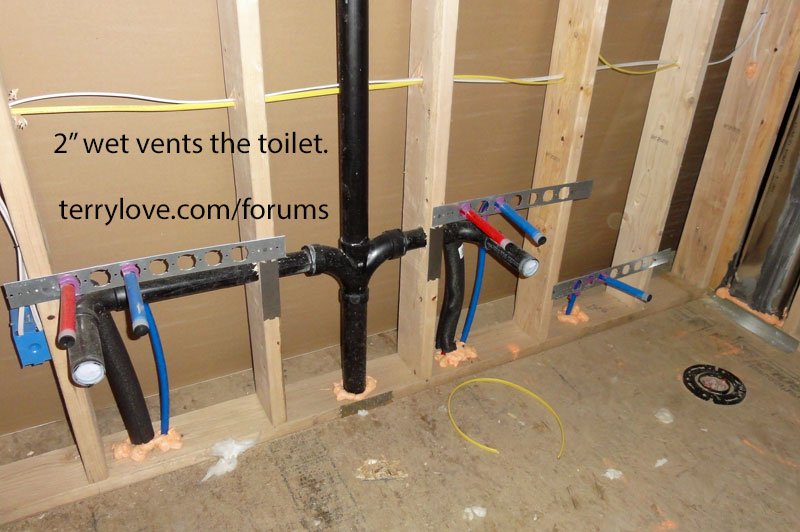
Plumbing Rough In
All About Plumbing Rough-In – Plumbing Concepts

Related Posts:


